The Steam Deck's analog triggers have a very large deadzone in them. This deadzone is added by the firmware when they are calibrated. It can make games using the analog triggers not feel as nice or responsive. For example, in a racing game, if you want to slightly accelerate or slightly press the brake, during the first few millimeters of pressing the trigger, nothing happens. Only after a considerable distance does the trigger suddenly kick in. This tool can completely solve that problem by overwriting the calibration values in the firmware. Now you can press that analog trigger just a millimeter and it will start registering!
This tool gives you complete control over the calibration values of the Steam Deck's triggers. If you read the instructions carefully, and follow the utility's instructions properly, you will likely be okay. But if you carelessly enter values, it could make the triggers inoperable. Take it slow, be careful, and double check your values before you apply them.
In any case, usage is at your own risk, and I do not accept any liability if damage does occur.
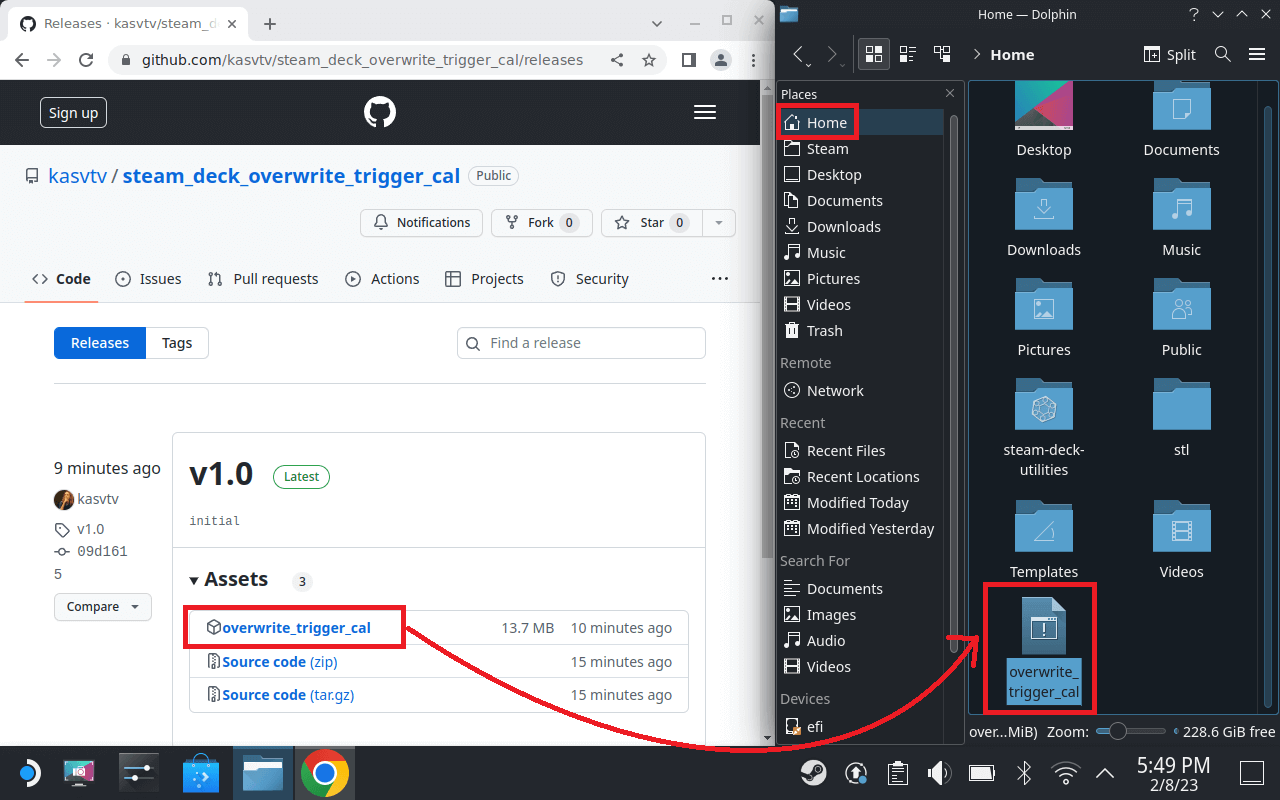
On your Steam Deck, go into desktop mode, open a web browser, and navigate to the releases page. Here, download the overwrite_trigger_cal file from the latest release to the "Home" folder on your Steam Deck. Make sure it is the "Home" folder:
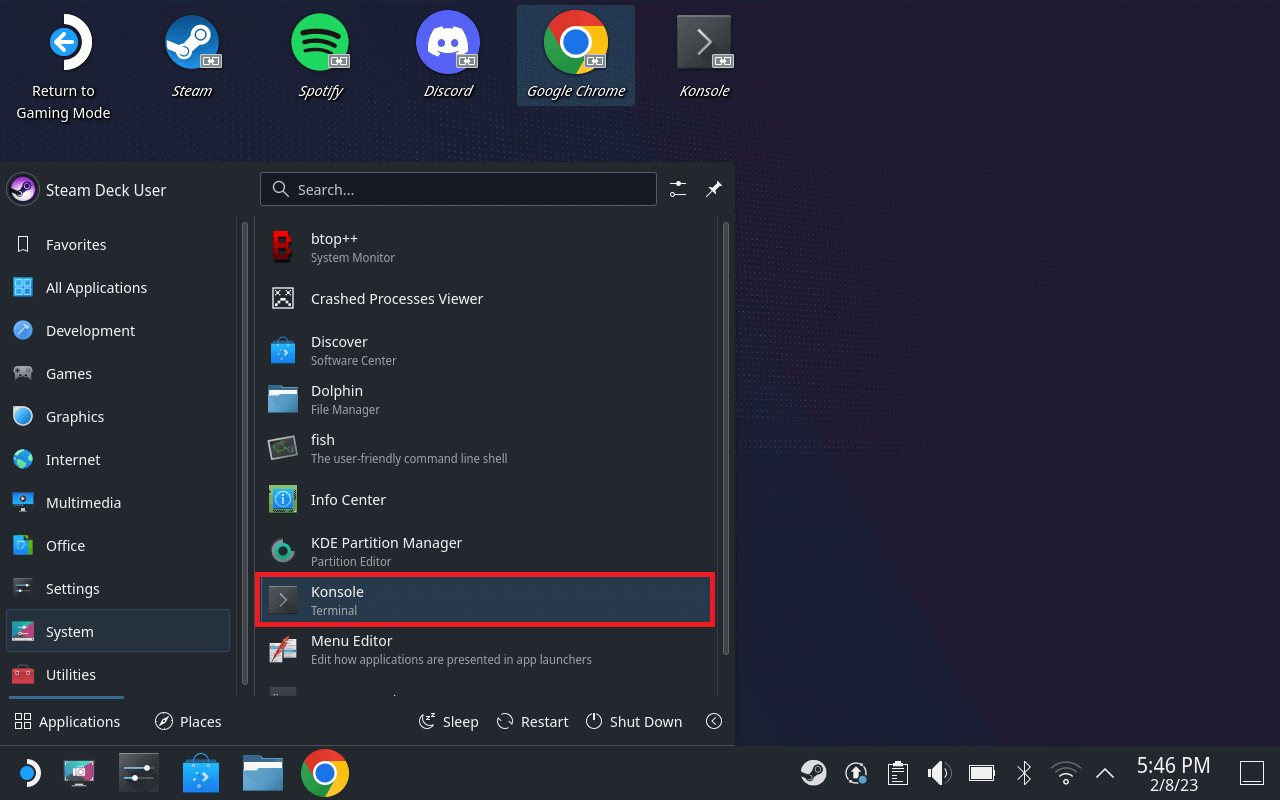
Open a Konsole. To do so, open the Start menu, go to System, click Konsole:
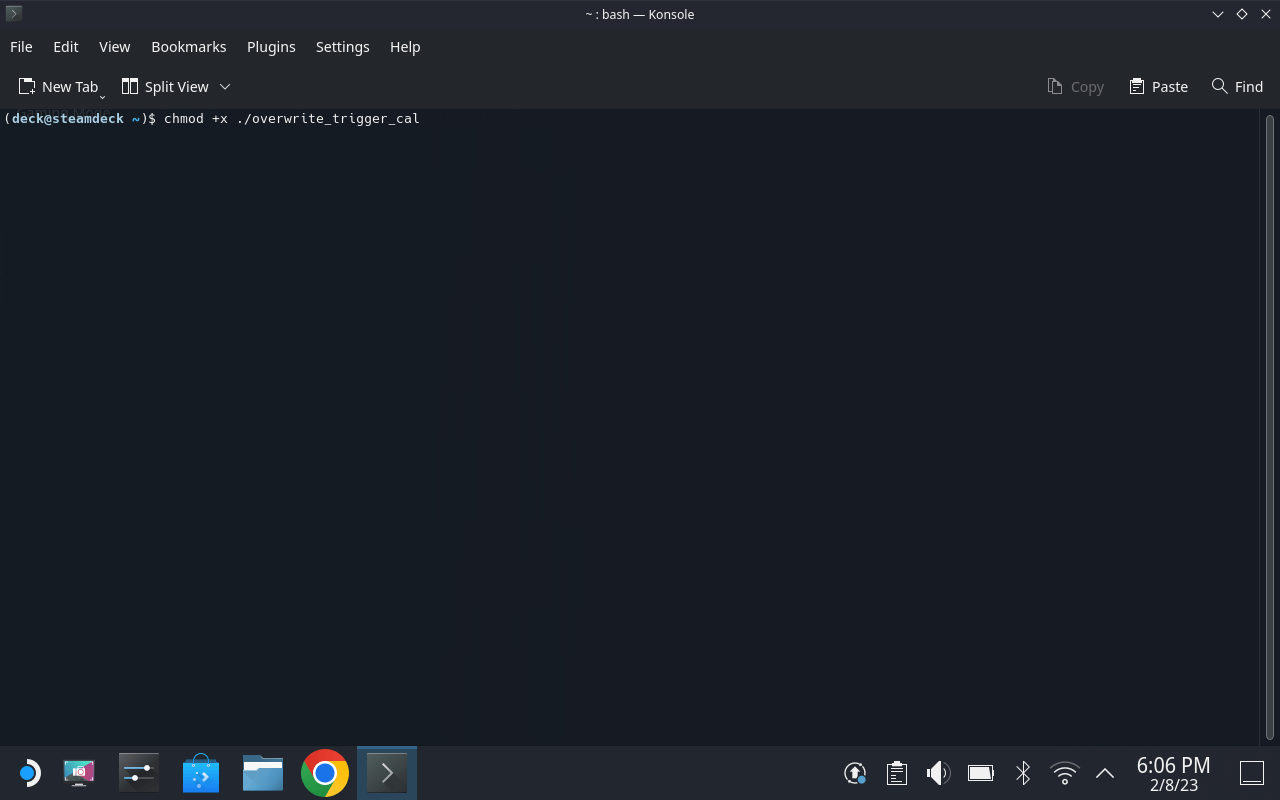
In the Konsole, enter chmod +x ./overwrite_trigger_cal. You can right click (left trigger) into the console to paste if you want. Then press the A button, or press the Enter key:
Installation is now complete
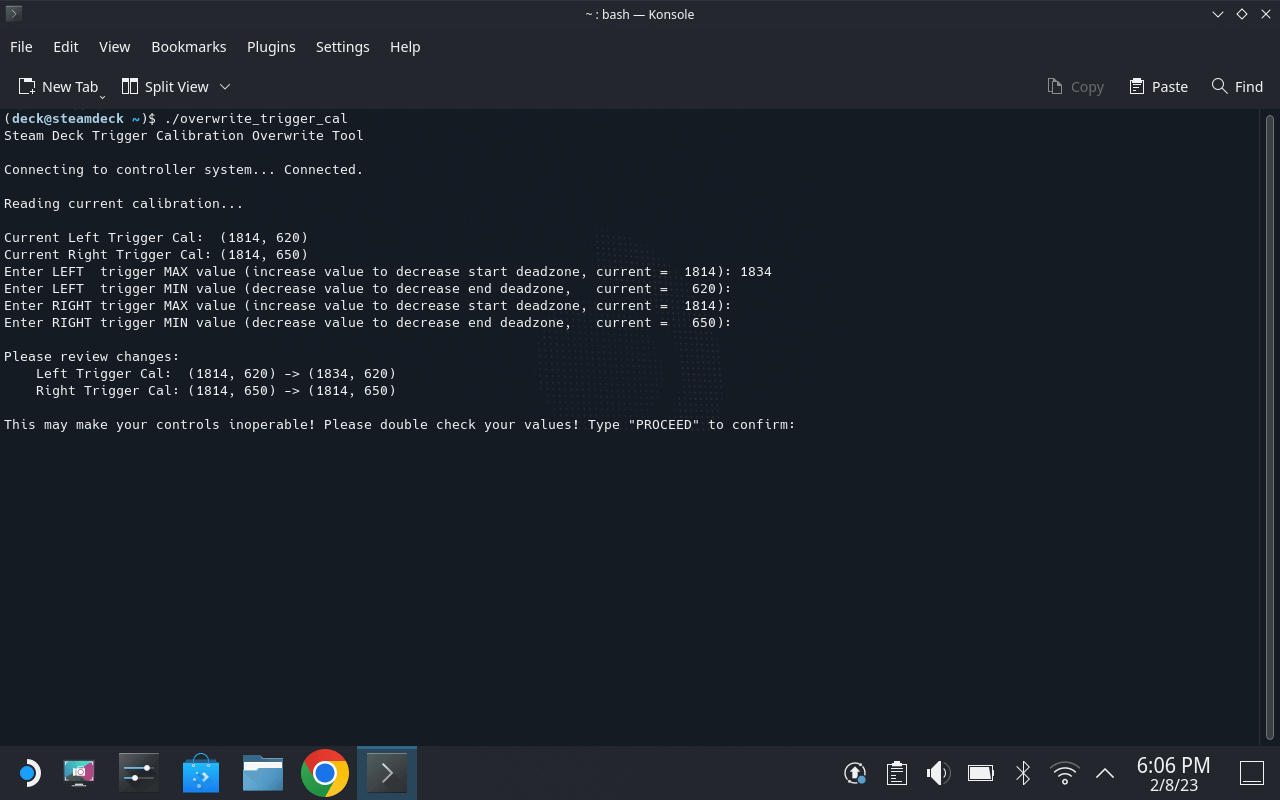
In a Konsole window (check previous section on how to open a Konsole), enter ./overwrite_trigger_cal. Then press the A button, or press the Enter key. The application now starts up, and you'll be able to see the current calibration values:
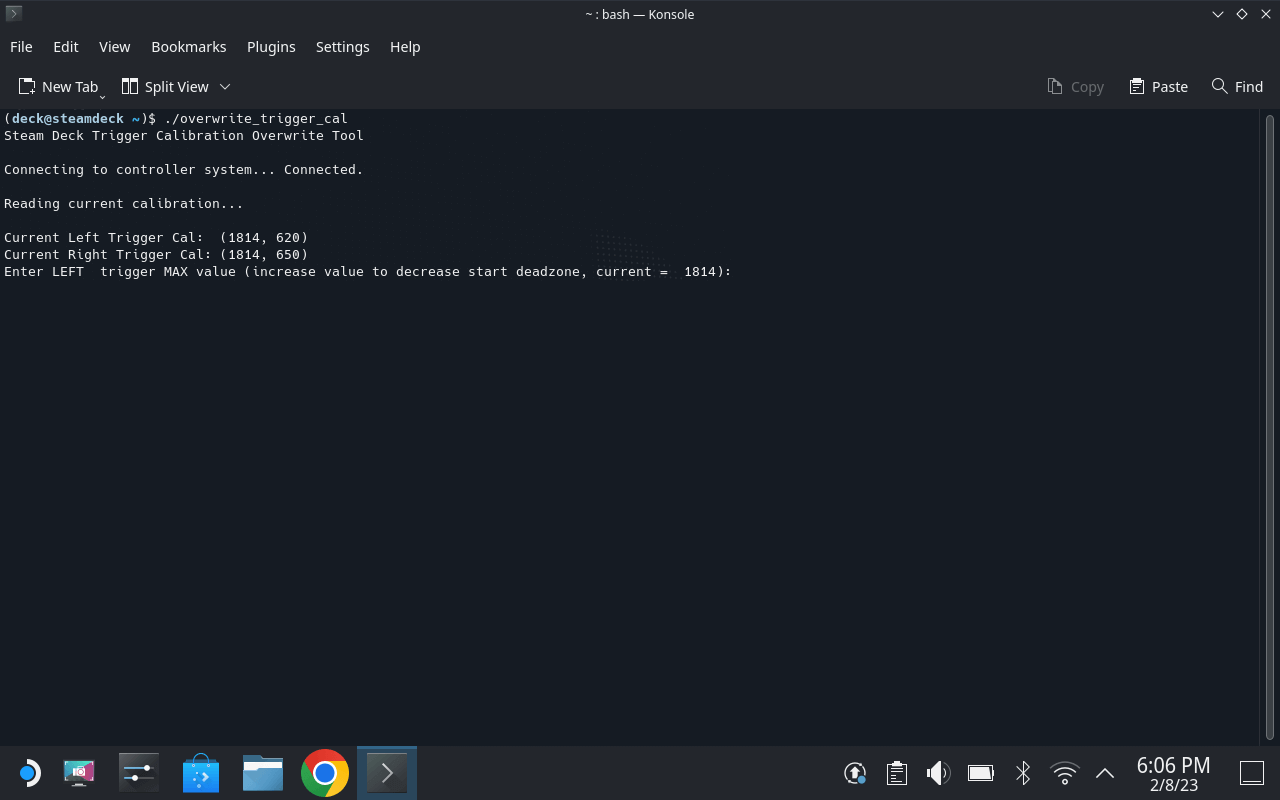
This is it. Here you can enter the new calibration values. If you're looking to remove the deadzone at the beginning of the trigger press, you'll only want to touch the MAX values. I recommend adding 20 to the current value at once. For example, in the screenshot below, we want to reduce the deadzone of the left trigger, and the left trigger max value is 1814, so we type in 1834. You can type by summoning an onscreen keyboard with the STEAM+X button shortcut. Then press Enter to submit the value. We don't want to edit any other values for now, so for those, we just press Enter without typing anything else:
Tip: If your cursor is in the top half of the screen, the onscreen keyboard appears in the bottom half, and vice versa. Use this to your advantage so that the onscreen keyboard doesn't cover up what you want to see.
The application will now show you a preview of what the values are going to be changed to. You must always make sure to double check that the values are correct. To proceed with these values, type in "PROCEED", verbatim, in caps, and press Enter:
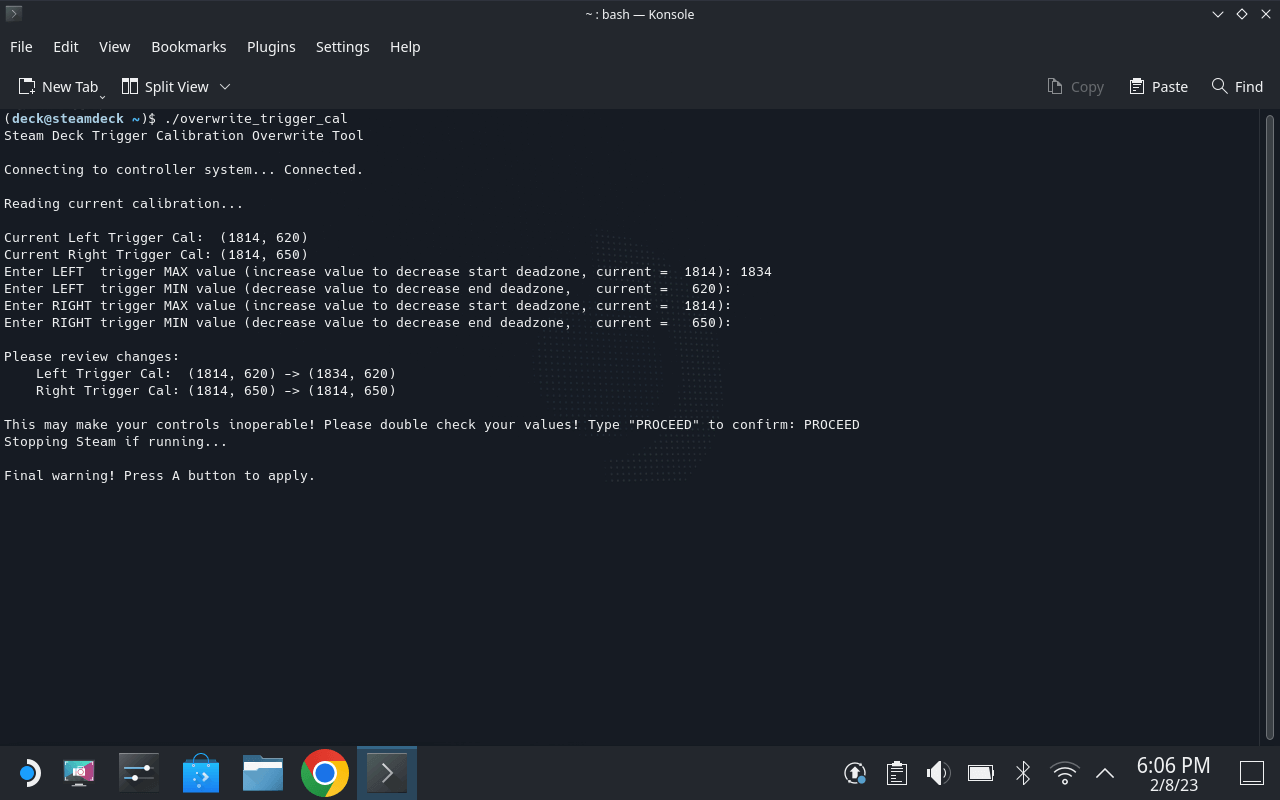
The application now needs to close Steam. Note that without Steam running, you can't summon an onscreen keyboard, you can only use the trackpads as a mouse and the triggers as mouse buttons. After Steam is closed, it may take a few seconds until the controls work again. This is normal. You now have one last chance to review your values. Press the A button on the Deck to write the values to the firmware:
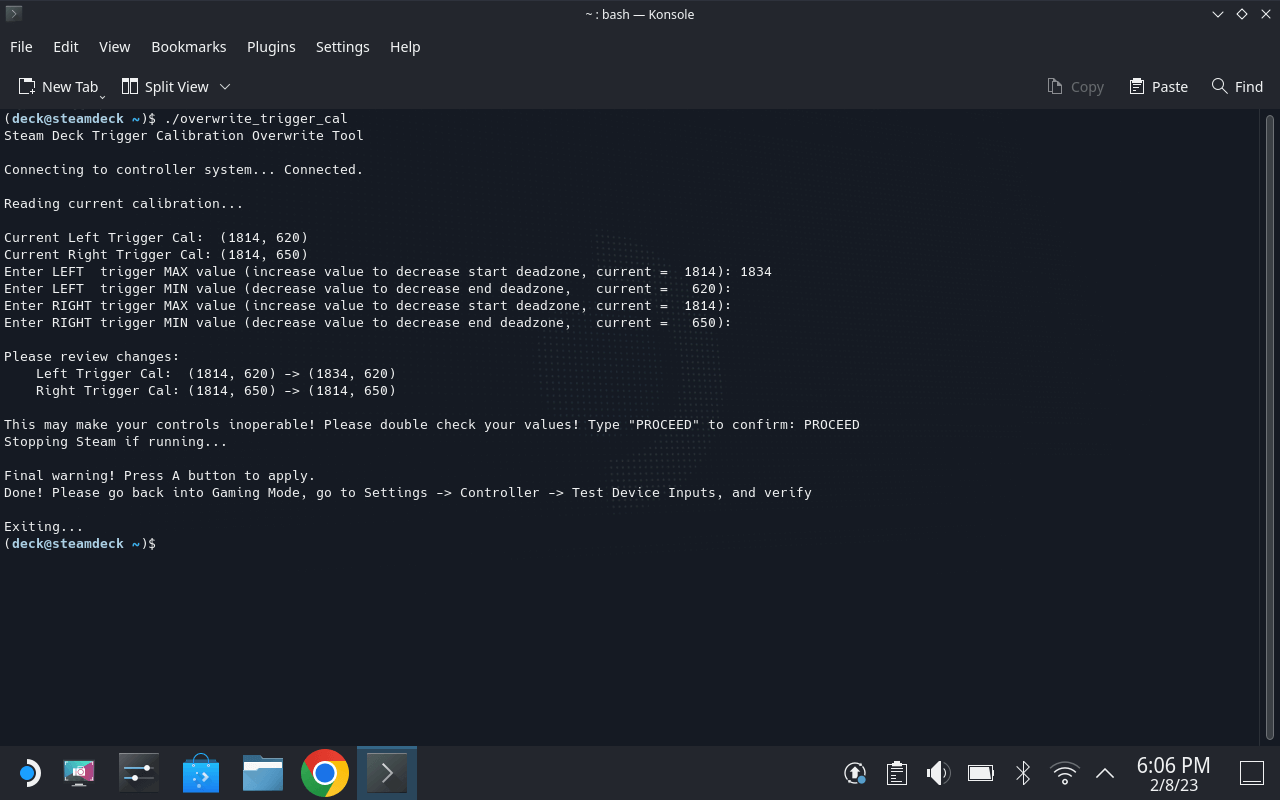
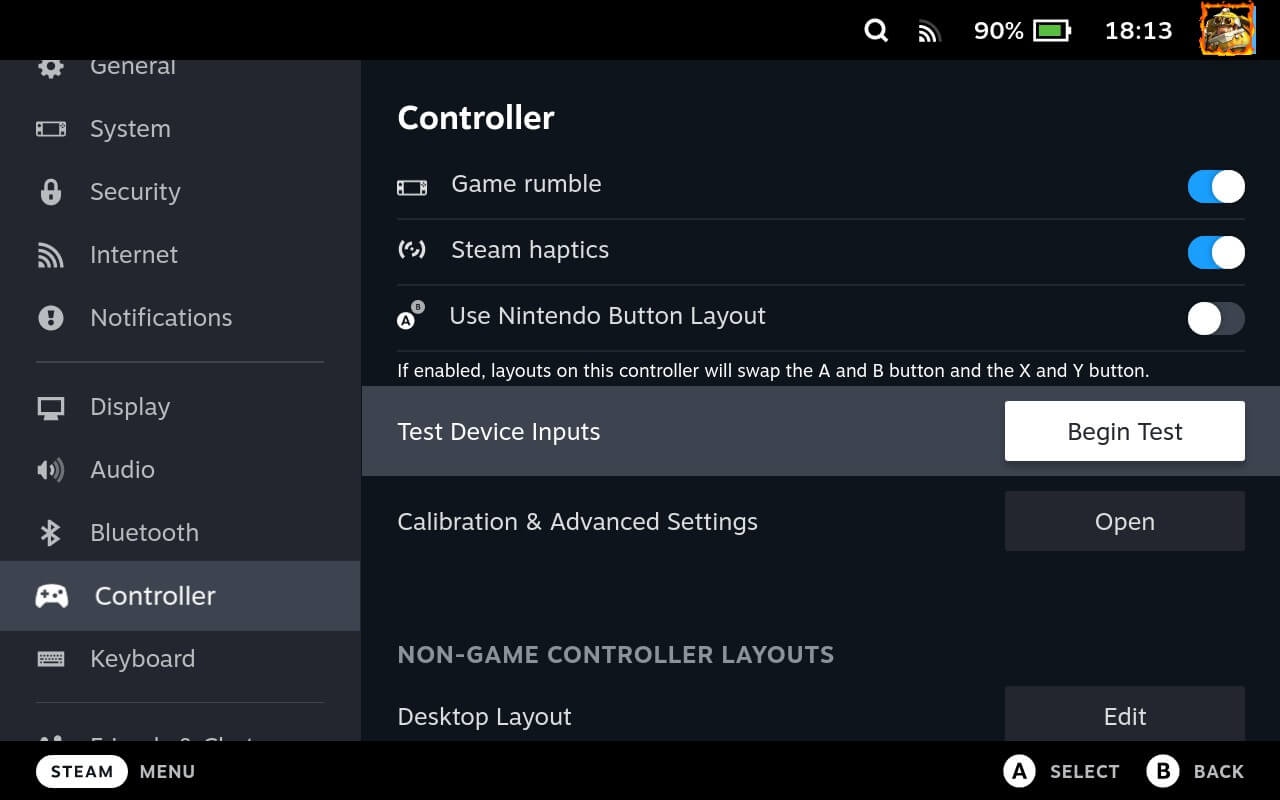
All done! You can close all the windows you had open. If you want to stay in Desktop Mode and use the onscreen keyboard again, you must reopen Steam again by double clicking on it on the desktop. But to test the calibration, double click on "Return to Gaming mode". Back in Gaming Mode, press the STEAM button on the Deck to open the menu, go to "Settings", then go to "Controller". Once there, click "Begin Test":
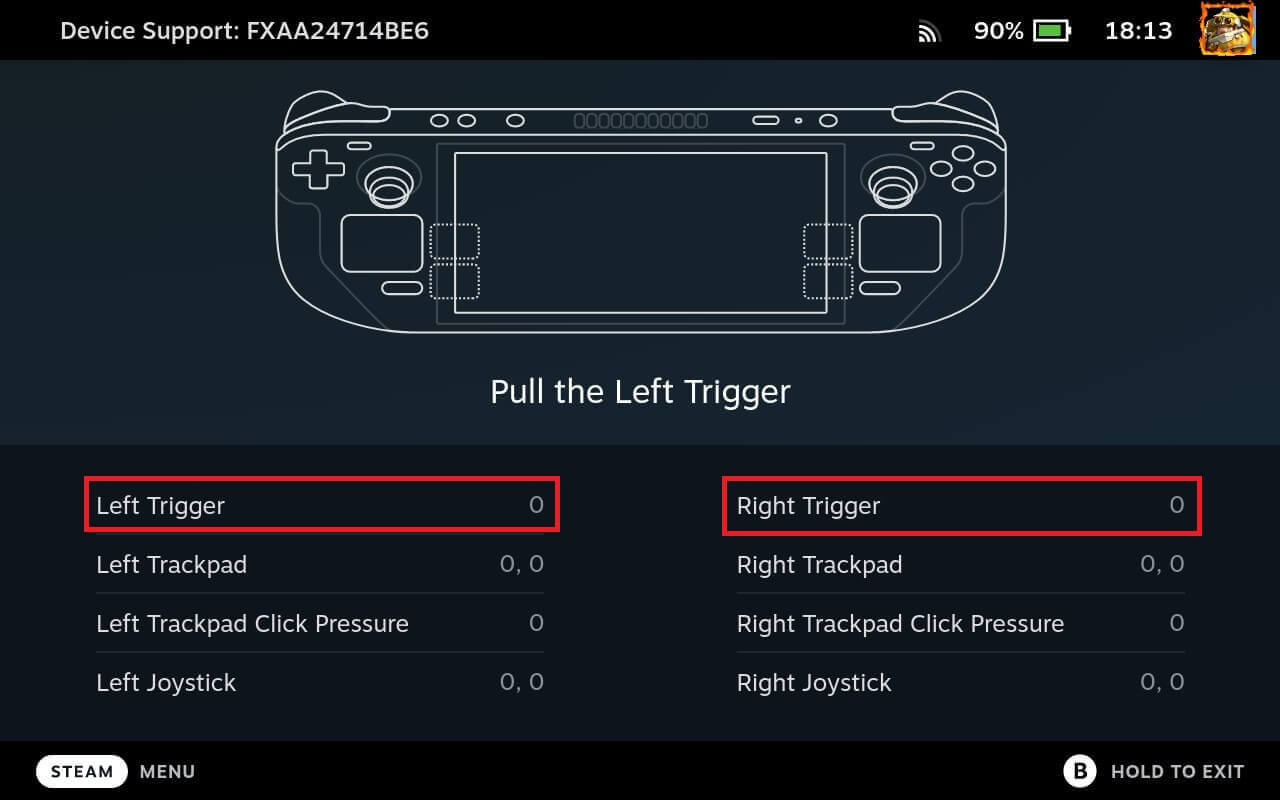
You'll now see the following screen. You can ignore the instructions that appear. What we really want to see is that if both triggers are not being pressed, that Left Trigger and Right Trigger both read 0. If this is NOT the case, repeat the process and LOWER the MAX value for the trigger that doesn't read 0.
If the triggers both read 0, try pressing the triggers, and see how quickly the number 0 starts to increase. If there is still too much dead zone before the 0 increases, repeat this process again for the trigger in question and raise the value by 20 again.
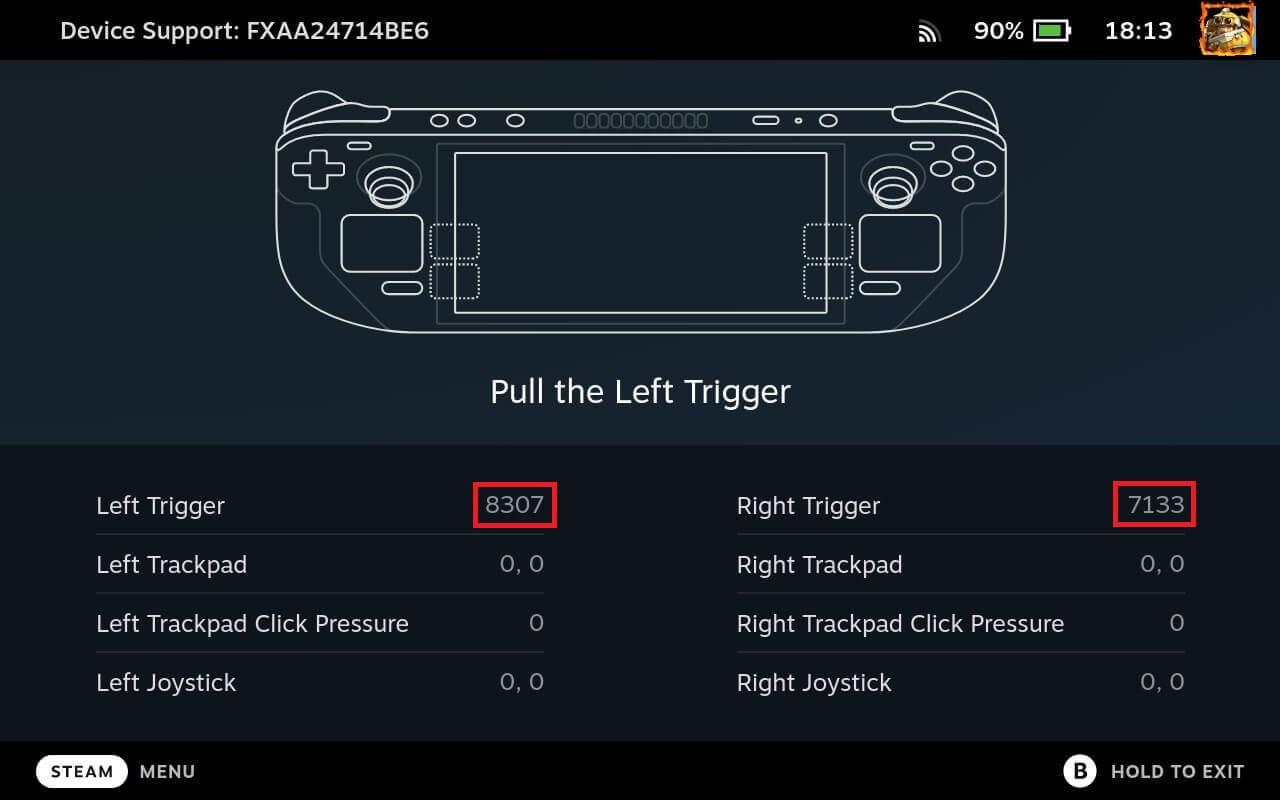
Repeat this process as many times as needed until the dead zone is nice and small. In my case my MAX values were about 1800. It might take up to 10 increases of 20 to get the right value, but better be safe than sorry!
Tip: to quickly start the utility again, open a Konsole, and press UP on the dpad to go back one command, and press the A button!
Enjoy more responsive triggers!
The deadzones on the thumbsticks are indeed larger than necessary, and Valve doesn't let the user edit them. Fun fact, the thumbstick deadzone calibration options in Settings -> Controller -> Calibration & Advanced Settings do absolutely nothing! They were hardcoded into Steam Input at some point (you can read more about that here) and not set by the firmware. I fully agree with you that the dead zones on the thumbsticks should be modifiable by the user. Currently, it's a real detriment to how responsive the controls feel. Please leave a comment on my feature request so we can MAKE THIS HAPPEN! on the Steam Forums to make this happen! Unfortunately, because they aren't set by the firmware, but part of Steam Input, this tool can not help this issue.
Not likely. All this application does is reuse the existing libraries on the Steam deck to call the trigger_set_cal function from the controller_if module. The triggers also don't cause a mouse click in Desktop mode unless they're pressed in pretty far, so even if you set the MAX values a little bit too high, you can still click stuff just fine in Desktop mode. If you go way too high on the MAX values (which won't happen if you slowly increase the values in steps of 20), you may have to use an external mouse/keyboard connected through a USB HUB (and maybe even open up the Deck to physically unplug the triggers temporarily) to fix things. To reset your calibration values back to factory settings, follow this guide.
Yes. See this page for instructions