- Mainsail OS
- Raspberry Pi
- Octopus Pro F446
- BTT U2C
- BTT EBB36
Become root
sudo su -Update Pi user so that password is not required to sudo
vi /etc/sudoers.d/010_pi-nopasswdUpdate APT sources
vi /etc/apt/sources.listUpdate apt sources to use local server, comment old server
# deb http://raspbian.raspberrypi.org/raspbian/ bullseye main contrib non-free rpi
deb http://raspbian.mirror.ac.za/raspbian/ bullseye main contrib non-free rpi
Update
apt clean all
apt update -y
apt dist-upgrade -y
Better editor
apt install vim
select-editor
apt purge nano
Update NTP server
vi /etc/systemd/timesyncd.confUpdate locale using sudo raspi-config to en_US.UTF-8 then run
vi /etc/default/localePaste:
LANGUAGE=en_US.UTF-8
LC_ALL=en_US.UTF-8
LANG=en_US.UTF-8
LC_CTYPE=en_US.UTF-8
Reboot
reboot nowmkdir ~/firmwares
cd ~/firmwares
git clone https://github.com/candle-usb/candleLight_fw.git
cd candleLight_fwsudo wget 'https://raw.githubusercontent.com/jvandervyver/Voron-2.4can-Config/main/downloads/can0.config' -O '/etc/network/interfaces.d/can0'
sudo reboot now
mkdir ~/firmwares
cd ~/firmwares
git clone https://github.com/Arksine/CanBoot.git
make clean
make menuconfig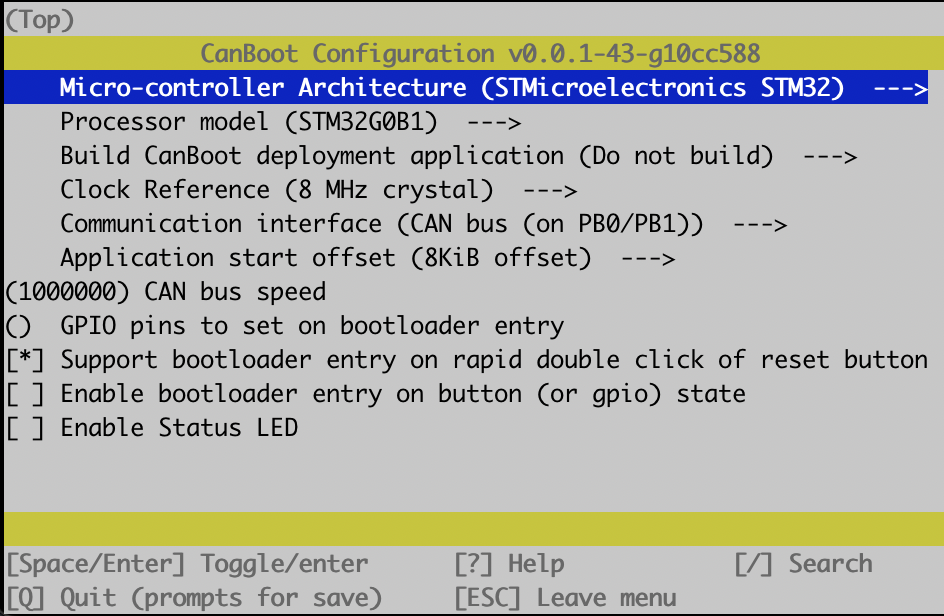
Follow the rest of the insturctions for flashing CanBoot in DFU mode.
Setup firmware build repos
mkdir ~/firmwares
cd ~/firmwares

git clone https://github.com/Klipper3d/klipper.git
cd ~/firmwares/klipper
make clean KCONFIG_CONFIG=config.rpi
make menuconfig KCONFIG_CONFIG=config.rpi
make flash KCONFIG_CONFIG=config.rpi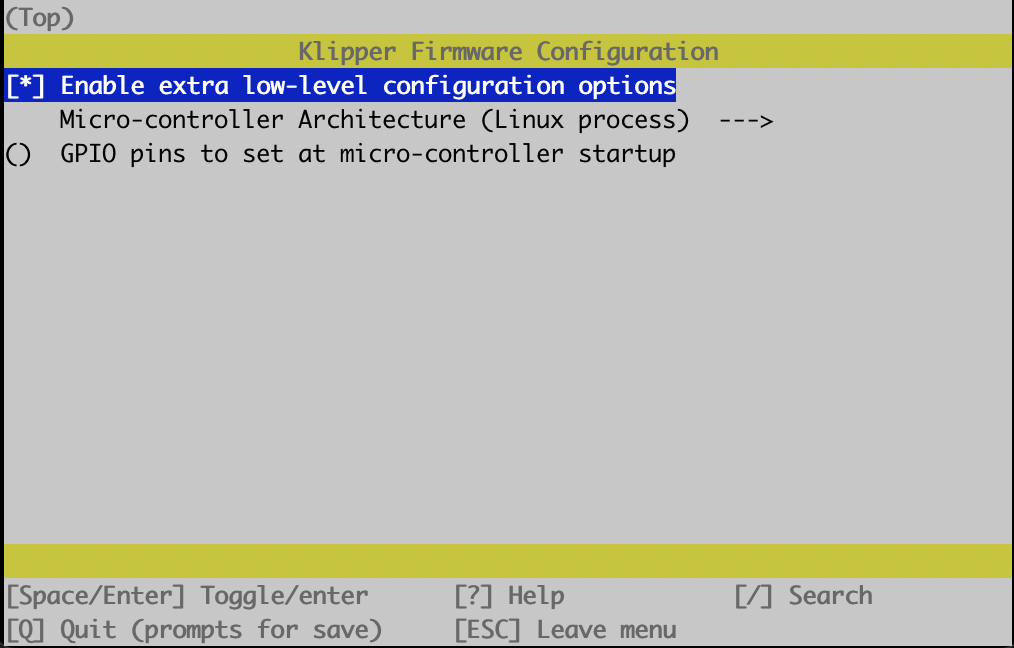
sudo wget 'https://raw.githubusercontent.com/jvandervyver/Voron-2.4can-Config/main/downloads/klipper-mcu.service' -O '/etc/systemd/system/klipper-mcu.service'
sudo systemctl enable klipper-mcu.service
sudo service klipper-mcu startcd ~/firmwares/klipper
make clean KCONFIG_CONFIG=config.octopus_f446
make menuconfig KCONFIG_CONFIG=config.octopus_f446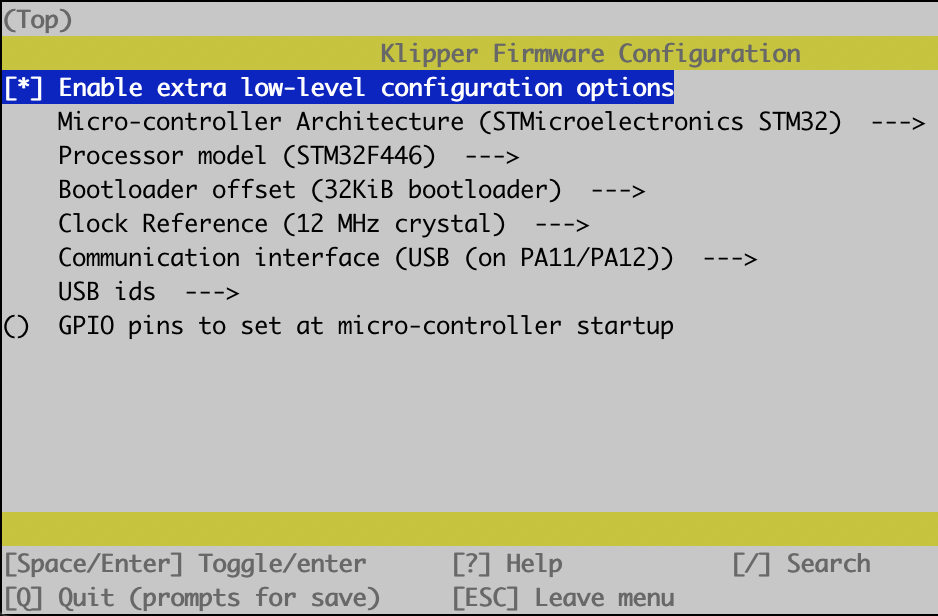
cd ~/firmwares/klipper
make clean KCONFIG_CONFIG=config.ebb_36
make menuconfig KCONFIG_CONFIG=config.ebb_36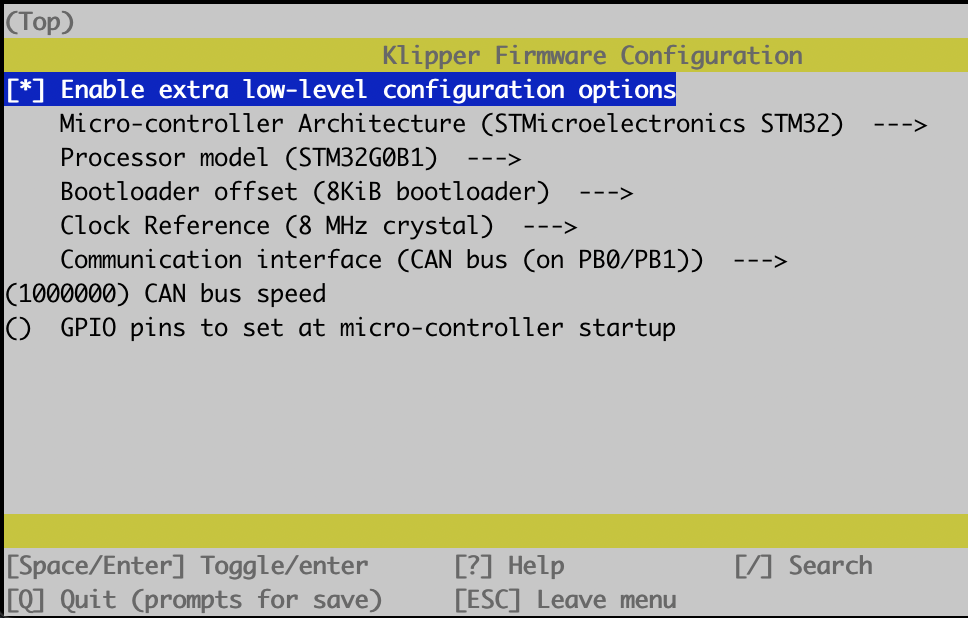
cd ~
git clone https://github.com/jvandervyver/Voron-2.4can-Config.git

ln -s ~/Voron-2.4can-Config/config/klippy.conf ~/printer_data/config/klippy.conf
ln -s ~/Voron-2.4can-Config/config/printer ~/printer_data/config/printer

mkdir ~/printer_data/config/macros
ln -s ~/moonraker-timelapse/klipper_macro ~/printer_data/config/macros/timelapse

mkdir ~/printer_data/config/macros/mainsail
ln -s ~/mainsail-config/mainsail.cfg ~/printer_data/config/macros/mainsail/mainsail.cfg

rm ~/printer_data/config/timelapse.cfg
rm ~/printer_data/config/mainsail.cfg
Update klipper environment to use klippy.conf
vi ~/printer_data/systemd/klipper.envcurl 'https://raw.githubusercontent.com/jvandervyver/Voron-2.4can-Config/main/scripts/install_theme.sh' | bashIn order to get WebRTC working as-of 7 May 2023 you need to switch over to the develop branch of crowsnest.
cd ~/crowsnest
sudo make uninstall
# Reboot

git reset --hard
git checkout develop
git branch --set-upstream-to=origin/develop develop
git pull
git reset --hard
make install
sudo vi /boot/config.txtThere may be multiple entries containing camera_auto_detect.
Remove all but one and set it to camera_auto_detect=1.
This is required to load the overlays for cameras.
crownest.conf is going to be updated, but for the Raspberry Pi v2 camera the following works well:
[cam 1]
mode: camera-streamer                      # ustreamer - Provides mjpg and snapshots. (All devices)
enable_rtsp: false                         # If camera-streamer is used, this enables also usage of an rtsp server
rtsp_port: 8554                            # Set different ports for each device!
port: 8080                                 # HTTP/MJPG Stream/Snapshot Port
device: /base/soc/i2c0mux/i2c@1/imx219@10  # See Log for available ...
resolution: 1280x720                       # widthxheight format
max_fps: 30                                # If Hardware Supports this it will be forced, otherwise ignored/coerced.
If it doesn't work, try debugging using log_level: debug which will contain the camera-streamer logs
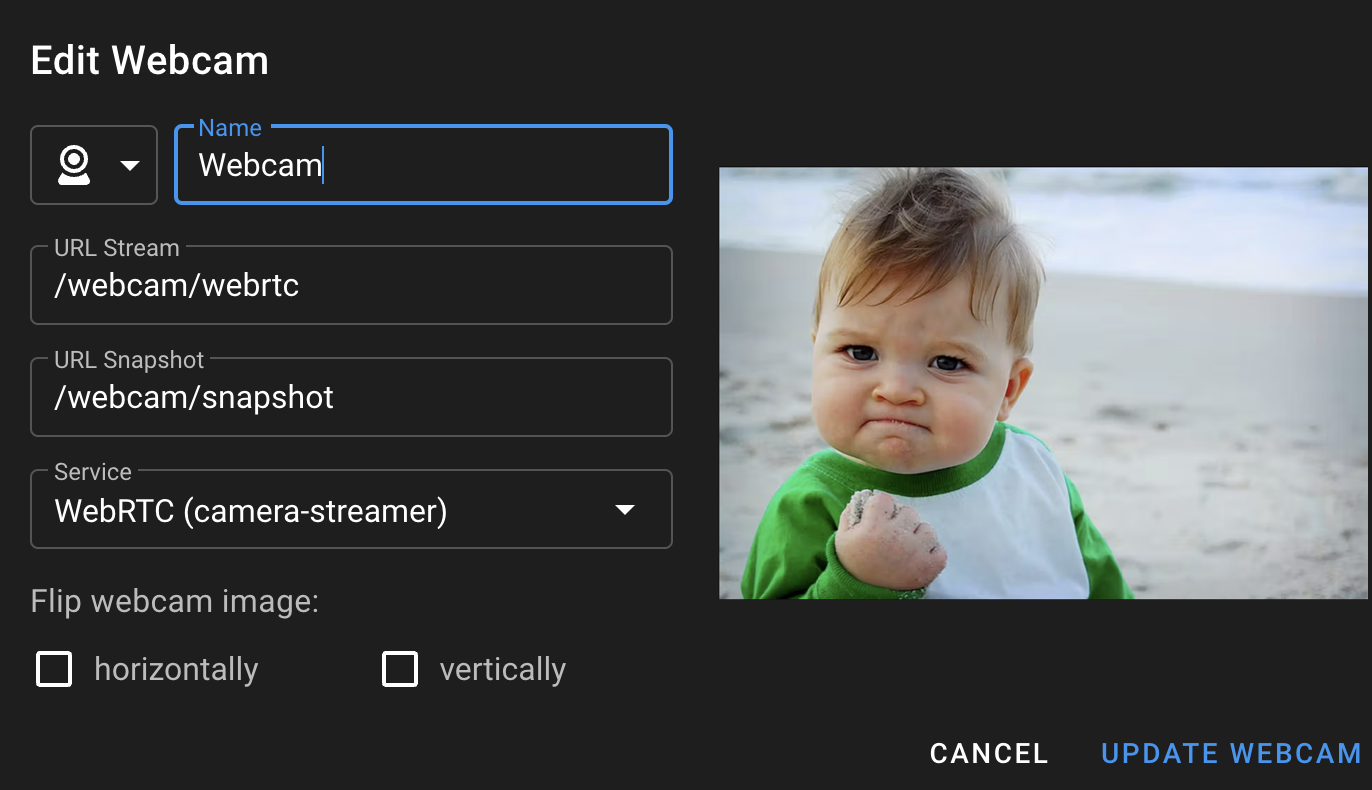
Next setup mainsail use WebRTC: