
This exercise allows you to practice and apply the concepts and techniques taught in class.
Upon completion of this exercise, you will be able to:
- Render array data as a list in a React app
- Correctly set a
keyattribute to the list of items - Remove items from a list
- Use operators
?and&&to conditionally render content - Extract new components and split the responsibilities of components
In this exercise, you will practice rendering lists from array data and using conditional rendering in React.
The objective of this exercise is to create a small React app that displays different travel plans, for a fictional company - Iron Travels (keeping in line with our Iron-labeling tradition at Ironhack).
The app that you will be creating may seem simple, but the concepts you are practicing are fundamental to every application or web platform. By working with lists and conditional rendering on a smaller scale, you will gain practical knowledge of how they work and how to use them. Once you understand these concepts, you will be able to apply them in different ways and build a variety of apps.
- Fork this repo
- Clone this repo
cd lab-react-iron-travels
npm install
npm run dev-
Upon completion, run the following commands:
git add . git commit -m "done" git push origin master -
Create a Pull Request and submit your assignment.
Inside of the src/ folder, create a new folder named components.
Use the components folder to store all the components that you create in the following iterations.
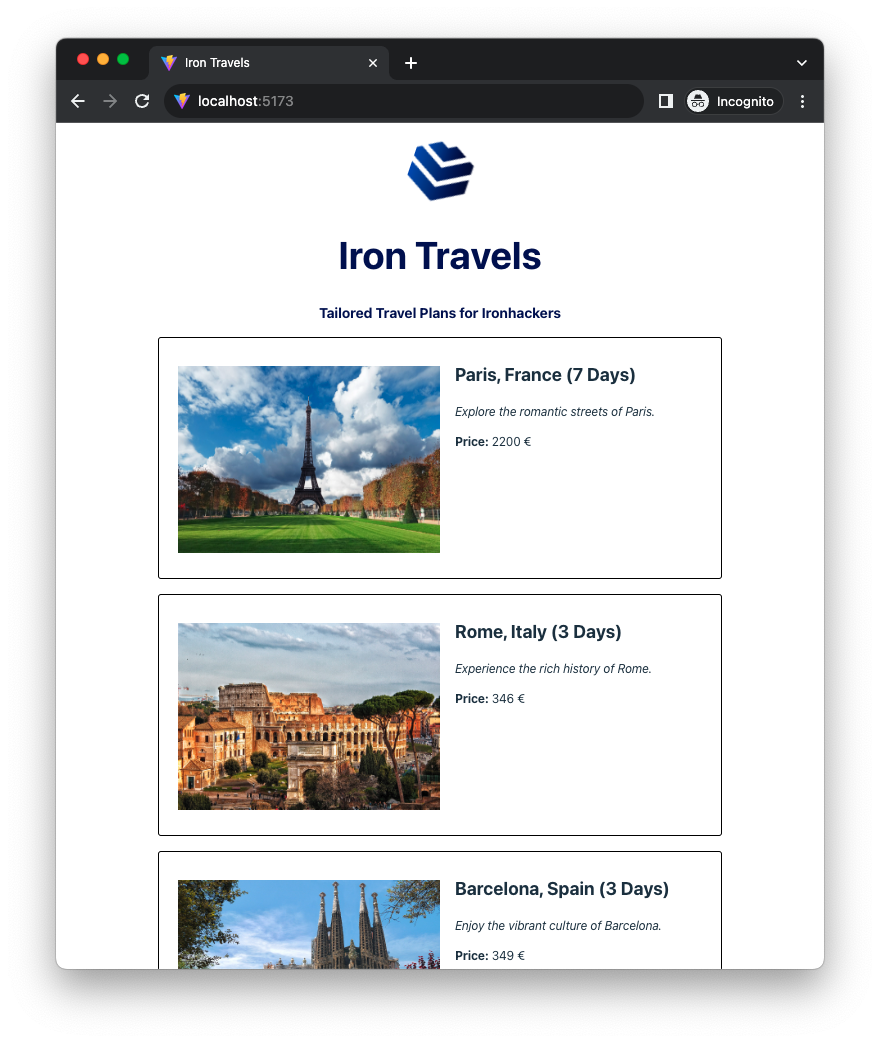
Create a TravelList component that displays the list of all the items coming from the file src/data/travel-plans.json. Remember to import the json data in the component:
import travelPlansData from "../assets/travel-plans.json";Example:
<TravelList />Expected Result
Hint
After importing the JSON data remember to store it in the component state. Use the useState hook to create a new state variable.
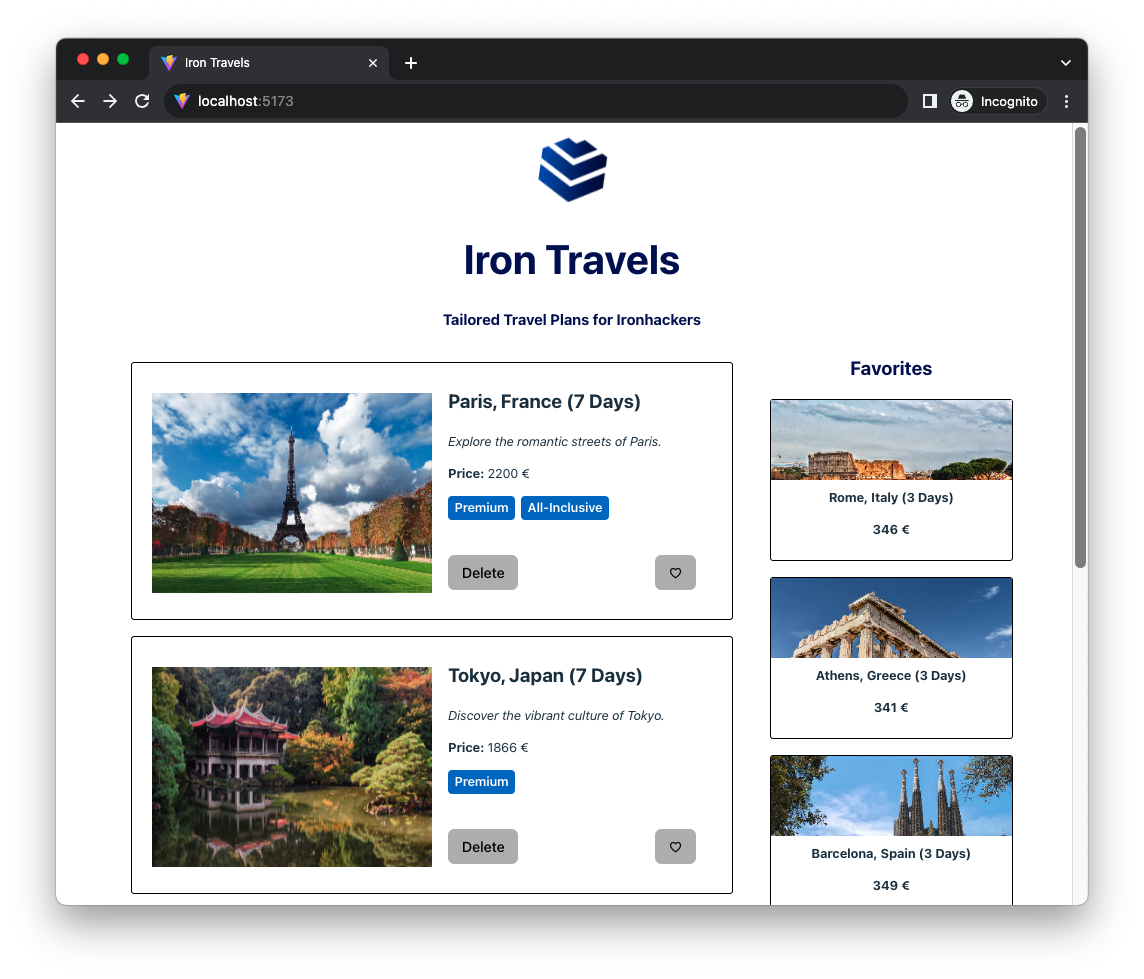
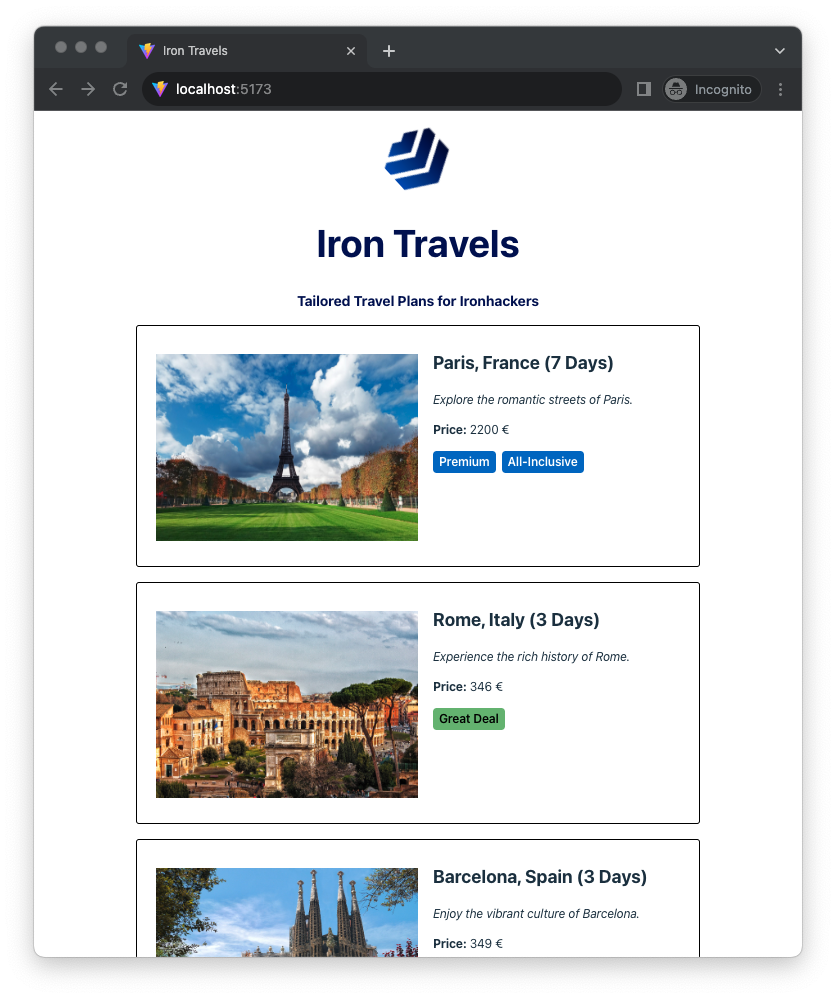
Update the TravelList component to display labels based on the cost (totalCost property) of each travel plan. Here’s how you should implement it:
-
Travel plans that cost
350or less should have a label Great Deal. -
Travel plans that cost
1500or more should have the label Premium.
Additionally, if the travel plan includes an all-inclusive package (allInclusive property), render a label All Inclusive in addition to the cost label.
Expected Result
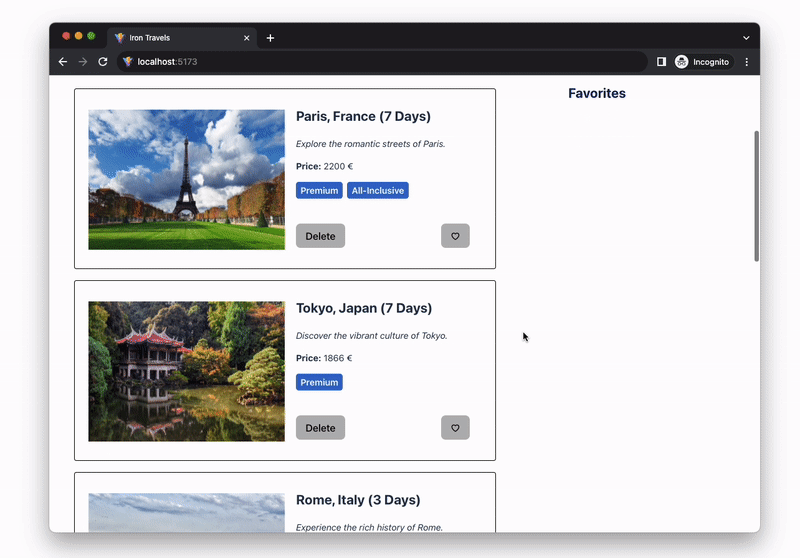
Update the TravelList component and display a delete button on each list item. When the user clicks on the button, the corresponding travel plan should be removed from the list.
Expected Result

Hint
You can use the id property of each travel plan to identify the item to remove.
Create a new component named TravelPlanCard and move the JSX code that renders each travel plan from the TravelList component to the new component.
The component should take 1 prop:
plan: An object with the travel plan data
Example:
<TravelPlanCard plan={plan} />Render a separate new list with the heading Favorites on the right side of the current list. Each list item should have a favorite button (♡) in addition to the delete button.
When the user clicks on the favorite button (♡) the corresponding travel plan should be added to the favorites list.
Additionally, the background color of the button should change with each click. You can use the following array of colors: ["purple", "blue", "green", "yellow", "orange", "red"]
Example:
<TravelList />Expected Result
Happy coding! 💙