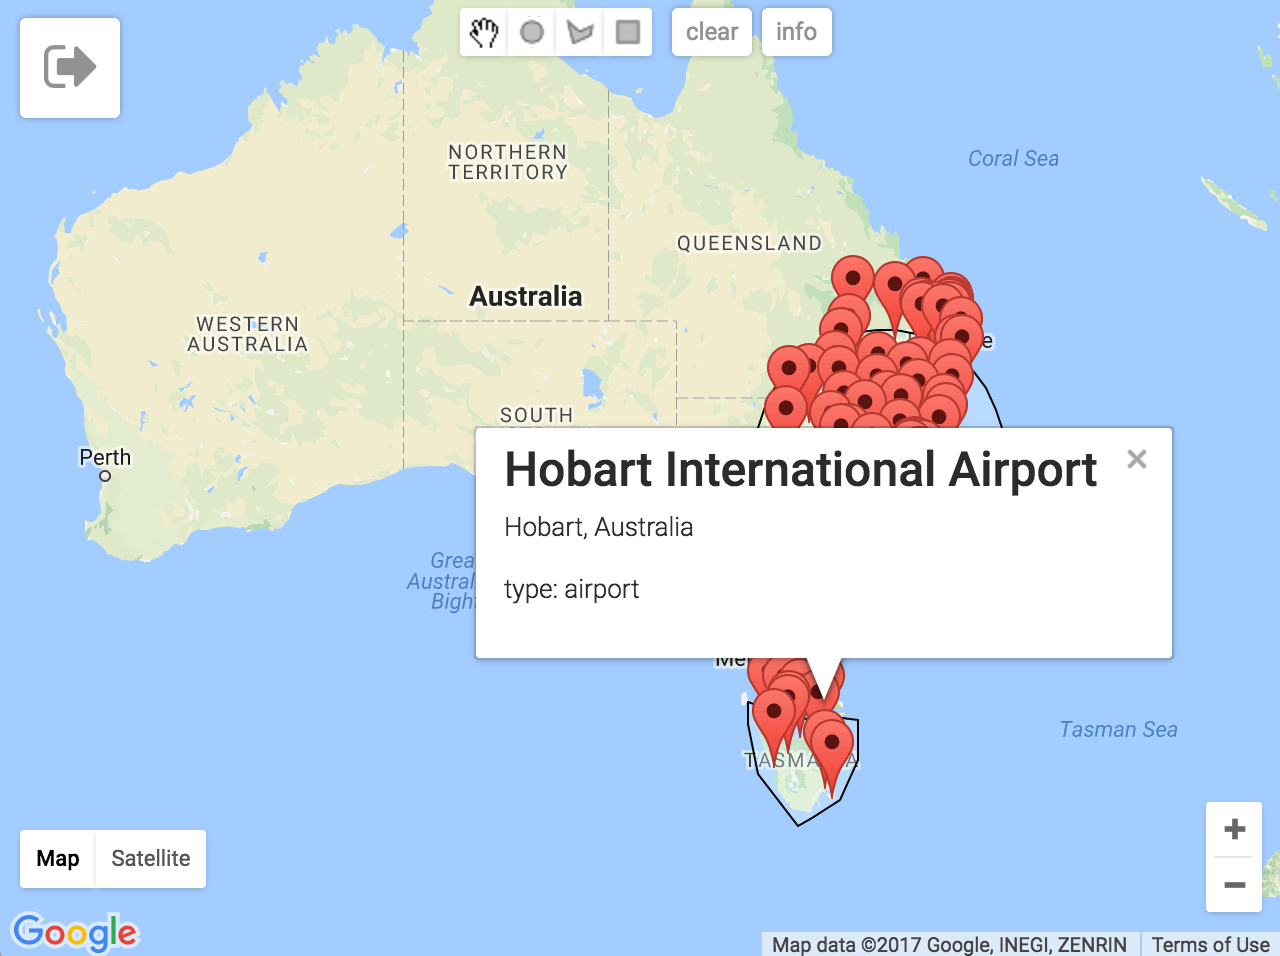
Example of a simple spatial app for searching for termini (airports, train stations etc.) across the world.
Spatial data in this application was obtained as csv data from Open Flights (openflights.org/data.html) which is licensed under the Database Contents License.
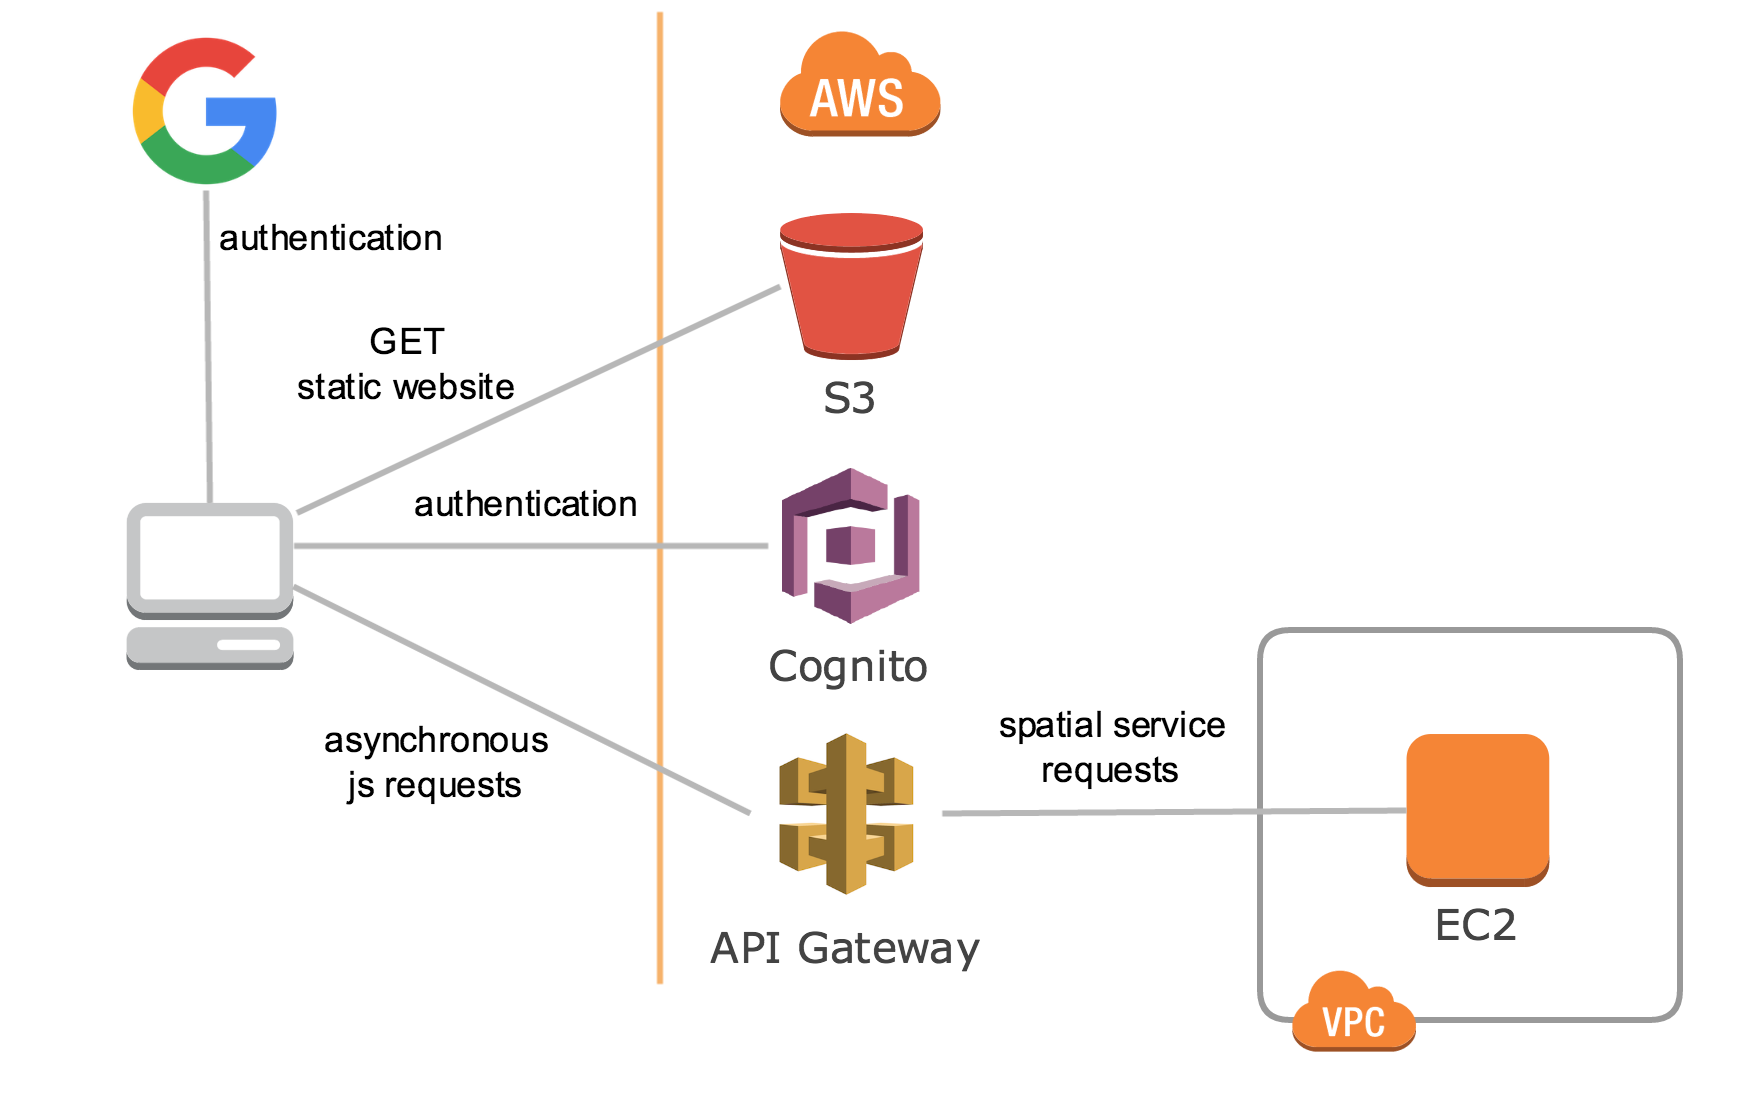
- static html/javascript frontend website
- user authentication with Google+
- temporary, limited privilege AWS credentials to perform GET requests to API Gateway
- API Gateway proxies requests to EC2 instance
- The flask app which is an API/Logic layer
- The postgres/postGIS database
The database port is exposed to the host so that you can point psql (or a desktop client) at it for debugging purposes.
This is the postgres/gis container. There are different versions around but this one does what I want it to do.
You should consider which AWS region you want to deploy in as not all AWS services are available in all regions. For example, Cognito, API Gateway, and Lambda are not available in all regions.
Some of the deployment tasks use the command line tool 'JQ' which is a JSON processor. I use it in place of the AWS CLI's --query flag for parsing JSON.
You need to have a public hosted zone in Route53 for 2 subdomains to be created. You don't need to explicitly create these subdomains, they will be provisioned by CloudFormation.
Description of subdomains:
e.g. spatialbackend.your.domain
A subdomain for the ec2 instance running the spatial service. This is required because API Gateway will proxy requests to this instance and needs to be secured with HTTPS to take advantage of API Gateway's client SSL certificate feature.
e.g. termini.your.domain
This subdomain will point to the website-enabled s3 bucket which will serve the static website.
- Goto: https://console.developers.google.com/apis/library
- Create a new project (optionally; you could re-use an existing project) by clicking 'Create Project' in the menu bar dropdown.
This will be used by Cognito.
- Left hand menu, select 'Credentials'
- Click 'Create Credentails'
- Choose 'OAuth Client ID'
- If prompted, configure consent screen (at least need to complete Product Name)
- Choose 'Application Type'='Web application'
- 'Authorized Javascript Origins'=[name of frontend website]
- Save
- Goto 'Library' area and choose 'Google Maps javascript API'
- Click 'Enable'
- Goto 'Credentials' area, click 'Create Credentials', choose 'API Key'
- Make a note of the API Key
- Click 'Restrict Key'
- (Optionally) give it a name
- Under 'key restriction' choose 'HTTP referrers' and enter the fully qualified domain name of the website that this app will be deployed at.
Cognito is not currently (at time of writing) supported in CloudFormation so it is necessary to create this using the AWS CLI. Identity Pools require an 'authenticated role' to function; this role will be created in Cloudformation and then we use another AWS CLI command to attach the role to the identity pool.
Configure variables and run bash commands below:
POOL_NAME=termini
COGNITO_REGION=<aws region e.g. ap-southeast-2>
GOOGLE_CLIENT_ID=<google client id from previous step>

aws cognito-identity create-identity-pool \
    --region $COGNITO_REGION \
    --identity-pool-name $POOL_NAME \
    --no-allow-unauthenticated-identities \
    --supported-login-providers accounts.google.com=$GOOGLE_CLIENT_ID \
    | jq .IdentityPoolId --raw-output
Note the output identity pool id (this will be used as a Cloudformation parameter)
Create new CloudFormation stack using the cf.yml template and the below parameters:
Parameters:
- Stack name: termini
- CognitoIdentityPoolId: < id obtained from creating cognito identity pool in previous step >
- GoogleClientID: < id obtained in previous step >
- GoogleMapsAPIKey: < id obtained in previous step >
- HostedZoneName: < route53 hosted zone name (without trailing '.') >
- KeyPairParameter: < select an existing SSH keypair >
- LetsencryptEmail: < your email address to register with SSL cert >
- SpatialServicesSubDomain: < subdomain (only - i.e. _not_ FQDN) e.g. 'spatialbackend' >
- UbuntuAMIParameter < AMI for Ubuntu 16.04 for your target region >
- WebsiteSubDomain: < subdomain (only - i.e. _not_ FQDN) e.g. 'termini' >
Note that the stack will reach the 'CREATED' status before the entire site is working because the EC2 instance will take a few minutes more to be fully provisioned (e.g. installing packages, docker etc. etc.)
When the CloudFormation stack has reached the 'CREATED' status, run the below CLI commands to attach the IAM roles defined in CloudFormation to the Cognito Identity Pool.
AWS_REGION=<aws region>

COGNITO_ROLE_ARN=$(aws cloudformation describe-stacks \
    --region $AWS_REGION \
    --stack-name termini \
    | jq .Stacks[].Outputs \
    | jq .[] \
    | jq 'select(.OutputKey == "CognitoAuthedRoleArn").OutputValue' --raw-output)

COGNITO_POOL_ID=$(aws cloudformation describe-stacks \
    --region $AWS_REGION \
    --stack-name termini \
    | jq .Stacks[].Parameters \
    | jq .[] \
    | jq 'select(.ParameterKey == "CognitoIdentityPoolId").ParameterValue' --raw-output)

aws cognito-identity set-identity-pool-roles \
    --region $AWS_REGION \
    --identity-pool-id $COGNITO_POOL_ID \
    --roles authenticated=$COGNITO_ROLE_ARN
Edit the parameters at the top of deploy_website.sh
AWS_REGION=<aws region e.g. ap-southeast-2>
Then run script
If minifier is installed, then termini.js will get minified
./deploy_website.sh
In your browser, you should now be able to navigate to http://termini.your.domain (or whatever you named it).
If everything has been deployed correctly, you should have a full-screen google map.
https://github.com/gsat-technology/termini
cd termini
mkdir postgres_data
#postgres_data folder will persist the database when docker isn't running
docker-compose -f docker-compose.yml -f docker-compose-dev.yml up --build
psql -U docker -h localhost -p 5432 postgres -c "CREATE DATABASE spatial;"
psql -U docker -h localhost -p 5432 spatial -f files/spatial.dump.sql
psql into docker container and perform a bounding box query of a box spanning the US. This should retrieve all 500 companies.
psql -h localhost -U docker -p 5432 spatial

#bounding box query like this should get all airports/stations in Tasmania
SELECT * FROM termini WHERE termini.geom_point && ST_MakeEnvelope(-43.722542, 144.121569, -39.418224, 148.933580, 4326);
You will need a Google Maps API key. Here's how to get one.
cd www
python -m SimpleHTTPServer
Open your browser at localhost:8000