


Beta. This is a Beta release of the Stackdriver Debugger agent for Node.js. These libraries might be changed in backward-incompatible ways and are not subject to any SLA or deprecation policy.
This module provides Stackdriver Debugger support for Node.js applications. Stackdriver Debugger is a feature of Google Cloud Platform that lets you debug your applications in production without stopping or pausing your application. Here's an introductory video:

See also, Setting up Stackdriver Debugger for Node.js.
- Stackdriver Debugger is comptible with Node.js version 4 or greater. Node.js v5+ is recommended.
# Install with `npm` or add to your `package.json`.
npm install --save @google-cloud/debug-agent
// Require and start in the startup of your application:
require('@google-cloud/debug-agent').start({ allowExpressions: true });
// No auth necessary if your code is running on Google Cloud Platform.
// ... or, if you are running elsewhere, you can manually provide credentials:
require('@google-cloud/debug-agent').start({
allowExpressions: true,
projectId: 'particular-future-12345',
keyFilename: '/path/to/keyfile.json'
});This starts the automatic Debugger Agent that enables your app to be debuggable using the Stackdriver Stackdriver Debug view within the Google Cloud Console. You can start adding snapshots and log-points to your application.
The Stackdriver Debugger agent should work without the need to manually provide authentication credentials for instances running on Google Cloud Platform, as long as the Stackdriver Debugger API access scope is enabled on that instance.
On Google App Engine, the Stackdriver Debugger API access scope is enabled by default, and the Stackdriver Debugger agent can be used without needing to provide credentials or a project ID.
On Google Container Engine, you need to explicitly add the cloud_debugger OAuth scope when creating the cluster:
$ gcloud container clusters create example-cluster-name --scopes https://www.googleapis.com/auth/cloud_debugger
For Google Compute Engine instances, you need to explicitly enable the cloud_debugger Stackdriver Debugger API access scope for each instance. When creating a new instance through the Google Cloud Platform Console, you can do this under Identity and API access: Use the Compute Engine default service account and select "Allow full access to all Cloud APIs" under Access scopes.
To use something other than the Compute Engine default service account see the docs for Creating and Enabling Service Accounts for Instances and the Running elsewhere section below. The important thing is that the service account you use has the Cloud Debugger Agent role.
If your application is running outside of Google Cloud Platform, such as locally, on-premise, or on another cloud provider, you can still use Stackdriver Debugger, provided that you supply a project ID and credentials to the Stackdriver Debugger agent.
Provide a project ID to the Stackdriver Debugger agent by setting the projectId value in the options object passed to the agent's start method, or set the GCLOUD_PROJECT environment variable:
On Linux or Mac OS X:
export GCLOUD_PROJECT=your-project-idOn Windows:
set GCLOUD_PROJECT=your-project-id
And on Windows Powershell:
$env:GCLOUD_PROJECT="your-project-id"
Google Cloud Platform client libraries use a strategy called Application Default Credentials (ADC) to find your application's credentials. You can provide credentials to the Stackdriver Debugger agent by setting the keyFilename value in the options object passed to the agent's start method, or you can set the GOOGLE_APPLICATION_CREDENTIALS environment variable. For more information, see Providing credentials to your application.
require('@google-cloud/debug-agent').start({
  projectId: 'your-project-id',
  keyFilename: '/path/to/key.json'
});Generate a source-context.json file which contains information about the version of the source code used to build the application. This file should be located in the root directory of your application. When you open the Stackdriver Debugger in the Cloud Platform Console, it uses the information in this file to display the correct version of the source.
gcloud beta debug source gen-repo-info-file
For more information see Selecting Source Code Manually.
You can customize the behaviour of the automatic debugger agent. See the agent configuration for a list of possible configuration options. These options can be passed in the options object passed to the start function.
require('@google-cloud/debug-agent').start({
  // .. auth settings ..

  // debug agent settings:
  allowExpressions: true,
  serviceContext: {
    service: 'my-service',
    version: 'version-1'
  },
  capture: { maxFrames: 20, maxProperties: 100 }
});Once your application is running (deployed, or elsewhere), you should be able to use the Debug UI in your Cloud developer console. You can find the Debug UI in the 'STACKDRIVER -> Debug' section in the navigation panel, or by simply searching for 'Debug' in the cloud console.
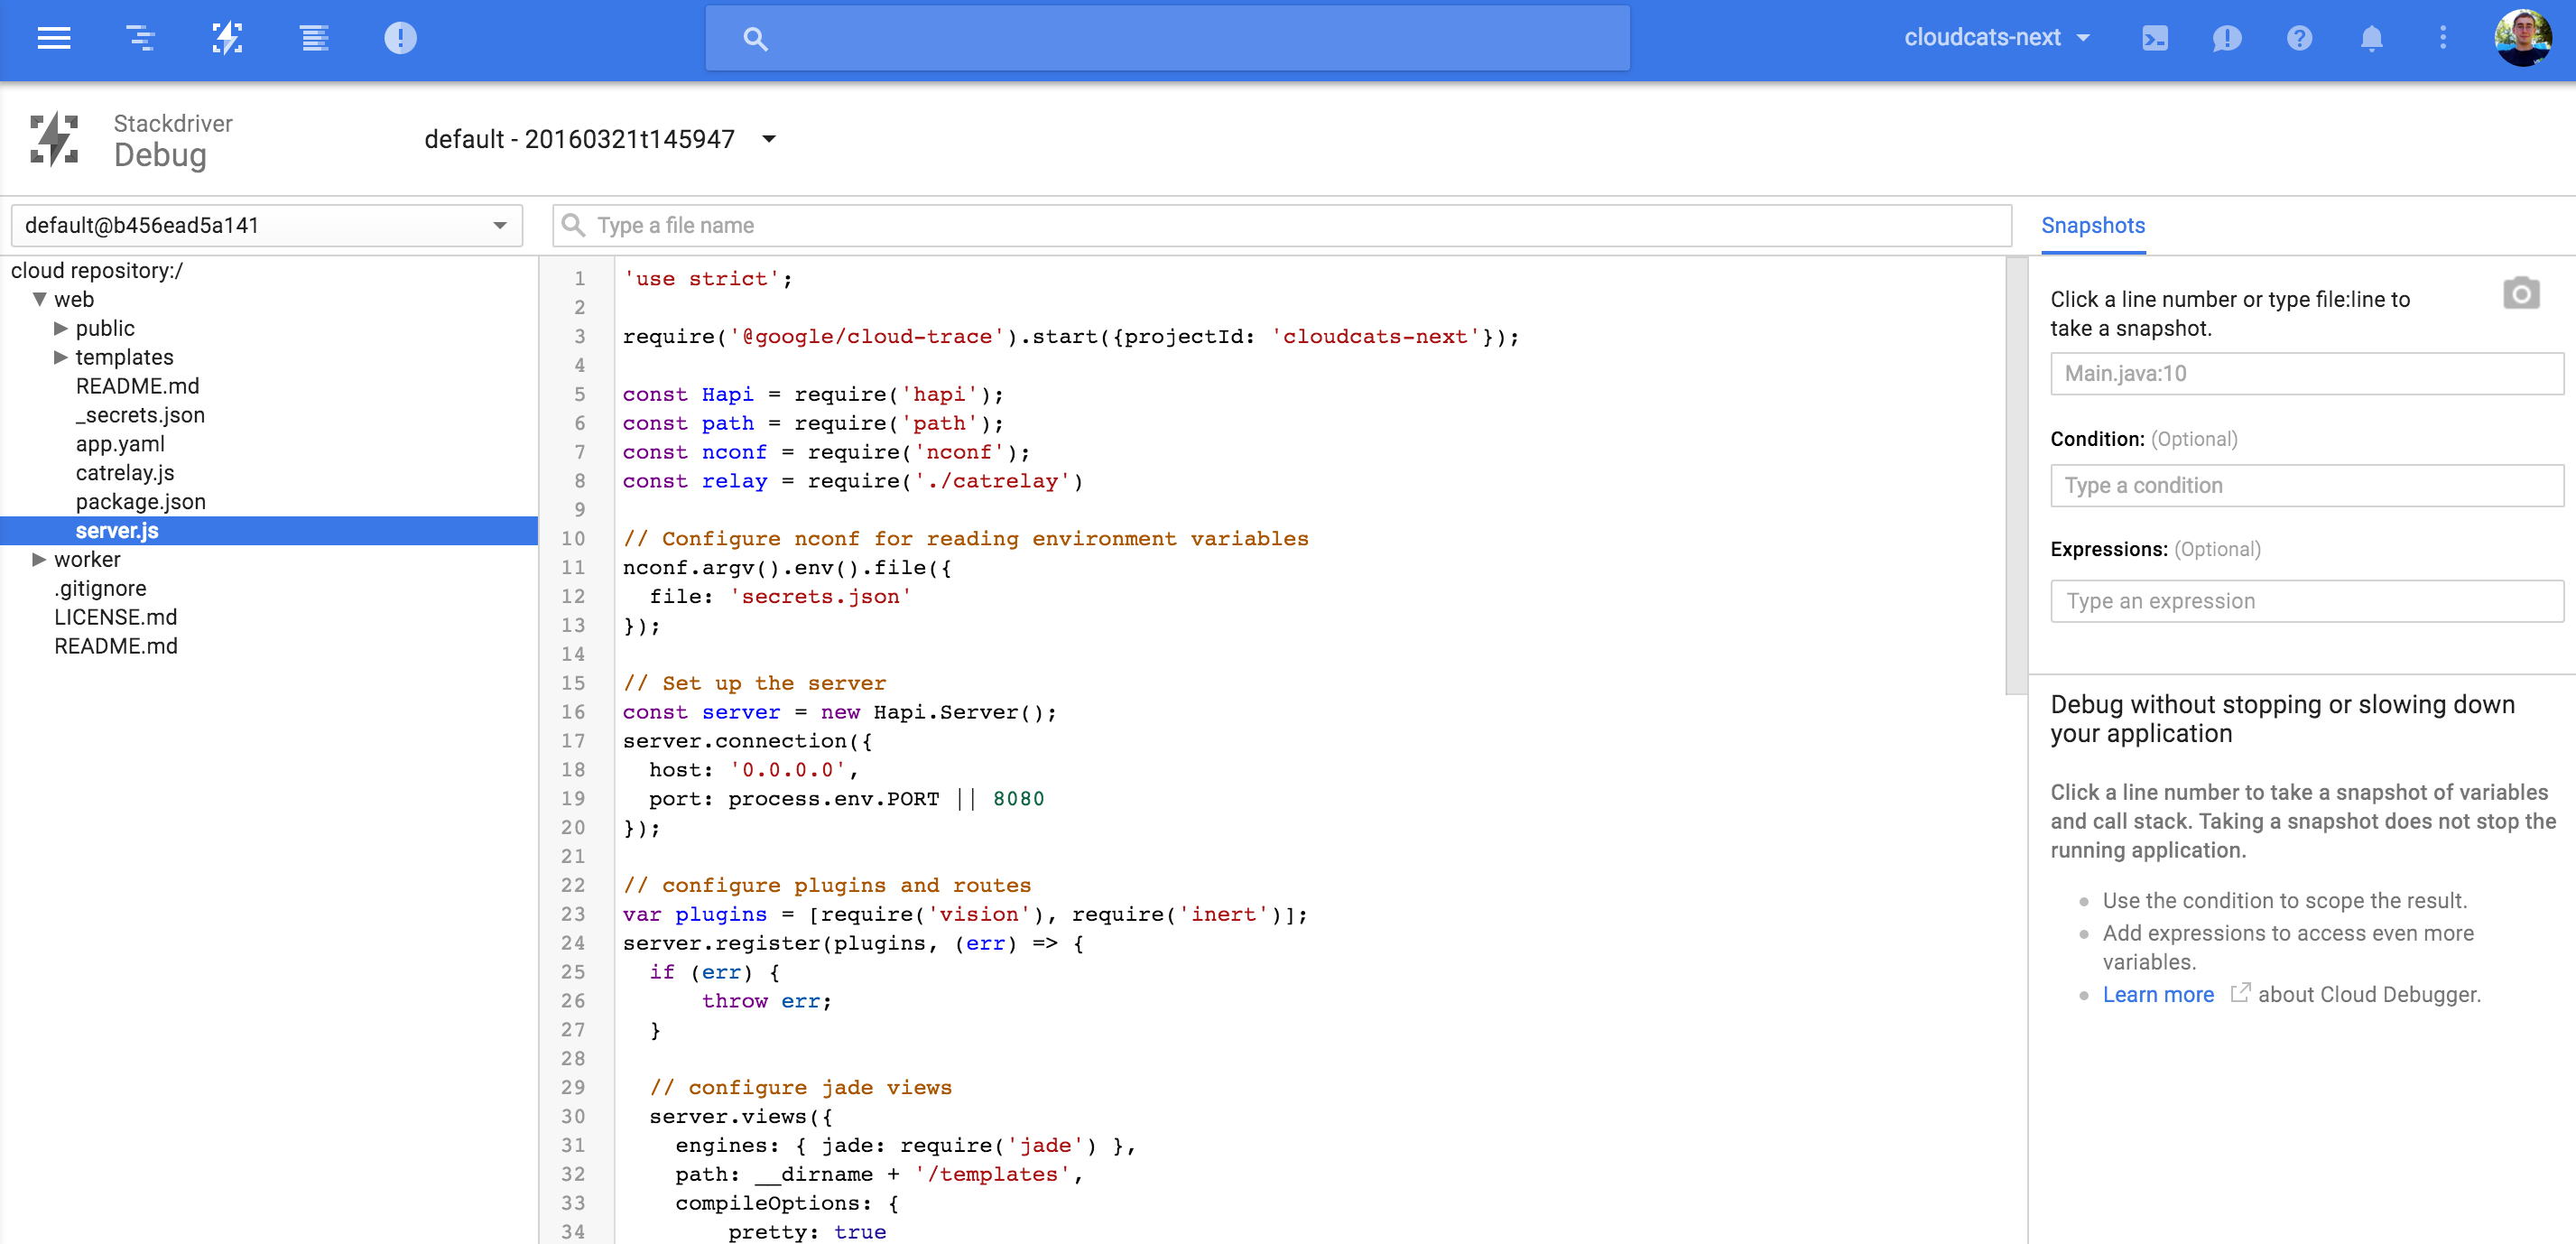
If your source is hosted in a cloud source repository, Stackdriver Debugger will display the source code of your application automatically. Alternatively, you can also point the debugger to local files, a GitHub or Bitbucket repository, through a Source Capture, or you can simply type in a filename and line number. More details are on source options are available here.
If you have the source available, you can set a snapshot by clicking in the gutter (line number area). Once you set a snapshot, the debug agent will insert a momentary breakpoint at the code location in the running instances of the application.

As soon as that line of code is reached in any of the running instances of your application, the stack traces, local variables, and watch expressions are captured, and your application continues.

Note: The directory layout of the code that is being debugged does not have to exactly match the source code specified in the Debug UI. This is because the debug agent resolves a snapshot filename by searching for a file with the longest matching path suffix. If a unique match is found, that file will be used to set the snapshot.
An example will help illustrate this. That is, suppose that the code on the running instance is structured as follows:
/running/instance/package.json
/running/instance/main.js
/running/instance/a/index.js
/running/instance/b/a/index.js
Further, suppose the source code repository or local directory you have provided to the Debug UI is structured as follows.
package.json
main.js
a/index.js
b/a/index.js
In this case, if you specify a snapshot in file b/a/index.js in the Debug UI, the debugger will identify that that file corresponds to the file /running/instance/b/a/index.js of the code on the running instance, and the breakpoint will hit when the specified line of /running/instance/b/a/index.js is reached.
Note, however, if a snapshot is specified for the file a/index.js in the Debug UI, then the debugger would not know whether this file corresponds to the file /running/instance/a/index.js or /running/instance/b/a/index.js. If such an ambiguity occurs, the snapshot cannot be set and a message will be displayed in the Debug UI with additional information.
The debugger supports the use of transpiled code, whether it be Javascript to Javascript transpilation or transpilation from another language (such as Typescript) to Javascript. In order to use transpiled code with the debugger, sourcemaps need to be generated with the transpiled code. The sourcemaps need to be provided in .js.map files.
Further, you do not need to deploy the original source files to the deployment environment as long as the sourcemap files are available at runtime.
In the Debug UI, you only need to provide the original source code -- you don't need the transpiled output files or the sourcemaps. When you set a snapshot in an original source file in the Debug UI, the corresponding file and line in the transpiled code is automatically determined based on the sourcemap files provided with the transpiled code at runtime. See the Using the Debugger section for more information about using the Debug UI. In addition, the exact directory layout of the original source is somewhat flexible, just as it is with the use of non-transpiled code as described in the Using the Debugger section.
The Stackdriver Debugger includes experimental support for the new V8 Inspector Protocol and will use it if and only if the GCLOUD_USE_INSPECTOR environment variable is set and the running version of Node supports the inspector protocol (Node 8+).
If the GCLOUD_USE_INSPECTOR environment variable is set, but the running version of Node does not support the inspector protocol, the agent will fall back to the legacy debugger protocol and a warning message will be logged.
The GCLOUD_USE_INSPECTOR can be set programmatically, but must be set before calling the start method as illustrated below:
process.env['GCLOUD_USE_INSPECTOR'] = true;
require('@google-cloud/debug-agent').start({ ... });- The root directory of your application needs to contain a
package.jsonfile. - You can set snapshot conditions and watch expressions to be evaluated in the context of your application. This leads to some issues you should be aware of
- You may be able to view sensitive data of your own users by looking at the values of the variables.
- The debug agent tries to ensure that all conditions and watchpoints you add are read-only and have no side effects. It catches, and disallows, all expressions that may have static side effects to prevent accidental state change. However, it presently does not catch expressions that have dynamic side-effects. For example,
o.flooks like a property access, but dynamically, it may end up calling a getter function. We presently do NOT detect such dynamic-side effects.
- With Node.js 4.x and older, your application may experience a performance impact when there are snapshots active. There should be no impact to performance when no snapshots are active. Node.js v5.x does not have this issue.
- Node.js v0.10.x or older are not supported as they lack some necessary APIs to avoid a permanent (life of the application) performance hit.