![]()
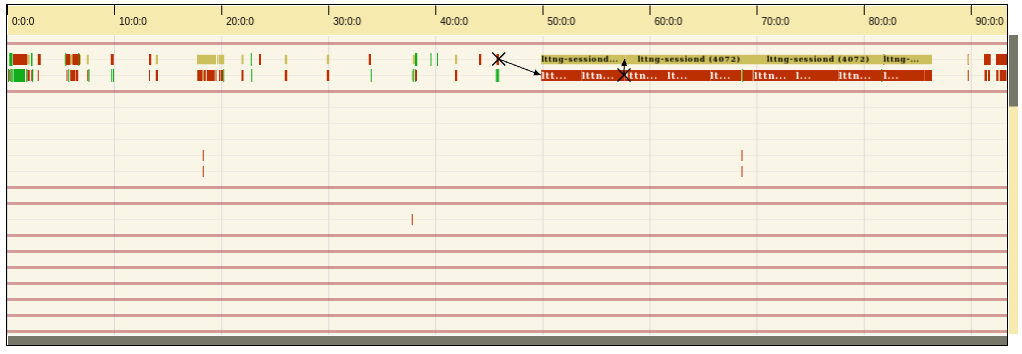
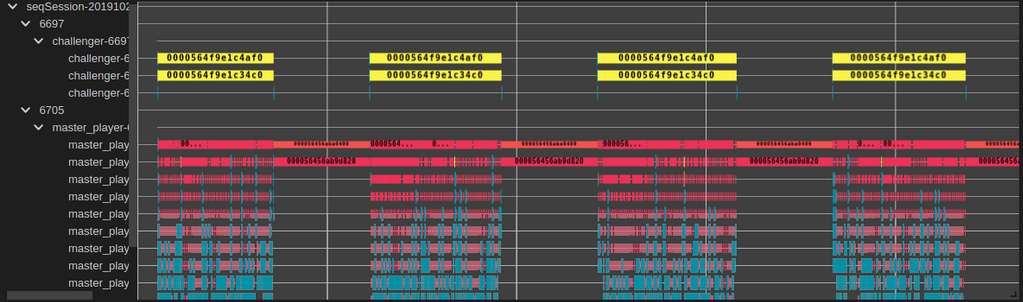
A time graph / gantt chart library for large data (e.g. traces)
First, you need Node.js and yarn:
It's suggested to install nvm to manage node on your machine. Once that's done, install the required version:
   nvm install 18
   # optional: make it the default version
   nvm alias default
   # or set it every time like so
   nvm use 18
Then install yarn:
npm i -g yarn # the default version should be okTo build, from the root type yarn
To test an application type yarn start then open localhost:8080 on your web browser

👋 Want to help? Read our contributor guide.
For detailed description of the timeline chart library and it's components see here.
The following list of applications are currently making use of the timeline-chart library;
Tests can be executed from the root of the project with:
yarn testOr from ./timeline-chart, where the tests outputs are formatted in a more readable way:
cd timeline-chart
yarn test --verbose --watchDevelopers can use unit tests to measure the performance improvement of their changes. The following section is a quick guide on how to set up unit tests.
The TimeGraphPerformanceTest is a class that conveniently creates a timeline chart for performance tests. To construct a chart for testing, trace data and its corresponding view range is required. The class provides some methods that return important test data, such as the total length of a trace for assertions. The code is taken from the timeline chart example.
You can view an example here. In this example, test data are 'packaged' into a single object for better readability.
- The
getTimeGraphChart()method returns the constructed timeline chart. From here, developers can call any methods that they want to test on the returned chart. If the methods are protected or private, using the@ts-ignoreannotation will bypass typescript checks. - It is important to re-construct the timeline chart before each test to make sure the results are consistent.
- The tests themselves only print out the results and don't compare them to an actual value, because the threshold depends on the environment it runs. Therefore, make sure to output the performance measurement to the output console, so that it can be viewed once the tests finished running.
The following command prints a coverage report to the terminal. As of now it covers all typescript files of the project, including those that are not supposed to have tests.
yarn test --coverage --collectCoverageFrom='src/**/*.ts'Publishing of npm package and creating GitHub releases / git tags, all happen on GitHub CI.
A next package is automatically published to npm every time a PR is merged.
Whenever a new release is desired, including publishing a corresponding latest package to npm, it can be triggered through a PR. The following has to be done:
Create a new branch for your PR. e.g.
git branch new-release && git checkout new-releaseThen decide if the release shall be a Major, Minor or Patch release and use the corresponding command below to step packages versions, according to the release type. A new release commit will be created:
yarn version:major
# or
yarn version:minor
# or
yarn version:patch
Modify the version tag in file ./RELEASE, to match the new release. Amend the release commit to include this change:
git add RELEASE && git commit --amendFinally, push the branch and use it to create a PR. When the PR is merged, a GitHub release should be created with auto-generated release notes, as well as a git tag. Then the publish-latest CI job should trigger and if everything goes well, publish the new version of the package to npm.