Containers UISplitViewController example
In this example, we show how HLSPlaceholderViewController can be used to implement a UISplitViewController-like container. The final result will look as follows:

- Create a new Xcode project and add CoconutKit to it
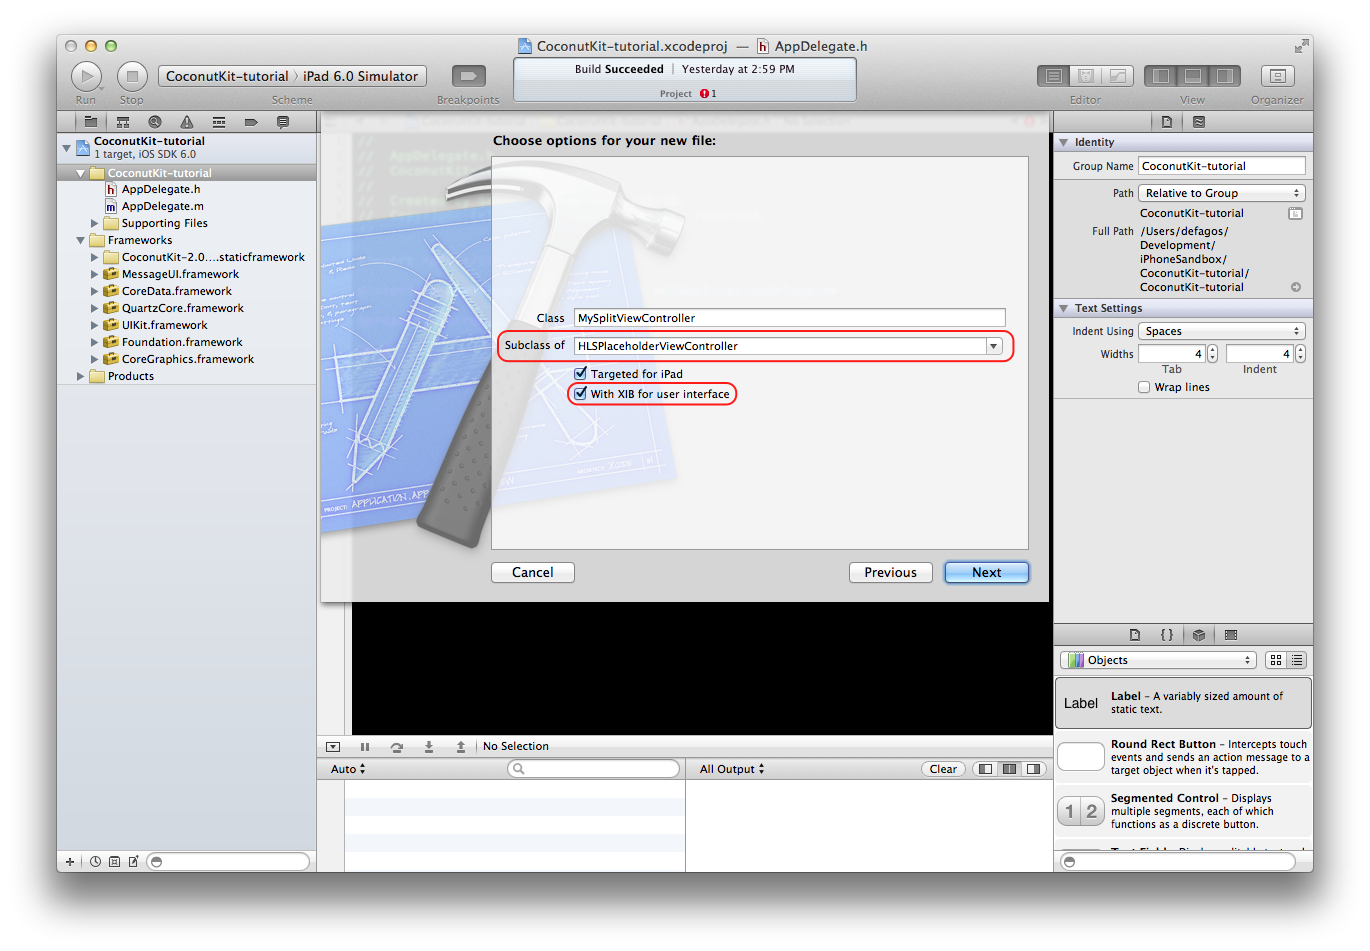
- Create an
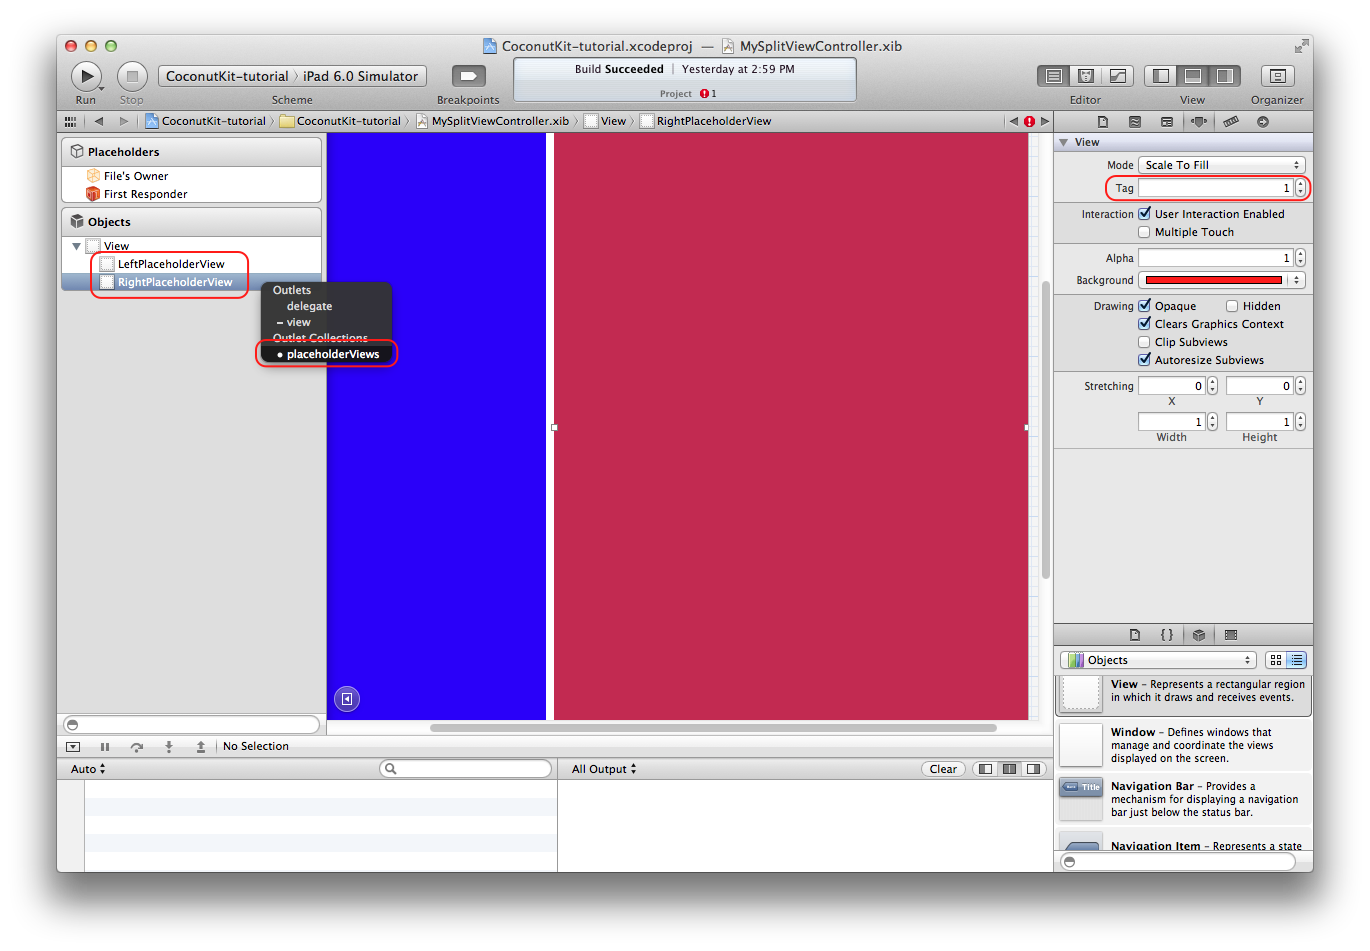
HLSPlaceholderViewControllersubclass calledMySplitViewController. We will manage the view layout using Interface Builder, you should therefore add axibfile bearing the class name at the same time (simply check the With XIB for user interface checkbox when creating the class files)
```objective-c
- (void)viewDidLoad
{
    [super viewDidLoad];

    for (UIView *placeholderView in self.placeholderViews) {
        placeholderView.backgroundColor = self.view.backgroundColor;
    }
}
```
-
Set the view controllers to be displayed. This can be made at any time before the container is actually displayed. A good choice is
-[MySplitViewController init]:- (id)init { if ((self = [super init])) { LeftViewController *leftViewController = [[LeftViewController alloc] init]; [self setInsetViewController:leftViewController atIndex:0]; RightViewController *rightViewController = [[RightViewController alloc] init]; [self setInsetViewController:rightViewController atIndex:1]; } return self; }
-
Edit both
LeftViewControllerandRightViewControllerxibfiles so that their view sizes match the ones ofMySplitViewControllerplaceholder views. Even ifHLSPlaceholderViewControllerresizes the frame of its child view controllers to match the placeholder view bounds, it is better to design at the proper scale. Also add two different labelsLandRin the middle of those views, with proper autoresizing mask (flexible height and width)

```objective-c
- (BOOL)application:(UIApplication *)application didFinishLaunchingWithOptions:(NSDictionary *)launchOptions
{
    self.window = [[UIWindow alloc] initWithFrame:[[UIScreen mainScreen] bounds]];
    self.window.backgroundColor = [UIColor whiteColor];
    [self.window makeKeyAndVisible];

    self.window.rootViewController = [[MySplitViewController alloc] init];

    return YES;
}
```
- Build and run the application, and also try to rotate the view. If your autoresizing masks were set up properly, the labels should behave properly when rotating. Congratulations! You have implemented your own
UISplitViewController-like container!