- 03.08.2023: virtual Keyboard and Speed slider fixed
- 01.08.2023: initial release
german manual: https://book.cryd.de/books/klipper/page/youtube-kobra-display-mit-klipper
based on: https://github.com/seho85/klipper-dgus
The following Kobra models have been tested:
- Kobra Max with Trigorilla Pro A 1.0.4
- Kobra Max with Trigorilla Pro B 1.0.2
Theoretical compatibility (models to be added after testing):
- Kobra
- Kobra Plus
- Kobra 2
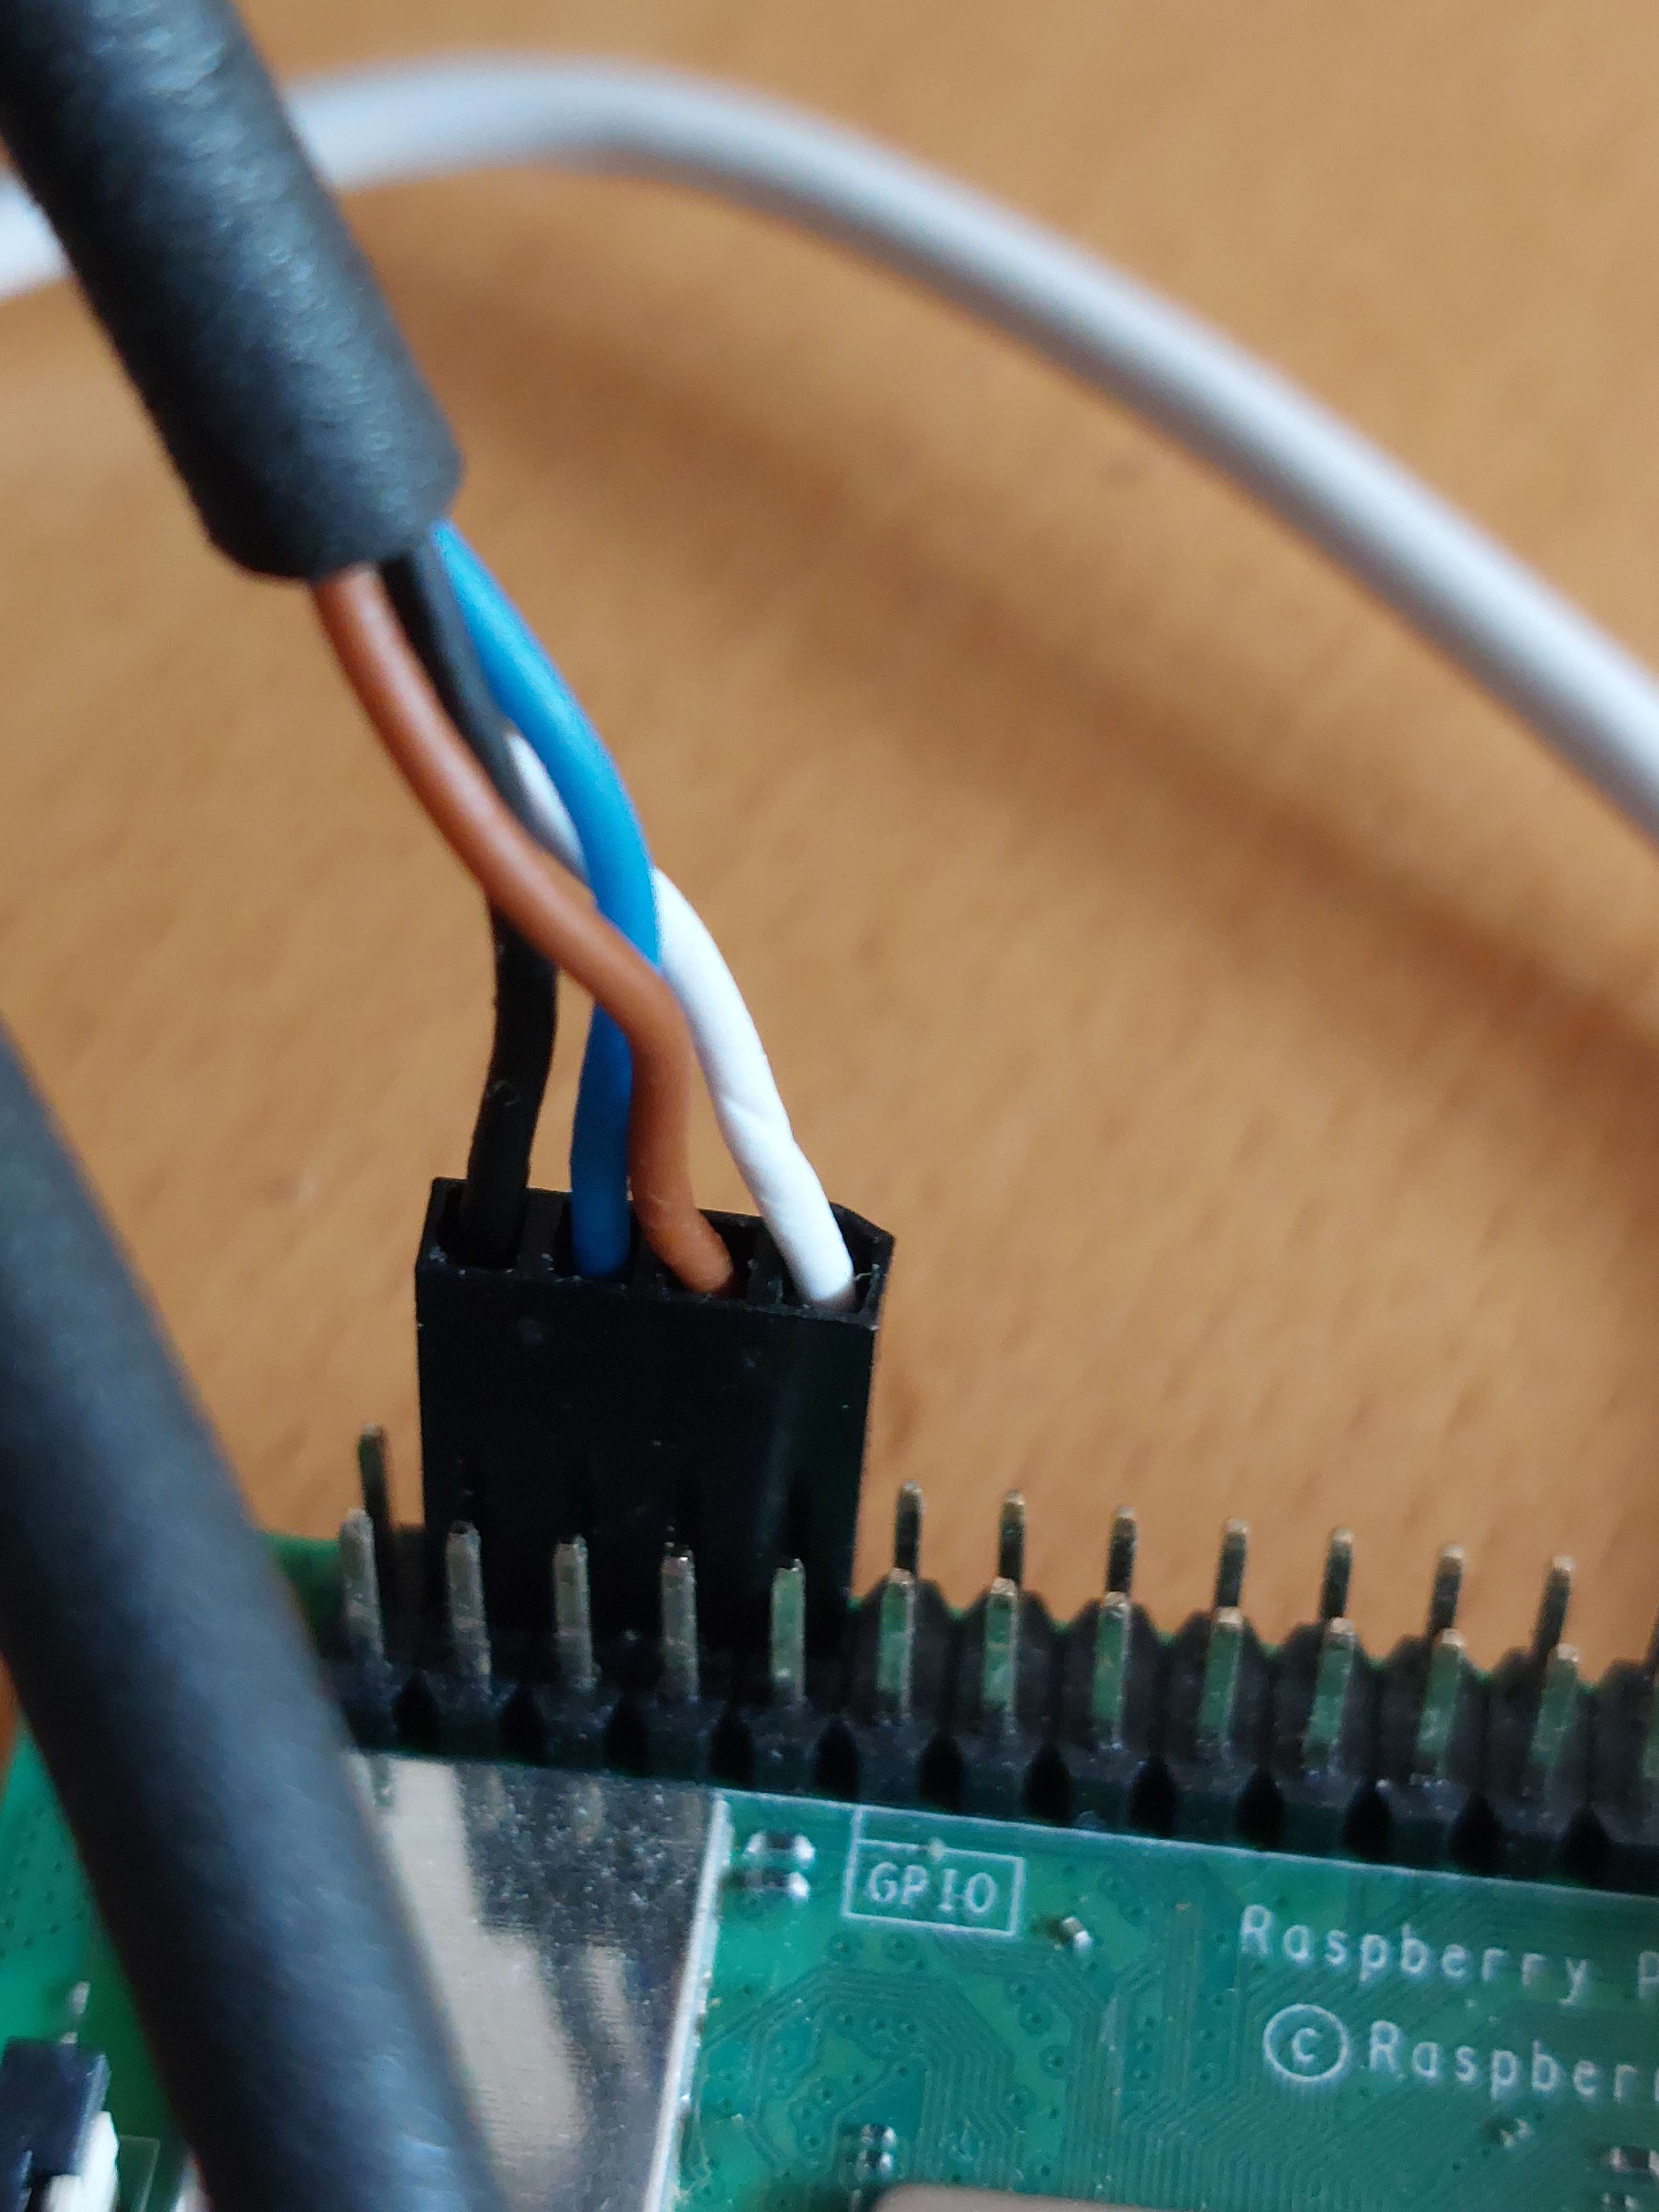
For usage, the display is no longer connected to the printer but directly to the Raspberry Pi via GPIO.
Bill of Materials (BOM):
- Dupont Connector 4 Pin (for connecting to Raspberry Pi GPIO)
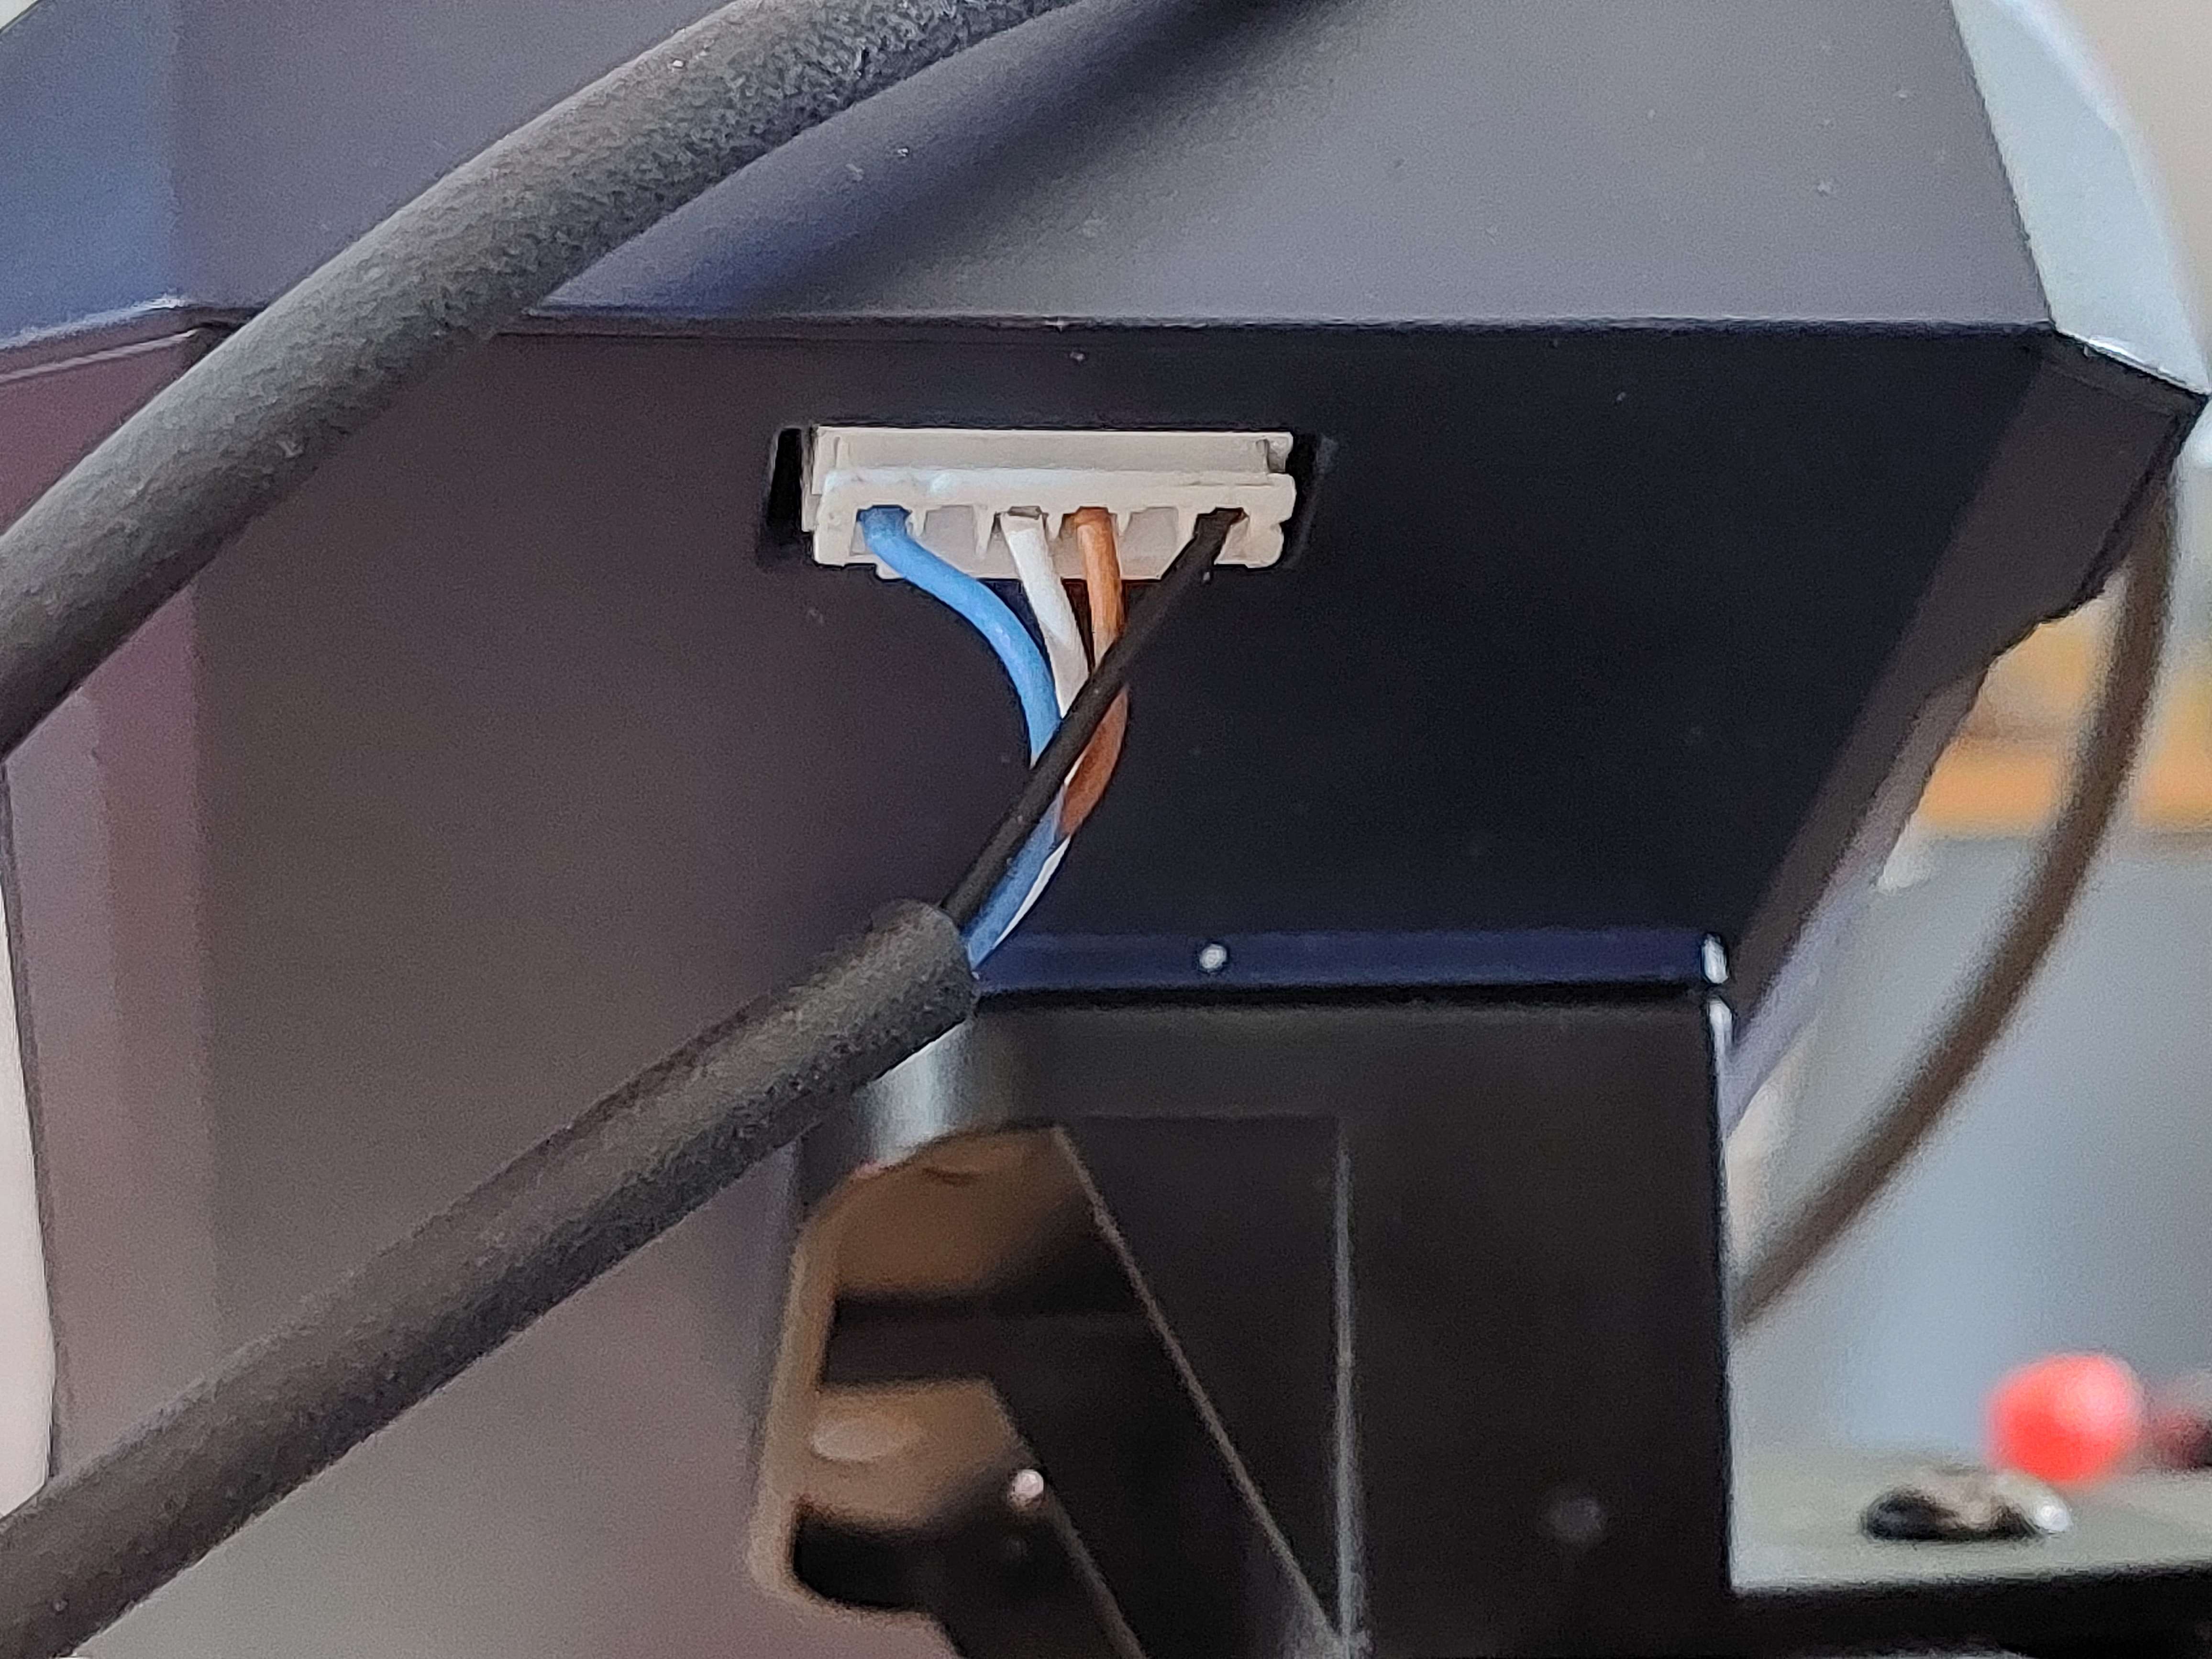
- JST XH Connector 6 Pin (for connecting to Kobra Display)
- Cables
The display is connected to the Raspberry Pi via the GPIO header.
- Enable the Serial Interface on Raspberry Pi
1 sudo raspi-config * 3) Interface Options * 6) Serial Interface
* Would you like a login shell to be accessible over the serial interface?
     * No

* Would you like the serial interface hardware to be enabled?
     * Yes
schematic:
| RaspberryPI PIN | Display |
|---|---|
| 5V | 5V |
| GND | GND |
| Pin 8 / GPIO 14 / TXD | RX2 |
| Pin 10 / GPIO 15 / RXD | TX2 |
You have to wire like this:
-
Download the (DWIN_SET) unzip it and copy to a correctly formatted microSD card.
-
Insert the microSD card into the powered-off display.
-
Power on the display.
-
A blue display screen will show the progress of the flashing process.
-
During the flashing process, the second line will display:
SD Card Process...
Once the flashing is completed, the second line will show:
SD Card Process... END!
-
Power off the display.
-
Remove the microSD card.
CAUTION:
It is crucial that the microSD card is correctly formatted with the following settings:
- File system: FAT32
- Allocation unit size: 4096
For a simple installation on MainsailOS, you can find a setup script named "install_for_mainsailos.sh" in the project folder.
Follow these steps to install:
- Copy the necessary data:
cd
git clone https://github.com/cryd-s/kobra_extended.git
mv kobra_extended klipper-dgus
chmod -R 755 klipper-dgus
cd klipper-dgus- Execute the installation script:
./install_for_mainsailos.shIMPORTANT: During the installation, you will be prompted to enter your sudo password.
- Copy the "dgus_display_macros.cfg" configuration file to the "config" folder of your Klipper setup.
- In the "printer.cfg" file, add the following line to include the "dgus_display_macros.cfg" configuration:
[include config/dgus_display_macros.cfg]
The file "serial_config.json" contains the settings for the serial interface used to communicate with the DGUS display.
The choice of serial interface depends on the specific Raspberry Pi model and the version of Raspbian being used. Start by selecting one interface, and if the display doesn't work, try the alternative interface as a workaround. If the display still doesn't function, please refer to troubleshooting steps.
By default, the following serial interface is commonly used:
"serial_port": "/dev/ttyS0"
If the display doesn't work, you can change the interface using this command: From "ttyS0" to "ttyAMA0":
sed -i '3s|/dev/ttyS0|/dev/ttyAMA0|' /home/pi/klipper-dgus/config/serial_config.json
If you need to revert the change (from "ttyAMA0" to "ttyS0"):
sed -i '3s|/dev/ttyAMA0|/dev/ttyS0|' /home/pi/klipper-dgus/config/serial_config.json
The "websocket.json" file contains the settings for the Websocket connection used to communicate with Klipper through the Moonraker socket. In most cases, only the first two parameters, ip and port, need to be changed. In addition to the ip and port settings, there are some other objects described here.
{
    "websocket": {
        "ip": "127.0.0.1",
        "port": 7125,

        "printer_objects": {
            "some_more_entries": "..."
        },

        "data_model": {
            "some_more_entries": "..."
        }
    }
}
IP: The IP address of the machine where Moonraker is running. If using MainsailOS, it's the same IP address used to connect to the web interface.
Port: The port on which Moonraker is transmitting. By default, it runs on 7125, and usually, no changes are required.
printer_objects: In this section, the printer objects are defined, which are used by the display. See this link for more information. Changes here may be necessary if new information is to be used on the display.
data_model:
The data_model contains the data recently exchanged with Moonraker. This section doesn't require any manual adjustments. It is generated by the Display Controller application and any manual changes will be overwritten when starting/shutting down the Controller application.