This tutorial demonstrates the basic building blocks and functionality necessary to build an elementary Hyperledger fabric chaincode application. You will be incrementally building up to a working chaincode that will be able to create generic assets. Then, you will interact with the chaincode by using the network's API. After reading and completing this tutorial, you should be able to explicitly answer the following questions:
- What is chaincode?
- How do I implement the chaincode?
- What dependencies are required to implement chaincode?
- What are the major functions?
- How do I compile my chaincode?
- How do I pass different values to my arguments?
- How do I securely enroll a user on my network?
- How do I interact with my chaincode by using the REST API?
Chaincode is a piece of code that is deployed into a network of Hyperledger fabric peer nodes that enables interaction with that network's shared ledger.
Currently, the Hyperlegger Fabric supports chaincode written in Go. We require Go 1.6. If you are already set up to develop in Go, and you have Go 1.6 installed, you may skip to step 3. If you have already set up a Hyperldger fabric development environment, you may skip this section entirely.
-
Download and install Golang for your operating system at Golang. If this is your first time installing Go, you should follow all of the instructions, including testing that it has been correctly installed and ideally, you should avoid installing Go in a custom location.
-
Add the Hyperledger shim code to your Go workspace (which you set as the value of $GOPATH) by opening a command prompt or terminal and entering the following:
cd $GOPATH go get github.com/hyperledger/fabric/core/chaincode/shim -
The IBM Bluemix IBM Blockchain service currently requires that chaincode to be in a GitHub repository. Therefore, if you don't already have a GitHub account, you should get one.
-
If you haven't got Git setup locally on your computer, you should do that, as well.
-
Fork this repository to your github account (scroll up to the top and click Fork.)
-
Now clone your fork to your $GOPATH.
cd $GOPATH mkdir -p src/github.com/<yourgithubid>/ cd src/github.com/<yourgithubid>/ git clone https://github.com/IBM-Blockchain/learn-chaincode.git -
Notice that we have provided two different versions of the chaincode used in this tutorial: Start - the skeleton chaincode from which you will start developing, and Finished - the finished chaincode.
-
Make sure it builds in your local environment:
- Open a terminal or command prompt
cd $GOPATH/src/github.com/<yourgithubid>/learn-chaincode/start go build ./- It should complete with no errors/text. If not, make sure that you have correctly followed all of the steps above, including testing your install of Go.
###Implementing the chaincode interface The first thing you need to do is implement the chaincode shim interface in your golang code. The three main functions are Init, Invoke, and Query. All three functions have the same prototype; they take in a function name and an array of strings. The main difference between the functions is when they will be called. We will be building up to a working chaincode to create generic assets.
###Dependencies
The import statement lists a few dependencies that you will need for your chaincode to build successfully.
fmt- containsPrintlnfor debugging/logging.errors- standard go error format.github.com/hyperledger/fabric/core/chaincode/shim- the code that interfaces your golang code with a peer.
###Init() Init is called when you first deploy your chaincode. As the name implies, this function should be used to do any initialization your chaincode needs. In our example, we use Init to configure the initial state of one variable on the ledger.
In your chaincode_start.go file, change the Init function so that it stores the first element in the args argument to the key "hello_world".
func (t *SimpleChaincode) Init(stub *shim.ChaincodeStub, function string, args []string) ([]byte, error) {
	if len(args) != 1 {
		return nil, errors.New("Incorrect number of arguments. Expecting 1")
	}

	err := stub.PutState("hello_world", []byte(args[0]))
	if err != nil {
		return nil, err
	}

	return nil, nil
}
This is done by using the shim function stub.PutState.
The first argument is the key as a string, and the second argument is the value as an array of bytes.
This function may return an error which our code inspects and returns if present.
###Invoke()
Invoke is called when you want to call chaincode functions to do real work.
Invocation transactions will be captured as blocks on the chain.
The structure of Invoke is simple.
It receives a function argument and based on this argument calls Go functions in the chaincode.
In your chaincode_start.go file, change the Invoke function so that it calls a generic write function.
func (t *SimpleChaincode) Invoke(stub *shim.ChaincodeStub, function string, args []string) ([]byte, error) {
	fmt.Println("invoke is running " + function)

	// Handle different functions
	if function == "init" {
		return t.Init(stub, "init", args)
	} else if function == "write" {
		return t.write(stub, args)
	}
	fmt.Println("invoke did not find func: " + function)

	return nil, errors.New("Received unknown function invocation")
}
Now that it’s looking for write let’s make that function somewhere in your chaincode_start.go file.
func (t *SimpleChaincode) write(stub *shim.ChaincodeStub, args []string) ([]byte, error) {
	var name, value string
	var err error
	fmt.Println("running write()")

	if len(args) != 2 {
		return nil, errors.New("Incorrect number of arguments. Expecting 2. name of the variable and value to set")
	}

	name = args[0]                            //rename for fun
	value = args[1]
	err = stub.PutState(name, []byte(value))  //write the variable into the chaincode state
	if err != nil {
		return nil, err
	}
	return nil, nil
}
This write function should look similar to the Init change you just did.
One major difference is that you can now set the key and value for PutState.
This function allows you to store any key/value pair you want into the blockchain ledger.
###Query()
As the name implies, Query is called whenever you query your chaincode state.
Queries do not result in blocks being added to the chain.
You will use Query to read the value of your chaincode state's key/value pairs.
In your chaincode_start.go file, change the Query function so that it calls a generic read function.
func (t *SimpleChaincode) Query(stub *shim.ChaincodeStub, function string, args []string) ([]byte, error) {
	fmt.Println("query is running " + function)

	// Handle different functions
	if function == "read" {                            //read a variable
		return t.read(stub, args)
	}
	fmt.Println("query did not find func: " + function)

	return nil, errors.New("Received unknown function query")
}
Now that it’s looking for read, make that function somewhere in your chaincode_start.go file.
func (t *SimpleChaincode) read(stub *shim.ChaincodeStub, args []string) ([]byte, error) {
	var name, jsonResp string
	var err error

	if len(args) != 1 {
		return nil, errors.New("Incorrect number of arguments. Expecting name of the var to query")
	}

	name = args[0]
	valAsbytes, err := stub.GetState(name)
	if err != nil {
		jsonResp = "{\"Error\":\"Failed to get state for " + name + "\"}"
		return nil, errors.New(jsonResp)
	}

	return valAsbytes, nil
}
This read function is using the complement to PutState called GetState.
This shim function just takes one string argument.
The argument is the name of the key to retrieve.
Next, this function returns the value as an array of bytes back to Query, who in turn sends it back to the REST handler.
Finally, you need to create a short main function that will execute when each peer deploys their instance of the chaincode.
It just starts the chaincode and registers it with the peer.
You don’t need to add any code for this function. Both chaincode_start.go and chaincode_finished.go have a main function that lives at the top of the file. The function looks like this:
func main() {
	err := shim.Start(new(SimpleChaincode))
	if err != nil {
		fmt.Printf("Error starting Simple chaincode: %s", err)
	}
}
If you're stuck or confused at any point, just go check out the chaincode_finished.go file. Use this file to validate that the code snippets you're building into chaincode_start.go are correct.
#Interacting with Your First Chaincode The fastest way to test your chaincode is to use the rest interface on your peers. We’ve included a Swagger UI in the dashboard for your service instance that allows you to experiment with deploying chaincode without needing to write any additional code.
###Swagger API The first step is to find the api swagger page.
- Login to IBM Bluemix
- You probably landed on the Dashboard, but double check the top nav bar. Click the "Dashboard" tab if you are not already there.
- Also make sure you are in the same Bluemix "space" that contains your IBM Blockchain service. The space navigation is on the left.
- There is a "Services" panel on this Bluemix dashboard near the bottom. Look through your services and click your IBM Blockchain service square.
- Now you should see a white page with the words "Welcome to the IBM Blockchain..." and there should be a teal "LAUNCH" button on the right, click it.
- You are on the monitor page and you should see two tables, though the bottom one may be empty.
- Noteworthy information on the network tab:
- Peer Logs will be found in the top table. Find the row for peer 1 and then click the file-like icon in the last row.
- It should have opened a new window. Congratulations you found your peer logs!
- In addition to this static view there are live-streaming peer logs in the View Logs tab near the top of the page.
- ChainCode Logs will be found in the bottom table. There is one row for every chaincode, and they are labeled using the same chaincode hash that was returned to you when it was deployed. Find the chaincode ID you want, and then select the peer. Finally click the file-like icon.
- It should have opened a new window. Congratulations you've found your peer's chaincode logs!
- Peer Logs will be found in the top table. Find the row for peer 1 and then click the file-like icon in the last row.
- Swagger Tab is the one labeled APIs. Click it to see the API interactive documentation.
- You are now on your Swagger API page.
- Noteworthy information on the network tab:
###Secure Enrollment
Calls to the /chaincode endpoint of the rest interface require a secure context ID.
This means that you must pass in a registered enrollID from the service credentials list in order for most REST calls to be accepted.
- Click the link + Network's Enroll IDs to expand a list of enrollIDs and their secrets for your network.
- Open up a notepad and copy one set of credentials. You will need them later.
- Expand the "Registrar" API section by clicking it
- Expand the
POST /registrarsection by clicking it - Set the body's text field. It should be JSON that contains an enrollID and secret from your list above. Example:


If you didn't receive a "Login successful" response, go back and make sure you properly copied your enrollID and secret. Now that you have enrollID set up, you can use this ID when deploying, invoking, and querying chaincode in the subsequent steps.
###Deploying the chaincode In order to deploy chaincode through the rest interface, you will need to have the chaincode stored in a public git repository. When you send a deploy request to a peer, you send it the url to your chaincode repository, as well as the parameters necessary to initialize the chaincode.
Before you deploy the code, make sure it builds locally!
-
Open terminal/command prompt
-
Browse to the folder that contains
chaincode_start.goand type:go build ./ -
It should return with no errors/text
-
Expand the "Chaincode" API section by clicking it
-
Expand the
POST /chaincodesection by clicking it -
Set the
DeploySpectext field (make the other fields blank). Copy the example below but substitute in your chaincode repo path. Also use the same enrollID you used in the/registrarstep. -
The
"path":will look something like this"https://github.com/johndoe/learn-chaincode/finished". It's the path of your fork and then one directory down, where our chaincode_finished.go file lives.{ "jsonrpc": "2.0", "method": "deploy", "params": { "type": 1, "chaincodeID": { "path": "https://github.com/ibm-blockchain/learn-chaincode/finished" }, "ctorMsg": { "function": "init", "args": [ "hi there" ] }, "secureContext": "user_type1_191b8c2993" }, "id": 1 }
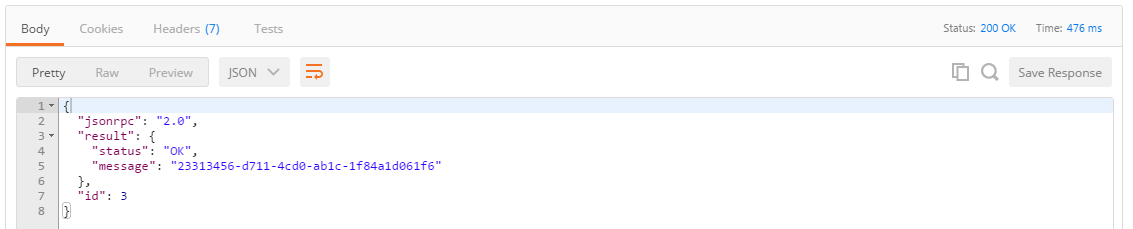
The response should look like:

The response for the deployment will contain an ID that is associated with this chaincode. The ID is a 128 character alphanumeric hash. Copy this ID on your notepad as well. You should now have a set of enrollID credentials and the cryptographic hash representing your chaincode. This is how you will reference the chaincode in any future invoke or query requests.
###Query
Next, let’s query the chaincode for the value of the hello_world key we set with the Init function.
-
Expand the "Chaincode" API section by clicking it
-
Expand the
POST /chaincodesection by clicking it -
Set the
QuerySpectext field (make the other fields blank). Copy the example below but substitute in your chaincode name (the hashed ID from deploy). Also use the same enrollID you used in the/registrarstep.{ "jsonrpc": "2.0", "method": "query", "params": { "type": 1, "chaincodeID": { "name": "CHAINCODE_HASH_HERE" }, "ctorMsg": { "function": "read", "args": [ "hello_world" ] }, "secureContext": "user_type1_xxxxxxxxx" }, "id": 2 }
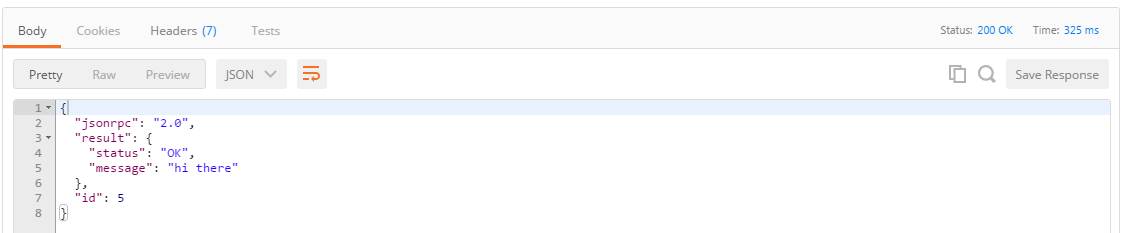
Hopefully you see that the value of hello_world is "hi there".
This was set by the body of the deploy call you sent earlier.
###Invoke
Next, call your generic write function with invoke.
Change the value of hello_world to "go away".
-
Expand the "Chaincode" API section by clicking it.
-
Expand the
POST /chaincodesection by clicking it. -
Set the
InvokeSpectext field (make the other fields blank). Copy the example below but substitute in your chaincode name (the hashed ID from deploy). Also use the same enrollID you used in the/registrarstep.{ "jsonrpc": "2.0", "method": "invoke", "params": { "type": 1, "chaincodeID": { "name": "CHAINCODE_HASH_HERE" }, "ctorMsg": { "function": "write", "args": [ "hello_world", "go away" ] }, "secureContext": "user_type1_xxxxxxxxx" }, "id": 3 }
Now to test if it's stuck, just re-run the query above.

That’s all it takes to write basic chaincode.