PBrick is a personal project born out of a desire to learn Kicad, and develop embedded software, learn USB-C PD, and create a full end-to-end software solutions. I currently use pbrick to power a few custom toys, and other things that require motor driver for toys and gadgets.
While I won't call this "battle-tested" hardware and software, I have successfully manufactured and used it for over a year now without problem or incident.
This board has been in various stages of development since 2018, and has been significantly impacted by the semi-conductor supply chain.
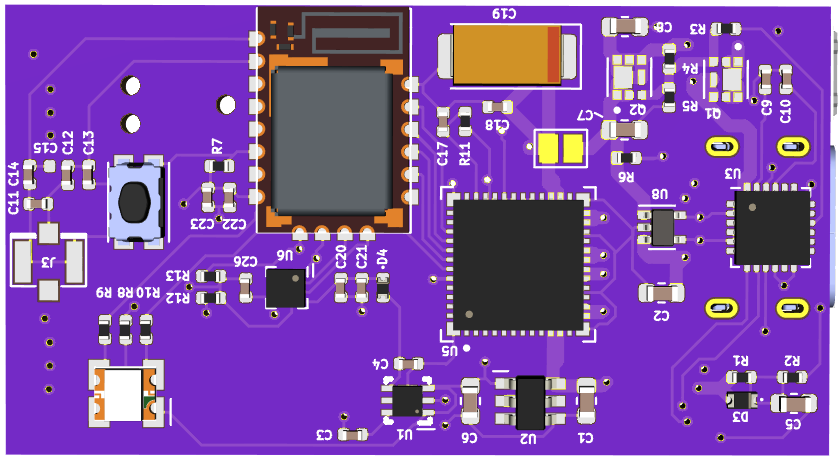
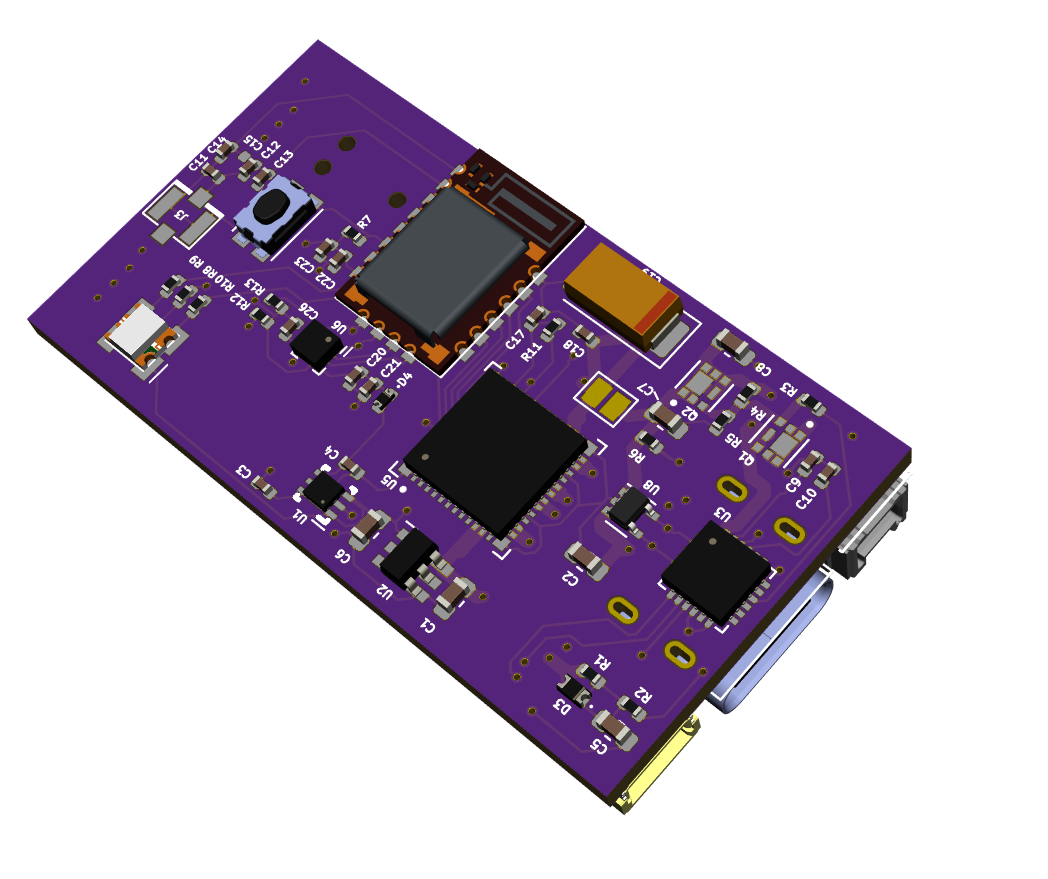
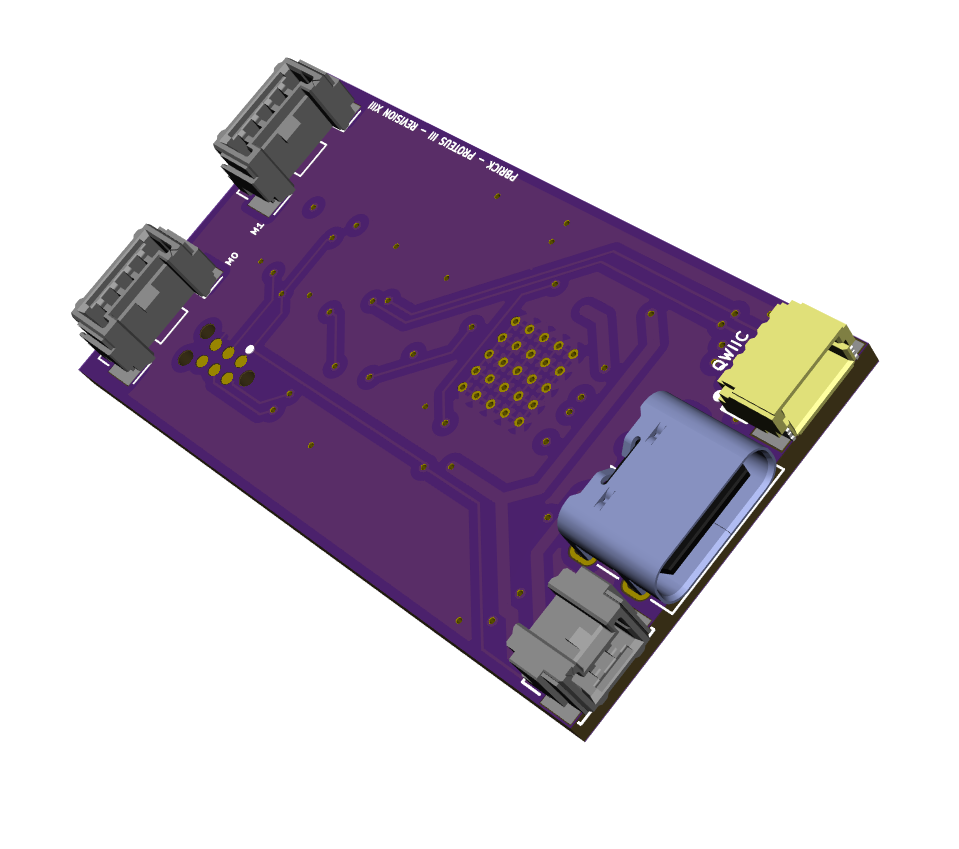
- Dual motor driver for powering two separate motors independently, up to 20V5A (100W of power), and 12V3A per rail
- Dual motor driver ouputs on rear of board with input power output rails + GND
- USB-C Power Delivery (PD) input
- Configurable JST-2 pin connector for either PD output when using USB-C PD, or direct power input with backfeed protection (You may power the board either by USB-PD or by this PIN)
- i2c output on rear of board for running and powering additional accessories
- Programmable LED Status light
- Single button with double tap to reset functionality available in the Kaidyth Bootloader
- Accelerometer for rollover detection
- 4 Layer board with dedicated GND layer


The current schematic is available at https://github.com/charlesportwoodii/pbrick/blob/TB67H420FTG-24MM-C-a/board/schematic.pdf.
There are a number of revisions to the board. The active branch is TB67H420FTG-24MM-C-a .
COVID-19 continues to cause part shortages, and I cannot currently provide any guarantees or alternative parts. Here's a few notes from my production of this revision of the board should you choose to make it yourself.
- I'd recommend OshPark + Osh Stencils to create the board and the stencil. Use a heat gun for soldering, then hand solder the external connections.
- After soldering and verifying all the components, I strongly recommend super-gluing the USB-C port directly to the board at the connection points. It's not difficult to break the connection by accident with just solder.
- You may ommit the accelerometer, and any i2c components depending upon available.
- The board should stay fairly cool even when running multiple motors on the same channel. If the board starts to rapidly heat up I am almost guarantee you have a bridge on the motor pins.
- I strongly recommend adding additional solder to JP1 bridge that connects VSS to VDD (see schematic). Be generous and liberal as this is the main power bus. The Jumper is used here as there is an alternative configuration where it can be cut and the board can be powered from one of the outputs but that's not supported yet so don't do it.
- Despite the abundance of USB-C PD devices on Amazon a lot of them don't actually support USB-C PD (most really only provide proprietary protocols). The best I've found is XCentz 5000mAh Charger but again, COVID has made stock + availability intermittent.
- You'll probably want a very short USB-C PD cable. The shortest I've found is: https://www.amazon.com/gp/product/B08L8Z7YJ8/ref=ppx_yo_dt_b_search_asin_title?ie=UTF8&psc=1.
- Q1 and Q2 will protect any backfeed current from J5 however if you're going to power the board over J5, I would completely omit the USB-C PD section of the board, and cut JP1 to prevent power flowing to that entire section of the board.
- Currently there's no software to measure or control the accelerometer due to stock and availability. I simply have never been able to source the part. The intent with the accelerometer is to provide "rollover" detection in the event the object/toy falls off the track or rolls over or experiences a significant G force event so that the power to the motors can be either momentarily or permanently cut.
- You can use the nRF Connect app to send the payload to the Motor service. The payload is a 3 byte serial, Motor selection being 00, and 01 for the respective board MX, the "speed" value being the PWM speed from 00-64 (anything greater than 64 is considered 64), and the direction parameter which will set the motor direction. There's a special mode 0x02 and 0x03 which will cause both motors to run at the same speed + PWM either in the same, or in opposite directions if you need to syncronize them. Feel free to play around with the inputs.
- Flash the board with both the Kaidyth Bootloader, and a compiled version so that you have full DFU support. Using other bootloaders will result in error.
PBRICK is currently source-available. For non-commercial scientific research, non-commercial education, or non-commercial artistic projects, PBRICK is available under the BSD-3 Clause license. No commercial license is permitted whatsoever.