Tutorial Welcome
After download and install of RailEssentials from the Daily Build download page RailEssentials is started in so-called Simulation Mode by default. If you still need to download and install RailEssentials, please check out the small gif record shown in the README.
RailEssentials is build every day (but only when the codebase has changed). An always latest Build and Setup is provided. Check out the date of the file names to get the really latest version.
The two entries with the red rectangle in the following screenshot are versions of the 08th April 2021.
-
railessentials-dailybuild-20210408-7642b4.zipcontains all binaries ofRailEssentials, after download and unzip it can be directly used. It is not really necessarry to use the setup, it is just provided as convenience approach. -
Setup-20210408-7642b4.exeis the fastest way to get and installRailEssentials. The setup does not provide complex variants.

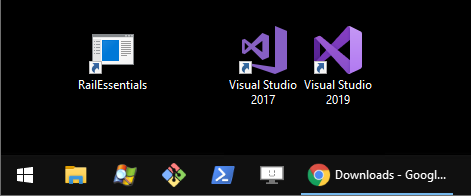
After install of RailEssentials a desktop icon should be provided (if not deactivated during setup). In general, this icon is just a shortcut to the railessentials.exe which is installed in C:\Users\%username%\AppData\Local\Programs\RailEssentials.
REMARK Icon needed! If you like to create and provide a nice and pretty icon for RailEssentials, feel free and send me your design.
By doubleclick, a small window will open, text with different colors will be shown. That small tool/window is responsible for the following things (at least):
- communication between the ESU ECoS and your computer
- providing the control user interface for you by use of an own webserver
- handling the automatic mode for autonomous traveling of your locomotives
- serialization/deserialization of all your settings/preferences
- execution of individual command for controlling external switches/lights
- et cetera...
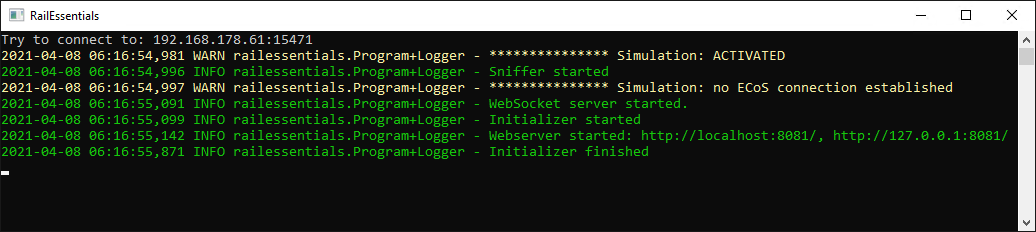
As you see, by default, RailEssentials is started in so-called simulation mode because of the fact that we do not known the connection settings to your ECoS, and second for safety reason -- RailEssentials does not know anything about your track/locomotives/accessories.
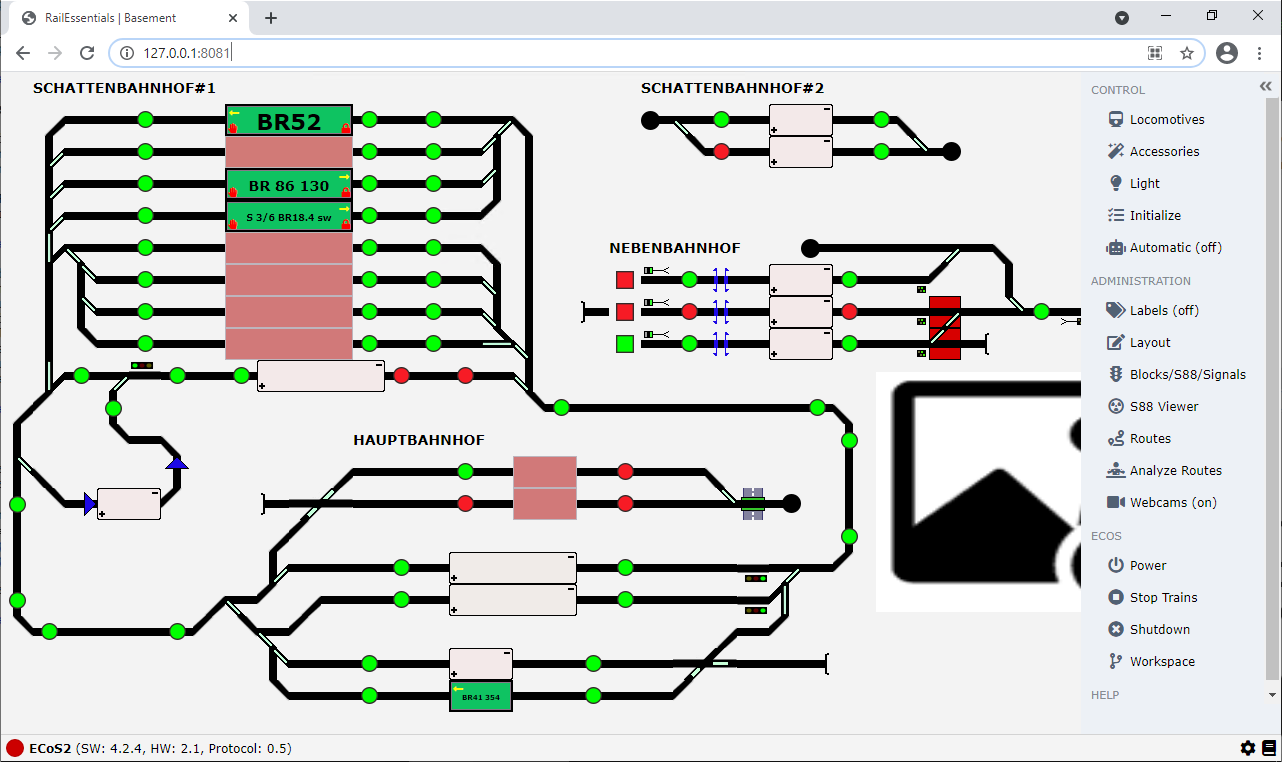
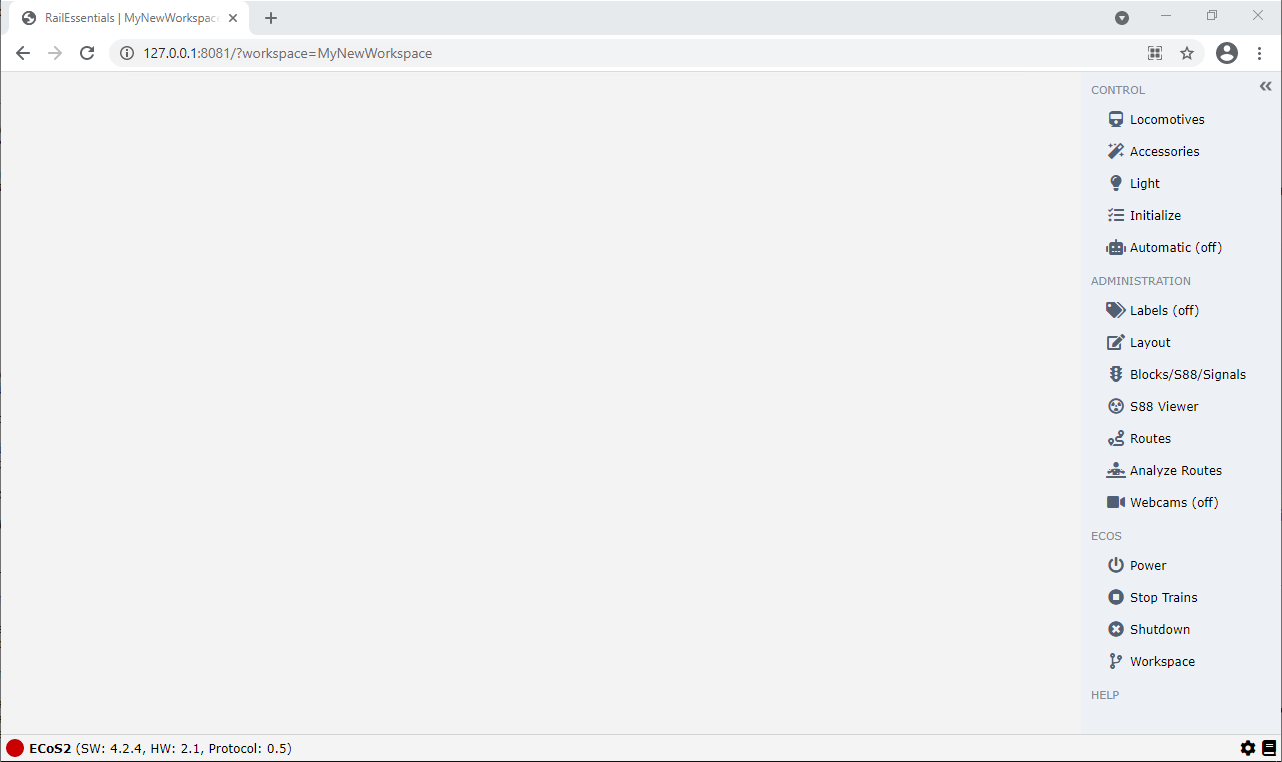
Open one of the following URLs in your favourite browser (Chrome, Firefox, Edge or Vivaldi should be fine):
The result should looks like this:
If you like to create your own plan right now, just go directly to Creating my own plan.
In the install directory of RailEssentials the file railessentials.json is located. This file contains several settings which are required to change to fit your needs.
For controlling your modelrailway directly with RailEssentials please disable the SimulationMode by changing true to false. Change the ECoS Connection settings as well. Restart RailEssentials and it will try to connect to your ECoS.
  "SimulationMode": true,
"SimulationData": "Demos\\Ecos\\ecosJson.txt",If SimulationMode is false then during startup of RailEssentials the application will try to connect to your ECoS and will sync any data/objects which are configured in your ECoS, e.g. locomotives will be automatically added to the locomotives dialog.
Please change the IP and Port to fit your needs.
  "Ecos": {
    "Ip": "192.168.178.61",
    "Port": 15471
}If you do not have any camera (video surveilance), just remove the whole part or just change it to "Webcams" : [ ].
  "Webcams": [
    {
      "Url": "http://localhost:8088/",
      "Width": 320,
      "Height": 240,
      "Fps": 5,
      "Caption": "Hauptbahnhof",
      "X": 875,
      "Y": 300
    }
  ],
If you like to have a video surveilance for your trains, check out the other Wiki Page.
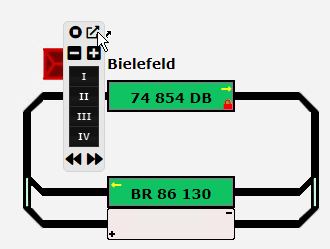
It can look like this:
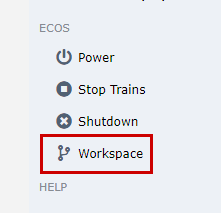
Any plan is a single Workspace. For creating your own plan we need to create a new Workspace, click Workspace in the sidebar:
A new dialog opens. You can change to already available workspaces or you can create a new workspace. Just try both ways.
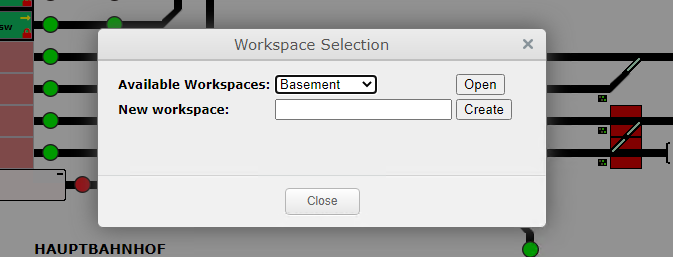
I have added a new Workspace named: MyNewWorkspace.
By a click on Create the URL in the browser changes and the page is reloaded, the plan is completly empty.
For adding track items to the plan, just open the Toolbox by clicking Layout:
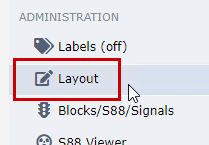
The plan gets a grid and on the left-hand side a Toolbox comes in front.
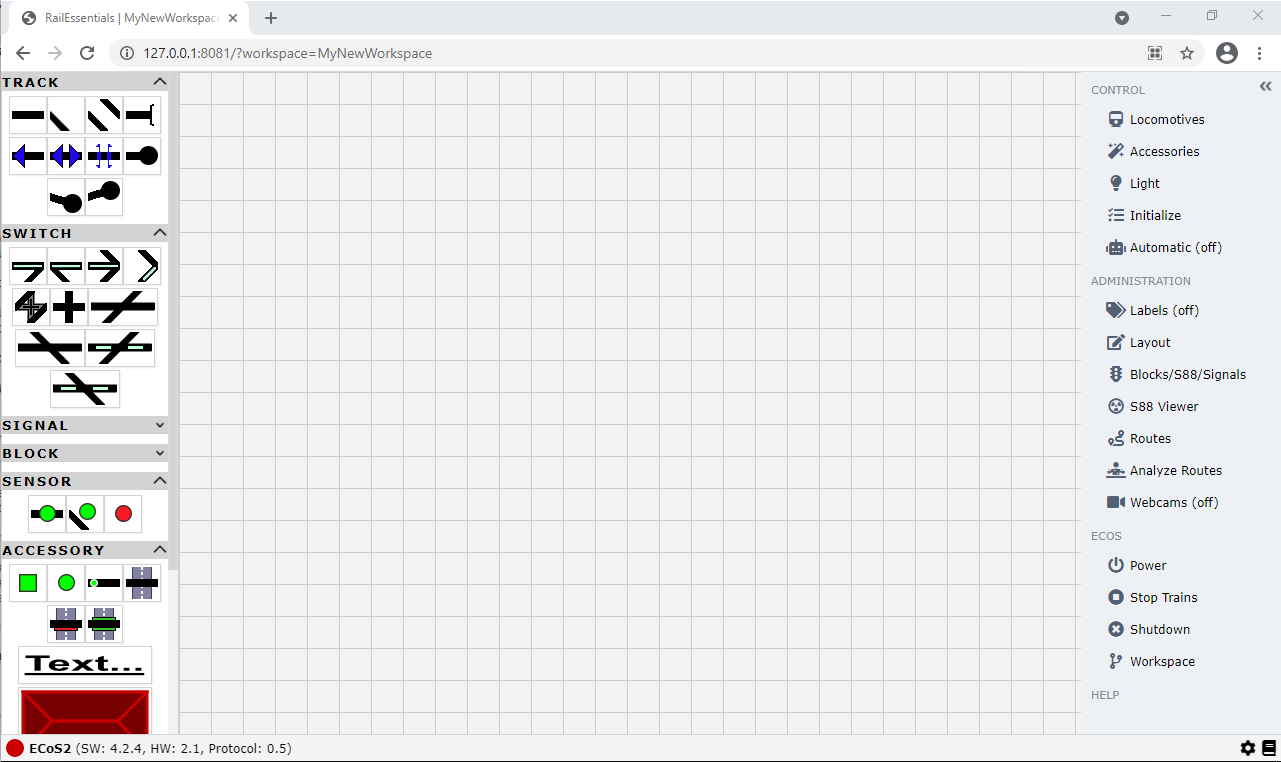
The Toolbox supports drag & drop, just select one of the track items in the Toolbox with the mouse and drag to the plan, and around a little bit...
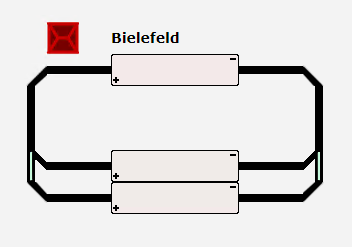
The plan in the previous section has been extended by a Block and two Switches.
These two switches are automatically added to the list of Accessories which is provided by clicking Accessories in the sidebar.
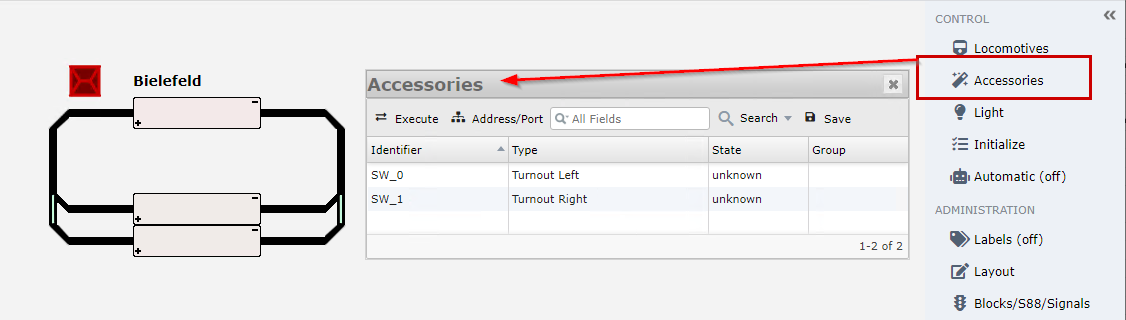
Select one of the Accessory and it will be highlighted in your plan.
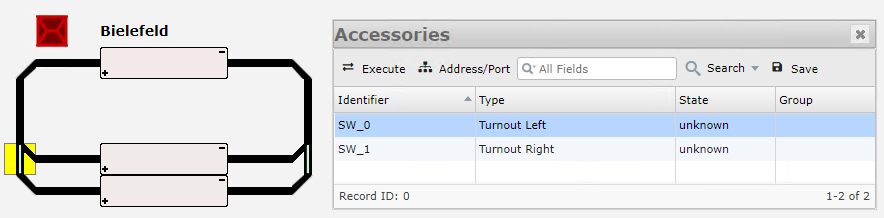
The switches can not be used right now because of missing configuration of there addresses.
Click Address/Port to shown up the address columns in the dialog. Enter any integer value and click Save, the red` marker will vanish again, because the values are saved.
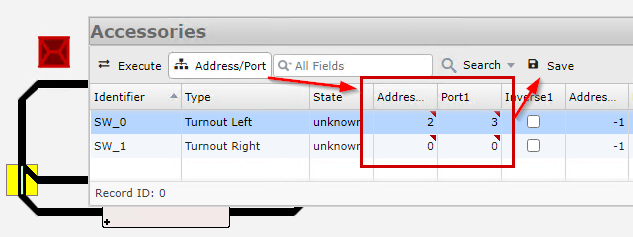
Now, the state of the switch can be changed by clicking Execute in the dialog or just by clicking the switch in the plan.
Please configure all your accessories for the next steps.
In the previous section we added three blocks. In the plan, that results in eight possible routes. To support fast route setup, the functionality Analyze Routes' can be used. Please open the Log Window` first, by click on the book icon on the bottom right-hand side:
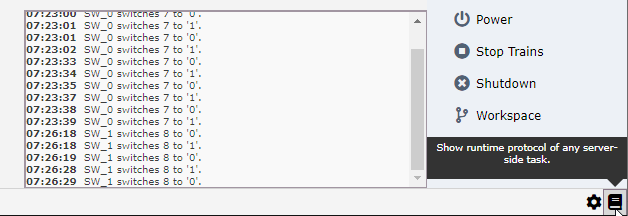
As you can see, the state changes of the switches are already added to the protocol.
Click Routes to open the dialog for showing routes.
Click Analyse Routes and voilà...
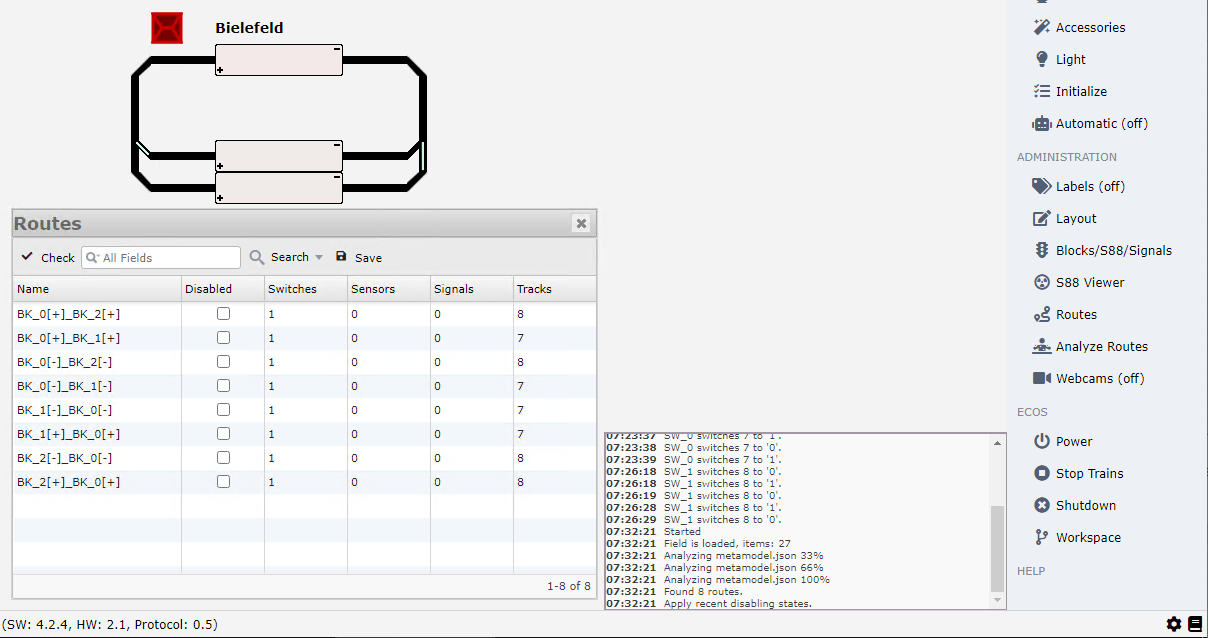
As you can see, switches are recognized, as well all other track items.
We do not have added any sensor (S88) for automatic mode or added any signal.
Select one of the rows and the route will be highlighted. In addition, with Check the correct switch state can be verified (relevant for AutoMode).
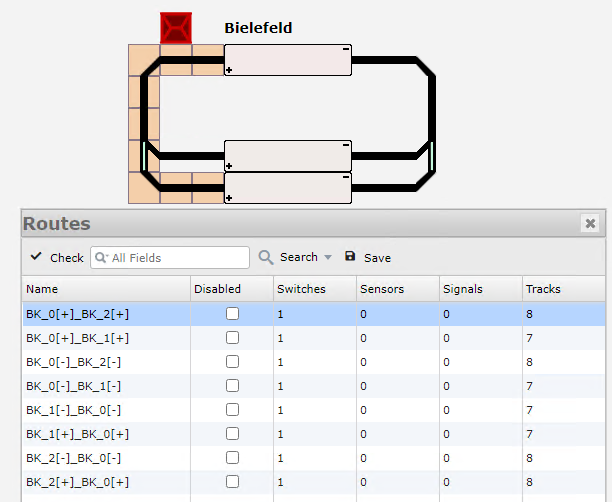
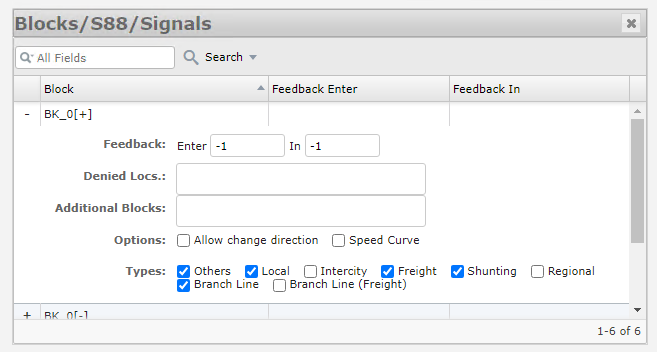
Any block of a route can be configured individually.
The dialog Blocks/S88/Signals should be used for it.
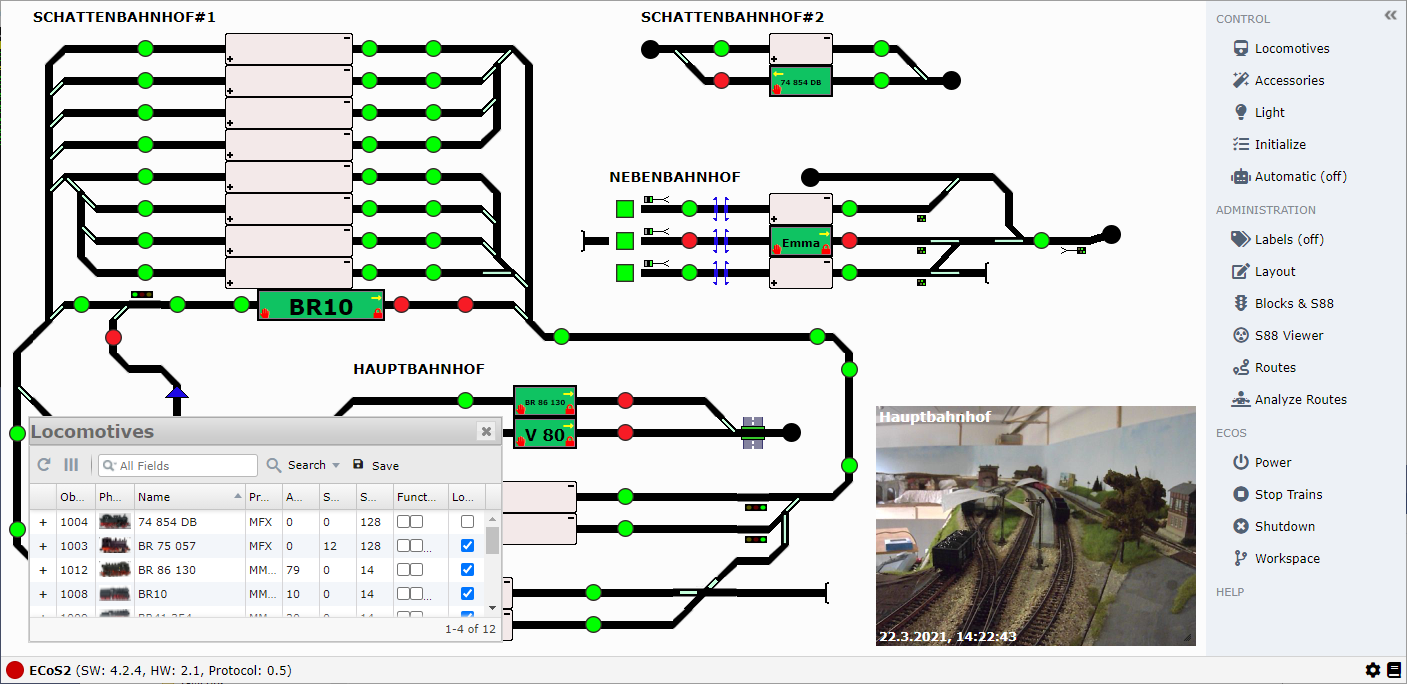
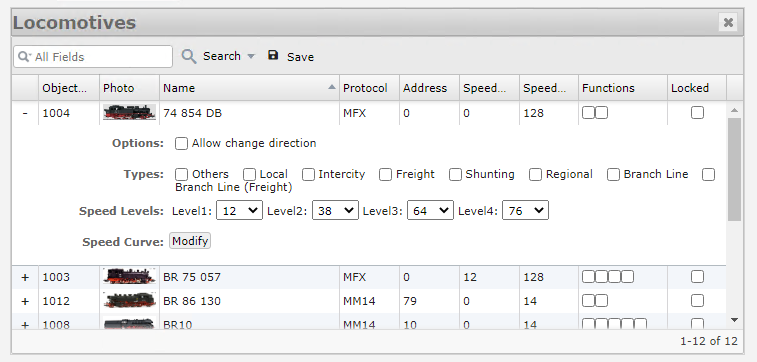
Just guess, yep, correct, the dialog Locomotives is used for handling/configuring locomotives.
In Simulation Mode` my small list of locomotives is provided as default, when you have established a connection to your ECoS your own list will be shown.
For adding your own locomotives images, please follow the instructions in the other Wiki Page.
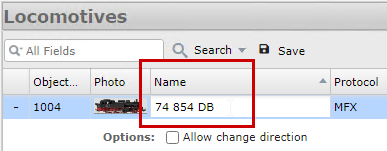
Any locomotive can be renamed on-demand by double clicking the current name:
You can add any locomotive to any block by just doing a drag & drop:
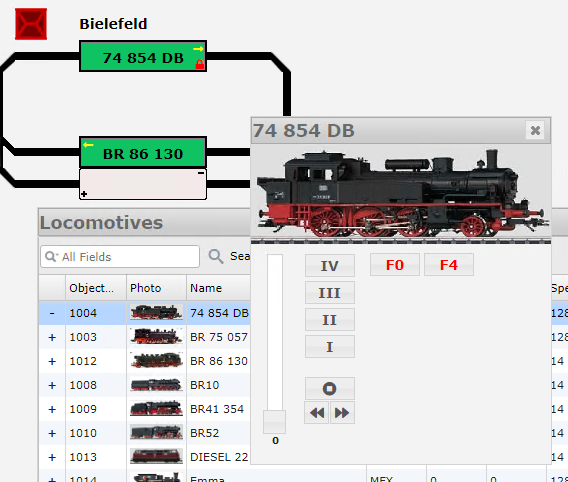
By double click on the locomotive image in the dialog, an additional dialog to control the locomotive will be shown.
REMARK We will make it more pretty and more functional in future!
It is also possible to open that dialog directly in the plan. Just make a mouseover over the block which has the locomotive assigned and click that icon: