


BTabViewController is available through CocoaPods but fist; make sure that you are working on the workspace not the project, otherwise you need to first initialize the workspace. Simply go to the project directory in terminal and run pod init, then cocoa will handle for initializing and creating the workspace. Next, open Podfile and add the following script to the file below the line Pods for <PROJECT_NAME>
pod 'BTabViewController'Now open again the terminal and run following command
pod installWe are ready to design the views!
BTabViewController does not need any dependent 3rd party, so just XCode 10+ version is enough to use.
Just look at first the models which we will oftenly use
/// To define child view controllers and their id
public struct BTabModel {
    // Attributes
    public var id: String
    public var target: UIViewController
}
It uses for accessing directly to the class of view which we have already appended into var tabList: [BTabModel] while creating the containers. For instance, tabList[0].target will give the ViewController class of the container view at 0th order.
/// Order should begin with zero
public struct BTabItemModel: Equatable {
    // Attributes
    public var order: Int
    public var title: String
    public var titleFont: UIFont = .systemFont(ofSize: 12)
    public var titleTextColor: UIColor = .init(red: 64/255.0, green: 64/255.0, blue: 64/255.0, alpha: 1.0)
    public var highlightFont: UIFont = .systemFont(ofSize: 12, weight: .bold)
    public var highlightTextColor: UIColor = .init(red: 64/255.0, green: 64/255.0, blue: 64/255.0, alpha: 1.0)
    public var backgroundColor: UIColor = .clear
    public var textAlignment: NSTextAlignment = .left
    // Private protection level attributes
    private var isActive: Bool = false
}
Model to determine the cells at the top which belongs to var tabCollectionView. The models which I explained above should set in the setView(tabList: [BTabModel], tabItems: [BTabItemModel]) function. And important to call super.setView(tabList: lists, tabItems: tabs) after adjustment has done.
// Sizing
open var tabsGap: CGFloat = 8
open var tabInset: CGFloat = 12
open var tabWidth: CGFloat = 80
open var tabsHeight: CGFloat = 50
open var tabAlignment: NSTextAlignment = .left
// Flags
open var fitTabs: Bool = false
open var indicatorIsRounded: Bool = true
open var isIndicatorVisible: Bool = true
open var isIndicatorSlide: Bool = false
open var isAnimated: Bool = true
// Indicator
open var indicatorView: UIView?
open var indicatorHeight: CGFloat = 4
open var indicatorWidth: CGFloat = 20
open var indicatorColor: UIColor = .init(red: 64/255.0, green: 64/255.0, blue: 64/255.0, alpha: 1.0)
These are the parameters of BTabViewController and their default values. You can adjust the parameters depending on your desire in
override func setView(tabList: [BTabModel], tabItems: [BTabItemModel]) {
    self.tabsGap = 0
    self.tabInset = 0
    self.tabsHeight = 30
    self.fitTabs = true
    self.isIndicatorVisible = false

    super.setView(tabList: tabList, tabItems: tabItems)
}You just inherit the BTabViewController in the ViewController which will be used to base controller class.
class FirstContainerViewController: BTabViewController {

}
Now override the delegate functions to communicate with the base class about the triggering event such as scroll, selecting (tapping) the tab.
public protocol BTabViewControllerProtocol: class {
    /// Trigger just tapping on the tab no matter the previous state
    /// - Parameters:
    ///   - target: Which container class did triggerred
    ///   - item: Selected tab item model
    ///   - index: Selected index order
    func listTab(_ target: UIViewController, didSelect item: BTabItemModel, index: Int)
    /// Called just changing operation did
    /// - Parameters:
    ///   - target: Container class just activated
    ///   - to: Newly changed tab model
    func listTab(_ target: UIViewController, tabSwitched toItem: BTabItemModel)
}
First function will be triggerred when every tapping action on the tab. The second one will just catch changing view action.
If you clone the repository and open with XCode, you will see the example project and related schemas. I collected the storyboards as Main and Tabs which they have corresponding
.xibs.
Create a ViewController in storyboard and connect it to its class. Next, add container view inside it. This shows how the base controller should be in storyboard.

Then we are able to implement protocol function and adjust the design parameters in the class.
import UIKit
import BTabViewController
class FirstContainerViewController: BTabViewController {
override func viewDidLoad() {
super.viewDidLoad()
}
// MARK: - BTab Stuff
override func setView(tabList: [BTabModel], tabItems: [BTabItemModel]) {
// Model setting
let firstTabVC = ExampleStoryboards.instantiateViewController(in: .tabs, classOf: FirstTabViewController.self)!
let secondTabVC = ExampleStoryboards.instantiateViewController(in: .tabs, classOf: SecondTabViewController.self)!
let thirdTabVC = ExampleStoryboards.instantiateViewController(in: .tabs, classOf: ThirdTabViewController.self)!
let firstList = BTabModel(id: "1", target: firstTabVC)
let secondList = BTabModel(id: "2", target: secondTabVC)
let thirdList = BTabModel(id: "3", target: thirdTabVC)
let lists = [firstList, secondList, thirdList]
var firstTab = BTabItemModel(order: 0, title: "First")
firstTab.highlightFont = .systemFont(ofSize: 16, weight: .bold)
firstTab.textAlignment = .center
var secondTab = BTabItemModel(order: 1, title: "Second")
secondTab.highlightFont = .systemFont(ofSize: 16, weight: .bold)
secondTab.textAlignment = .center
var thirdTab = BTabItemModel(order: 2, title: "Third")
thirdTab.highlightFont = .systemFont(ofSize: 16, weight: .bold)
thirdTab.textAlignment = .center
let tabs: [BTabItemModel] = [firstTab, secondTab, thirdTab]
// Parameter adjusting
self.tabsGap = 0
self.tabInset = 0
self.tabsHeight = 30
self.fitTabs = true
self.isIndicatorVisible = false
// Dont forget to call super
super.setView(tabList: lists, tabItems: tabs)
}
override func listTab(_ target: UIViewController, didSelect item: BTabItemModel, index: Int) {
super.listTab(target, didSelect: item, index: index)
}
override func listTab(_ target: UIViewController, tabSwitched toItem: BTabItemModel) {
super.listTab(target, tabSwitched: toItem)
}
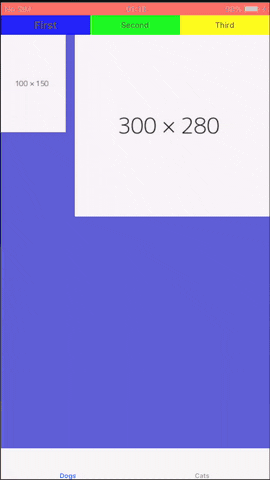
}Run the example project on any device, the transitions and their visualizations are illustrated below gif. You can simply observe the flow when size of views are changed. The customization is very adaptive too.
Berkay Vurkan, berkayvurkan@yahoo.com
BTabViewController is available under the MIT license. See the LICENSE file for more info.