
Turn your Raspberry Pi or Nvidia Jetson into a Ninja-cam with hardware-acceleration enabled! Publish live streaming video to VDO.Ninja.
This code is more a proof of concept at the moment; I wouldn't recommend using things as is for production projects, but it could work well for you. The core concepts and code used in this project can be reused for other projects; most Ubuntu systems and a large variety of embedded systems, including smartphones.
Please note, as an alternative to this low-level approach to publishing with a Rpi, please consider using something like a Chromebook, especially if not connecting over a wired LAN network. Packet loss isn't tolerated well with this script yet, so you need a prestine connection for things to work well.
If you wish to play a video back, using a Raspberry pi, try this "kiosk" mode image that can be found here: https://awesomeopensource.com/project/futurice/chilipie-kiosk. Raspberry Pis seem to handle video playback in Chromium-based browsers pretty well; it's just the encoding they don't do well in browser yet.
Youtube video demoing: https://youtu.be/J0qqXxHNU_c

It is recommended to use the provided raspberry pi image, as the install process is otherwise quite challenging.
Download and extract the image file: https://drive.google.com/file/d/1NchpcHYHcNMvjm7NaBf84ZH0xKgLomXR/view?usp=sharing
Write the image to an SD cards; at least 8GB in size, using the appropriate tool: https://www.raspberrypi.org/documentation/installation/installing-images/windows.md
SSH is enabled on port 22 if needed.
Login information for the device is:
username: pi
password: raspberry
It's recommend that you connect over Ethernet, but USB works I think, too. Connecting to a Raspberry Pi can be searched for on Google though.
Once connected, you can use the existing server.py file, or you can pull the repo for the newest code version:
git clone https://github.com/steveseguin/raspberry_ninja.git
The newest code supports streaming over the Internet, rather than just a LAN, so be sure to update if you need that functionality.
- If you do not want to use the provided image, you can try to install from scratch, but be prepared to lose a weekend on it. Please see the install script provided, but others exist online that might be better. Gstreamer 1.14 is required as a minimum, but future versions of this script will probably require at least 1.16.
Please see the nvidia_jetson folder for details on installation.
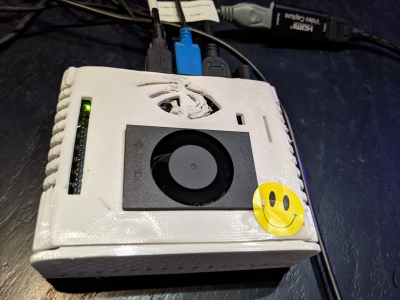

The Raspberry Pi image is setup to use an official Raspberry Pi camera by default. The Nvidia Jetson is conversely setup to use an HDMI to USB 2.0 MJPEG 1080p30 adapter.
If you wish to use a different type of device, you'll need to modify the script accordingly.
Using gst-device-monitor-1.0 will list available devices and their 'caps', or settings. This can help determine what GStreamer pipeline changes need to be made in the script.
gst-launch-1.0 can be used to test a pipeline out before adding it to the script.
Once you have things setup, you can turn the Python script into a system service, so it boots automatically at run time. This lets you plug and play the setup headlessly, but this is more for advanced users at this point.
For for added reference, here is an example Pipeline for the Rasbperry Pi to enable UVC-based MJPEG video capture support is:
PIPELINE_DESC = "webrtcbin name=sendrecv v4l2src device=/dev/video0 ! image/jpeg,framerate=30/1,width=1280,height=720 ! jpegparse ! jpegdec ! video/x-raw ! videoconvert ! video/x-raw ! omxh264enc ! video/x-h264 ! h264parse ! rtph264pay config-interval=-1 ! application/x-rtp,media=video,encoding-name=H264,payload=96 ! queue ! sendrecv. "
This is a very untuned pipeline though, but tuning it can be quite frustrating. Good luck.
Adding audio is possible, but it requires a bit of tweaking to get it working respective of the audio device you are using.
Assuming pulseaudio is installed, running the following from the command line will give us access to audio device IDs
pactl list | grep -A2 'Source #' | grep 'Name: ' | cut -d" " -f2
resulting in..
alsa_input.usb-MACROSILICON_2109-02.analog-stereo
alsa_output.platform-sound.analog-stereo.monitor
alsa_input.platform-sound.analog-stereo
Our HDMI audio source is the first in the list, so that is our device name. Your device name will likely vary.
Knowing that, we can then modify our Gstreamer Pipeline in the server.py file, changing things to look a bit like this:
webrtcbin name=sendrecv stun-server=stun://stun4.l.google.com:19302 bundle-policy=max-bundle rpicamsrc bitrate="+bitrate+"000 ! video/x-h264,profile=constrained-baseline,width=1280,height=720,level=3.0 ! queue ! h264parse ! rtph264pay config-interval=-1 ! queue ! application/x-rtp,media=video,encoding-name=H264,payload=96 ! sendrecv. pulsesrc device=alsa_input.usb-MACROSILICON_2109-02.analog-stereo ! audioconvert ! audioresample ! queue ! opusenc ! rtpopuspay ! queue ! application/x-rtp,media=audio,encoding-name=OPUS,payload=96 ! sendrecv. "
Notice how we used device = OUR_AUDIO_DEVICE_NAME to specify the audio device we want to use.
So far others have confirmed this works, even with micro USB microphones, so give it a go and let me know how it goes!
Ensure the pi/jetson is connected to the Internet, via Ethernet recommended. You will also need an official raspberry pi camera; v1 or v2 will probably work, if using a Raspberry Pi. When using an Nvidia Jetson, it's setup to use a UVC 2.0 1080p MJPEG-based capture device by default; this can be changed at a code level.
Run using:
python3 server.py --streamid SomeStreamID --bitrate 4000
In Chrome, open this link to view:
https://backup.vdo.ninja/?password=false&view=SomeStreamID
One viewer at a time can work at the moment. Hoping to address this limitation with future updates.
If you run with sudo, you might get a permissions error when using audio.
Installation from source is pretty slow and problematic on a rpi; using system images makes using this so much easier.
Please use the provided backup server for development and testing purposes.
Passwords must be DISABLED explicitly as this code does not yet have the required crypto logic added.
Details on WebRTC mechanics, Gstreamer, debugging issues, and discussion of Hardware encoders: https://cloud.google.com/solutions/gpu-accelerated-streaming-using-webrtc