AMPi is an audio receiver that integrates an amplifier with a mains electricity power supply, a 4-channel audio relay switcher, a ground loop isolator, a Raspberry Pi with a DAC-HAT, a ST7735-based TFT-display, and an Arduino Nano micro-controller.
It is an integrated audio system that combines 3 external analog stereo inputs and digital-to-analog converter that supports high-quality audio playback though wireless or wired local area network audio streaming (like AirPlay), and internet audio streaming (like Pandora.com), and personal area networks (Bluetooth 4.2) in one box less than 10 inches (250mm) wide, 4 inches (80mm) high, and 8 inches (190mm) deep.
This repository is the service code for the Raspberry Pi.
The Node.js app lives in the AMPi-Node folder.
For the code running on the Arduino Nano, go to the AMPi-Display-Interface repository.
Front and back panel design (WIP):

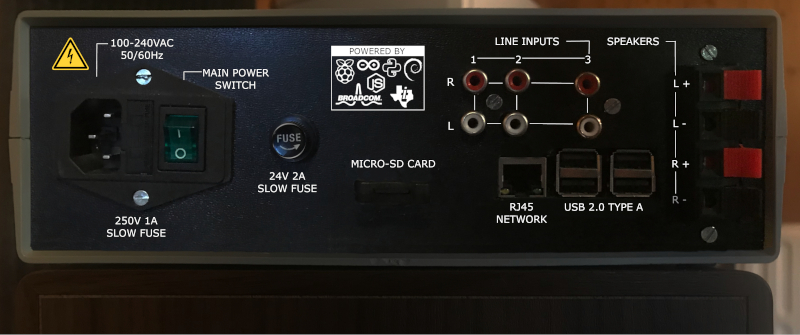
- Mini size 250mm x 190mm x 80mm. Maxi sound
- 2 channels x 100W (Stereo) Class D Audio Amplifier
- Built-in internet audio streaming device with high-quality Digital-to-Analog Converter (DAC), e.g. 192KHz/24-bit FLAC
- Built-in pre-amplifier
- Input audio transformers functioning as a ground loop isolator. This allows for a full galvanic separation between external audio equipment and the DAC, and the amplifier section
- Computer-controlled interface that controls the screen, manages the power of and the services running on the built-in audio streaming device
- 3 switchable external analog audio input channels using a relay array through a rotary switch
- Audio level indicator
- Built-in mains power supply (100-230V)
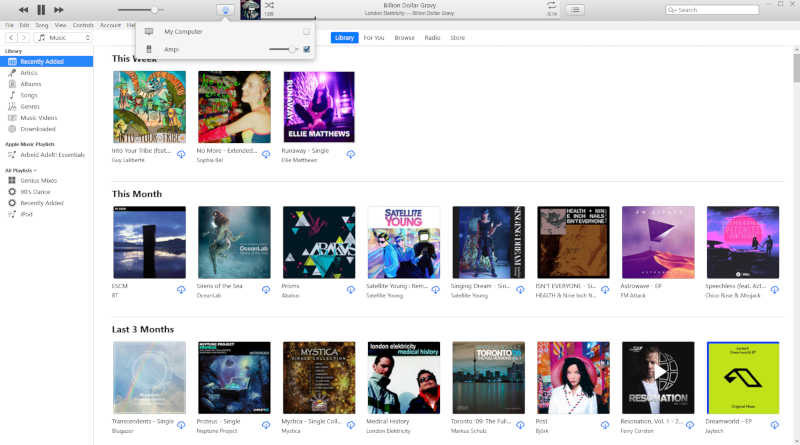
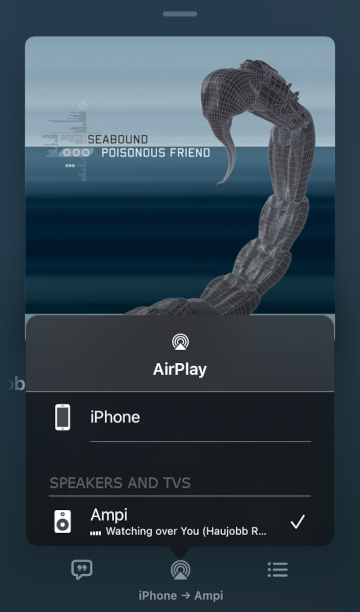
- AirPlay playback using Shairport Sync. AMPi identifies itself as a AirPlay network player, where your iPhone or iTunes on a Mac can be connected to, to play music. You can also use iTunes on Windows 10 to play music through AirPlay or route your audio to AMPi using TuneBlade
- Bluetooth 4.2 Playback, this overrides everything and directly accessible after power-up
- Quiet & high-quality upsampled to 192kHz/16bit Audio CD playback through generic USB CD/DVD drive (WIP). Breaths new life into the Audio CD format!
- Pandora.com music player (WIP), using Pianobar
For parts / tools used for the hardware, refer to the AMPi-Display-Interface repository.
Contains a Raspberry Pi Model 3 and an Arduino Nano
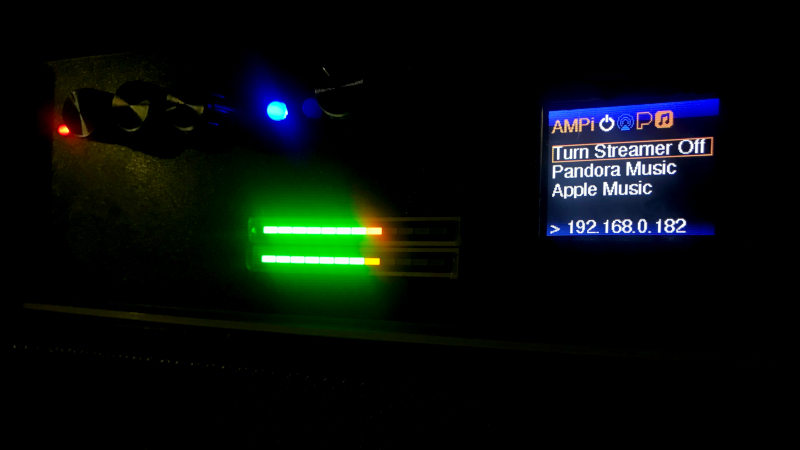
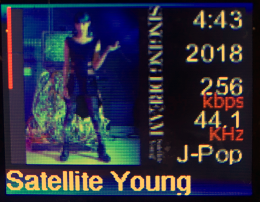
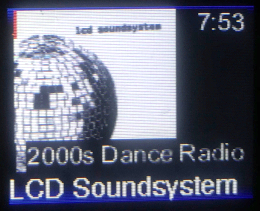
When playing iTunes over AirPlay and when using Pianobar to play Pandora Music, AMPi is displaying the current song and artwork.
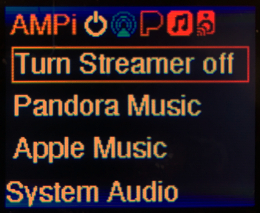
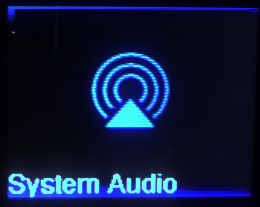
| Main menu | Playback screen with cover art |
|---|---|
 |
 |
AirPlay connection to AMPi in iTunes (Windows 10):
AirPlay connection to AMPi on iPhone:
| AirPlay connection | Playback screen with cover art (Live) |
|---|---|
 |
 |
AirPlay connection to AMPi in TuneBlade (Windows 10):
| AirPlay connection | Playback screen with no cover art |
|---|---|
 |
 |
Self-contained playback of Pandora Music:
| Playback screen with cover art |
|---|
 |
- Front & Back Panel Label - with level indicators and indications what the knobs do
- HDMI break-out cable to add in the back, needed for possibly external display or video streaming (currently shipping)
- Raspberry Pi Software - further integration with the display interface component
- Interface to enter Wi-Fi / LAN settings
- Streaming software for Apple Music
- Add CD Player interface for external USB drive
- ...and more
At the moment the service software is written using Node.js, future plans are to write it using Python too and to be able to provide as a build.
- Raspbian GNU/Linux 12 (bookworm) - We installed a new Raspberry Pi image with the
ampihostname, enabled remote SSH login, and connected it to the Internet - Node.js for running the service - installed using these instructions and run
command -v node, it will return a path to thenodeexecute like this - we need this later:/home/pi/.nvm/versions/node/v20.14.0/bin/node - Shairport Sync 3.3.8+ for Airplay playback. Build according these instructions on its GitHub. (3.3.7rc2 has a bug that does not create the metadata pipe). NQPTP has to be built and it must be compiled with the
--with-metadata option& installed it as a service calledshairport-sync: so you will end up with following./configurecommand while building Shairport Sync:
./configure --sysconfdir=/etc --with-alsa \
    --with-soxr --with-avahi --with-ssl=openssl --with-systemd --with-airplay-2 \
--with-metadata option- Samba service to have a WINS local host name eg.
ampi.local- installed from the Raspbian repository usingsudo apt-get install samba,sudo nano /etc/samba/smb.conf, setwins support = yesand runsudo service smbd restart, see link - Pianobar - when Pandora Music is required, see the pandorasbox repository how to properly configure the pianobar service, make sure it is disabled on start-up
- Mplayer - for CD playback - Installed through the Raspbian repository using
sudo apt-get install mplayer, for more details so below
The software will run under the context of the pi user and therefore the home-directory is /home/pi
- serialport - access serial ports with JavaScript. Linux, OSX and Windows.
- jimp - JavaScript Image Manipulation Program
- read-ini-file - read and parse an ini file
- shairport-sync-reader - shairport-sync metadata reader
- make sure that have installed the required software above
- enable SSH and remote into the Raspberry Pi
- move into the home folder
cd /home/pi - check in the portfolio
git clone https://github.com/bjaan/AMPi-Service.git - Install pre-requisites for building the required node modules
sudo apt-get install build-essential - move into the directory
cd AMPi-Service\AMPi-Service - run
npm installto install the Node.js modules - move back to the home folder
cd /home/pi - to start:
node AMPi-Node/app.js
- Remove Pulseaudio, we will use ALSA only!
sudo apt-get remove pulseaudio
- Raspberry Pi boot configuration in
/boot/firmware/config.txt
...

# Uncomment some or all of these to enable the optional hardware interfaces
dtparam=i2c_arm=on
dtparam=i2s=on
#dtparam=spi=on

...

# Enable audio (loads snd_bcm2835)
#dtparam=audio=on
dtoverlay=hifiberry-dacplus

...

# Enable DRM VC4 V3D driver on top of the dispmanx display stack
#dtoverlay=vc4-fkms-v3d
max_framebuffers=2

[all]
enable_uart=1
hdmi_blanking=2- ALSA (sound system) configuration in
/etc/asound.conf
pcm.!default {
  type hw card 0
}
ctl.!default {
  type hw card 0
}
Running aplay -l will result in following output:
**** List of PLAYBACK Hardware Devices ****
card 0: sndrpihifiberry [snd_rpi_hifiberry_dacplus], device 0: HiFiBerry DAC+ HiFi pcm512x-hifi-0 [HiFiBerry DAC+ HiFi pcm512x-hifi-0]
  Subdevices: 0/1
  Subdevice #0: subdevice #0
- AMPi service file
/etc/systemd/system/ampi.serviceto set-up a service for AMPi, called ampi - and installed the service following these instructions. Change the location of thenodeexecutable in theExecStartto the actual location. We put a start-up delay of 10 seconds to ensure that the serial port is available during this phase of the start-up.
[Unit]
Description=ampi
After=network.target

[Service]
ExecStartPre=/bin/sleep 10
ExecStart=command -v node
/home/pi/.nvm/versions/node/v20.14.0/bin/node ~/AMPi-Service/AMPi-Node/app.js
WorkingDirectory=/home/pi
StandardOutput=inherit
StandardError=inherit
Restart=always
User=pi

[Install]
WantedBy=multi-user.target- Shairport Sync configuration changes the metadata section in
/etc/shairport-sync.confto enable shairport-sync metadata sharing:
metadata =
{
        enabled = "yes";
        include_cover_art = "yes";
        cover_art_cache_directory = "/tmp/shairport-sync/.cache/coverart";
        pipe_name = "/tmp/shairport-sync-metadata";
        pipe_timeout = 15000;
};We use the MPlayer software - and its built-in algorithms - to play Audio CDs from the attached USB CD/DVD/Blu-ray drive and send an high-bitrate digital data stream through the DAC. The post-processing on the read requires a lot of processing power, which Raspberry Pi happily offers.
We set the drive to a maximum low read speed (1x or 150 KB/sec) so that the drive doesn't spin-up very loudly during playback. This way the drive will not scream and start making heaps of high-pitched load noises, when we want enjoy our music instead.
We apply our floating-point precision polyphase filterbank (PFB) processing audio resolution enhancement technology during CD playback. This upsampling process to 192kHz/16bit doesn't add any additional information to the audio stream, and technically does not improve the sound quality of the Audio CD format, but it removes potential errors and filters the audio better during the digital to analog audio conversion. More information available here in Dutch: https://verstraten-elektronica.blogspot.com/p/upsampling-bij-audio.html
We also apply our advanced dynamic buffering anti-stutter stabilization technology to enhance the Quality-of-Service (QoS) of the data stream from the Audio CD medium to the DAC. This will fill a 16-megabit buffer while the player ensures that 80% is filled with audio data during playback. This compensates for breaks in the playback due to recoverable reading errors occurring on the medium due to the physical and spinning nature of the medium.
First, we install a bunch of pre-requisites which allow drive control, internet media information retrieval from gnudb.org & MusicBrainz, and audio playback
sudo apt-get install setcd
sudo apt-get install abcde
sudo apt-get install mplayer
Now, you can test it out yourself: with PFB upsampling to 192kHz/16bit:
setcd -x 0
mplayer -ao alsa -srate 192000 -cache 2048 -af resample=192000:1:2 -nolirc -cache-min 80 -cdrom-device /dev/cdrom cdda://
versus no upsampling 44.1kHz/16bit sound reproduction:
mplayer -ao alsa -cache 2048 -nolirc -cache-min 80 -cdrom-device /dev/cdrom cdda://
For details of the mplayer command line options, check here http://www.mplayerhq.hu/DOCS/man/en/mplayer.1.html