This repository is accompanied by a comprehensive guide with screenshots which you can find on Medium.
In broad strokes, we will use this repository to:
- Set up Superset in a local VS Code development container.
- Rather than creating the Superset configuration database locally, we'll point our development container to the SQL database within Google Cloud Platform that we'll use to support the final deployment.
- Use our local deployment to configure the GCP SQL database.
- Once the Google Cloud database is configured we'll stage a container image in Google Artifact Registry.
- Create the Google Cloud Run service from the Artifact Registry Container.
This repository contains:
.devcontainer: folder containing the files that will create a VS Code development container.setup-scripts: folder that contains a collection of shell scripts to set up and configure Google Cloud Platform (GCP) services. These scripts can be customized for your needs but they shouldn't require any customization as they rely on environment variables from the VS Code development container which you'll set in.env.template.src: folder that contains the files to build the Google Cloud Run Service..env.templateto allow you to set environment variables with the values for your deployment.
Performing the above steps will require:
- Docker Desktop
- Visual Studio Code
- The Remote Containers extension
- Google Cloud CLI
It's very important that all of the shell commands/scripts outlined below be executed from the terminal inside the VS Code development container.
Install each of the above prerequisites in the order presented. Visual Studio Code, the Remote Containers extension, and the Google Cloud CLI are all easy to install. Follow the Docker installation instructions explicitly! Docker itself has a number of prerequisite steps. If you don't already have Docker installed be very mindful of the installation steps.
If you encounter an error in the below steps it is likely because you didn't execute the prerequisite installation steps correctly.
- Once you've completed the prerequisite installations, clone this repository to your machine. Do not rename the repository root folder from
superset-on-gcp-cloud-run. - Rename the file
./.env.templateto./.envand open this file in Notepad or another text editor. Keep it open until instructed to save and close it. We'll be populating some needed values in the next section.
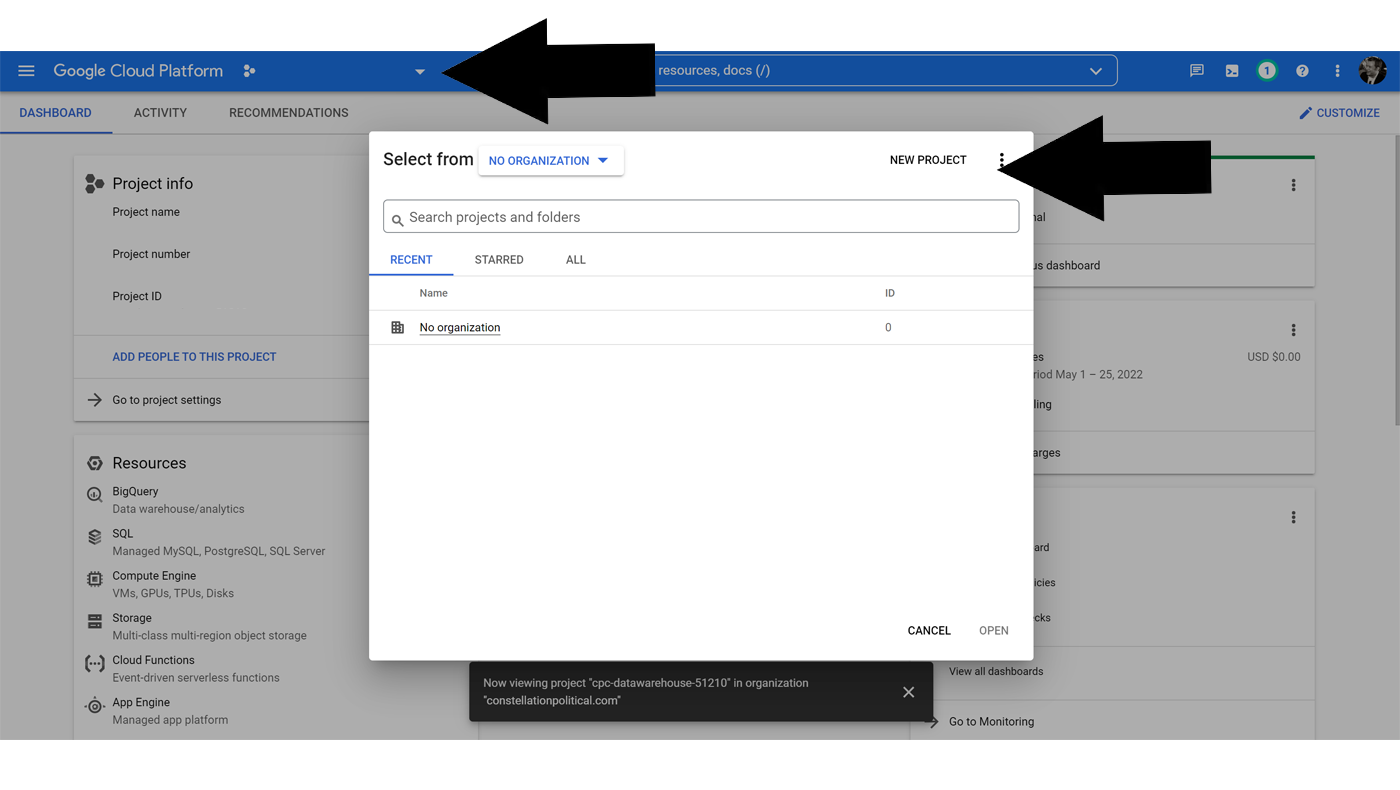
If you don't already have a Google Cloud project set up for this, you'll need to create one. So, take a jaunt over to the Google Cloud Platform web interface -- Google Cloud Console.
Selecting or creating a project is easily done from the drop-down on the top-left next to the 'Google Cloud Platform' text. Once you've created your project make sure you're working in it by ensuring the correct project name appears next to the drop-down you just selected.
Be sure to enable billing on the project that you've created.
- Type 'Billing' in the top search bar and choose that option.
- You should be greeted by a notification saying that the project has no billing account. Choose Link a Billing Account.
- Choose (or create) your billing account.
Make sure the GOOGLE_CLOUD_PROJECT variable in ./.env is set to match whatever you've chosen for your project name. Note that this value needs to be used in the SUPERSET_CONNECTION_NAME and SUPERSET_CONECTION_SECRET variables as well, so replace that portion of those strings as well now.
Our deployment is designed to allow any user from your Google-based organization to access Superset. In other words, if their email contains '@yourorganization.com' they'll be able to sign in. To do this we'll need to configure a few things in the Google Cloud Console before proceeding.
- From Google Console Home type 'APIs & Services' and choose that section.
- Choose 'OAuth Consent Screen' from the left-hand menu.
- Select 'Internal' and click Create.
- Set the below fields. All can be at your discretion but note that 'Authorized domains' will determine access so be sure that's your organization's correct, top-level domain.
- App name
- User support email
- Authorized domains
- Developer contact information
- Click Save and Continue.
- Click the Add or Remove Scopes button.
- Select the 'openid' scope and click Update.
- Click Save and Continue.
- Click the Back To Dashboard button.
- Select 'Credentials' from the left-hand menu of the 'APIs & Services' screen.
- Click '+Create Credentials' > 'OAuth Client ID'.
- Set the Application type drop-down to 'Web application' and choose a 'Name' of your liking.
- Click Create.
- 'Your Client ID' and 'Your Client Secret' will be displayed in a pop-up. Note these values and copy them into their respective variables in the
./.envfile:GOOGLE_CLIENT_IDandGOOGLE_CLIENT_SECRET. Be mindful of leading/trailing white space. It'd be wise to Download JSON as well. You shouldn't need it, but just in case.
Ensure that all of the variables in the ./.env file accompanying this repository now have values assigned to them. Save and close the ./.env file.
- Ensure that Docker is running and open on your machine and then open VS Code.
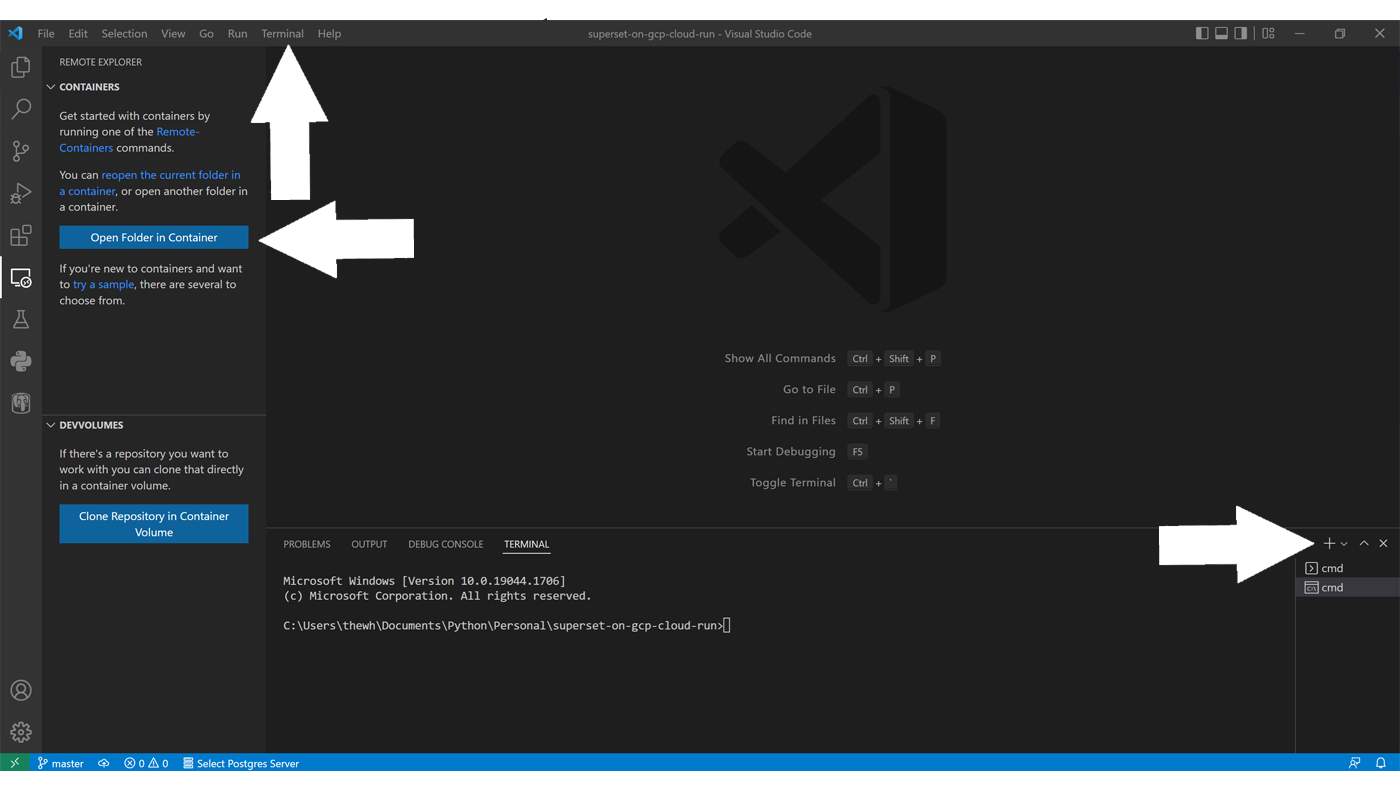
- Within VS Code select the 'Remote Explorer' icon from the left navigation bar to open the 'Remote Containers' extension.
- Choose the 'Open Folder in Container' button and select the folder containing the entirety of this repository:
superset-on-gcp-cloud-run. This step can take 5-10 minutes while the dependencies download and the container is built. When the container is fully built the file tree should display in the left pane. - From the top VS Code menu choose 'Terminal' > 'New Terminal' to open a terminal pane.
- Enter the command
printenvin the terminal and press return. This will print a list of all the environment variables in your container. Scan through this to make sure those variables defined in./.envare displaying the correct values. If they aren't double-check that file, save it, and rebuild the container. You won't be able to proceed if there are inaccuracies.
- Log in to Google cloud via the terminal by entering the command
gcloud auth login. Because the container isn't connected to the outside world, it will generate a command that you'll need to copy into your Google Cloud SDK running outside the container. So, open the Google Cloud SDK Shell on your machine and paste in the command from the VS Code Terminal. This should open a browser window seeking your authorization to continue. Grant it access using your Google account of the same domain that you're deploying Superset on. - Copy and paste the results from the Google Cloud SDK back into the VS Code terminal. If successful you should get a message saying 'You are now logged in as...'
- Switch to the Google Cloud Project you set up earlier by entering the command
gcloud config set project $GOOGLE_CLOUD_PROJECTthis will take advantage of the environment variable defining the name of your Google Cloud Project that you should have set earlier. If successful the terminal should return 'Updated property [core/project].' - Enable the various Google Cloud services we'll need within the project by typing
setup-scripts/enable_gcp_services.shinto the VS Code terminal.
Some users have reported getting a 'Permission denied' error when attempting to run these shell scripts. If that happens to you, simply give yourself permission to execute the script by typing chmod u+x setup-scripts/enable_gcp_services.sh for example. This will give you execute permission on the script you designate.
- Create the Superset SQL database in Google Cloud by running the
setup_sql.shscript from this repository by typingsetup-scripts/setup_sql.shinto the VS Code Terminal.
Your Cloud Run service will pull secrets from GCP Secret Manager. These secrets will all be created based on the values you set in the ./.env file.
- Run the
create_gcp_secrets.shscript by enteringsetup-scripts/create_gcp_secrets.shinto the VS Code terminal. - We'll also need to create a service account for Superset to use and grant it access to the secrets we just created as well as the various services we'll rely on. Run
setup-scripts/create_gcp_service_account.shin the VS Code terminal to create a service account named 'superset' in your project that can do this.
- Connect the VS Code development container to the GCP database we created by running this command in the terminal:
/cloud_sql_proxy -instances=$SUPERSET_CONNECTION_NAME=tcp:5432. If it's successful you should see the number next to the 'PORTS' heading at the top of the terminal increase by one and a pop-up may display informing you that 'Your application is now running on port 5432'. - This proxy connection will monopolize the terminal window you were just working in. Open a new terminal window by clicking '+' on the top-right of the terminal window you were just working in.
- In the new terminal window you've just opened type
superset db upgrade. This may take some time to execute but this command is critical as it populates your Google Cloud hosted SQL database with all of the tables needed for Superset to run.
Next, we will push a Docker image to a Google Artifact Registry within the Google Cloud project. A Cloud Run service will then be created to deploy that image.
- Create a Google Artifact Registry container by typing the command
setup-scripts/create_gcp_artifact.shinto the VS Code terminal. - Upload the contents of this repository's
srcfolder to the repository you just created as a Docker image by typingsetup-scripts/create_gcp_image.shinto the VS Code terminal. - Turn the image you've uploaded into an active Google Cloud Run Service by typing the command
setup-scripts/create_gcp_cloud_run.shinto the VS Code terminal
After running the script above, you will receive a Google Cloud Run service URL.
- Return to Google Cloud Console.
- Search for and select APIs & Services in the top search bar.
- Select Credentials from the left navigation bar.
- Choose the pencil icon to edit your OAuth credential, and update the Authorized redirect URIs to
<CLOUD-RUN-URL>/oauth-authorized/google, replacing<CLOUD-RUN-URL>with the value the VS Code terminal returned. Wait a few minutes before proceeding. - Navigate to the Cloud Run service URL displayed by the VS Terminal (*without the extra text you added in Step 4.). This will authenticate you as an admin of the Superset deployment.
Once you've done that, you will need to run the steps below to ensure future users are not granted admin access.
- Update
AUTH_USER_REGISTRATION_ROLEinsuperset_config.pyto 'Public'. Save and close that file. All new accounts moving forward will default to Public and no longer Admin. - Update the container image by again typing
setup-scripts/create_gcp_image.shinto the VS Code terminal. - Deploy your new container version by again typing
setup-scripts/create_gcp_cloud_run.shinto the VS Code terminal.
- Make sure you're still connected via the Google cloud sql proxy and type
superset initinto the VS Code Terminal. This will take several minutes to complete.
Everything should now be running successfully and you should be able to access your deployment by visiting the URL returned when running setup-scripts/create_gcp_cloud_run.sh.