In this practice, you'll create a UI using HTML elements for a basic implementation of a single-player Battleship game! You'll be utilizing your knowledge of event listeners to create an interactive Battleship game board.
Clone the practice from the starter.
See details of the Battleship game here if you are not familiar with the game.
You will be creating a single-player Battleship game on the browser.
The goal of this practice is to have a Battleship game board displayed on the browser which a user can interact with to find and destroy ships by guessing their coordinates on the board. Once all the ships are found, the user wins and the game is over!
The HTML file is provided for you in index.html with the CSS and JavaScript
files imported already. However, you will need to create HTML elements in the
<body> using JavaScript. You can view the page by starting the server in
app.js by running node app.js and navigate to http://localhost:5000 in
the browser.
The task of randomly generating a Battleship game board is done for you. If you
initialize the Board class in the assets/js/board.js, the grid property
on the new Board() will be a 9x9 2-D array. There are 9 rows and 9 columns.
A null value in the grid 2-D array means that there is no ship at that cell
that the element represents. A number value in the grid means that there is
a section of the ship that forms a ship with a length represented by that
number.
You can examine what the grid 2-D array will look like navigating to
http://localhost:5000 in the browser and opening up the "Console" tab in the
browser's Developer Tools. There you will see a Board's grid logged to the
console from the assets/js/index.js file
In the assets/js/index.js file, you will create HTML elements that represent the Battleship game board and create an interactive Battleship game in the browser using event listeners.
Create an HTML structure using JavaScript that can be positioned using CSS to
visually represent the layout of the Battleship game board. Add your CSS to the
assets/css/index.css file to make each cell in the board a square. Each
cell in the grid should be represented by a square. You should link that
square HTML element with the cell in the grid by storing the data about the
row and the column of the cell on the HTML element.
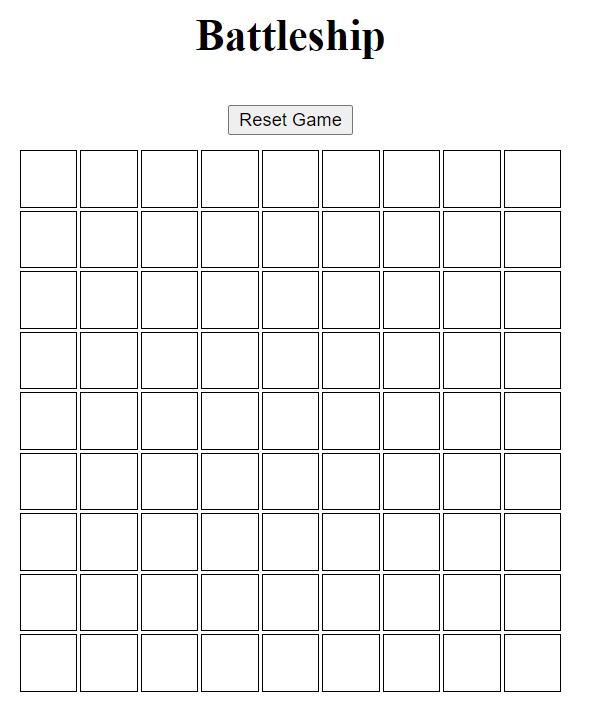
Tweak with your CSS to get the layout to look something like this:
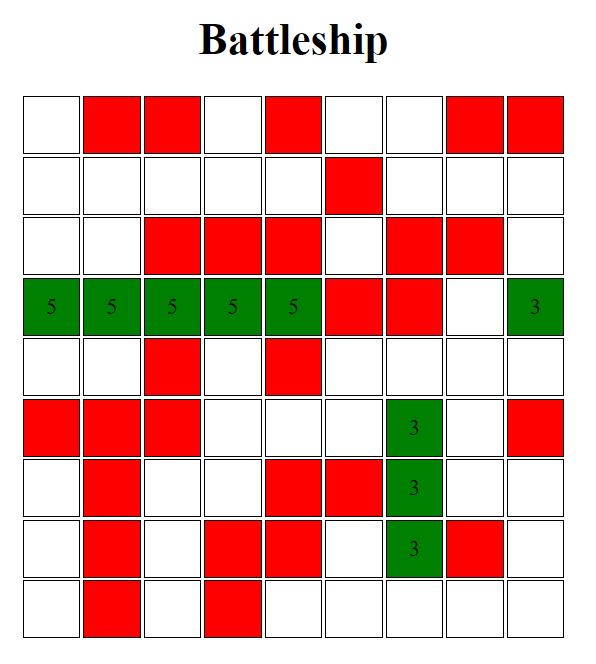
Next, when a user clicks a square, the game should be updated and the user
should see some visual indication that they've hit a ship or missed. When the
square is clicked, you should call the .makeHit(row, col) method on the
board passing in the row and the column that the square is on to update
the game.
Hint: To get the row and col of the square, read the data you saved on the
square when creating the square.
The .makeHit(row, col) method will return the value of the grid at that
row and col after updating the game. If the value is null, then the user
has missed and the square should turn red. If the value is a number, then add
that number as text to the square and turn the square green.
Hint: To change the color of the clicked square, add CSS class(es).
Add more to your CSS so that the clicked squares will look something like this:
Now that the user can interact with the UI, now you have to figure out when the
game is over, or else your user will just be left hanging. Recall that your
Board object should be keeping track of how many squares are still remaining.
Whenever a square results in a hit, the board should be updated, and then
checked to see if the game is over.
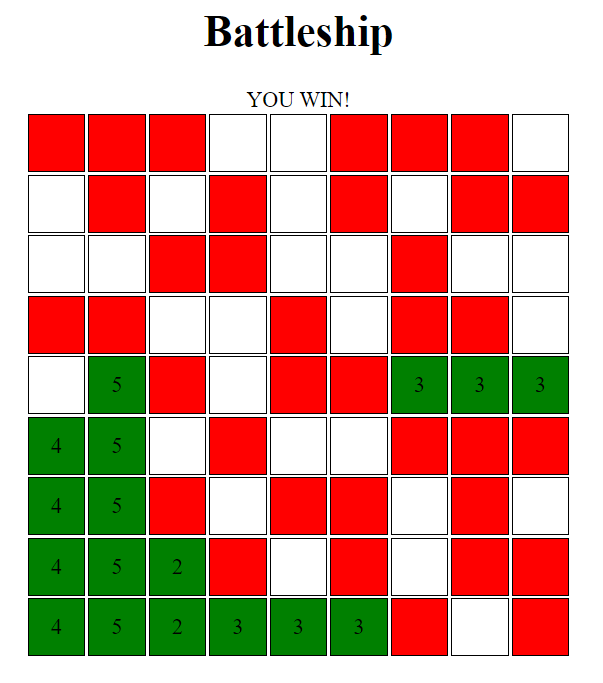
If the game is over, the board should be locked out, and a message should
appear, notifying the user they've completed the game. The .isGameOver()
method on the board will return true if the game is over and false if
there are still ships left to hit. Important Note: This method will not work
if you haven't been updating the game state properly by calling the
.makeHit(row, col) method on the board in Phase 1.
Whenever a square is clicked, you should check to see if the game is over. If the game is over, you should make sure that none of the squares are clickable and a game over message right above the game board should appear letting the user know that they have won. It should look something like this:
The only thing left to do is implement the reset button so the user can start a new game whenever the reset button is clicked.
When the reset button is clicked, the board should be initialized again to
create a new grid and all the squares on the page should be reset to reflect
the state of the new grid. The game over message should also be reset to show
no message.
The user should be able to click the reset button to reset the game regardless of if the game is over.
Here's what it should look like before the reset button is clicked:
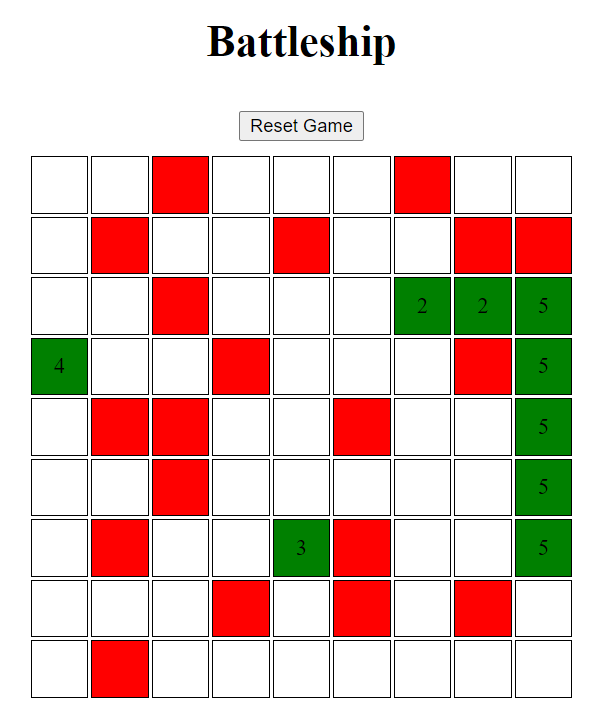
Here's what it should look like after the reset button is clicked:
By the end of this phase, you should have a barebones version of a single player Battleship running! If you have time, continue on to the bonus section.
To implement a computer player, you will have to create a ComputerPlayer and
HumanPlayer class to separate the game logic/actions for each.
Two boards should now be generated and the computer should make a random move after the user makes a move. To make sure the computer doesn't repeat moves, the game state must be more sophisticated than just the number of squares remaining.
Also, keep in mind that the user should not be able to click on their own board.
Refactor the board initialization process so that the user can select where to place their pieces. This can be done either by submitting a form indicating the ship locations, or implement draggable pieces on the board. This may be a bit more ambitious, but look in the draggable HTML property and the drag and drop API if you're interested!
Introduce a "setup" phase, where each player can choose the board size and ship sizes.
More validation will be needed to make sure your board can support the ships you want to add!