Django Sample project that allows registered users to edit their profile outside of the admin module. Django User Profile is provided on top of Volt, a popular open-source Django Bootstrap 5 provided by Themesberg and AppSeed. For newcomers, Django is the most popular Python-based web framework initially released in 2003 and is currently a top-rated framework in web development.
- 👉 Django User Profile -
LIVE Demo - 👉 Django Bootstrap 5 - the original starter
Have questions?Contact Support (Email & Discord) provided by AppSeed
| Free Version | PRO Version | Custom Development |
|---|---|---|
| ✓ Extended User Profiles | Everything in Free, plus: | Everything in PRO, plus: |
| ✓ Best Practices | ✅ Premium Bootstrap 5 Design | ✅ 1mo Custom Development |
| ✓ Bootstrap 5 Design | ✅ OAuth Google, GitHub |
✅ Team: PM, Developer, Tester |
✓ CI/CD Flow via Render |
✅ API, Charts |
✅ Weekly Sprints |
✓ Docker |
✅ DataTables (Filters, Export) | ✅ Technical SPECS |
| - | ✅ Celery | ✅ Documentation |
| - | ✅ Media Files Manager | ✅ 30 days Delivery Warranty |
| - | ✅ Extended User Profiles | - |
| - | ✅ Private REPO Access |
- |
| - | ✅ PRO Support - Email & Discord | - |
| - | ✅ Deployment Assistance | - |
| ------------------------------------ | ------------------------------------ | ------------------------------------ |
| ✓ LIVE Demo | 🚀 LIVE Demo | 🛒 Order: $3,999 (GUMROAD) |
$ # Get the code
$ git clone https://github.com/app-generator/sample-django-extended-user-profile.git
$ cd sample-django-extended-user-profile
$
$ # Virtualenv modules installation (Unix based systems)
$ virtualenv env
$ source env/bin/activate
$
$ # Virtualenv modules installation (Windows based systems)
$ # virtualenv env
$ # .\env\Scripts\activate
$
$ # Install modules - SQLite Storage
$ pip3 install -r requirements.txt
$
$ # Create tables
$ python manage.py makemigrations
$ python manage.py migrate
$
$ # Start the application (development mode)
$ python manage.py runserver # default port 8000
$
$ # Start the app - custom port
$ # python manage.py runserver 0.0.0.0:<your_port>
$
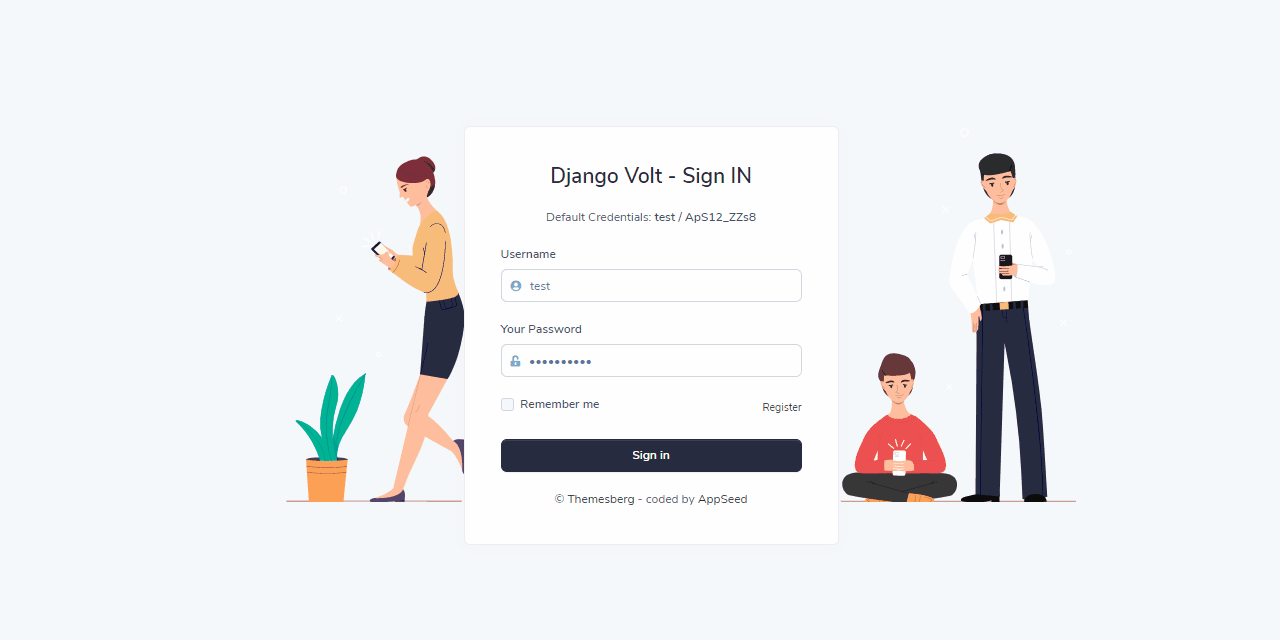
$ # Access the web app in browser: http://127.0.0.1:8000/Note: To use the app, please access the registration page and create a new user. After authentication, the app will unlock the private pages.
The project is coded using a simple and intuitive structure presented below:
< PROJECT ROOT >
   |
   |-- core/                               # Implements app logic and serve the static assets
   |    |-- settings.py                    # Django app bootstrapper
   |    |-- static/
   |    |    |-- <css, JS, images>         # CSS files, Javascripts files
   |    |-- templates/                     # Templates used to render pages
   |         |
   |         |-- includes/                 # HTML chunks and components
   |         |-- layouts/                  # Master pages
   |         |-- accounts/                 # Authentication pages
   |         |
   |      index.html                       # The default page
   |       *.html                          # All other HTML pages
   |
   |-- authentication/                     # Handles auth routes (login and register)
   |    |-- urls.py                        # Define authentication routes
   |    |-- forms.py                       # Define auth forms
   |
   |-- app/                                # A simple app that serve HTML files
   |    |-- views.py                       # Serve HTML pages for authenticated users
   |    |-- urls.py                        # Define some super simple routes
   |
   |-- customers/                          # Handles the profile edit     <-------- NEW
   |    |-- __init__.py                    # Defines App init             <-------- NEW
   |    |-- admin.py                       # Defines App admin            <-------- NEW
   |    |-- apps.py                        # Defines App apps             <-------- NEW
   |    |-- forms.py                       # Defines App forms            <-------- NEW
   |    |-- models.py                      # Defines App models           <-------- NEW
   |    |-- signals.py                     # Defines App signals          <-------- NEW
   |    |-- tests.py                       # Defines App tests            <-------- NEW
   |    |-- urls.py                        # Defines App routes           <-------- NEW
   |    |-- views.py                       # Defines App views            <-------- NEW
   |
   |-- requirements.txt                    # Development modules - SQLite storage
   |-- .env                                # Inject Configuration via Environment
   |-- manage.py                           # Start the app - Django default start script
   |
   |-- ************************************************************************
The bootstrap flow
- Django bootstrapper
manage.pyusescore/settings.pyas the main configuration file core/settings.pyloads the app magic from.envfile- Redirect the guest users to Login page
- Unlock the pages served by app node for authenticated users
This section describes the coding process for this feature that allows authenticated users to update their profiles.
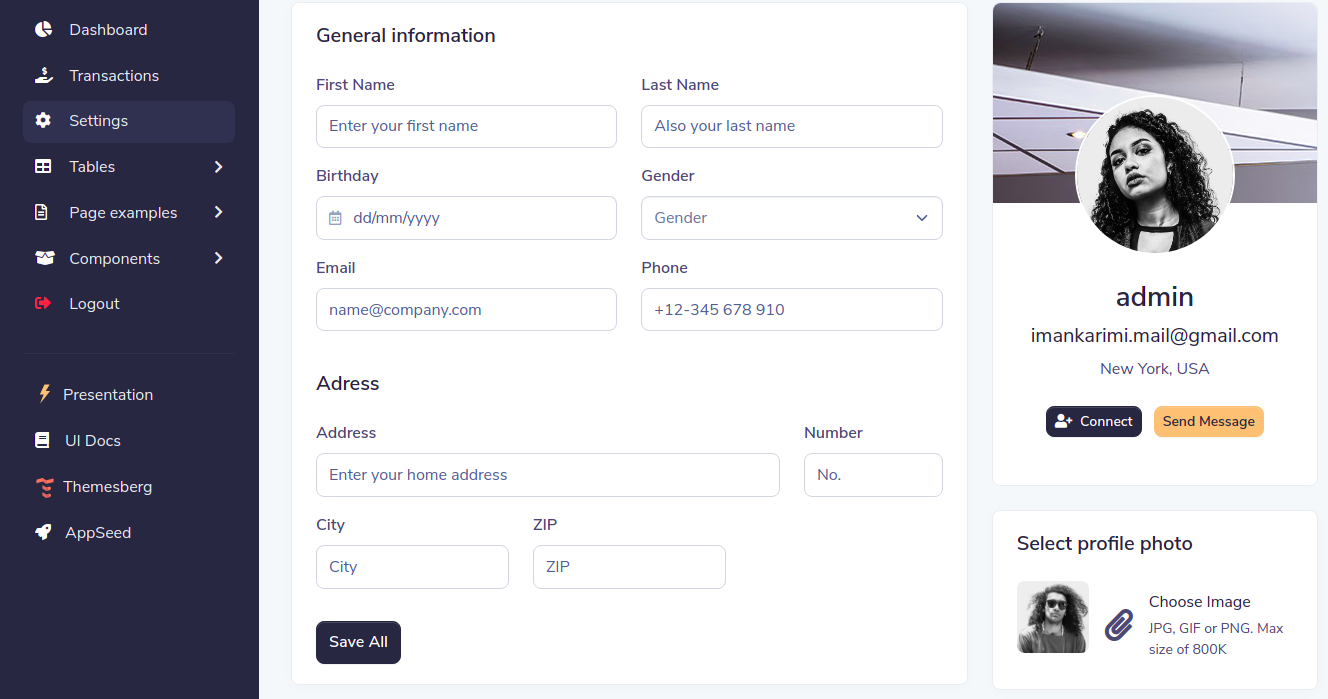
In this section, the user can change profile information, including name, email, avatar, ... etc.
To do this, we create a new app called customers, then create a model named Profile to store user information.
This module will manage the user profile information by defining a new model, form, and view. Authenticated users can also upload their avatar.
$ python manage.py startapp customerscustomers/models.py:
class Profile(models.Model):

    # Managed fields
    user     = models.OneToOneField(User, related_name="profile", on_delete=models.CASCADE)
    avatar   = models.ImageField(upload_to="customers/profiles/avatars/", null=True, blank=True)
    birthday = models.DateField(null=True, blank=True)
    gender   = models.PositiveSmallIntegerField(choices=GENDER_CHOICES, null=True, blank=True)
    phone    = models.CharField(max_length=32, null=True, blank=True)
    address  = models.CharField(max_length=255, null=True, blank=True)
    number   = models.CharField(max_length=32, null=True, blank=True)
    city     = models.CharField(max_length=50, null=True, blank=True)
    zip      = models.CharField(max_length=30, null=True, blank=True)

    @property
    def get_avatar(self):
        return self.avatar.url if self.avatar else static('assets/img/team/default-profile-picture.png')
get_avatar: In this property, if the avatar value is not provided by the user, the default value is used.
Create related form to show inputs & store data. The ProfileForm will be defined in the customers/forms.py using a definition as below:
from django import forms
from customers.models import Profile

class ProfileForm(forms.ModelForm):
    first_name = forms.CharField(max_length=255)
    last_name = forms.CharField(max_length=255)
    email = forms.EmailField()

    class Meta:
        model = Profile
        fields = '__all__'
        exclude = ['user']


def form_validation_error(form):
    """
    Form Validation Error
    If any error happened in your form, this function returns the error message.
    """
    msg = ""
    for field in form:
        for error in field.errors:
            msg += "%s: %s \\n" % (field.label if hasattr(field, 'label') else 'Error', error)
    return msg
Note: We have three fields (first_name, last_name, email) that are outside the profile model (they are in the user model). We need to add these three fields to our form.
form_validation_error: If any error happened in your form, this function returns the error message.
- create
ProfileViewincustomers/views.py:
from django.contrib import messages # import messages to show flash message in your page
from customers.forms import ProfileForm, form_validation_error # import the used form and related function to show errors
from customers.models import Profile # import the Profile Model


@method_decorator(login_required(login_url='login'), name='dispatch')
class ProfileView(View):
    profile = None

    def dispatch(self, request, *args, **kwargs):
        self.profile, __ = Profile.objects.get_or_create(user=request.user)
        return super(ProfileView, self).dispatch(request, *args, **kwargs)

    def get(self, request):
        context = {'profile': self.profile}
        return render(request, 'customers/profile.html', context)

    def post(self, request):
        form = ProfileForm(request.POST, request.FILES, instance=self.profile)

        if form.is_valid():
            profile = form.save()

            # to save user model info
            profile.user.first_name = form.cleaned_data.get('first_name')
            profile.user.last_name  = form.cleaned_data.get('last_name')
            profile.user.email      = form.cleaned_data.get('email')
            profile.user.save()

            messages.success(request, 'Profile saved successfully')
        else:
            messages.error(request, form_validation_error(form))
        return redirect('profile')
dispatch method: In this section, if the user does not have a profile, it will be created and the value of the profile object will set in the profile field.
The template that handles the user input is defined in customers/profile.html file.
    <form action="{% url 'profile' %}" method="POST" enctype="multipart/form-data">

        {% csrf_token %}

        <div>
            <label for="first_name">First Name</label>
            <input name="first_name" class="form-control" id="first_name" type="text"
                    placeholder="Enter your first name" value="{{ profile.user.first_name }}"
                    required>
        </div>

        <div>
            <label for="last_name">Last Name</label>
            <input name="last_name" class="form-control" id="last_name" type="text"
                    placeholder="Also your last name" value="{{ profile.user.last_name }}"
                    required>
        </div>

        <label for="gender">Gender</label>
        <select name="gender" class="form-select mb-0" id="gender"
                aria-label="Gender select example">
            <option selected>Gender</option>
            {% for key, value in profile.GENDER_CHOICES %}
                <option value="{{ key }}"
                        {% if profile.gender == key %}selected{% endif %}>{{ value }}</option>
            {% endfor %}
        </select>

        <!-- And the rest of the fields -->

    </form>
Note: Make sure there is
enctype="multipart/form-data"attribute in the form tag to upload the avatar.
Activate the routing for customers app by edit the customers/urls.py file with the following code:
from django.urls import path
from customers import views

urlpatterns = [
    path('profile/', views.ProfileView.as_view(), name='profile'),
]
Update core/urls to include customers urls:
from django.conf import settings
from django.contrib import admin
from django.conf.urls.static import static
from django.urls import path, include

urlpatterns = [
    path('admin/', admin.site.urls),  # Django admin route
    path('customers/', include("customers.urls")),  # Django customers route
    # ...
]

# to support and show media & static files in developer mode
if settings.DEVEL:
    urlpatterns += static(settings.MEDIA_URL, document_root=settings.MEDIA_ROOT)
urlpatterns += static(settings.STATIC_URL, document_root=settings.STATIC_ROOT)- Django - the official website
- More Django Templates provided by Themesberg
- More Django Dashboards provided by AppSeed
Django Template Volt - Provided by Themesberg and AppSeed.