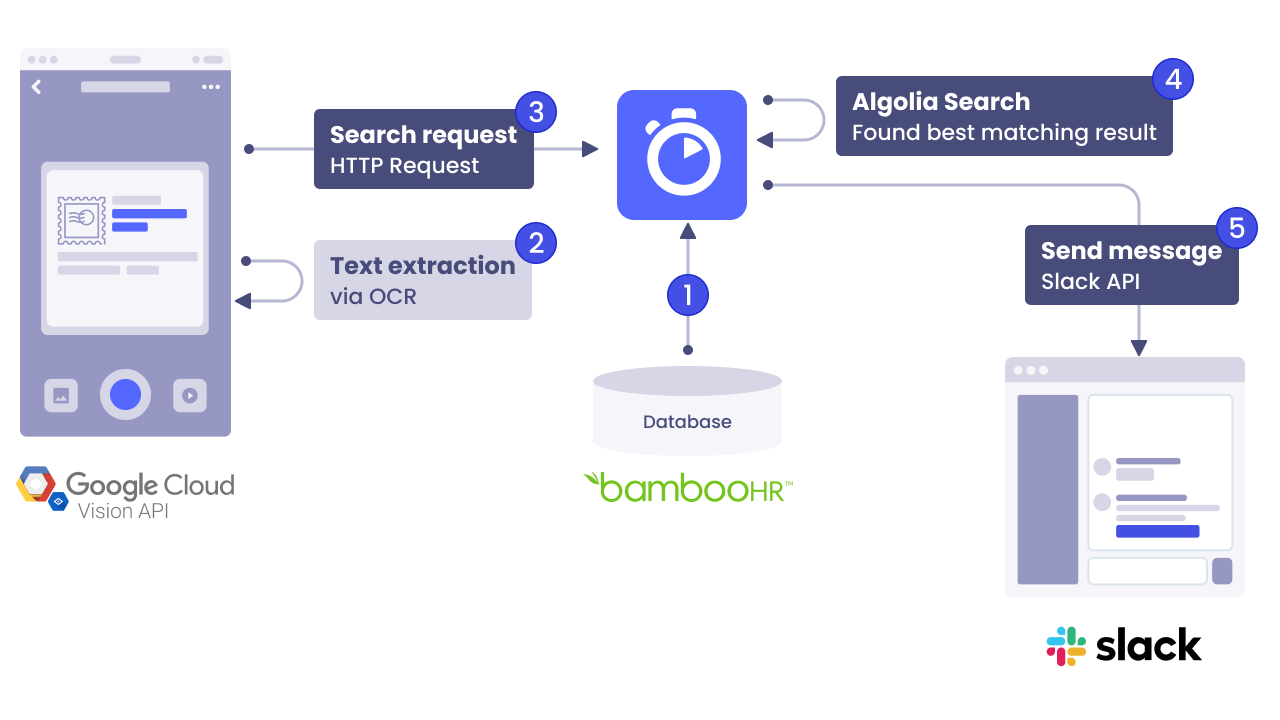
This sample app lets you scan a shipping label with your phone and sends a Slack message to the recipient of the package. The app combines optical character recognition (OCR), Algolia search, and Slack notifications.
Read more about how we use this app at Algolia on the Algolia blog.
The sample app uses the following features:
📱📷 Detect and extract text from an image with Google Cloud Vision.
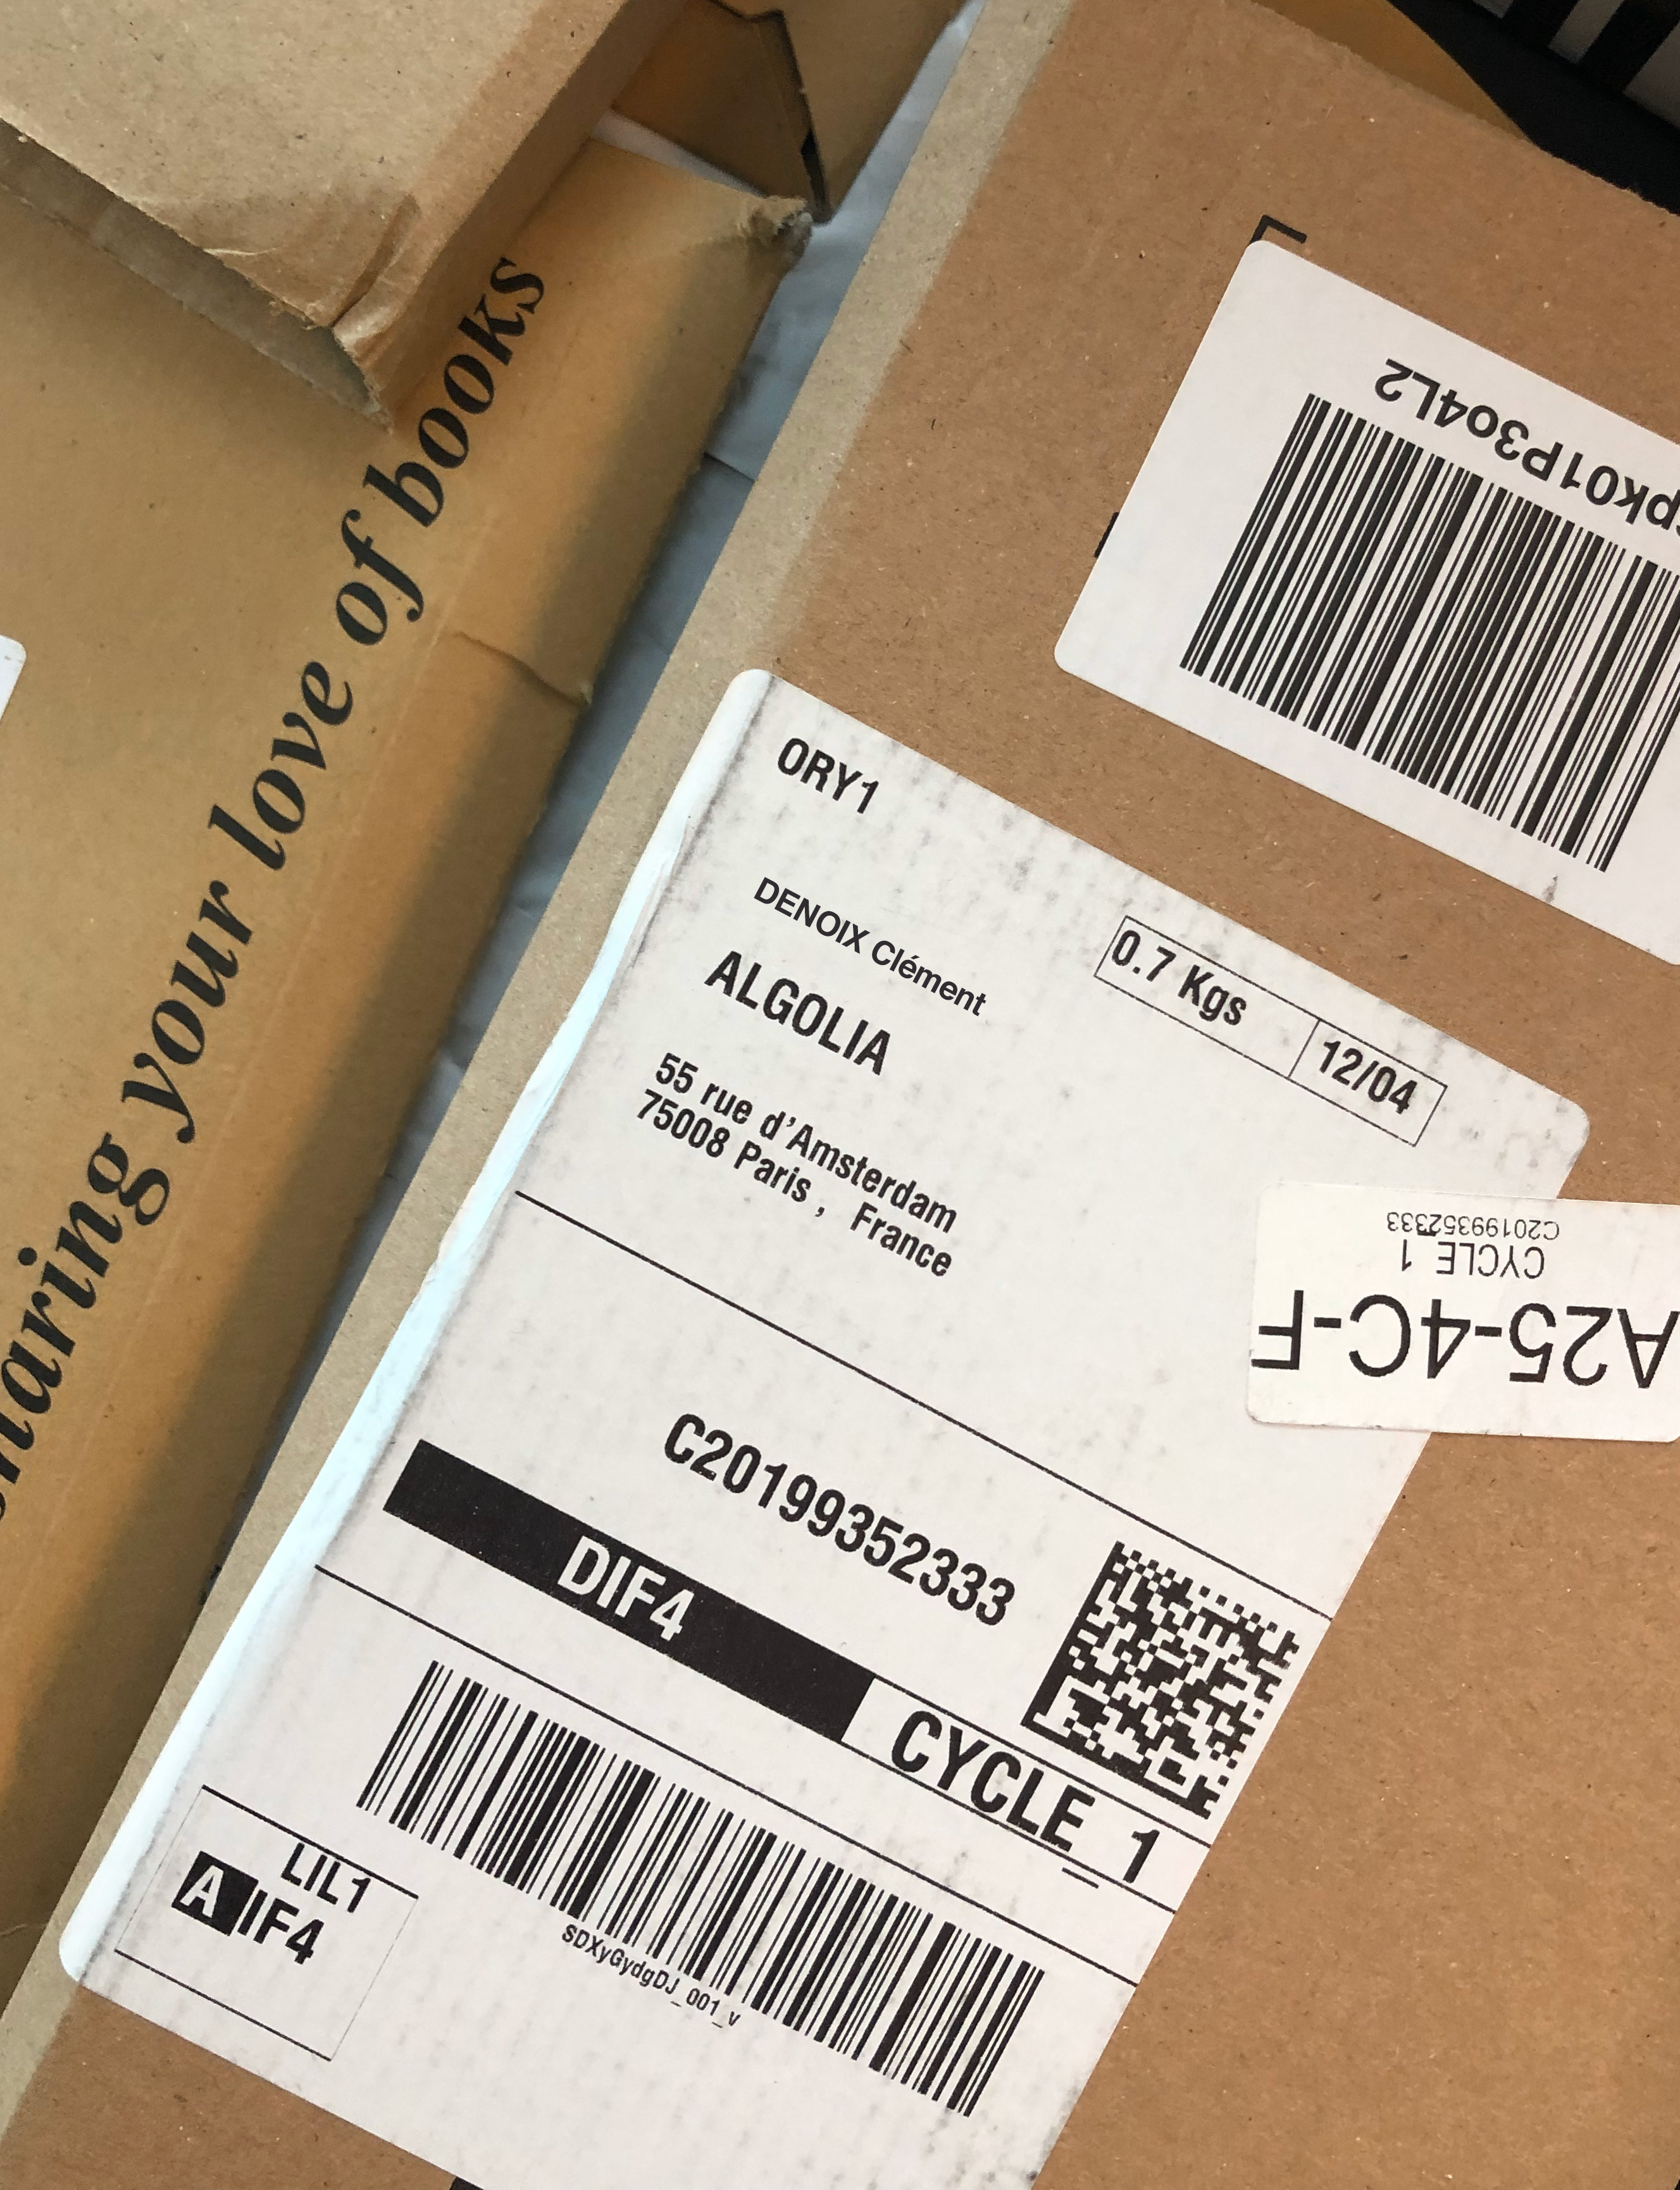
Depending on the quality of the scan, the Google Cloud Vision API might return a response like this:
{
  "textAnnotations" : [
    {
      "description": "ORY1\n0.7 KG\nDENOIX Clément\nALGOLIA\n55 rue d'Amsterdam\n75008 Paris, France\nC20199352333\nDIF4\nCYCLE\nlove of boo\nAnod",
      ...
    },
    ...
  ],
  ...
}
The extracted text isn't "clean" and contains extra characters. You could try to write your own logic to extract the person first name / last name from the extracted text, or you can leave this part to Algolia!
With the removeWordsIfNoResults parameter set to allOptional, Algolia treats all words in the search query as optional. To make it easier for Algolia to recognize the individual words, we replace all newline characters with spaces and perform the following query:
{
  query: "ORY1 0.7 KG DENOIX Clément ALGOLIA 55 rue d'Amsterdam 75008 Paris, France C20199352333 DIF4 CYCLE love of boo Anod",
  removeWordsifNoResults: "allOptional",
  ...
}
If Algolia finds the name in the index, it returns the corresponding Slack ID:
{
  hits: [
    {
      "displayName": "Clément Denoix",
      "slackID": "<SLACK_HANDLE>"
    }
  ]
}
💌📦 Notify people using Slack bots.
The Slack bot sends a message: "A 📦 is waiting for you at the front desk!".
This short clip demonstrates how to use the sample app:

Follow these steps to use the demo app with a sample index.
- Scan this QR code with your phone to open the demo app👇
QR code

- Scan the shipping label👇
Shipping label
The sample app implements three servers in these programming languages:
The client is a single HTML page with Vanilla JavaScript.
git clone https://github.com/algolia-samples/delivery-scannerCopy the file .env.example to the directory of the server you want to use and rename it to .env..
For example, to use the Go implementation:
cp .env.example server/go/.envTo use this sample app, you need an Algolia account. If you don't have one already, create an account for free. Note your Application ID and API key.
In the .env file, set the environment variables ALGOLIA_APP_ID and ALGOLIA_API_KEY to the values from your Algolia account.
ALGOLIA_APP_ID=<replace-with-your-algolia-app-id>
ALGOLIA_API_KEY=<replace-with-your-algolia-api-key>Create and populate an index with names, Slack IDs, and images of people you want to notify.
The sample app expects the index record to follow this structure:
{
    "displayName": "Jane Doe",
    "slack": {
        "id": "U01GC09PJEN",
        "image": "https://thispersondoesnotexist.com/image"
    }
}
To upload your data, you can use the Algolia dashboard or use on of Algolia's API clients.
After creating the index and uploading the data, set the environment variable ALGOLIA_INDEX_NAME in the .env file:
ALGOLIA_INDEX_NAME=<replace-with-your-algolia-index-name>Set up your Google Cloud account to use the Google Cloud Vision API.
In the .env file, set the environment variable GOOGLE_APPLICATION_CREDENTIALS to the path of your credentials file:
GOOGLE_APPLICATION_CREDENTIALS=<replace-with-the-path-of-your-credentials-file>Create a Slack application and set the environment variable SLACK_TOKEN in the file .env:
SLACK_TOKEN=<replace-with-the-slack-bot-token>Each server directory has a file with instructions:
For example, to run the Python implementation of the server, follow these steps:
cd server/python # there's a README in this folder with instructions
python3 venv env
source env/bin/activate
pip3 install -r requirements.txt
export FLASK_APP=server.py
python3 -m flask run --port=4242