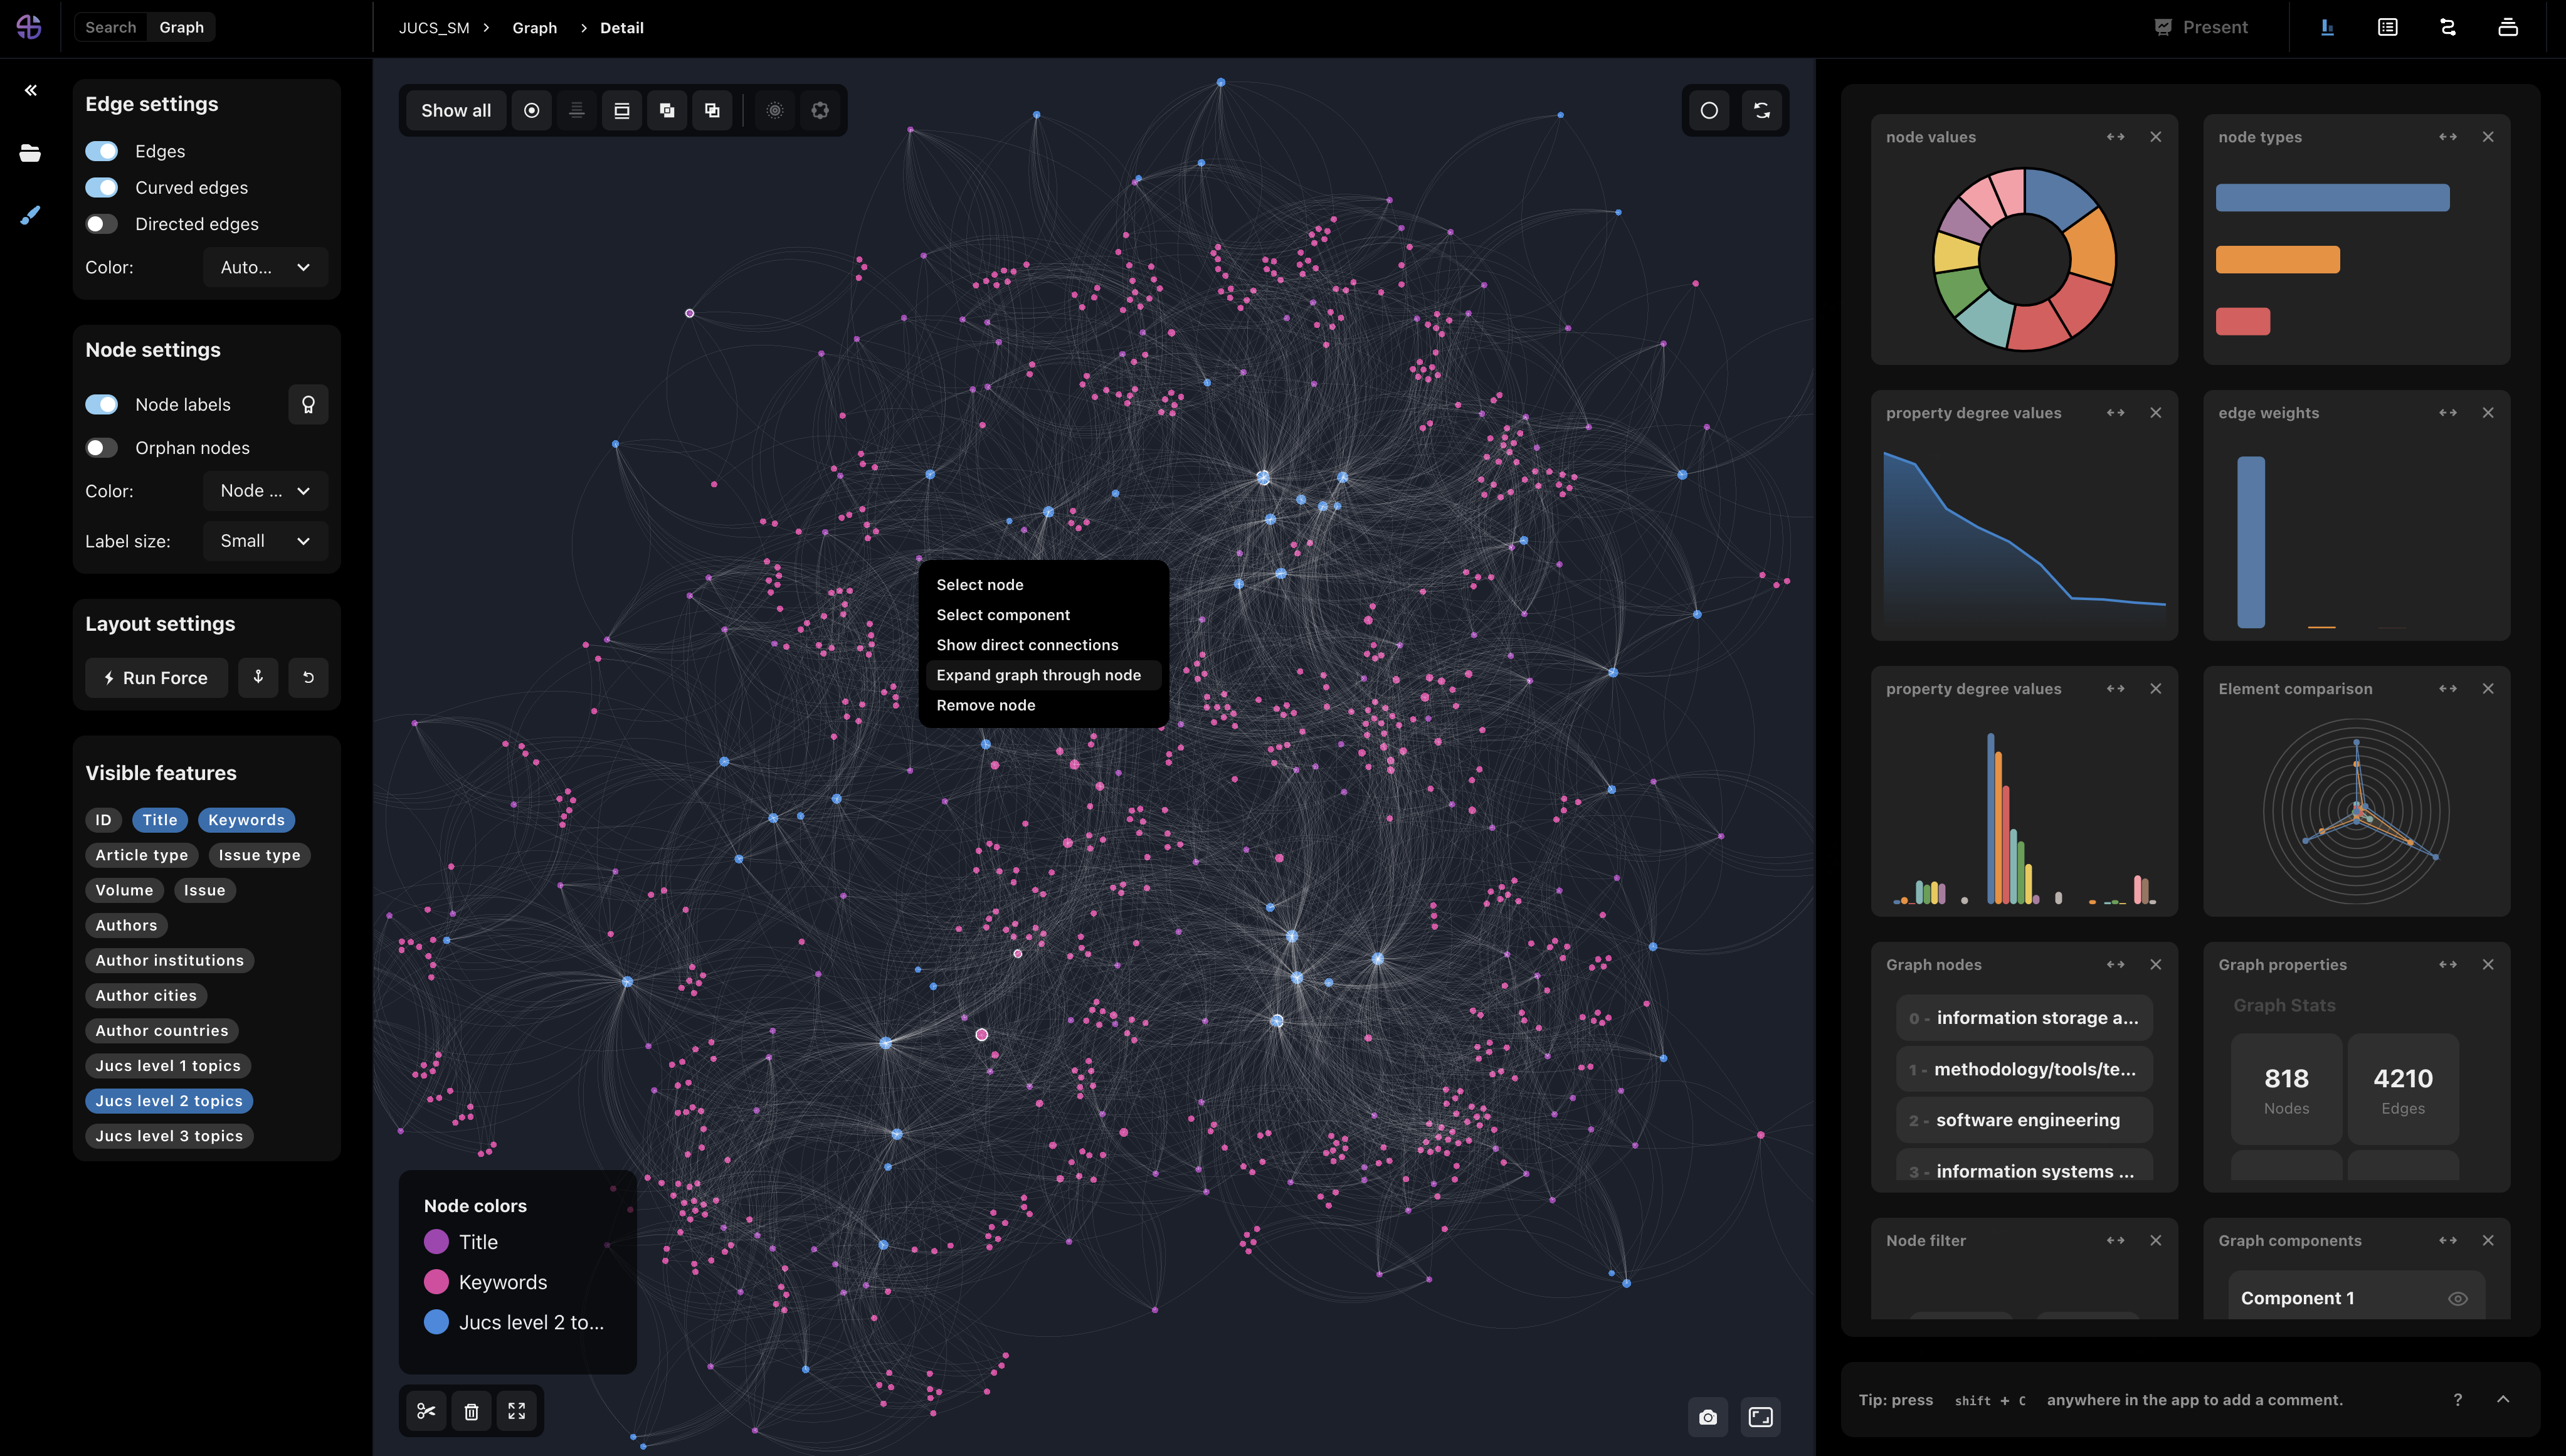
Collaboration spotting X (CSX) is a network-based visual-analytics application for exploring tabular data through network visualizations, interactions, and advanced network analytics. The main aim of CSX is to enable users to retrieve a subset of their dataset and provide tools for visual and interactive exploration and filtering of their retrieved data in a network format. You can read more about the project on csxp.me.
This project was developed by Aleksandar Bobić as part of his PhD research during his time as a doctoral student at CERN and the Graz University of Technology under the supervision of his CERN supervisor Jean-Marie Le Goff and his TU Graz supervisor Christian Gütl.
This project was inspired by concepts introduced in the previous Collaboration Spotting project. We would like to thank the previous Collaboration Spotting team for their contributions.
If you would like to collaborate or contribute to the project or have any questions feel free to send me an email to contact@abobic.com.
Contributors from the following institutions were involved in the development of this project:
If you happen to mention or use this project as part of one of your scientific works, please cite the following paper: Bobic, A., Le Goff, JM., Gütl, C. (2023). Exploring Tabular Data Through Networks. In: , et al. Advances in Information Retrieval. ECIR 2023. Lecture Notes in Computer Science, vol 13982. Springer, Cham. https://doi.org/10.1007/978-3-031-28241-6_13
A big thank you to all contributiors of this project:
@LorenaEgger
- Introduction
- Overview Graph
- Detail Graph
- Direct Connections
- History & Comments
- Advanced Search
- Studies & Presentations
- Bobic, A., Le Goff, JM., Gütl, C. (2023). Exploring Tabular Data Through Networks. In: , et al. Advances in Information Retrieval. ECIR 2023. Lecture Notes in Computer Science, vol 13982. Springer, Cham. https://doi.org/10.1007/978-3-031-28241-6_13
- Bobic, A., Le Goff, J. M., & Gütl, C. (2021). Towards supporting complex retrieval tasks through graph-based information retrieval and visual analytics. In CEUR Workshop Proceedings (Vol. 2950, pp. 30-37). RWTH Aachen. Presentation Video
- Bobic, A., Le Goff, J. M., & Gütl, C. (2021). Collaboration Spotting X-A Visual Network Exploration Tool. In in Proceedings of the The Eighth International Conference on Social Networks Analysis, Management and Security: SNAMS 2021. Presentation Video
To start developing this project, please complete the following steps:
- Install docker
- Clone the CSX project
- Start docker
- In a terminal, navigate to the project directory and run
docker-compose up, which will start the app in development mode. - Once the project is running, it will be accessible on http://localhost:8882
- Upload the example file
just_sm.csvfrom thedatasets_examplefolder.
If you want to contribute to this project, pick an open issue you find interesting and create your branch (from the develop branch) with the issue number as the branch name. If there is no open issue for your feature, please open a new issue with a detailed description of the feature first.
Once you are happy with your implementation, open a pull request to the develop branch.
Run docker-compose up, which will start the app in development mode on http://localhost:8882
Navigate to the dataset_examples folder and drag and drop the example file just_sm.csv into the csx drop zone to populate the running elastic instance with sample data collected from the Journal of Universal Computer Science.
To add a custom dataset simply prepare a CSV file with the following format (make sure there are no single quotation marks in the text since that might interfere with the automatic processing of list values):
| String feature name | Category feature name | Number feature name | List feature name |
|---|---|---|---|
| Some string value. | Categorical val 1 | 1 | ["val1","val2","val3"] |
| Another string value | Categorical val 2 (same as a string) | 4.35 | ["val6","val4","val1"] |
When the dataset is uploaded a config file is created in the server/app/data/config folder. This file defines the default configuration for a dataset.
🚨 Config files should never be manually modified. If you want to modify the config of a dataset either click on the change default settings for dataset button next to each of the datasets on the homepage or delete the dataset and upload it again with different settings.:
In additiona to making sure the flag REACT_APP_DISABLE_TRACKING in ./app/.env.development is set to false you must run the docker-compose command with particular parameters: docker-compose --profile analytics up
On the first run make sure to visit localhost:8883 and go through the matomo setup process.
To configure, disable or enable various csx features visit the ./app/.env.{development/production} file and set the desired value. The following feature flags are available:
| Flag name | What it does | Values |
|---|---|---|
| REACT_APP_DISABLE_UPLOAD | Disable or enable the file upload features | true / false |
| REACT_APP_DISABLE_DATASET_LIST | Disable or enable the dataset list component | true / false |
| REACT_APP_DISABLE_UPLOAD | Disable or enable the file upload features | true / false |
| REACT_APP_DISABLE_DATASET_DOWNLOAD | Disable or enable the file download feature | true / false |
| REACT_APP_DISABLE_ADVANCED_SEARCH | Disable or enable the advanced search feature | true / false |
| REACT_APP_DISABLE_TRACKING | Disable or enable tracking | true / false |
| REACT_APP_SURVEY_LINK | Link to your survey | string (including https) |
| REACT_APP_SURVEY_LINK_USER_ID | The link variable used for unique IDs. | string |
| REACT_APP_SURVEY_MESSAGE | The message that should show up when the survey popup displays. | string |
| REACT_APP_SURVEY_SHOW_AFTER_HISTORY_DEPTH | Dispaly the survey popup after a user performs a particular number of actions on a graph | number (int) |
- Make sure to delete the previously existing volumes, containers and images.
- Make sure that the SEARCH_SOURCE environment vairable in the environment of the server service in docker-compose is set to
elastic. - Run the following command:
docker-compose --profile elastic up --build
Run docker-compose -f docker-compose.prod.yml up --build --remove-orphans --force-recreate
Runs the app in production mode. Open http://localhost:8880 to view it in the browser.
In additiona to making sure the flag REACT_APP_DISABLE_TRACKING in ./app/.env.production is set to false you must run the docker-compose command with particular parameters: MATOMO_PASS=your_db_pass docker-compose -f docker-compose.prod.yml --profile analytics up --build --remove-orphans --force-recreate
To run also with elastic in production make sure to also add --profile elastic right after --profile analytics and also set the ELASTIC_PASS env variable.
To run with mongo just make sure that the SEARCH_SOURCE in the environment of the server service is set to mongo and that the MONGO_USER and MONGO_PASS are set.