https://next-js-chat-app.vercel.app/
This is a demo of building a chat application with Next.js using Ably as the messaging platform.
You'll learn how to -
- Create a brand new Next.js application
- Create an Ably account and get an API key
- Create a Next.js Vercel Serverless API
- Use React Functional components and React Hooks with Ably
- Host your app on Vercel
Next.js is a React framework from Vercel. It is used to build static web applications with server side rendering, serverless functions and seamless hosting. It's a framework that takes the React knowledge you already have, and puts some structure and conventions in place.
Ably is realtime, pub/sub messaging platform with a suite of integrated services to deliver complete realtime functionality directly to end-users.
Vercel is a hosting platform, built from the ground up to host Next.js apps, and Serverless Functions with them.
React is a JavaScript library for building user interfaces with encapsulated components that manage their own state.

Vercel allows users to deploy Serverless Functions, which are essentially just blocks of code which provide a response to an HTTP request. However, these functions have a maximum execution timeout, which means that it is not possible to maintain a WebSocket connection this way. This is where Ably comes in. The client can connect to an Ably Channel and send and receive messages on it to add Realtime functionality to your app by managing your WebSocket connections for you. We'll go over how to build an app which uses realtime functionality in this walkthrough, if preferred, you can jump straight to how to use Ably with Vercel.
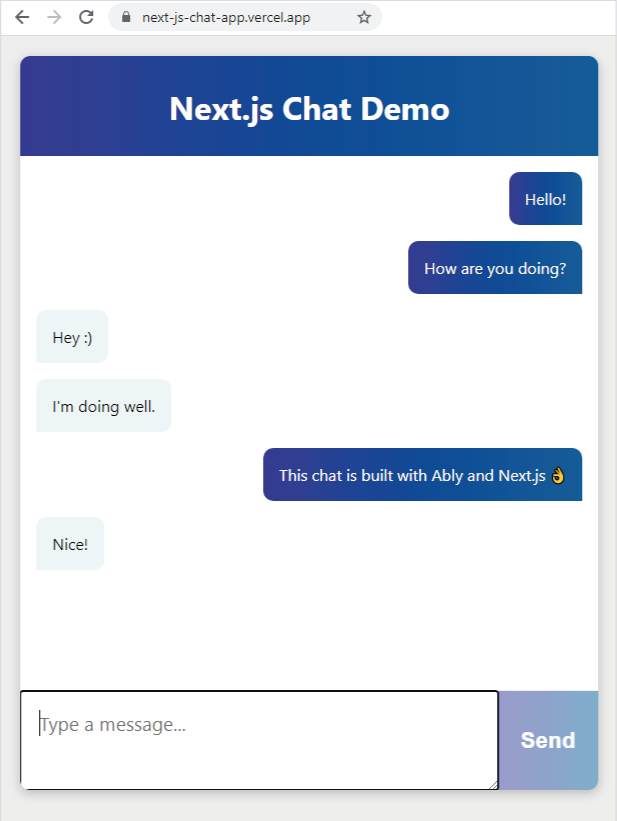
The UI of the app we'll build with this walkthrough
We'll build a realtime chat app that runs in the browser. It will be built upon the Next.js create-next-app template, it will contain a React component which will use Ably to send and receive messages. We'll also write a Next.js serverless function which will be used to connect to Ably.
In order to build this app, you will need:
- An Ably account for sending messages: Create an account with Ably for free.
- A Vercel Account for hosting on production: Create an account with Vercel for free.
- Node 12 (LTS) or greater: Install Node.
You'll need an API key from Ably to authenticate with the Ably Service. To get an API key, once you have created an Ably account:
- Visit your app dashboard and click on "Create New App".
- Give the new app a name
- Copy the Private API key once the app has been created. Keep it safe, this is how you will authenticate with the Ably service.
Vercel provides some Next.js command line tools to help us. They don't need to be installed on your system as they're executed using npx.
- In your terminal, type
npx create-next-appto create an empty Next.js app. - Create a file called
.envin the root of the directory, this is where we'll put the project's environment variables. - Add your Ably API key to the .env file:
ABLY_API_KEY=your-ably-api-key:goes-here
- Navigate to your Next.js application directory and type into the console:
npm run devThe Next.js dev server will spin up and you'll see an empty Next.JS starter app. This is what we'll build our chat app on top of.
The chat app we'll build uses Ably for pub/sub messaging between the users. Pub/Sub stands for Publish and Subscribe, and it is a popular pattern used for realtime data delivery. The app will be able to send, or publish messages over an Ably Channel. The clients that use the app will be subscribed to the channel and will be able to receive the messages. We'll build a UI to create messages to be sent, and to display messages as they are received.
Vercel Next.js apps don't run traditional "server side code", however, you can add JavaScript files to /pages/api/* and the Vercel deployment engine will treat each one as an API endpoint and manage them as serverless functions for you.
For local development, the Next.js tools run these functions in a Node server, so they work as you would expect in your local dev environment. We're going to add a Next.js / Vercel serverless function to the starter code that we created earlier to authenticate our app with Ably, and make it possible to start sending and receiving messages over the Ably service.
You'll need to install the Ably npm package (it's important you're running Ably 1.2.5+ for this app, for compatibility with Vercel).
In the terminal, in the root of your new app run:
npm install ably@1.2.5-beta.1Next, create a file called ./pages/api/createTokenRequest.js into which add the following code:
import Ably from "ably/promises";

export default async function handler(req, res) {
    const client = new Ably.Realtime(process.env.ABLY_API_KEY);
    const tokenRequestData = await client.auth.createTokenRequest({ clientId: 'ably-nextjs-demo' });
    res.status(200).json(tokenRequestData);
};
This serverless function uses the Ably SDK to create a tokenRequest with your API key. This token will be used later - it allows you to keep your "real" API key safe while using it in the Next.js app. By default, this API is configured to be available on http://localhost:3000/api/createTokenRequest
We're going to provide this URL to the Ably SDK in our client to authenticate with Ably.
The topology of our Next.js app will look like this:
├─ .env
├─ .gitignore
├─ package-lock.json
├─ package.json
├─ README.md
|
├─── components
│     ├─ AblyChatComponent.jsx
│     ├─ AblyChatComponent.module.css
│     └─ AblyReactEffect.js
|
├─── pages
│    ├─ index.js
│    │
│    └─── api
│          └─ createTokenRequest.js
│
└─── public/pages/index.jsis the home page/api/createTokenRequest.jsis our Ably token authentication API/components/AblyChatComponent.jsxis the chat component/components/AblyChatComponent.module.csscontains the styles for the chat component/components/AblyReactEffect.jsis the Ably React Hook.
Let's walk through how this application is built.
Pages in Next.js are React components, so the pages/index.js home page is the React component that contains the page layout.
This is the default page generated by create-next-app, we'll add our own component to this - an AblyChatComponent:
import Head from 'next/head'
import dynamic from 'next/dynamic'

const AblyChatComponent = dynamic(() => import('../components/AblyChatComponent'), { ssr: false });

export default function Home() {
  return (
    <div className="container">
      <Head>
        <title>Create Next App</title>
        <link rel="icon" href="https://static.ably.dev/motif-red.svg?nextjs-vercel" type="image/svg+xml" />
      </Head>

      <main>
        <h1 className="title">Next.js Chat Demo</h1>
        <AblyChatComponent />
      </main>

      <footer>
        Powered by
        <a href="https://vercel.com" target="_blank" rel="noopener noreferrer">
          <img src="/vercel.svg" alt="Vercel Logo" className="logo" />
        </a>
        and
        <a href="https://ably.com" rel="noopener noreferrer">
          <img src="/ably-logo.svg" alt="Ably Logo" className="logo ably" />
        </a>
      </footer>

      <style jsx>{`
        ...
      `}</style>

      <style jsx global>{`
        ...
      `}</style>
    </div>
  )
}
You'll notice that it doesn't look like a regular import - we're including it like this:
const AblyChatComponent = dynamic(() => import('../components/AblyChatComponent'), { ssr: false });before using it like any other react component:
<main>
  <h1 className="title">Next.js Chat Demo</h1>
  <AblyChatComponent />
</main>
This unusual include style is because the AblyChatComponent can only be run inside the user's browser. It connects using WebSockets and isn't suitable for Server Side Rendering with Vercel. By default, Next.js attempts to render everything on the server side, so by including the component using a dynamic() call, we can tell Next.js not to render this during the build process, where it would throw errors because it can't connect to the APIs that it needs to function.
The chat app logic is contained inside the AblyChatComponent.jsx component.
Start off by referencing the imports we'll need at the top of the file:
import React, { useEffect, useState } from 'react';
import { useChannel } from "./AblyReactEffect";
import styles from './AblyChatComponent.module.css';
Then we'll define the function that will be exported as a React Functional component. We need to access some HTML elements in the code so we can create variables to store their references:
const AblyChatComponent = () => {

  let inputBox = null;
  let messageEnd = null;
Next, set up the state properties that we'll use in the component:
  const [messageText, setMessageText] = useState("");
  const [receivedMessages, setMessages] = useState([]);
const messageTextIsEmpty = messageText.trim().length === 0;- messageText will be bound to textarea element where messages can be typed
- receiveMessages to the on screen chat history
- messageTextIsEmpty is used to disable the send button when the textarea is empty
Now we'll make use of the useChannel hook that we imported earlier.
useChannel is a react-hook style API for subscribing to messages from an Ably channel. You provide it with a channel name and a callback to be invoked whenever a message is received.
  const [channel, ably] = useChannel("chat-demo", (message) => {
    // Here we're computing the state that'll be drawn into the message history
    // We do that by slicing the last 199 messages from the receivedMessages buffer

    const history = receivedMessages.slice(-199);
    setMessages([...history, message]);

    // Then finally, we take the message history, and combine it with the new message
    // This means we'll always have up to 199 message + 1 new message, stored using the
    // setMessages react useState hook
  });
Next, we need to handle the UI interactions by defining a few functions.
First, there's sendChatMessage, which is responsible for publishing new messages.
It uses the Ably Channel returned by the useChannel hook, clears the input, and focuses on the textarea so that users can type more messages:
  const sendChatMessage = (messageText) => {
    channel.publish({ name: "chat-message", data: messageText });
    setMessageText("");
    inputBox.focus();
  }
Then handleFormSubmission, which is triggered when the submit button is clicked and calls sendChatMessage, along with preventing a page reload:
  const handleFormSubmission = (event) => {
    event.preventDefault();
    sendChatMessage(messageText);
  }
In addition, the handleKeyPress event is wired up to make sure that if a user presses the enter key, while there is text in the textarea, the sendChatMessage function is triggered.
  const handleKeyPress = (event) => {
    if (e.charCode !== 13 || messageTextIsEmpty) {
      return;
    }
    sendChatMessage(messageText);
    event.preventDefault();
  }
Next, we need to construct the UI elements to display the messages. To do this, we will map the received Ably messages into HTML span elements:
  const messages = receivedMessages.map((message, index) => {
    const author = message.connectionId === ably.connection.id ? "me" : "other";
    return <span key={index} className={styles.message} data-author={author}>{message.data}</span>;
  });
In order to keep the message box scrolled to the most recent message (the one on the bottom) we'll need to add an empty div element into the message container, which will then be scrolled into view whenever the components re-renders. This is the element that we'll add to the UI later:
<div ref={(element) => { messageEnd = element; }}></div>We use a useEffect hook along with scrollIntoView() to scroll the message history to the bottom whenever the component renders.
  useEffect(() => {
    messageEnd.scrollIntoView({ behaviour: "smooth" });
  });
Finally we will write the React component markup with the event handlers all bound up to onChange and onKeyPress events in JSX.
The markup itself is just a few div elements and a form with a textarea for user input.
There are two calls to the react ref function, which allows us to capture a reference to the elements when they are rendered so that we can interact with them in JavaScript.
The returned markup will look like this:
  return (
    <div className={styles.chatHolder}>
      <div className={styles.chatText}>
        {messages}
        <div ref={(element) => { messageEnd = element; }}></div> // empty element to control scroll to bottom
      </div>
      <form onSubmit={handleFormSubmission} className={styles.form}>
        <textarea
          ref={(element) => { inputBox = element; }}
          value={messageText}
          placeholder="Type a message..."
          onChange={e => setMessageText(e.target.value)}
          onKeyPress={handleKeyPress}
          className={styles.textarea}
        ></textarea>
        <button type="submit" className={styles.button} disabled={messageTextIsEmpty}>Send</button>
      </form>
    </div>
  )
}

export default AblyChatComponent;
Right at the bottom of the file, the function is exported as AblyChatComponent so that it can be referenced in the Next.js page we created at the start.
One of the trickier parts of using Ably with React Functional Components is knowing when and where to create the instance of the SDK and when and where to connect to your channel(s). You will want to avoid instancing the SDK when the component is rendered as this could make multiple connections and burn through your Ably account limits.
To make sure that the app handles component redrawing, mounting and unmounting correctly - AblyReactEffect exports a React Hook to interact with the Ably SDK.
React hooks can seem a little unusual the first time you use them. A hook is a function which:
- Executes the functionality that we'd expect
componentDidMountto run - Returns another function that will be executed by the framework where
componentDidUnmountwould be called - Performs any other behaviour it needs to
This React Hook is built upon useEffect. When referenced, it creates an instance of the Ably SDK (it does this only once) which is configured to use the URL of your Serverless function to createTokenRequest for authentication:
import Ably from "ably/promises";
import { useEffect } from 'react'

const ably = new Ably.Realtime.Promise({ authUrl: '/api/createTokenRequest' });
Instancing the Ably library outside the scope of the component will mean it is only created once and will keep your limit usage down.
We then need to create the function we're going to export - our Hook, so that we can use it in our components.
We'll call it useChannel and it will require the channel name, and a callback as arguments. Each time useChannel is called, we get the requested channel from the Ably-JS SDK and prepare the hook functions.
- onMount is the code run each time our component is rendered. Inside onMount, we will subscribe to the specified channel, triggering
callbackOnMessagewhenever a message is received. - onUnmount is the code run whenever the component is unmounted before it is re-rendered. Here we will unsubscribe from the channel, which will stop accidental multiples of connections, again saving our account limits.
- useEffectHook is a function that calls these functions correctly, returning onUnmount for React to use.
The exported Hook in AblyReactEffect.js will look like this:
export function useChannel(channelName, callbackOnMessage) {
    const channel = ably.channels.get(channelName);

    const onMount = () => {
        channel.subscribe(msg => { callbackOnMessage(msg); });
    }

    const onUnmount = () => {
        channel.unsubscribe();
    }

    const useEffectHook = () => {
        onMount();
        return () => { onUnmount(); };
    };

    useEffect(useEffectHook);

    return [channel, ably];
}
The useChannel Hook returns both the current Ably channel and the Ably SDK for the calling code to use to send messages. This hook encapsulates Ably pub/sub for React functional components in one place, so we don't need to worry about it elsewhere, and the code that uses it can just process the messages it receives.
You might have noticed when writing the chat component that Next.js has some compiler enforced conventions that dictate where you keep your CSS and how to import it.
For this app, we will create a CSS file with the same name as the .jsx file, just with the extensions .module.css. We do this to keep management of the components easier, if in the future we want to delete this component it is nice and simple to also remove its CSS. Once created, it can be imported into the component:
import styles from './AblyChatComponent.module.css';When creating a CSS class on a JSX element, we use the following syntax on the element:
className={styles.yourClassName}and the accompanying css would look like this:
.yourClassName {
  styles: gohere;
}
This app is built with CSS Grid to create the app layout, you are of course welcome to use the CSS provided with this project or to write your own or use a framework.
We're using Vercel as our development server and build pipeline.
The easiest way to deploy Next.js to production is to use the Vercel platform from the creators of Next.js. Vercel is an all-in-one platform with Global CDN supporting static & Jamstack deployment and Serverless Functions. -- The Next.js documentation
In order to deploy your new chat app to Vercel you'll need to:
- Create a GitHub account (if you don't already have one)
- Push your app to a GitHub repository
- Create a Vercel account
- Create a new Vercel app and import your app from your GitHub repository. (This will require you to authorise Vercel to use your GitHub account)
- Add your
ABLY_API_KEYas an environment variable - Watch your app deploy
- Visit the newly created URL in your browser!
There are a few ways that this example could be extended:
There is currently no chat history in this demo, you'll only see messages that come in after you join the chat. You could expand this demo by using Ably's rewind feature for up to two minutes of history for free, or with a paid account, for up to ~48 hours.
There aren't any usernames sent with the chat messages. This demo could be extended to introduce a username input box, and to add the current username to messages as they're sent.
The demo uses the randomly generated Ably client Id as a unique identifier - which is how it can detect if it is "me" or "someone else" who sent the message.
If this tutorial was helpful, or you're using Next.js and Ably in your project, we'd love to hear about it. Drop us a message on Twitter or email us at devrel@ably.io.