This BitBucket Repository contains the project for Polytechnique Montreal ELE4205 class project for team number 7. The team members are:
- Gabrielle Caron
- Samuel Narcisse

The goal of this project is to interface an Odroid-c2 board with a webcam to a computer through a TCP-IP connection.
Hardware:
- Odroid-c2 embedded microcontrollor with a pre-installed OS,in this case a Yocto image.
- Scientific Linux 7.5 Computer
- USB Logitech c270 webcam
Open CV version installed on Scientific Linux 7.5:
https://docs.opencv.org/2.4.5/
Open CV version installed on the Odroid-C2:
https://docs.opencv.org/3.1.0/
Yocto:
https://www.yoctoproject.org/
Face Recognition:
https://docs.opencv.org/3.4/da/d60/tutorial_face_main.html
Tutorial:
https://www.superdatascience.com/opencv-face-recognition/?fbclid=IwAR06Q9KKUCob0067iXzQogP6oozvgMveGPpSD-v7IscJ1Mi1DOHSWlYcrlw
The repository is divided in two subfolders, the TCP client and TCP server.
The TCPClient folder contains the source code for the executable that will run on the computer. Create a sister folder named debug, in which you will have to compile and "make" the code with the following instructions in the terminal, or the equivalent:
cmake -DCMAKE_BUILD_TYPE=Release ../src
make
The TCPServeur folder contains the source code for the executable that will run on the Odroid-c2. Create a sister folder named debug, in which you will have to compile and "make" the code with the following instructions in the terminal, or the equivalent:
bash
source /export/tmp/4205_07/opt/poky/environment-setup-aarch64-poky-linux
cmake -DCMAKE_BUILD_TYPE=Release \ -DOpenCV_DIR:STRING="/export/tmp/4205_nn/poky/build-oc2/tmp/sysroots/odroid-c2/usr/share/OpenCV" ../src
make
scp TCPServeur root@192.168.7.2:/home/root
Additional steps will be needed to configure certain GPIOs of embedded control and to set up connection.
- Verify that USB ETHERNET WIRED CONNECTION is set to OFF.
- Manually set up USB Ethernet Connection
sudo /users/Cours/ele4205/commun/scripts/ifconfig-enp0s29f7-up
- Clean known_hosts files.
gedit .ssh/known_hosts
- Connect to Odroid via ssh and set up pin configuration
ssh root@192.168.7.2
echo 228 > /sys/class/gpio/export
echo in > /sys/class/gpio/gpio228/direction
exit
- Download file "haarcascade_frontalface_alt.xml" and put it in the same folder as your client's executable.
- In the code, in the client's class.h, change the values for the path and csv file to fit your computer.
- Create a blank file named "Face_Label_DATA.csv" in the repository identified in your path.
- TCPServeur should be run first. Run command:
./TCPServeur
- Program will open a terminal window. Wait until "Ready to accept" appears in terminal window, then execute the command:
./TCPClient
Program is controlled by either interface outputs connected to board or by a hidden menu available at all time.
- Light receptor: Will stop streaming if there are bad lighting conditions or if it's covered.
- Push button: Main input to take a action, forks program to needed fonctions.
- Key a will display Resolution menu.
*Inputs: 1-160X120 2-320X240 3- 960X720 4-1280X960 -will change window size - Key b will display mode menu.
*Inputs: 1-Training(Apprentissage),2-Recognition(Reconaissance) -will fork to corresponding mode - Key Esc will exit client module and send a quit signal to server modules and close the programs.
**To use Keys, streaming window must be selected. **
**To use inputs, must click inside terminal window write input and click enter, you will have to go back after to window to see change. **
**Has to be selected first. At least two users have to be created, each having taken around 20 pictures. **
**There has to be only one face in the picture **
Responsible of detecting faces and storing them.
After clicking b and choosing mode 1, you will have a prompt to create a new user(create a new user folder with new images) or to log in into a existing user (update a existing user folder with new images)
- 0 To create a new user and folder
- Any number to to log in into existing user
- In Training Mode, any click of the pushbutton will save original picture, detected picture and resized face picture in the corresponding sub folder. It will also update the CSV file with new image path.
**Can be selected only once at least two users have been created and taken around 20 pictures in training mode. **
It will load all face sub folder and create a face trained model.
Then any click of the push-button will save ToRecon original picture, ToRecon detected picture and ToRecon resized face picture in the corresponding current folder.
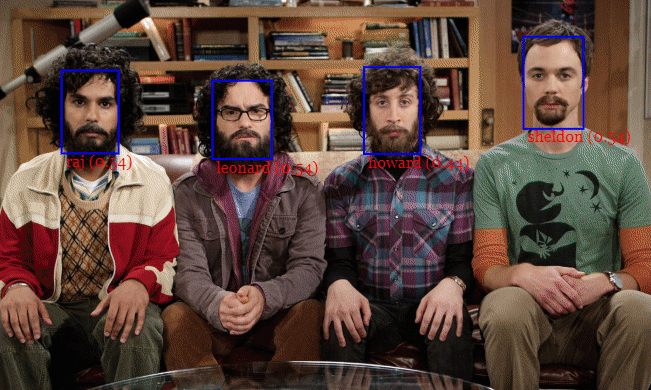
It will use recognition algorithm to compared resize face(if any) to face trained model and output prediction in format of a new picture with name written on it.
- Use Esc-Key
- Save files elsewhere and delete in succession these folders, files and file contents.
- Delete ALL generated user picture sub-folders.
- Delete ToRecon,CropResizePic and DetectedPic .png files in current folder
- Open Face_Label_Data.csv with text editor and clear all data for futur use. CTRL-A, CTRL-X,CTRL-S.
These steps are necessary because: no cleaning method has been implemented in the code as of yet and code is expecting a clean slate before each use.
To obtain the doxygen documentation, follow the steps:
- In a terminal, place yourself in the folder with your source code
- Execute the command
doxygen -g
- Execute the command
doxygen
- In the generated "html" folder, double-click on file "index.html"
Polytechnique, Richard Gourdeau, Jeremie Pilon, Yocto, OpenCV, Online tutorials.