

Import module for Magento 2 - provides commands, logs, reporting, utilities and abstractions for building imports for Magento 2 projects .
$ composer config repositories.jh-import vcs git@github.com:WeareJH/m2-module-import.git
$ composer require wearejh/m2-module-import
$ php bin/magento setup:upgrade- Creating a new import
- Report Handlers
- Triggering an import
- Viewing Import Configuration
- Viewing import logs
- Sequence detection
- Import Locking
- Archiving
- File Cleanup
An import consists of a bunch of components:
- A source - Responsible for reading the data
- A specification - Responsible for transforming and filtering the data
- A Writer - Responsible for saving the data
In this section we will create an import named price.
The first step of using the import module is to create a new module in your project to contain the import configuration
and any code you may have to write. Go ahead and create that - our convention is Vendor/Import. We will create an
example module in this documentation to help show the concepts.
We will use N98 magerun2 to do this:
$ n98 dev:module:create MyVendor ImportDelete the events.xml & crontab.xml files from the modules etc directory, we don't need those.
Define the import in your module in an imports.xml file:
In our example that would be app/code/MyVendor/Import/etc/imports.xml
<config xmlns:xsi="http://www.w3.org/2001/XMLSchema-instance" xsi:noNamespaceSchemaLocation="urn:magento:module:Jh_Import:etc/imports.xsd">
    <files name="price">
        <!-- other required config> -->
    </files>
</config>
The files key here represents the type of import. In this case a files type. Supported import types:
filesdbwebapi
You can see the supported types in the $types property of src/Import/Manager.php.
The name attribute is the unique name for your import and is how you execute it from \Jh\Import\Import\Manager. Here we named
it price.
The required configuration values for your import are:
- source
- match_files
- specification
- writer
- id_field
Optional values are:
- incoming_directory - default:
jh_import/incoming - archived_directory - default:
jh_import/archived - failed_directory - default:
jh_import/failed - archive_already_imported_files - default:
false - process_only_last_file - default:
false
The above directories will be created in the var directory of the magento instance if they do not already exist.
This should be the name of a class or a virtual type. It should point to a class which implements Jh\Import\Source\Source.
The only source type currently available is Jh\Import\Source\Csv for reading CSV files. You can customise the constructor
arguments by using a virtual type.
If this value is left unspecified it will default to: jh_import/incoming
This is where your files will be read from. This directory will be prefixed with the absolute path of the Magento installations var directory.
For example, you specify: vendor_import/incoming translates to: /var/www/magento/var/vendor_import/incoming
If this value is left unspecified it will default to: jh_import/archived
This is where your files will be moved to if they successfully import. This directory will be prefixed with the absolute path of the Magento installations var directory.
For example, you specify: vendor_import/archived translates to: /var/www/magento/var/vendor_import/archived
If this value is left unspecified it will default to: jh_import/failed
This is where your files will be moved to if they fail to import. This directory will be prefixed with the absolute path of the Magento installations var directory.
For example, you specify: vendor_import/failed translates to: /var/www/magento/var/vendor_import/failed
Here you can configure which files should be read from the directory based on their name, the values can be:
*- read all files in the directory- a regex, for example:
/[a-z]+\.csv/- read all files which have a csv extension and only contain lower case alpha chars in the name - a static name, for example
stock.csv- read only a file namedstock.csv, if it exists
This should be the name of a class or a virtual type. It should point to a class which implements Jh\Import\Specification\ImportSpecification.
This is the class which takes care of manipulating the incoming data in to a generic format. This will be explained in more detail later on.
This should be the name of a class or a virtual type. It should point to a class which implements Jh\Import\Writer\Writer.
This is the class which takes care of saving the data in to Magento. This will be explained in more detail later on.
This should be the name of a field that exists in every row of the data and is unique. This is used for logging purposes. For example it would
probably be sku for a product import.
The finished config my look like:
<config xmlns:xsi="http://www.w3.org/2001/XMLSchema-instance" xsi:noNamespaceSchemaLocation="urn:magento:module:Jh_Import:etc/imports.xsd">
    <files name="price">
        <source>Jh\Import\Source\Csv</source>
        <incoming_directory>jh_import/incoming</incoming_directory>
        <match_files>/price_\d{8}.csv/</match_files>
        <specification>MyVendor\Import\Specification\Price</specification>
        <writer>MyVendor\Import\Writer\Price</writer>
        <id_field>sku</id_field>
    </files>
</config>By enabling this option all files reported as already imported will be moved into failed_directory
instead of being left in incoming_directory.
This option enabled will process only last file from matched batch of files. Useful when you have multiple files of same content
and you want to save your processing time by importing data only from last one of them. Other matched files from batch
will be moved into failed_directory.
The name attribute is the unique name for your import and is how you execute it from \Jh\Import\Import\Manager. Here we named
it price.
The required configuration values for your import are:
- connection_name
- source
- specification
- writer
- id_field
- source_id
- select_sql
- count_sql
Name of the DB connection to use. The connection should be specified in app/etc/env.php. E.g.
'db' => [
        'table_prefix' => '',
        'connection' => [
            'default' => [
                'host' => 'db',
                'dbname' => 'docker',
                'username' => 'docker',
                'password' => 'docker',
                'model' => 'mysql4',
                'engine' => 'innodb',
                'initStatements' => 'SET NAMES utf8;',
                'active' => '1',
                'driver_options' => [
                    1014 => false
                ]
            ],
            'migration' => [
                'host' => 'db',
                'dbname' => 'migration',
                'username' => 'root',
                'password' => 'docker',
                'model' => 'mysql4',
                'engine' => 'innodb',
                'initStatements' => 'SET NAMES utf8;',
                'active' => '1',
                'driver_options' => [
                    1014 => false
                ]
            ]
        ]
    ],
    'resource' => [
        'default_setup' => [
            'connection' => 'default'
        ],
        'migration' => [
            'connection' => 'migration'
        ]
    ],
This should be the name of a class or a virtual type. It should point to a class which implements Jh\Import\Source\Source.
The core source type currently available is Jh\Import\Source\Db for reading data from a database. It can be extended
further to customise it.
This should be the name of a class or a virtual type. It should point to a class which implements Jh\Import\Specification\ImportSpecification.
This is the class which takes care of manipulating the incoming data in to a generic format. This will be explained in more detail later on.
This should be the name of a class or a virtual type. It should point to a class which implements Jh\Import\Writer\Writer.
This is the class which takes care of saving the data in to Magento. This will be explained in more detail later on.
This should be the name of a field that exists in every row of the data and is unique. This is used for logging purposes. For example it would
probably be sku for a product import.
A unique ID for the import type.
SQL query used for loading data from the DB. If you need a more advanced way of loading data, overwrite the source class.
SQL query used for counting the data to update.
==================================================================================================================
The finished config could look like:
<config xmlns:xsi="http://www.w3.org/2001/XMLSchema-instance" xsi:noNamespaceSchemaLocation="urn:magento:module:Jh_Import:etc/imports.xsd">
    <db name="customer">
        <connection_name>migration</connection_name>
        <source>Jh\Import\Source\Db</source>
        <specification>MyVendor\Import\Specification\Customer</specification>
        <writer>MyVendor\Import\Writer\Customer</writer>
        <id_field>id_customer</id_field>
        <source_id>customer_migration</source_id>
        <select_sql>SELECT * FROM ps_customer</select_sql>
        <count_sql>SELECT COUNT(1) FROM ps_customer</count_sql>
        <indexers>
            <indexer>customer_grid</indexer>
        </indexers>
    </db>
</config>The name attribute is the unique name for your import and is how you execute it from \Jh\Import\Import\Manager. Here we named
it test.
The configuration values for your import are:
- source
- specification
- writer
- id_field
- source_id
- count_request_factory
- count_response_handler
- data_request_factory
- data_request_paging_decorator
- data_request_filter_decorator
- data_request_page_decorator
- data_request_filter_decorator (optional)
- data_request_response_handler
This should be the name of a class or a virtual type. It should point to a class which implements Jh\Import\Source\Source.
The core source type currently available is Jh\Import\Source\Webapi for reading data from a database. It can be extended
further to customise it.
This should be the name of a class or a virtual type. It should point to a class which implements Jh\Import\Specification\ImportSpecification.
This is the class which takes care of manipulating the incoming data in to a generic format. This will be explained in more detail later on.
This should be the name of a class or a virtual type. It should point to a class which implements Jh\Import\Writer\Writer.
This is the class which takes care of saving the data in to Magento. This will be explained in more detail later on.
This should be the name of a field that exists in every row of the data and is unique. This is used for logging purposes. For example it would
probably be sku for a product import.
A unique ID for the import type.
This should be a class implementing Jh\Import\Source\Webapi\RequestFactoryInterface. It should return object of Psr\Http\Message\RequestInterface built
to be sent to get entities amount. This building process is encapsulated inside object, so it can be implemented inside migration module
and prevent changing abstraction by import module (open-closed principle).
This should be a class implementing Jh\Import\Source\Webapi\CountResponseHandlerInterface. It should return integer telling how many entites do we have to migrate.
The handling process is encapsulated inside object, so it can be implemented inside migration module
and prevent changing abstraction by import module. (open-closed principle)
This should be a class implementing Jh\Import\Source\Webapi\RequestFactoryInterface. It should return object of Psr\Http\Message\RequestInterface built
to be sent to get actual data. This building process is encapsulated inside object, so it can be implemented inside migration module
and prevent changing abstraction by import module (open-closed principle).
This should be a class implementing Jh\Import\Source\Webapi\DataRequest\PagingDecoratorInterface. It should return object of Psr\Http\Message\RequestInterface built
which is modified to contain paging parameters. This building process is encapsulated inside object, so it can be implemented inside migration module
and prevent changing abstraction by import module (open-closed principle).
This should be a class implementing Jh\Import\Source\Webapi\DataRequest\FilterDecoratorInterface. It should return object of Psr\Http\Message\RequestInterface built
which is modified to contain filtering parameters. This building process is encapsulated inside object, so it can be implemented inside migration module
and prevent changing abstraction by import module (open-closed principle).
This should be integer telling how many entities should be retrieved in one page from webapi.
This should be a class implementing Jh\Import\Source\Webapi\DataResponseHandlerInterface. It should return iterable, so data can be iterated and persisted into db.
The handling process is encapsulated inside object, so it can be implemented inside migration module
and prevent changing abstraction by import module. (open-closed principle).
==================================================================================================================
The finished config could look like:
<config xmlns:xsi="http://www.w3.org/2001/XMLSchema-instance" xsi:noNamespaceSchemaLocation="urn:magento:module:Jh_Import:etc/imports.xsd">
    <webapi name="test">
      <source>Jh\Import\Source\Webapi</source>
      <source_id>test_migration</source_id>
      <specification>MyVendor\Import\Specification\Test</specification>
      <writer>MyVendor\Import\Writer\Test</writer>
      <id_field>id</id_field>
      <count_request_factory>MyVendor\Import\Specification\Request\CountRequestFactory</count_request_factory>
      <count_response_handler>MyVendor\Import\Specification\Response\CountResponseHandler</count_response_handler>
      <data_request_factory>MyVendor\Import\Specification\Request\DataRequestFactory</data_request_factory>
      <data_request_paging_decorator>MyVendor\Import\Specification\Request\DataRequest\PagingDecorator</data_request_paging_decorator>
      <data_request_filter_decorator>MyVendor\Import\Specification\Request\DataRequest\FilterDecorator</data_request_filter_decorator>
      <data_request_page_size>250</data_request_page_size>
      <data_response_handler>MyVendor\Import\Specification\Response\DataResponseHandler</data_response_handler>
    </webapi>
</config>
Example module can be found in examples.
Create the class from the configuration we just mentioned: MyVendor\Import\Specification\Price. This class should implement
Jh\Import\Specification\ImportSpecification.
There is one method which should be fulfilled as part of the contract: public function configure(Importer $import);
This method allows you to configure the importer by adding transformers and filters. A transformer and a filter are simply
PHP callables.
A transformer is used to rename columns, manipulate data and organise it. For example if the sku column comes in as Product_Number
from the CSV file (Product_Number would be the column header in the CSV), you might want to rename it to sku so your writer accepts
generic data. You could do this like:
<?php
class Price implements \Jh\Import\Specification\ImportSpecification
{
    public function configure(\Jh\Import\Import\Importer $importer)
    {
        $importer->transform(function (\Jh\Import\Import\Record $record, \Jh\Import\Report\ReportItem $report) {
            $record->renameColumn('Product_Number', 'sku');
        });
    }
}
This transformer function will be ran on every row read from the source. The importer will convert that row from the source
in to a Record object. The Record object has many methods on it for manipulating data, some are listed below:
setColumnValue(string $columnName, $value): voidunset(string $columnName): voidunsetMany(string ...$columnNames): voidonly(string ...$columnNames): voidgetColumnValue(string $columnName, $default = null, $dataType = null): mixedgetColumnValueAndUnset(string $columnName, $default = null, $dataType = null): mixedcolumnExists(string $columnName): booltransform(string $column, callable $callable): voidrenameColumn(string $columnFrom, string $columnTo): voidmoveColumnToArray(string $columnFrom, string $columnTo, string $key = null): voidmoveMultipleColumnsToArray(array $columns, string $columnTo): void- `addValueToArray(string $column, string $key, $value): void
- `addValueToArray(string $column, string $key, $value): void
transform(string $column, callable $callable): void is particularly interesting as it can be passed any
PHP callable, so also an invokable class which can change the data. See src/Transformer for
examples of transformers. The ProductStatusTransformer maps an enabled or disabled string value in the import to
the correct Magento constants.
Note You also have access to the Report object here where you can add errors and debug information. You might add a debug message
if a particular product status was not recognised.
Note You can add as many transformers as you need.
Filters allow you to ignore some rows of data from the source. Ff the filter returns false for a particular record, then it will be discarded. See below where we ignore something with a price of over 100, completely arbitrary of course.
<?php
class Price implements \Jh\Import\Specification\ImportSpecification
{
    public function configure(\Jh\Import\Import\Importer $importer)
    {
        $importer->filter(function (\Jh\Import\Import\Record $record, \Jh\Import\Report\ReportItem $report) {
            return $record->getColumnValue('price') <= 100;
        });
    }
}
See src/Filter/SkipNonExistingProducts.php for an example of a filter which skips rows which reference sku's which do not exist in the system.
You would add this filter like this:
<?php
class Price implements \Jh\Import\Specification\ImportSpecification
{
    public function configure(\Jh\Import\Import\Importer $importer)
    {
        //using an injected object manager to create the filter
        $importer->filter($this->objectManager->get(\Jh\Import\Filter\SkipNonExistingProducts::class));
        //or you could just inject the filter
        $importer->filter($this->skipExistingProductsFilter);
    }
}
Note You can add as many filters as you need.
Create the class from the configuration we mentioned in the defining configuration section: MyVendor\Import\Writer\Price. This class should implement
Jh\Import\Writer\Writer. The writer is responsible for saving the data in to Magento, it could be using a model repository, resource model
or directly using the db adapter (if performance is a concern). The writer is passed each record from the source (after it has been transformed and filtered)
and you must save it. A very basic price writer might look like:
<?php

class Price implements \Jh\Import\Writer\Writer
{

    private $productRepository;

    public function __construct(ProductRepositoryInterface $productRepository)
    {
        $this->productRepository = $productRepository;
    }

    public function prepare(\Jh\Import\Source\Source $source)
    {
        //use this method to do any preparation you might need for the writing
        //for example loading config, data from other tables, etc.
    }

    public function write(\Jh\Import\Import\Record $record, \Jh\Import\Report\ReportItem $reportItem)
    {
        $price = $record->getColumnValue('price');
        $sku   = $record->getColumnValue('sku');

        $product = $this->productRepository->get($sku);
        $product->setPrice($price);

        $this->productRepository->save($product);
    }

    public function finish(\Jh\Import\Source\Source $source) : Jh\Import\Import\Result
    {
        return new Result([]);
    }
}
Note It is your responsibility in the writer to catch any exceptions and deal with any errors which may happen. You
should log any errors to the $reportItem object.
Note The product repository is extremely slow to load and save so I would not advise to use it. For the product import I used the resource model, but again, loading any saving each product is going to take an extremely long time. It will be necessary to investigate whether just one attribute can be saved on a product - and maybe it is not necessary to even load the product first.
Usually whenever you save anything in Magento 2 - it will run the required indexers for each save performed for that entity. This is a slow a costly
process. We can batch reindex at the end instead, by returning a result object from finish containing all the ids which should be reindexed. The indexers
which are indexed with these id's are specified by config:
<config xmlns:xsi="http://www.w3.org/2001/XMLSchema-instance" xsi:noNamespaceSchemaLocation="urn:magento:module:Jh_Import:etc/imports.xsd">
    <files name="price">
        <source>Jh\Import\Source\Csv</source>
        <incoming_directory>jh_import/incoming</source>
        <match_files>/price_\d{8}.csv/</source>
        <specification>MyVendor\Import\Specification\Price</specification>
        <writer>MyVendor\Import\Writer\Price</specification>
        <id_field>sku</id_field>
        <indexers>
            <indexer>catalog_product_price</indexer>
            <indexer>catalog_product_attribute</indexer>
            <indexer>catalog_product_category</indexer>
            <indexer>catalog_product_flat</indexer>
            <indexer>catalogsearch_fulltext</indexer>
        </indexers>
    </files>
</config>
Note the additional indexers key above. To find which indexers are triggered for the save of your entity, it will be necessary to debug
through the saving process and look through any plugins and events which may be dispatched along the process. catalog_product_price is the
indexer id and can be found on the indexer class, for example, the constant: \Magento\Catalog\Model\Indexer\Product\Price\Processor::INDEXER_ID.
By specifying these indexers in the config, at the start of the import, the importer will disable those indexers. Then if you return a Result object
from the finish method of your writer with some id's in it, the importer will run those id's through all the indexers you specified.
You can do that by recording the id of the entity you saved every time, for example you could amend the writer like so:
<?php

class Price implements \Jh\Import\Writer\Writer
{
    private $productRepository;
    private $savedProductIds = [];

    public function __construct(ProductRepositoryInterface $productRepository)
    {
        $this->productRepository = $productRepository;
    }

    public function prepare(\Jh\Import\Source\Source $source)
    {
        $this->savedProductIds = [];
        //use this method to do any preparation you might need for the writing
        //for example loading config, data from other tables, etc.
    }

    public function write(\Jh\Import\Import\Record $record, \Jh\Import\Report\ReportItem $reportItem)
    {
        $price = $record->getColumnValue('price');
        $sku   = $record->getColumnValue('sku');

        $product = $this->productRepository->get($sku);
        $product->setPrice($price);

        $this->productRepository->save($product);
        $this->savedProductIds[] = $product->getId();
    }

    public function finish(\Jh\Import\Source\Source $source) : \Jh\Import\Import\Result
    {
        return new \Jh\Import\Import\Result($this->savedProductIds);
    }
}All import types options can have their default values configured through app/etc/config.php or app/etc/env.php.
    'system' => [
        'default' => [
            ...
            'jh_import' => [
                'default' => [
                    'files' => [
                        'source' => \Jh\Import\Source\Csv::class,
                        'archive_date_format' => 'YmdHis',
                        'directory_permissions' => 0755,
                    ],
                    'db' => [
                        'connection_name' => 'default',
                    ],
                ]
            ],
            ...
        ],
        ...
    ],
    ...
Report handlers deal with debug information and errors that happen during the import process. By default the only report handler added to the import process is the database handler. This logs all messages to database tables which can be viewed in the admin. Another report handler is added automatically based on the environment. If the magento instance is in developer mode or the import is manually triggered from the CLI the console handler is added. This logs the messages directly to the CLI.
This section details the existing report handlers and how to use them. It also details how to create your own report handlers.
The following handlers are bundled with the library:
- Jh\Import\Report\Handler\DatabaseHandler
- Jh\Import\Report\Handler\ConsoleHandler
- Jh\Import\Report\Handler\EmailHandler
To use an additional report handler, you just add the class name or the name of a virtual type to the import configuration:
<config xmlns:xsi="http://www.w3.org/2001/XMLSchema-instance" xsi:noNamespaceSchemaLocation="urn:magento:module:Jh_Import:etc/imports.xsd">
    <files name="price">
        <source>Jh\Import\Source\Csv</source>
        <incoming_directory>jh_import/incoming</source>
        <match_files>/price_\d{8}.csv/</source>
        <specification>MyVendor\Import\Specification\Price</specification>
        <writer>MyVendor\Import\Writer\Price</specification>
        <id_field>sku</id_field>
        <report_handlers>
            <report_handler>Jh\Import\Report\Handler\EmailHandler</report_handler>
            <report_handler>my_report_handler</report_handler>
        </report_handlers>
    </files>
</config>This handler is always added to the import.
This handler is automatically added based on the magento mode. It also automatically added if the import is triggered manually from the CLI.
The mail handler will send an e-mail at the end of the import, if any messages/errors occur. Before sending the e-mail, the e-mail handler will pass the emails to strategy which can filter/organise the logs.
A strategy is an instance of \Jh\Import\Report\Handler\Email\Strategy\EmailHandlerStrategy and the default is \Jh\Import\Report\Handler\Email\Strategy\FingersCrossedMax
The provided strategies are as follows:
\Jh\Import\Report\Handler\Email\Strategy\FingersCrossed- Send all logs after a log of a given severity is hit. The minimum severity is provided as a constructor arg\Jh\Import\Report\Handler\Email\Strategy\FingersCrossedMax- Same as the previous one with a maximum number of logs. Severity and max provided as constructor args\Jh\Import\Report\Handler\Email\Strategy\All- Forwards every single messages regardless of severity\Jh\Import\Report\Handler\Email\Strategy\AboveLevelWithContext- Sends all logs over a given severity with the previous and next 5 logs regardless of severity to provide context
To use a different strategy globally for all imports define a preference for \Jh\Import\Report\Handler\Email\Strategy\EmailHandlerStrategy in your import module. You can use virtual types to configure the
various arguments of the strategies.
Or to scope it to a particular import, when defining your email handler virtual type, specify your strategy virtual type there.
To configure the mail handler, you need to create a virtual type which specifies the constructor arguments:
<!-- in a di.xml file -->
<config xmlns:xsi="http://www.w3.org/2001/XMLSchema-instance" xsi:noNamespaceSchemaLocation="urn:magento:framework:ObjectManager/etc/config.xsd">
    <virtualType name="my_email_handler" type="Jh\Import\Report\Handler\EmailHandler">
        <arguments>
            <argument name="recipients" xsi:type="array">
                <item name="aydin" xsi:type="string">aydin@wearejh.com</item>
            </argument>
            <argument name="fromAddress" xsi:type="string">import@wearejh.com</argument>
            <argument name="fromName" xsi:type="string">JH Import </argument>
        </arguments>
    </virtualType>
</config>
<!-- uses the default strategy -->
To use a different strategy globally:
<!-- in a di.xml file -->
<config xmlns:xsi="http://www.w3.org/2001/XMLSchema-instance" xsi:noNamespaceSchemaLocation="urn:magento:framework:ObjectManager/etc/config.xsd">
    <preference for="Jh\Import\Report\Handler\Email\Strategy\EmailHandlerStrategy" type="Jh\Import\Report\Handler\Email\Strategy\All" />
</config>
<!-- Sets all instances of Jh\Import\Report\Handler\EmailHandler to use `All` strategy by default -->
To use a different strategy for one import (or whichever use this email handler):
<!-- in a di.xml file -->
<config xmlns:xsi="http://www.w3.org/2001/XMLSchema-instance" xsi:noNamespaceSchemaLocation="urn:magento:framework:ObjectManager/etc/config.xsd">
    <virtualType name="my_email_handler" type="Jh\Import\Report\Handler\EmailHandler">
        <arguments>
            <argument name="recipients" xsi:type="array">
                <item name="aydin" xsi:type="string">aydin@wearejh.com</item>
            </argument>
            <argument name="fromAddress" xsi:type="string">import@wearejh.com</argument>
            <argument name="fromName" xsi:type="string">JH Import </argument>
            <argument name="emailHandlerStrategy" xsi:type="object">my_email_handler_strategy</argument>
        </arguments>
    </virtualType>
    <virtualType name="my_email_handler_strategy" type="Jh\Import\Report\Handler\Email\Strategy\FingersCrossedMax">
        <arguments>
            <argument name="logLevel" xsi:type="const">Jh\Import\LogLevel::CRITICAL</argument>
            <argument name="maxMessages" xsi:type="number">500</argument>
        </arguments>
    </virtualType>
</config>
<!-- Sets email handler `my_email_handler` to use the strategy defined as `my_email_handler_strategy` -->
You would then use the name of this virtual type my_email_handler and add it to the report_handlers config of your import.
You may want to send messages to a third party logging system. In order to do that you just need to implement the interface
Jh\Import\Report\Handler\Handler. See src/Report/Handler for the existing implementations.
If your handler is fairly generic, consider pull requesting it to this repository. If it is project specific, keep it in the project repository. Using your custom report handler in an import is the same as the bundled handlers. Simply reference the class name or a virtual type referencing the class name in the import configuration.
After an import is defined it can be retrieved from the import manager which is an instance of \Jh\Import\Import\Manager
So anywhere you have an instance of \Jh\Import\Import\Manager you can execute an import by its name.
For example:
<?php

$objectManager->get(Jh\Import\Import\Manager::class)->executeImportByName($myImportName);
Where $myImportName is the name given to the import in app/code/MyVendor/Import/etc/imports.xml. In the case of our example
the import name would be price.
You may want to execute an import on a regular basis and for this you will want to create a cron job. Simply create a
cron job that is injected with Jh\Import\Import\Manager and executes the correct import. Set the cron schedule via
configuration. An example cron class might be:
<?php

namespace MyVendor\Import\Cron;

use Jh\Import\Import\Manager;

class Price
{

    /**
     * @var Manager
     */
    private $importManager;

    public function __construct(Manager $importManager)
    {
        $this->importManager = $importManager;
    }

    public function execute()
    {
        $this->importManager->executeImportByName('price');
    }
}
The cron is just a dumb object, the Import Manager does the real work.
If you create a cron for your import you should add the cron job name and the group (the one you specify in crontab.xml) to your import configuration defined in app/code/MyVendor/Import/etc/imports.xml. This will allow the import admin to display details about your cron configuration. See below for an example configuration:
<config xmlns:xsi="http://www.w3.org/2001/XMLSchema-instance" xsi:noNamespaceSchemaLocation="urn:magento:module:Jh_Import:etc/imports.xsd">
    <files name="price">
        <source>Jh\Import\Source\Csv</source>
        <incoming_directory>jh_import/incoming</source>
        <match_files>/price_\d{8}.csv/</source>
        <specification>MyVendor\Import\Specification\Price</specification>
        <writer>MyVendor\Import\Writer\Price</specification>
        <id_field>sku</id_field>
        <cron>vendor_import_product</cron>
        <cron_group>default</cron_group>
    </files>
</config>
Where vendor_import_product is the cron job code specified in crontab.xml, for example:
<?xml version="1.0"?>
<config xmlns:xsi="http://www.w3.org/2001/XMLSchema-instance" xsi:noNamespaceSchemaLocation="urn:magento:module:Magento_Cron:etc/crontab.xsd">
    <group id="default">
        <job name="vendor_import_product" instance="Vendor\Import\Cron\Product" method="execute">
            <schedule>*/5 * * * *</schedule>
        </job>
    </group>
</config>The import module provides a console command which allows to manually run an import, useful for testing and on-demand imports. To use it simply run
php bin/magento jh-import:run <import-name> substituting for the name of the import you want to run defined in app/code/MyVendor/Import/etc/imports.xml. Eg: `price
.
You will get real time progress updates and live scrolling log including eta's and memory usage.
For reference the console command exists here: src/Command/RunImportCommand.php.
The import files should be placed in the folders specified in app/code/MyVendor/Import/etc/imports.xml for your import.
The match_files config can support a regex, * (for everything in the dir) or a single file name for the files to process. If using a regex it should start and end with /.
See src/Type/Files.php for how the match_files config is parsed.
For example on a client project we use the regex /RDrive_Export_\d{8}.txt/ to look for files. So it will pick up:
RDrive_Export_13022017.txtRDrive_Export_05042017.txt
So before you run an import, you will need to make sure the file name matches the configuration file and it is placed in the correct folder.
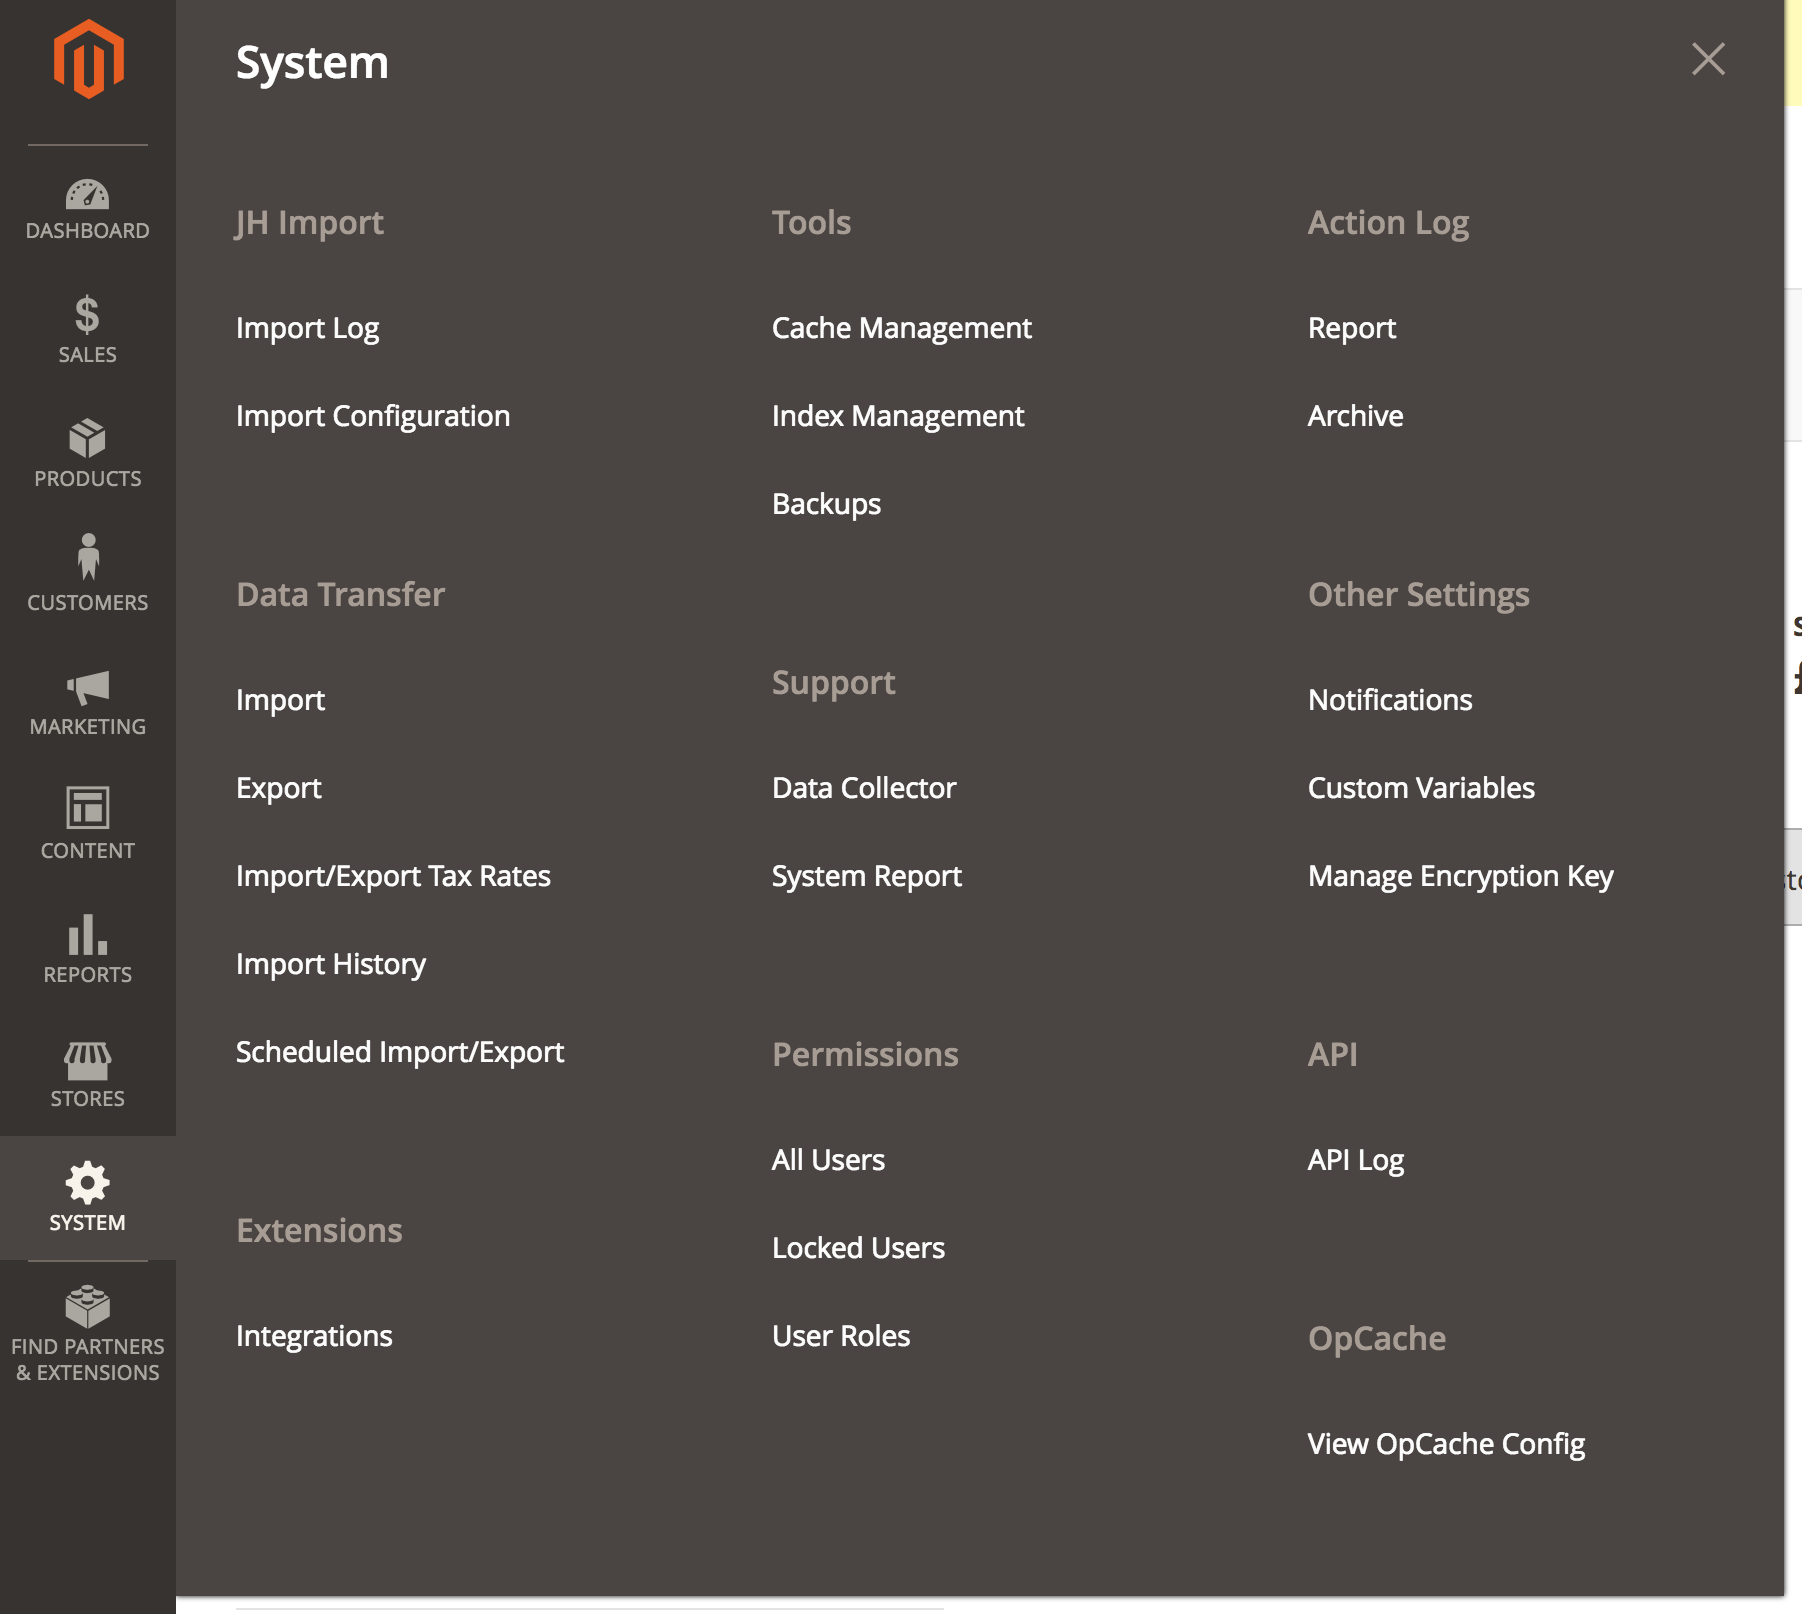
Import configuration can be viewed in the admin area. All the information specified in imports.xml and more will be displayed there. Simply navigate to: Admin -> System -> JH Import -> Import Configuration.
You will first be presented with a list of the configured imports in your system, loaded from your imports.xml file. There will be a summary of some of the information in the table. Click the Info link on the import you want to view.

After clicking the link you will be presented with a page which details the particular import, like the following:

From here you can view the name, type, indexers which will be refreshed on import completion and the extra report handlers used. You can see the directories and the files within them. You can also see the file match pattern.
If you have specified a cron code for your import then the cron expression will also be shown here, with a link to a human readable decoded version, helpful for a client or PM to know when the import runs.
You will also see a selection of files listed in the import folders. For the archived and failed folders you will see the last 15 files sorted by their changed time, eg when they were moved to that folder. For the incoming folder you will see all files present.
On the right-hand side you will see all the files currently in the incoming folder. These files are waiting to be processed. However, some of them will be ignored based on the match_files configuration. This sometimes causes confusion with clients when they incorrectly named their files wrong. From this screen they can see which files will and will not be processed, a green tick indicates that the file name matches the match_files directive and a red cross indicates that it does not. All files with a red cross will not be processed by this import.
Note If multiple imports share the same incoming folder, you might see that some imports show they don't match a file that another import does, this is to be expected as different imports can have different match_files values.
Any file from any of the folders can be download and viewed, simply click the file name.
Any file from any of the folders can be deleted on the server, simply click the trash can icon next to the file name.
Import logs can be viewed in the admin area. Simply navigate to: Admin -> System -> JH Import ->Import Log.
The listing will show the previous imports. Filter by import type and date to find the import you wish to view the logs for, then select
View Logs. The view is split into two listings:
Issues which occurred at the item level, missing images, incorrect data etc. You should also find a reference to the line number which the error occurred on and also the
primary key of the row so you can search the source for it. Note the line number may not always be completely accurate, it is an estimation. The primary key field is defined in app/code/MyVendor/Import/etc/imports.xml
for each import.
Issues which occurred at the import level, for example: duplicate source detected, importer already running etc.
You can also get a summary of the logs on the CLI. Simply run the following command:
$ php bin/magento jh-import:view-logs <import-name>Substituting for the name of the import you want to run defined in app/code/MyVendor/Import/etc/imports.xml. Eg: price.
There is an optional second parameter to limit the number of log entries displayed, eg:
$ php bin/magento import:view-logs price 20You will be presented with a table describing all the imports with the import name you entered, from here you must enter the ID of the import you want to view the logs for.
The importer has sequence detection built in - in that you cannot import the same source twice. For example if your import uses the csv source, the file will be hashed and stored. If you attempt to import the same file again the import will fail.
You can force running the import again by deleting the logs and history. Use the following command to remove the log entries for the last import of a given name:
$ php bin/magento import:clear-last <import-name>When an import is running it will be locked. This prevents the same import running again while the first has not finished. This is useful in the case that you need files to be imported sequentially but the first is taking a longer time than expected and the second is due to start. The locking mechanism will cause the new import to be skipped until the first is finished.
Import locks are stored in the table jh_import_lock. If for some reason a lock is not released you can manually release it like so:
$ php bin/magento import:unlock <import-name>After an import source has finished being processed it is passed to an archiver. Each source type is mapped to it's own archiver. See src/Archiver/Factory.php for the mappings.
Depending on whether the import is deemed successful or not it is moved to an archived folder or a failed folder respectively. These folders come from your import configuration at app/code/MyVendor/Import/etc/imports.xml.
If the folders are not specified in the config then the defaults will be used: jh_import/incoming, jh_import/archived & jh_import/failed. All these folders will be created inside the Magento var folder.
The file name will be changed to include the current timestamp (time of moving) to prevent race conditions.
During the process of importing through the various components - a report object is passed around so the source/transformers/filters and writers can
add debug information and errors. The report object is an instance of \Jh\Import\Report\Report - see: src/Report/Report.php.
Entries can be added with any of the Log Levels defined in src/LogLevel.php. If you see the $failedLogLevels property in src/Report/Report.php
you will see the error levels which it regards as failures. So any message added to the report with a level which exists in the $failedLogLevels array will cause the import to be failed.
The archived & failed directories will soon start to contain many files that take up a lot of space. In order for this to not get out of hand we offer
two strategies for keeping the file numbers down. They are both opt-in so they will need to be enabled in your import configuration.
This cron job runs at 1AM every sunday. For each import that has it enabled it will scan each of the failed and archived directories looking for files older than 3 days. It will zip
these files together and delete the original files. If there are no files older than 3 days in either of the folders then no zip will be created. A zip will be created in each of the folders
name like archived-d-m-Y-H-i.zip where d-m-Y-H-i will be substituted with the date/time of the zip creation.
To enable, set archive_old_files to 1 in your app/code/MyVendor/Import/etc/imports.xml file, like so:
<config xmlns:xsi="http://www.w3.org/2001/XMLSchema-instance" xsi:noNamespaceSchemaLocation="urn:magento:module:Jh_Import:etc/imports.xsd">
    <files name="price">
        <source>Jh\Import\Source\Csv</source>
        <incoming_directory>jh_import/incoming</source>
        <match_files>/price_\d{8}.csv/</source>
        <specification>MyVendor\Import\Specification\Price</specification>
        <writer>MyVendor\Import\Writer\Price</specification>
        <id_field>sku</id_field>
        <cron>vendor_import_product</cron>
        <archive_old_files>1</archive_old_files>
    </files>
</config>This cron job runs at 1AM every day. For each import that has it enabled it will scan each of the failed and archived directories looking for files older than 2 weeks (14 days)/ It will delete all of those files.
To enable, set delete_old_files to 1 in your app/code/MyVendor/Import/etc/imports.xml file, like so:
<config xmlns:xsi="http://www.w3.org/2001/XMLSchema-instance" xsi:noNamespaceSchemaLocation="urn:magento:module:Jh_Import:etc/imports.xsd">
    <files name="price">
        <source>Jh\Import\Source\Csv</source>
        <incoming_directory>jh_import/incoming</source>
        <match_files>/price_\d{8}.csv/</source>
        <specification>MyVendor\Import\Specification\Price</specification>
        <writer>MyVendor\Import\Writer\Price</specification>
        <id_field>sku</id_field>
        <cron>vendor_import_product</cron>
        <delete_old_files>1</archive_old_files>
    </files>
</config>