

MineCloud is an on-demand multiplayer server hosting solution based on AWS CDK (Cloud Development Kit) that allows users to set up an almost free on-demand game server for a Discord community in just a few minutes.
MineCloud supports the following games out of the box:
Don’t see your favorite games? Consider contributing to the list by following the Create and publish your own MineCloud Configuration Packages guides!

Enjoy your hassle-free server with your friends on Discord at almost no cost!
- Discord Bot - start, stop, and backup the server with Discord commands (The server IP address will be sent to the Discord channel after start)
- Auto shutdown and backup when no one is online
- Support varieties of games out of the box
- Easy to setup - we do our best to make the process as simple as possible :)
- Almost free (≈60 cents for 20 hr play/month - with a 2 CPUs & 8GB RAM server)
- Fully customizable - install whatever mods you like
- No maintenance cost - don't have time to play? Just leave it there! It cost almost nothing
- Able to support new games by creating and publishing Configuration Packages
mc_start: Start the server and send the IP address to the Discord channelmc_stop: Stop the servermc_restart: Restart the server processmc_backup: Pause the server and create a backupmc_backup_download: Get the download link of the latest backup
with 20 hrs play / month
- Lambda: Free tier
- S3: 5GB free tier for first 12 months, $0.03/GB after that (default max backup count is 3)
- Data Transfer: Free tier, unless total data transfer exceeds 100GB
- EC2: 0.035 (
t2.largespot price) * 20 (hr) ≈ $0.7/month - Total: ≈ $0.7/month
Please refer to Spot Instances Pricing and S3 Pricing for more information.
 For more details, please check out the wiki page.
Interested in MineCloud? Join our Discord Server!
If you prefer, we have a step-by-step video tutorial ↓
- A Discord account :)
- Node.js 18 (or above) - If haven't, go to https://nodejs.org to download and install the latest version
- Type
node --versionin the terminal to confirm Node is properly set up. You should see something like this:v18.xx.x
- Type
- An AWS account and AWS CLI
- If haven't already, go to https://aws.amazon.com/ to register an AWS account
- Download and install AWS CLI from here
- Type
aws --versionin the terminal to confirm AWS CLI is properly set up. Something like this should show up:aws-cli/2.10.0 Python/3.11.2 Windows/10 exe/AMD64 prompt/off
- Type
- Setup AWS CLI credentials:
- Login to your AWS account, click the account name at the top-right corner and click "Security credentials". Go to the "Access keys" section and create an access key. Notes down
Access keyandSecret access key

- Login to your AWS account, click the account name at the top-right corner and click "Security credentials". Go to the "Access keys" section and create an access key. Notes down
- In the terminal, type:
When prompted, enter the
aws configureAccess keyandSecret access keyyou got from the last step (and optionally choose the "default AWS region" and "output format") - Once done, type
aws sts get-caller-identityin the terminal to confirm the AWS CLI credentials are set up correctly. Something like this should show up:{ "UserId": "1234567890", "Account": "1234567890", "Arn": "arn:aws:iam::1234567890:xxx" } - Prerequisites done, now start the fun part :)

- Pick a Configuration Package from your desired game. Next to the package you will see the corresponding MineCloud version (e.g.
MineCloud x.x.x), download the corresponding version from the MineCloud release page and unzip it. - Open terminal in the MineCloud project directory:
- Install Node dependencies:
npm install - Copy and paste the downloaded Configuration Package (e.g.
"1.19.4 Vanilla.zip") into the/minecloud_configsfolder. - Install Configuration Package:
npm run install-minecloud-config-pack- The following message should be printed:
Successfully installed <Configuration Package Name> configuration package.
- The following message should be printed:
- Install Node dependencies:
- Open
MineCloud-Service-Info.tsand fill in the following fields:AWS_ACCOUNT_ID: Click the account name at the top-right corner of your AWS console and copy theAccount IDAWS_REGION: Pick a region that's closet to you. Some example values are:us-west-2,ap-northeast-1oreu-west-2DISCORD_APP_IDandDISCORD_PUBLIC_KEY: Go to Discord Developer Portal and click "New Application" to create a new Discord APP. On the "General Information" page, you will find the App Id and Public Key.

DISCORD_BOT_TOKEN: Go to the "Bot" tab, reset and copy the token- This is the Discord BOT that will handle our commands. If there's no BOT shown, click the "Add Bot" button to create a one

You can optionally setup the BOT avatar
- This is the Discord BOT that will handle our commands. If there's no BOT shown, click the "Add Bot" button to create a one
DISCORD_CHANNEL_WEB_HOOK:- Open regular Discord, go to the Discord server you want to add MineCloud to, choose a text channel, and click "Edit Channel".
- Go to "Integrations" => "Webhooks", click "New Webhook" to create a new Webhook then copy it.
- This text channel is where our VM server instance will send updates to

You can also optionally set up the BOT avatar here
- Deploy MineCloud
- (Optional) Customize Deployment
- Common customizable options (e.g. VM type, disk size...etc) can be found in
minecloud_configs\MineCloud-Configs.ts - Follow the "Custom deployment" section on the Configuration Package's home page for games-specific customizations
- Common customizable options (e.g. VM type, disk size...etc) can be found in
- Open the terminal in the MineCloud folder and enter
npx cdk listto make sure the build pass. You should see the stack name being printed:<Stack Name> - Bootstrap your AWS account by running
npx cdk bootstrap aws://<AWS_ACCOUNT_ID>/<AWS_REGION> - Before deploying, read through the End User License Agreement for the game (ex: Minecraft EULA, Factorio EULA)
- Enter
npx cdk deployto deploy the stack. - Sit back and relax, this will take like 5~10 minutes ☕.
- When you see a "The server instance is ready" message shown up in the Discord channel, this means your game server is almost ready to connect :)
- (Optional) Customize Deployment
- Setup BOT for your Discord server
- After MineCloud is deployed, go to your AWS CloudFormation page (make sure to select the right AWS region)
- Click on the deployed stack, go to "Outputs" and copy the value of "Discord Interaction End Point Url"

- Go back to your Discord Developer Portal, select the APP created, and paste the URL into the "INTERACTIONS ENDPOINT URL" field.

- Go to "OAuth2" => "URL Generator", select "application.commands" and click "Copy"

- Open the copied URL (either in Discord or the browser) and add the BOT to your Discord server.
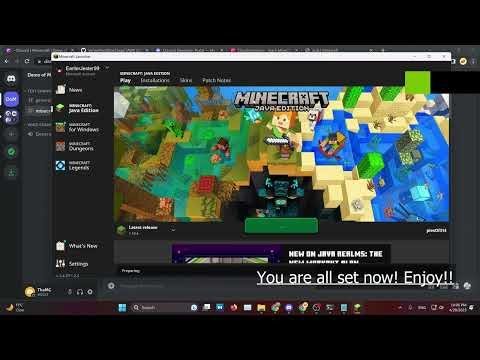
- You are all set now - Type any command (ex:
/mc_restart) in the Discord text channel to give it a try🎉!


If you have deployed MineCloud more than once, THERE MIGHT BE DANGLING SPOT INSTANCE REQUESTS THAT WILL CONSTANTLY CHARGE YOU. MAKE SURE TO CHECK YOUR EC2 SPOT REQUESTS TAB AND CANCEL THE DANGLING SPOT REQUEST IF THERE'S ANY!!
After Deployment, the server can be managed by SSH terminals and SFTP clients.
MineCloud's working directory is /opt/minecloud and the game server folder is located at /opt/minecloud/server.
Different Configuration Packages may have different file-saving locations, please refer to the Configuration Package's homepage for more details.
The server can be connected via SSH, the easiest way to do it is by using the "Connect" button at the top-right of the EC2 instance page on the AWS console.
For useful commands, please check out the Useful Linux Commands section on the Wiki.
The game server is running in a Screen session. To interact with the game server:
- Type
sudo screen -lsto list out the screen session, and typesudo screen -rto enter the session - When done, use
Ctrl-a Ctrl-dto exit the session.
To manually start/stop the game server:
- Pause the MineCloud service first:
sudo systemctl stop minecloud.service - Go to the server directory with:
cd /opt/minecloud/server, - Manually start the game server:
sudo ./start_server.sh - Manually stop the game server:
sudo ./stop_server.sh - Once done, Resume the MineCloud service:
sudo systemctl start minecloud.service
Usually, we will want to do this to make sure the server can start up correctly after we've made changes to the server files.
As long as ./start_server.sh and ./start_server.sh function properly, MineCloud service can start/stop the game server when the VM start and stop.
To make changes to the server files, connect to your EC2 instance with an SFTP client (ex: WinSCP).
- Download and install WinSCP
- Install PuTTY (which should come with
PuTTY Key Generator) - Setup key pair:
- Open
PuTTY Key Generatorand click "Generate". When done, you should see your public key in the "Public key for pasting into OpenSSH authorized_keys" field - Turn on your EC2 instance, connect to the instance terminal via the AWS web console
- Type
sudo nano .ssh/authorized_keysto edit. Copy and paste in the public key from the "Public key for pasting into OpenSSH authorized_keys" field as a new line andctrl+xto save the file. - In
PuTTY Key Generator, click "Save private key" to save your private key. - Your key pair is ready now!
You can also use this key to SSH into your server with PuTTY client.
- Open
- Before connecting, you will want to change the files' owner first. To do so:
- In the EC2 terminal launched in previous steps. Run
sudo suto become root user, and runchown -R ec2-user:ec2-user /opt/minecloud/serverto change the owner of the server files to our WinSCP login user. - This is a workaround for our current user permission setup. We will further address this in future releases.
- In the EC2 terminal launched in previous steps. Run
- In the EC2 terminal, run
sudo systemctl stop minecloud.serviceto pause the MineCloud system service - Open WinSCP, paste in the server IP, click "Advanced" => "SSH/Authentication" and select the private key.
- Save and click "Login" to connect. Input "ec2-user" for the user name when prompted.
- You are all set now! Navigate to
/opt/minecloud/serverand start editing the server and world files. - When done, run
sudo /opt/minecloud/server/start_server.shto make sure the server can start properly and runsudo systemctl start minecloud.serviceto enable the MineCloud system service again.
- In your EC2 dashboard, click on
Key pairs, clickCreate key pairon the top right corner. - Enter key pair name then click
Create key pair, your key pair will be downloaded to your /Downloads folder. - Open up terminal on your local machine, navigate to the folder the key pair is stored.
- You need to make sure the pem file can only be access by yourself or else the ssh client will refuse to establish a connection with the server, thus you need to set the following file permission.
sudo chmod 400 "name of .pem"- Type in the following command to extract the public key from the .pem file.
ssh-keygen -y -f "name of .pem"- Copy the results, now turn on your EC2 instance and connect to it via the AWS web console .
- Edit the
authorized_keysusing the editor of your choice, eg.
sudo nano .ssh/authorized_keys- Paste the public key at the top of
authorized_keys. Save and exit. - After all that you can finally connect to your instance using SSH by running the command:
ssh -i "name of .pem" <your instance's username>@<your instance's public ipv4 DNS>- Example:
ssh -i SSH_SFTP.pem ec2-user@ec2-54-169-92-65.ap-southeast-1.compute.amazonaws.com- Connect to your instance via SSH or AWS web console and type in:
sudo chown -R ec2-user:ec2-user /opt/minecloud/server- Install Filezilla Client
- Open Filezilla, open
Site Managerby pressingCtrl + s. - Click on
New Site, type the name of your server. Protocol: chooseSFTP - SSH File Transfer Protocol.Host: paste in thePublic ipv4 addressof your instance.Logon Type: chooseKey file.User: type in the username of your instance, default isec2-user.Key file: select the pem file.- Click
Connectand you can start transfering files!
- We can have multiple MineCloud game servers for a Discord server (ex: 1 Minecraft server and 1 Terraria server)
- Every game server needs to have its own Discord Bot and CloudFormation stack name. CloudFormation Stack name can be set via the
STACK_NAMEfield inminecloud_configs/MineCloud-Configs.ts. - We can also have 2 versions of the same game (ex: Minecraft Vanilla 1.19.4 and Minecraft Forge server 1.19.3) as long as they have different Stack names.
Common questions and troubleshooting can be found in the FAQs & Troubleshooting page.
You can also create a question post or ask on Discord if you like.
A star will be appreciated ;)
Also, feel free to contribute to the project if you have any thoughts!