To give a broad intro to iOS in Swift, we’re going to make a “Morning Briefing” app that displays a bunch of things you may want to see every day. For example, a quote-of-the-day, the weather, a top news article, etc. Throughout the process, you’ll learn about the basic process behind making iOS apps, making HTTP requests, working with storybards (one method to display the UI of your app), and Swift (Apple’s open source programming language).
If you don’t have Xcode installed on your computer, install it from the Mac App Store.
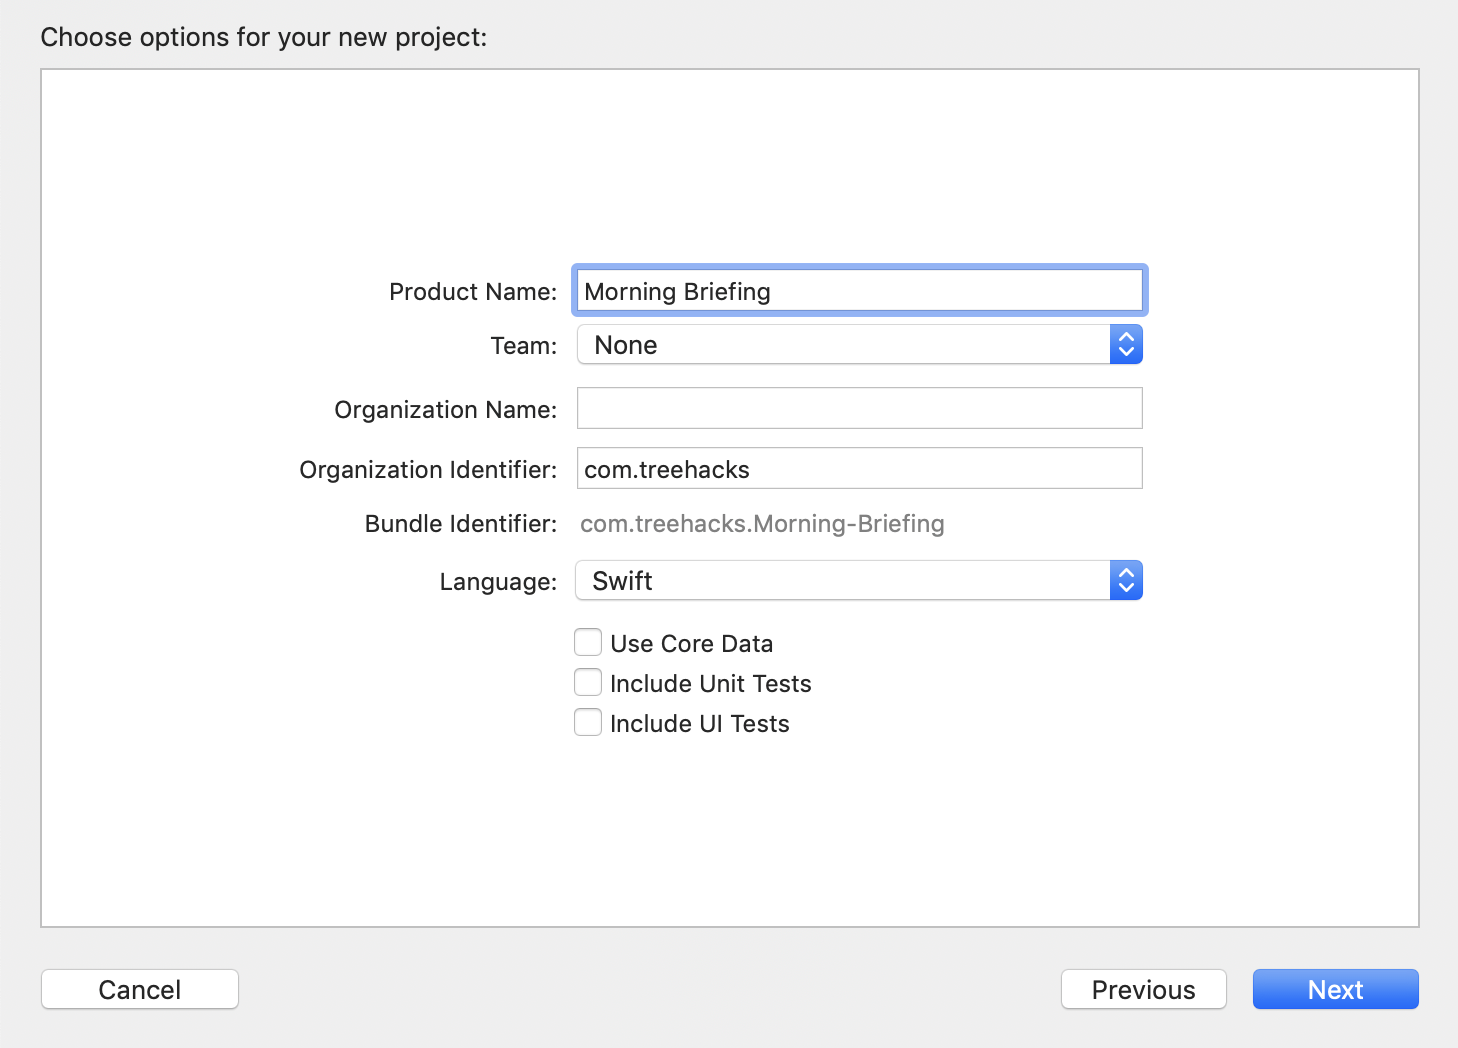
 Click “Create a new Xcode project” and under iOS → Application, select “Single View Application”. Fill in the following fields. After clicking Next, choose somewhere to save the project and press Create.
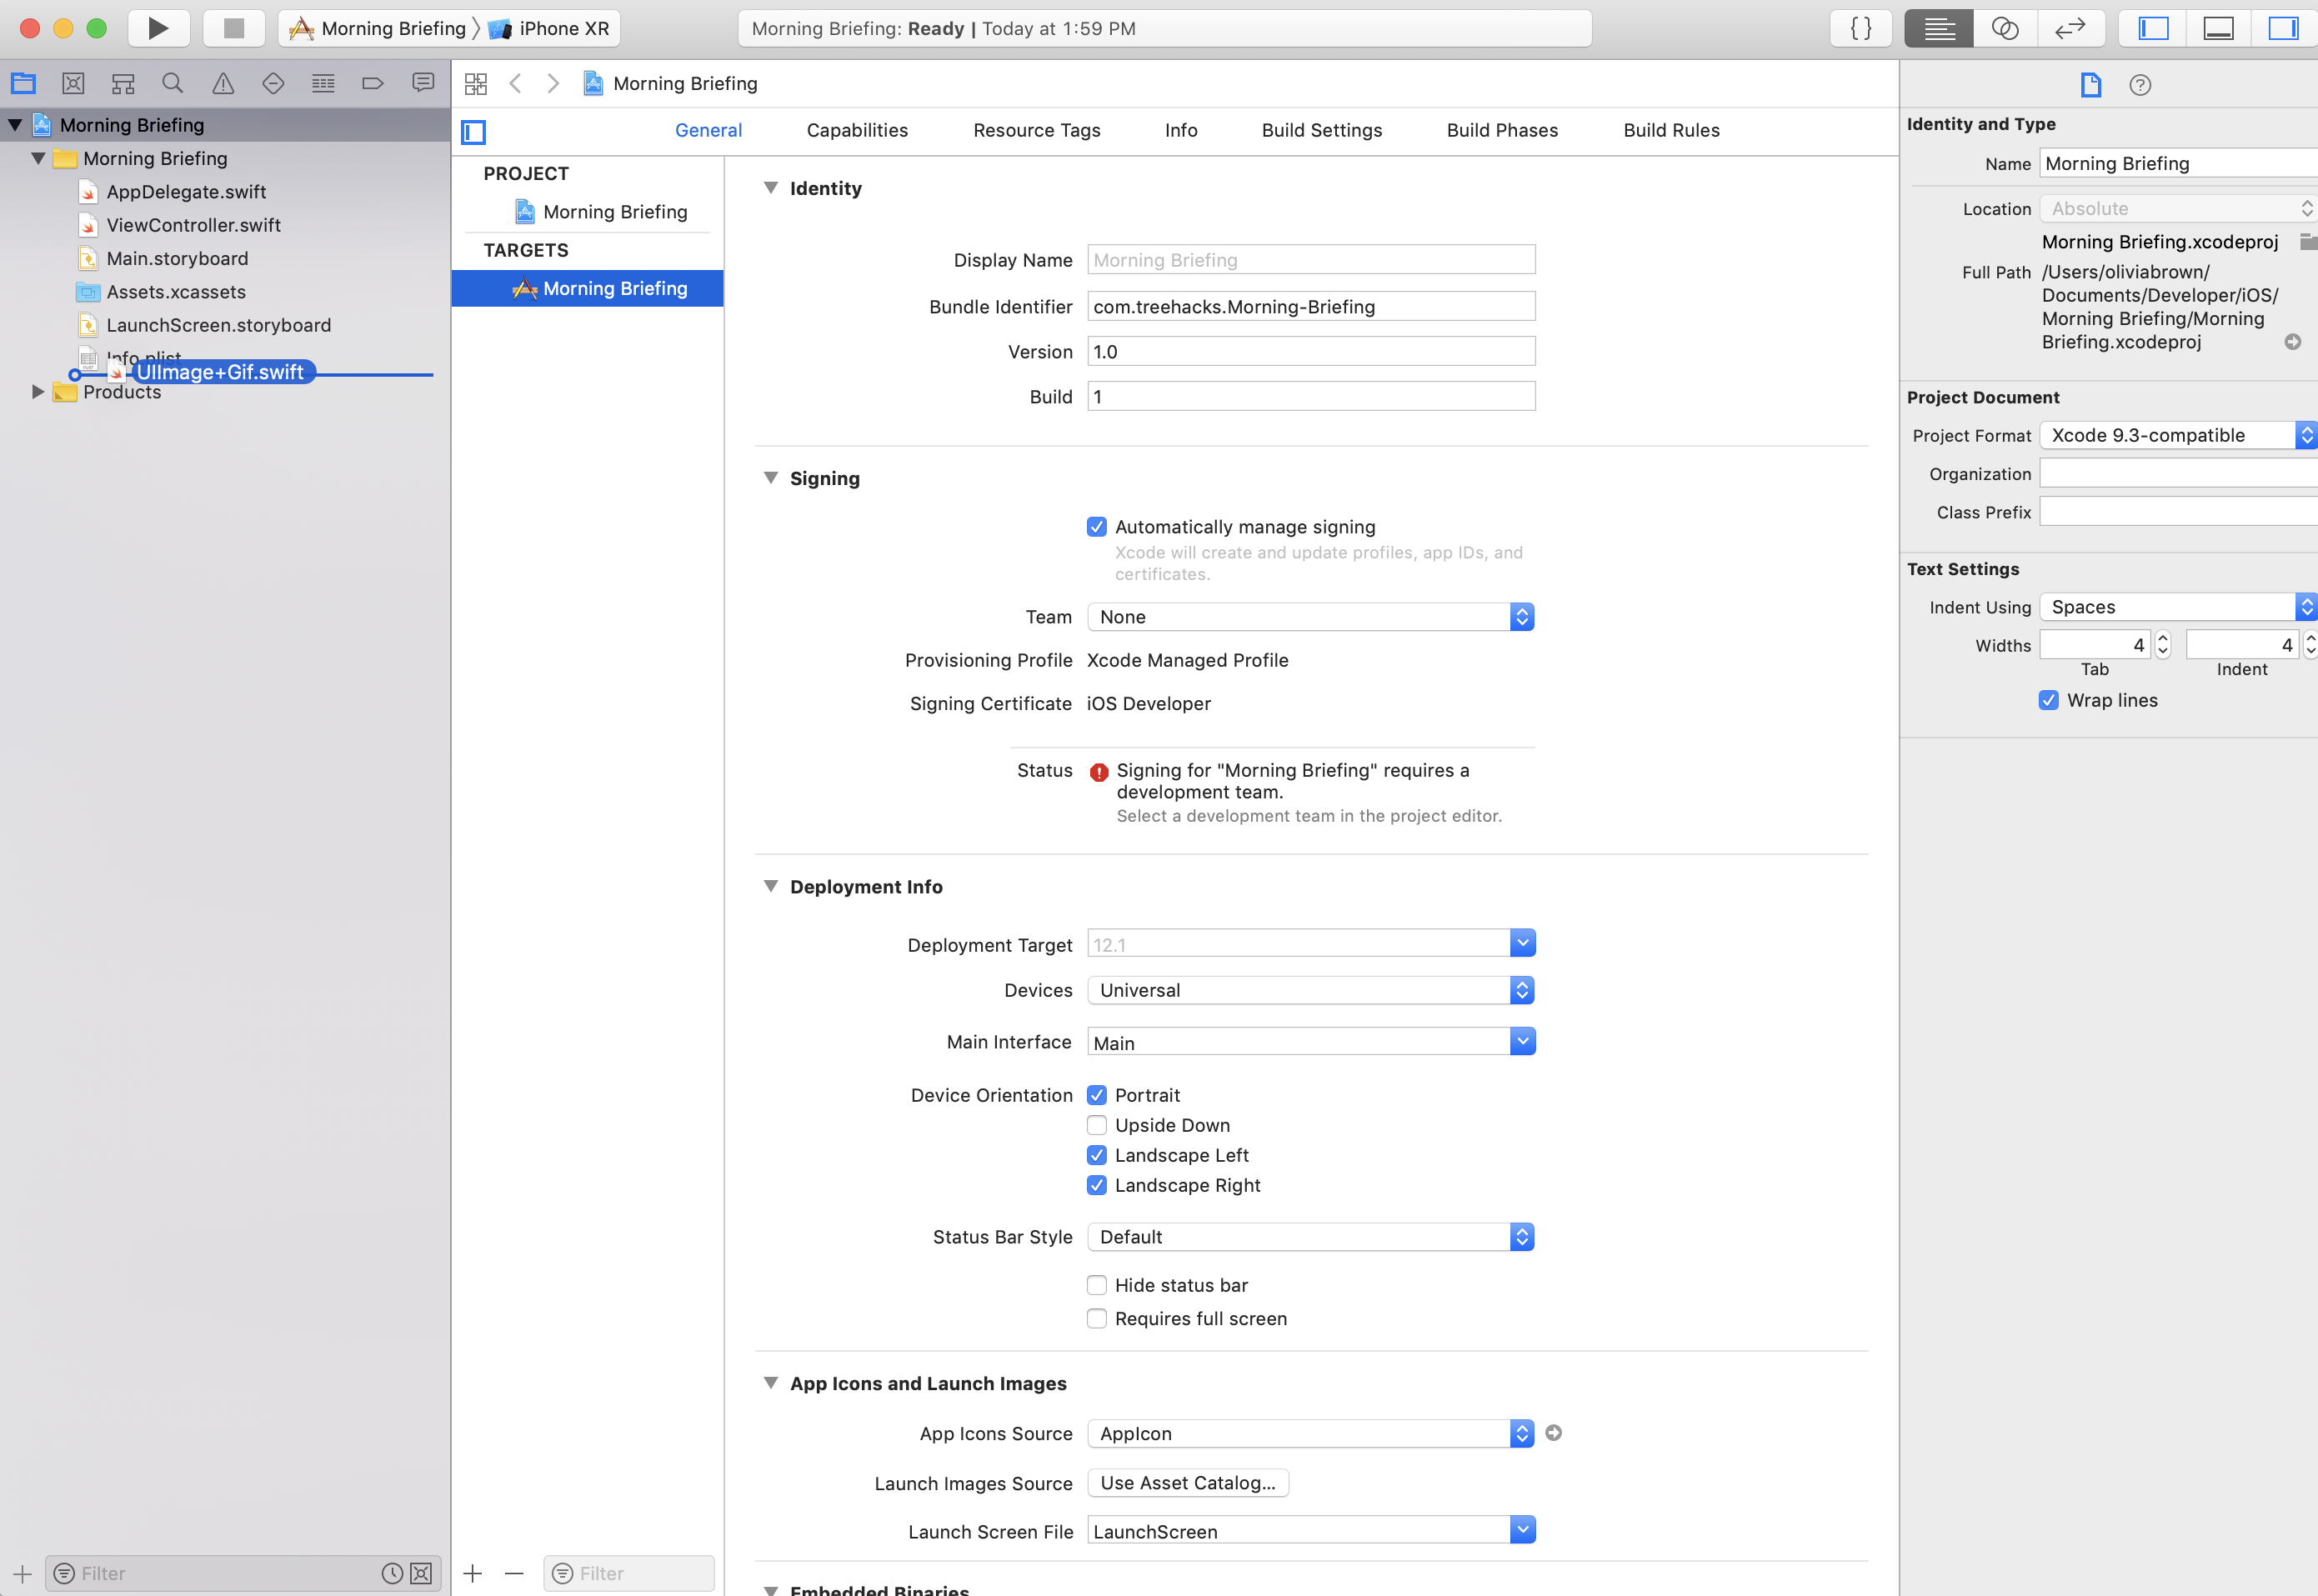
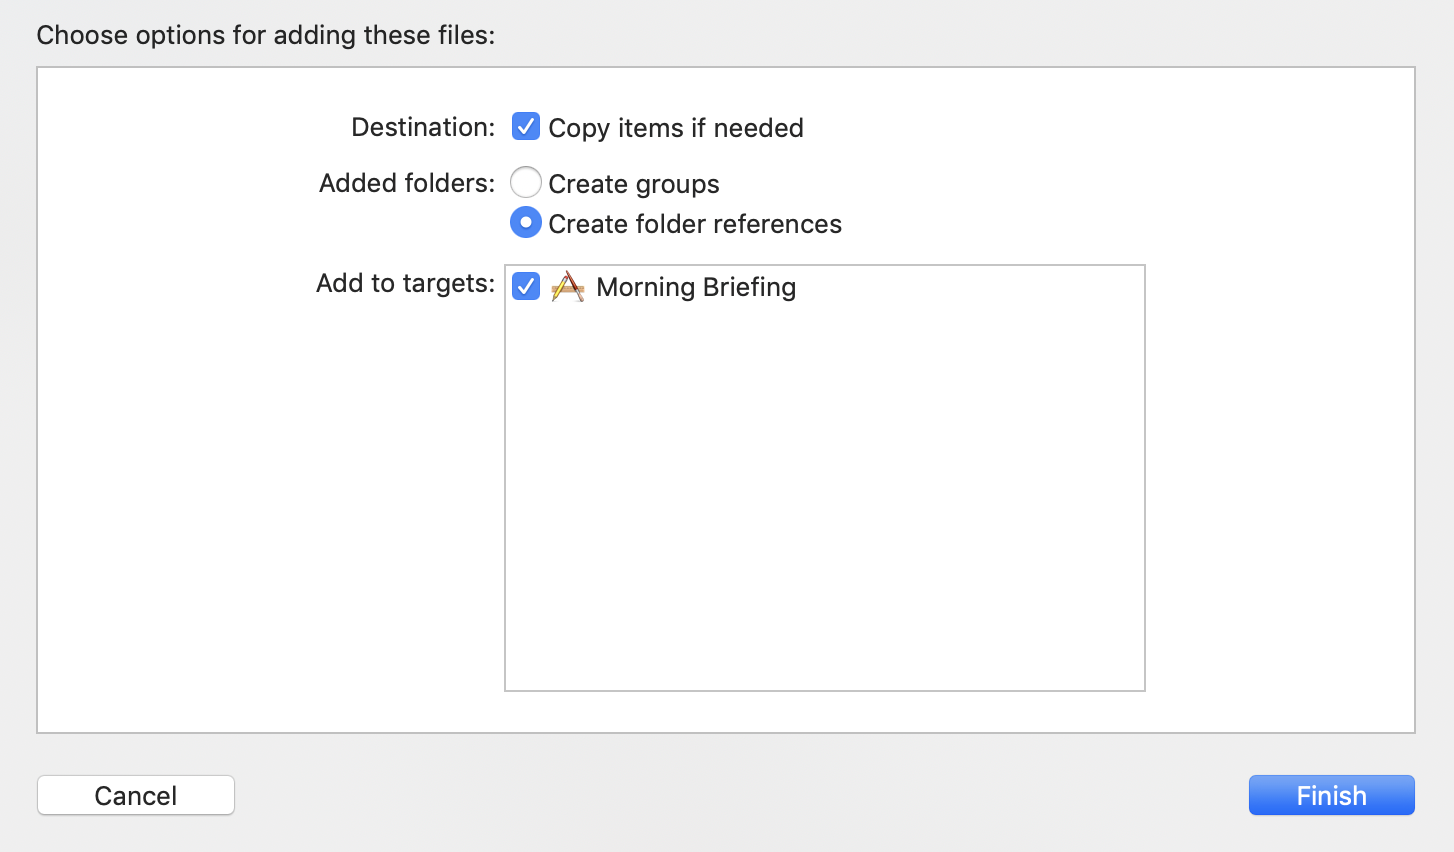
First, we’re going to add the necessary elements to display a GIF. Apple doesn’t natively support displaying GIFs in image views, so we’re going to add an open source framework to help. Select 'Clone or download' on the SwiftGif repo and download ZIP. Add UIImage+Gif.swift (found inside the SwiftGifCommon folder) to your project directory by dragging the file to the left panel as so:
 Make sure the following options are selected and press Finish.
 Next, open Main.storyboard. Main.storyboard is where you lay out how you want your app to look. You can position different UI elements, change colors and fonts, and connect screens together.
Go to the top and click Editor → Embed In → Navigation Controller. Navigation controllers allow you to navigate back to previous screens naturally and allow you to title a screen.
After that, click on the object menu in the top right side. It looks like this:  . Find “Image View” and then drag an image view onto View Controller.
 Position it somewhere at the top. You can click on it again to change the width/height.
After that, click on the Assistant Editor on the top right  . This will bring up a panel to view two different files side by side. We want to have
 Main.storyboard on one side and ViewController.swift on the other. The different files can be accessed from the top of each panel.
Once you have that setup:
- Hold the control key on your keyboard
- Click on the image view, and drag the resulting line to underneath
class ViewController: UIViewController { - When the small dialog pop ups to connect, name the image view “imageView” and press “connect” to finish.
- Congratulations! You just connected the image view you dragged and a variable called “imageView” that you can now use to change its properties in your code.
You can switch back to just displaying one file from the top right again. Open ViewController.swift.
In viewDidLoad(), add the following code after super.viewDidLoad(). Feel free to change the styling or type of GIF we're loading:
// Set up the navigation controller (the bar at the top) to have a specific color, title, and tint.
if let navController = self.navigationController {
    navController.navigationBar.barTintColor = UIColor.orange
    navController.navigationBar.tintColor = UIColor.white
    self.title = "Rise & Shine"
}

// Set up all the components on the screen
setupGIF(of: "sunshine")
Underneath the viewDidLoad function, add the following code:
// Load a GIF of the passed search term by querying the giphy.com API and filling our image view
private func setupGIF(of searchTerm: String) {
    // Construct the URL by inserting our search term (which we edit to have the correct characters for a URL)
    guard let encodedSearchTerm = searchTerm.addingPercentEncoding(withAllowedCharacters: CharacterSet.urlQueryAllowed),
        let searchURL = URL(string:"http://api.giphy.com/v1/gifs/translate?s=\(encodedSearchTerm)&api_key=dc6zaTOxFJmzC") else { return }
    let searchData = try? Data(contentsOf: searchURL)

    // Parse the JSON by accessing multiple levels of dictionaries to get the gif's link
    do {
        if let jsonResult = try JSONSerialization.jsonObject(with: searchData!, options: []) as? [String: Any] {
            guard let images = (jsonResult["data"] as? [String: Any])?["images"] as? [String: Any],
                let link = (images["downsized"] as? [String: String])?["url"],
                let url = URL(string: link),
                let gifData = try? Data(contentsOf: url),
                let gif = UIImage.gifWithData(gifData) else { return }
            self.imageView.image = gif // display the gif we found
        }
    } catch let error {
        print(error.localizedDescription)
    }
}
Now, let's test that the app runs and loads a GIF! You can press the run button (looks like a play button in the top left corner). If everything worked, you should see a random sunshine-themed GIF show up in the simulator (something like this):
 Next, we'll add a quote of the day.
To add a quote, we're not going to be adding any files but rather just pulling the quote from the quotes.rest API.
To start off, go to Main.storyboard and drag in a UITextView from the object menu we used previously. Double click to add some placeholder text. If you want, you can also add a title by dragging in a label from the same menu and setting its text. It should look like this:

Like before, we're going to have to connect these text views in code. Click
again and bring up
Main.storyboard and ViewController.swift side-by-side. Hold control, click, and drag the connector over to underneath the image view we added before. When the prompt comes up, name it quoteTextView and click connect. We don't need to connect the title label because we don't need to change it in our code.
Next, add setupQuote() in viewDidLoad() and add the following code block underneath setupGIF():
// Load a quote using the URLSession framework to get data returned from Quotes API
private func setupQuote() {
    guard let url = URL(string: "http://quotes.rest/qod.json") else { return }
    let session = URLSession.shared
    let task = session.dataTask(with: url, completionHandler: {(data, reponse, error) in
        do {
            // Parse the JSON by accessing multiple levels of dictionaries to get the quote and author
            if let jsonResult = try JSONSerialization.jsonObject(with: data!, options: []) as? [String: Any] {
                guard let quotes = (jsonResult["contents"] as? [String: Any])?["quotes"] as? [Any],
                    let firstQuote = quotes[0] as? [String: Any],
                    let quoteText = firstQuote["quote"] as? String,
                    let quoteAuthor = firstQuote["author"] as? String else { return }

                // Change the text view to display quote on the main thread
                DispatchQueue.main.async {
                    self.quoteTextView.text = "\(quoteText)\n\n- \(quoteAuthor)"
                }
            }
        } catch let error {
            print(error.localizedDescription)
        }
    })
    task.resume()
}
The code is pretty similar to adding in the GIF. We're parsing the JSON returned from http://quotes.rest/qod.jsonand setting the self.quoteTextView.text to be the text we get.
Once that's completed press run (play) button on the top left and a random quote will show up!
We're going to create two buttons to take us to new screens.
In Main.storyboard, drag in two Buttons from the object menu and place them somewhere near the bottom of the screen. Double click to change the title to “Briefing” and "Entertainment". At this point, your view controller should look similar to this:

Next, drag in two View Controllers and place it next our original one:
 Next, hold control, click on one button, and drag the connector to one of the new view controllers. When a gray prompt comes up, select “push.” You should see a connection between the screens now. Repeat with the other button and the other view controller.

This connects the button and the next screen together. When the button is tapped, it with “push” the next view controller onto your screen.
Press the run button to check it out! You may notice the blank screen, but that's because we haven't added anything there yet!
We're going to add a screen to give you some necessary info you might want to see every morning: the day's weather forecast and the top NYTimes article. Set up your view controller linked to the "Briefing" button to look something like this, using labels for titles, a text view for the weather forecast, and a button for the article link.

However, you may have noticed that we don't have another ViewController.swift. So, we're going to add another file:

Make sure it's a Cocoa Touch Class and then fill in these fields:
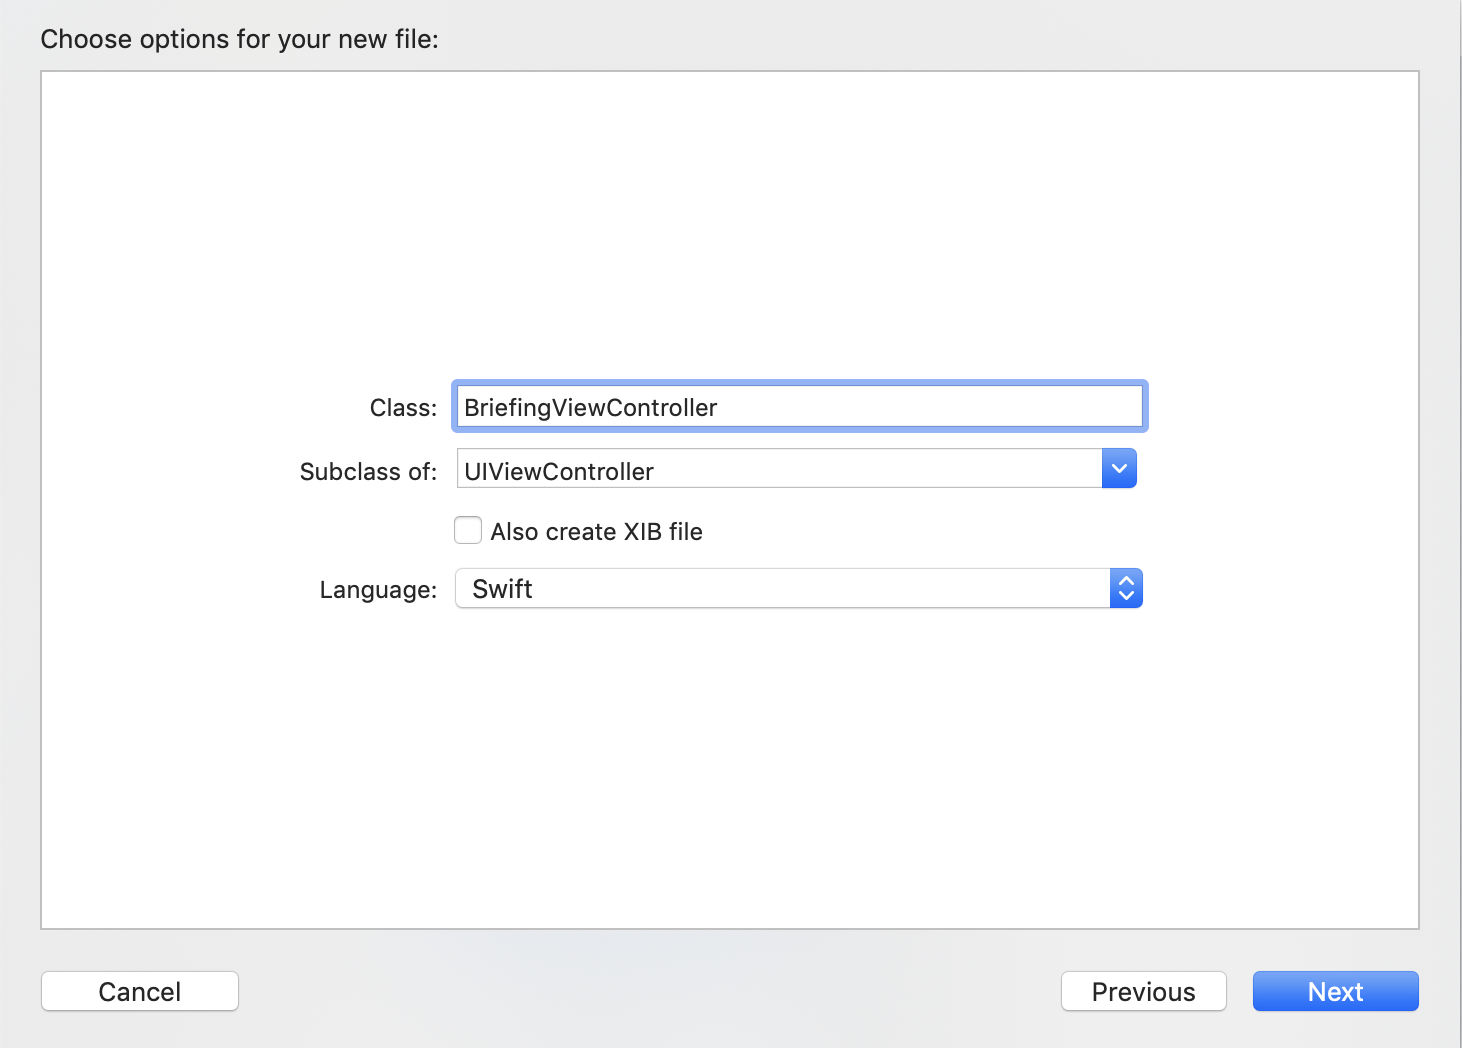
We now have BriefingViewController.swift to connect our UI elements. Before we do that though, go back to Main.storyboard, click on the view controller you just styled and fill out its Class in the right panel:
 This connects the storyboard view controller and the the code. After that, click on
 again and connect the respective UI elements with variable names as so:
@IBOutlet weak var weatherTextView: UITextView!
@IBOutlet weak var newsButton: UIButton!
Now let's set up our news article. Underneath the variables you just made, declare an optional string:
private var articleUrlString: String?
Call the helper method in viewDidLoad()
setupNews()
And finally add the following function to load the news article:
// Display a button that links to and displays the title of the top NYTimes article by calling the NYTimes API
private func setupNews() {
    guard let url = URL(string: "https://api.nytimes.com/svc/topstories/v2/home.json?api-key=8085826bc22e436aa53e58765b1c38f6") else { return }
    let session = URLSession.shared
    let task = session.dataTask(with: url, completionHandler: {(data, reponse, error) in
        do {
            if let jsonResult = try JSONSerialization.jsonObject(with: data!, options: []) as? [String: Any] {
                guard let topArticle = (jsonResult["results"] as? [[String: Any]])?[0],
                    let articleTitle = topArticle["title"] as? String,
                    let url = topArticle["url"] as? String else { return }
                self.articleUrlString = url
                DispatchQueue.main.async {
                    self.newsButton.setTitle(articleTitle, for: .normal)
                }
            }
        } catch let error {
            print(error.localizedDescription)
        }
    })
    task.resume()
}

// Open the url every time the button is tapped
@IBAction private func buttonTapped(_ sender: UIButton) {
    if let urlString = articleUrlString, let url = URL(string: urlString) {
        UIApplication.shared.openURL(url)
    }
}
Last but not least, switch over to Main.storyboard, control, click, and drag from the Button to the top first button on the view controller:
. This menu will come up:
 Choose “buttonTapped:”
Finally, we're going to add in the weather by pulling the user's current location from the phone and then doing a similar API call to above for the quote!
First, open Info.plist and add click the plus icon at the bottom. On the left enter in "Privacy - Location When In Use Usage Description" and on the right add "To display the weather in your location".
 This lets us request the user's current location on their device.
Next, in BriefingViewController.swift, under "Import UIKit", add
import CoreLocation
Where you added in your articleUrlString, add in:
// Access the current location
private var locationManager = CLLocationManager()
Inside your view did load, add in setting up the location manager you just created:
locationManager.delegate = self
locationManager.requestWhenInUseAuthorization()
Underneath your setUpQuote method, add this setUpWeather method:
// Display the weather in the user's current location using the CoreLocation framework and the Open Weather Map API
private func setupWeather() {
    // Only display if we have the current location
    guard let coordinates = locationManager.location?.coordinate,
        let url = URL(string: "http://api.openweathermap.org/data/2.5/weather?lat=\(coordinates.latitude)&lon=\(coordinates.longitude)&units=imperial&APPID=2f6eb7ed8c5576e5d51fe15b51cdea10") else { return }
    let task = URLSession.shared.dataTask(with: url, completionHandler: {(data, reponse, error) in
        do {
            if let jsonResult = try JSONSerialization.jsonObject(with: data!, options: []) as? [String: Any] {
                guard let items = jsonResult["main"] as? [String: Any],
                    let tempMin = items["temp_min"] as? Double,
                    let tempMax = items["temp_max"] as? Double,
                    let humidity = items["humidity"] as? Double else { return }
                DispatchQueue.main.async {
                    self.weatherTextView.text = "Today's Forecast:\n\nHigh: \(tempMax)°F\nLow: \(tempMin)°F\nHumidity: \(humidity)%"
                }
            }
        } catch let error {
            print(error.localizedDescription)
        }
    })
    task.resume()
}
Finally, at the very bottom of your file, outside the class, add in the extension to support setting the weather when we have the user's location:
extension BriefingViewController: CLLocationManagerDelegate {
    func locationManager(_ manager: CLLocationManager, didChangeAuthorization status: CLAuthorizationStatus) {
        if status == .authorizedWhenInUse {
            locationManager.startUpdatingLocation()
            setupWeather()
        }
    }
}
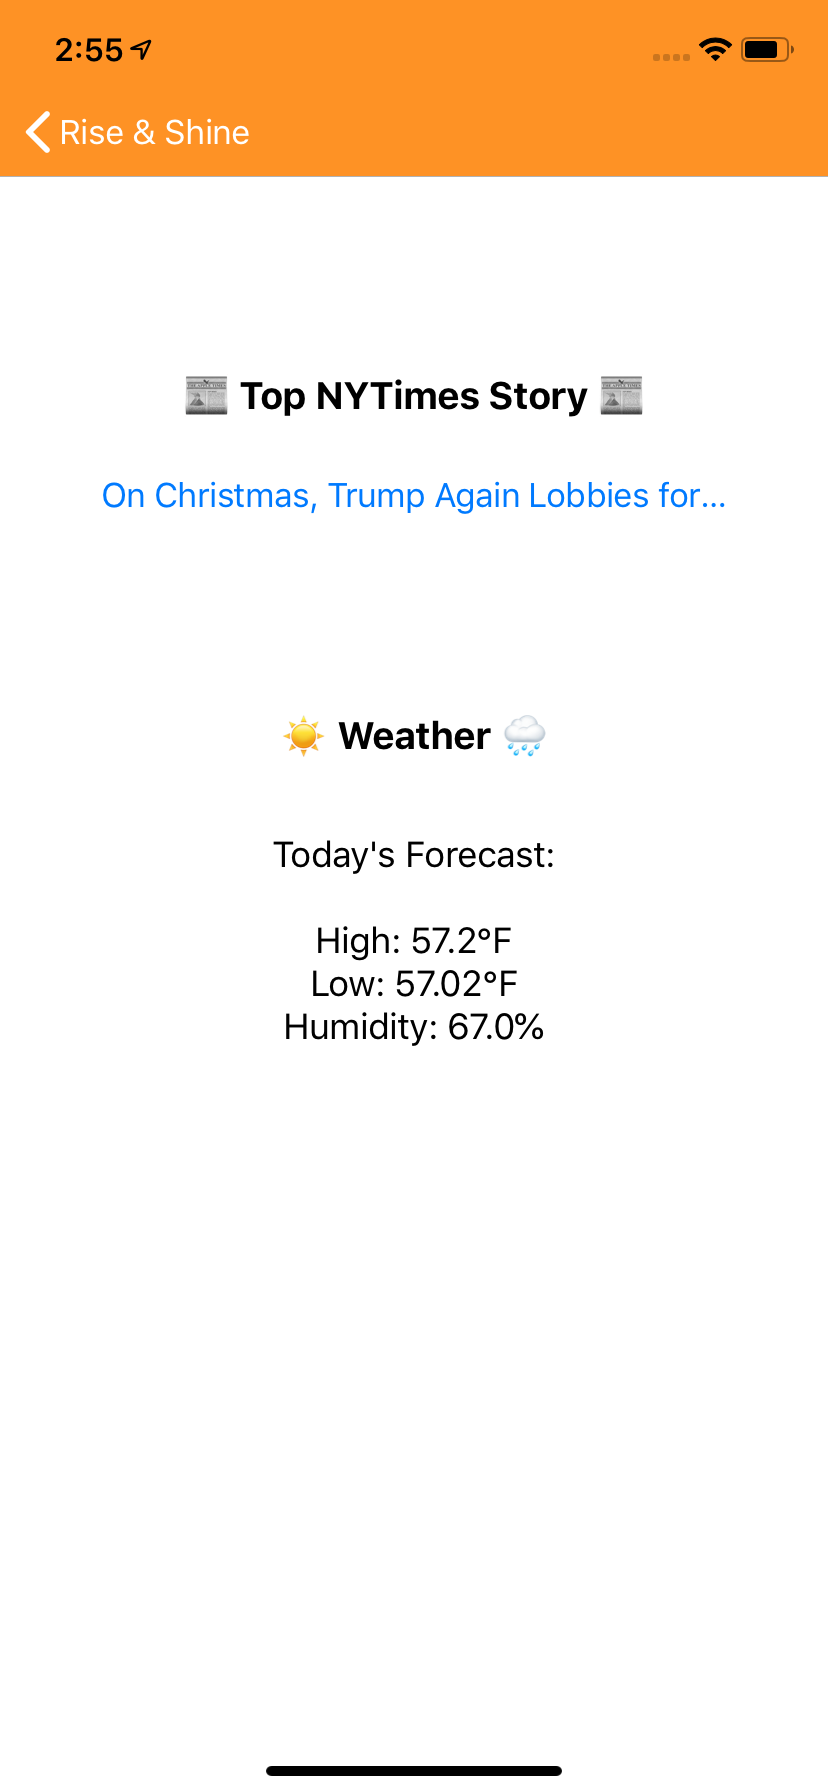
Congrats, you just finished the briefing view controller! Run your app, and it should look something like this. Note: in Simulator, Apple always defaults to showing your location as San Francisco, but you can run your app on a physical device to get your actual location!
With all your skills you've learned, you're ready to add in a view controller to display a countdown to a special day and a daily XKCD comic.
Here are the helper methods you'll need:
// Display a countdown of the number of days until the passed in date
// Call this function like: setupCountdown(until: "2019-02-18")
private func setupCountdown(until targetDateString: String) {
    // Set up the format the date should be in
    let dateFormatter = DateFormatter()
    dateFormatter.dateFormat = "yyyy-MM-dd"
    let calendar = Calendar.init(identifier: .gregorian)

    // Find the difference between target date and today and display in label
    let targetDate: Date! = dateFormatter.date(from: targetDateString)
    let todayDate: Date! = Date()
    let dateString = DateFormatter.localizedString(from: targetDate, dateStyle: .short, timeStyle: .none)
    if let numDays = calendar.dateComponents([.day], from: todayDate, to: targetDate).day {
        self.countdownLabel.text = "Days until \(dateString): \(numDays)"
    }
}

// Displays the most current xkcd comic in an image view
private func setupXKCD() {
    guard let url = URL(string: "http://xkcd.com/info.0.json") else { return }
    let session = URLSession.shared
    let task = session.dataTask(with: url, completionHandler: {(data, reponse, error) in
        do {
            if let jsonResult = try JSONSerialization.jsonObject(with: data!, options: []) as? [String: Any] {
                guard let imageLink = jsonResult["img"] as? String, let title = jsonResult["title"] as? String,
                let url = URL(string: imageLink), let imageData = try? Data(contentsOf: url) else { return }

                DispatchQueue.main.async(execute: {
                    self.xkcdTitleLable.text = title;
                    self.xkcdImageView.image = UIImage(data: imageData)
                })
            }
        } catch let error {
            print(error.localizedDescription)
            }
        })
    task.resume()
}
If you get stuck, check out our Main.storyboard and EntertainmentViewController.swift. Our final version looks like this:

You’ve finished the iOS Hackpack. Hopefully, you learned a little about making iPhone apps, HTTP requests, and Swift. If you get stuck or have questions, let Olivia (organizer-olivia) know in our Slack, and she'd be down to help!
If you want to work on the app a little more, here are some ideas on how to extend it:
- integrate the ESPN API
- get info about popular stocks using Yahoo or Google Finance API
- show an interesting fact of the day
- anything else you can think of
If you want to learn a bit more about Swift and iOS development, check out some of the details we've added in the project in this repo. See how we made our Main.storyboard scalable with constraints. Investigate why we changed access control (we made all the UI element variables private!). Dig through optionals in Swift and why we use guard/if let everywhere.
MIT
HackPacks are built by the TreeHacks team to help hackers build great projects at our hackathon that happens every February at Stanford. We believe that everyone of every skill level can learn to make awesome things, and this is one way we help facilitate hacker culture. We open source our hackpacks (along with our internal tech) so everyone can learn from and use them! Feel free to use these at your own hackathons, workshops, and anything else that promotes building :)
If you're interested in attending TreeHacks, you can apply on our website during the application period.
You can follow us here on GitHub to see all the open source work we do (we love issues, contributions, and feedback of any kind!), and on Facebook, Twitter, and Instagram to see general updates from TreeHacks.