This program lets you load Daz figures quicker by limiting the amount of product Daz Studio must process. You can also use this program to browse the thumbnail of products you have installed.
If you got too many characters and morphs installed, Daz Studio figure loading process becomes tediously slow. The only way to speed to process up is by selectively include files you want Daz to load. Fortunately, Daz only "see" files in folders you included as Base Directory. By only including folders containing contents you want to use, the character load process will be fast. However, manually managing which product to include is practical, especially when switching between scenes. This program automates the process by creating a "Virtual Folder" containing links to files you want to include, thus can be used as a Base Directory in Daz Studio.
The advantages of this program are:
- Space efficient. The virtual folder contains only links to the actual files, thus take a negligible amount of space.
- Permanent. Multiple virtual folders can be created for different scenes, allowing easy switch between scenes and come back to the scene later.
- Repeatable. Products are selected based on the content of a scene file. The generated virtual folder can be deleted and recreated later.
- (For DIM installed product) Files from the same product also included, automatically including corrective morphs and other files that items in the scene might need*. *Note transitive dependencies are not handled, but nearly all Daz products should be standalone and work correctly.
- Non-destructive. Does not modify daz product installation. Original files can still be used and DIM will keep working.
- Download program file here
- May also need to install .net 5 Desktop Runtime x64 download link
- Either turn developer mode on windows 10 or run the program as administrator. How to turn developer mode on
- Run Daz Package Manager.exe.
Step 0: Set Windows to developer mode or run the program as admin.
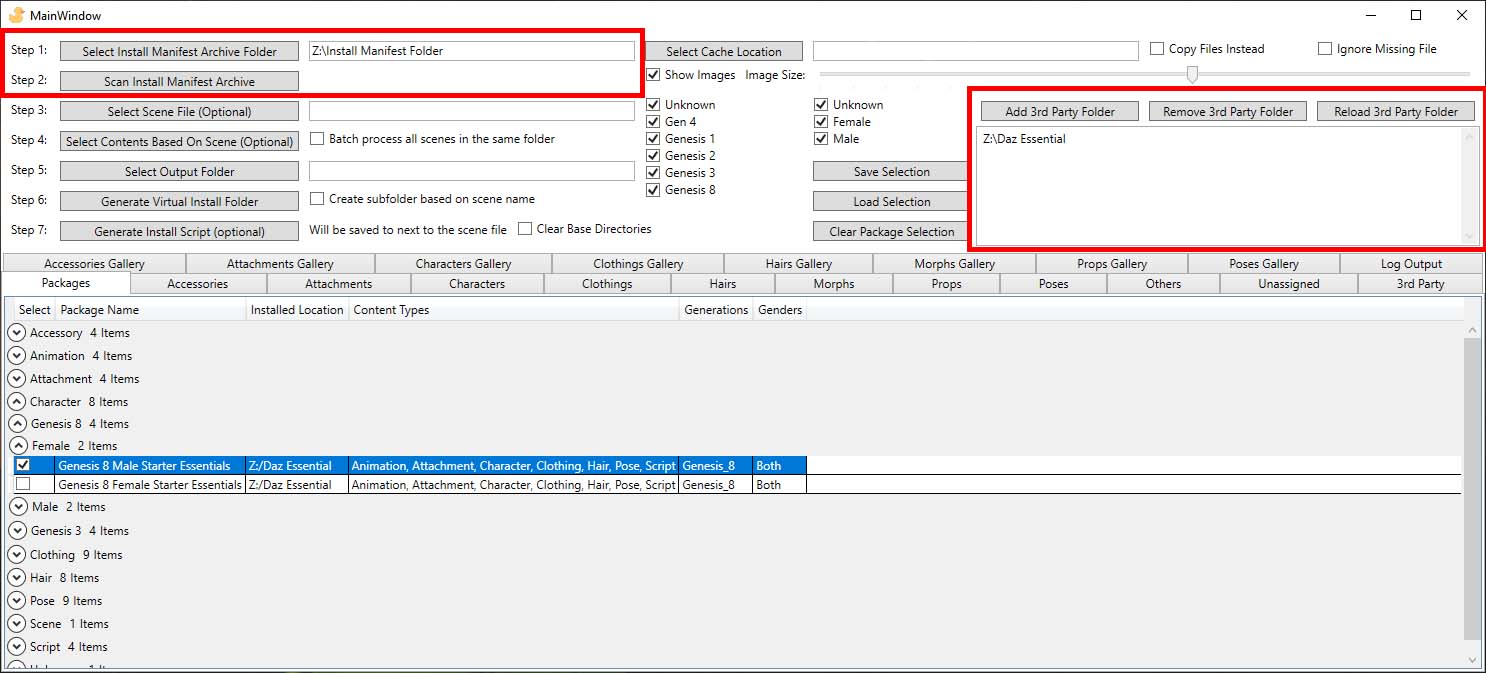
To start, add all daz contents you want to manage, either by automatically find files installed by DIM/Central, or manually add folders. The scanning process might take sometime but the result is cached, you only need to repeat the step if you have added new contents that you want to manage through this program.
For contents installed by DIM/Central, you can use Step 1 and Step 2 on upper left corner to the program to select the Daz install manifest folder.
To find where the install manifest folder is located, go to DIM -> advanced setting -> Installation -> Manifest Archive.
Rerun step 2 to refresh the cache.
Alternatively for any Daz content, you can just add the folder it is in as a 3rd party folder using the buttons on the right side. Use reload button to rescan the 3rd party folders.
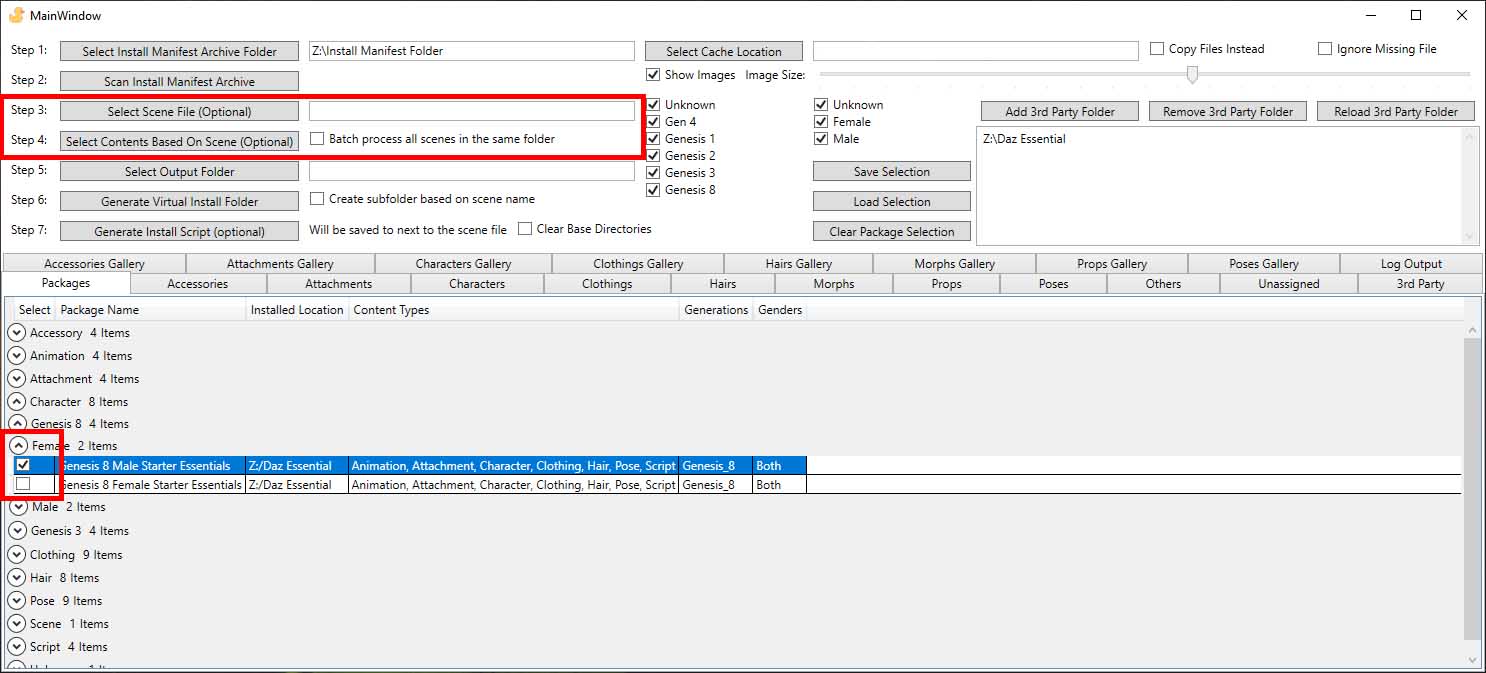
You can either have the program find all files referenced in a scene file, batch process a whole folder, or select contents manually.
To automatically automatically select contents, use Step 3 and Step 4. Tick Batch process all scens in the same folder process all the files in the same folder or subfolders.
All duf file should work including scene file, scene subset, and characters.
Both compressed and uncompressed files are supported.
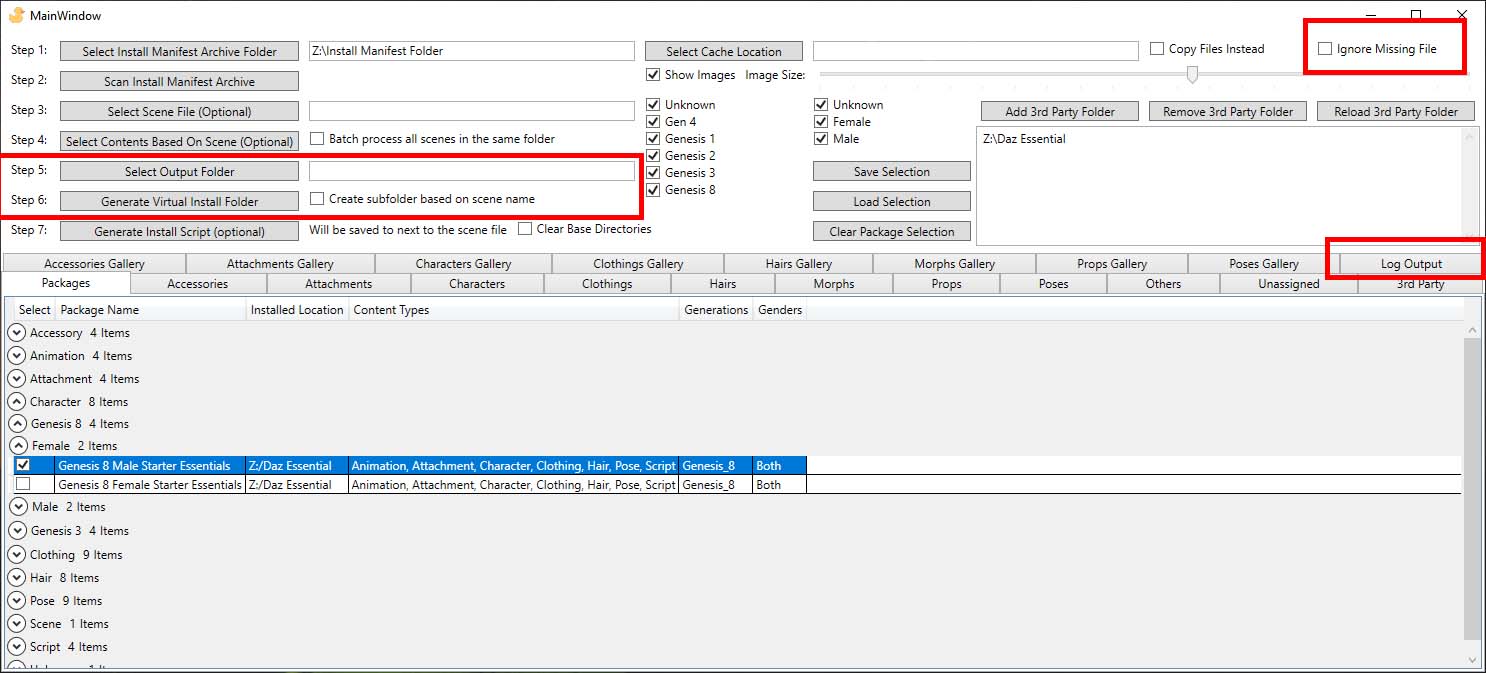
When selecting contents, contents installed by DIM, selecting one item will automatically select every other files in the same package, third party contents will be selected at folder level (automatically select other files in the same folder).
To make manual selection, select packages by using checkbox as indicated in the red box.
Individual contents can be browsed in list view as the above image show. Select using the red box area indicated on the left hand side.
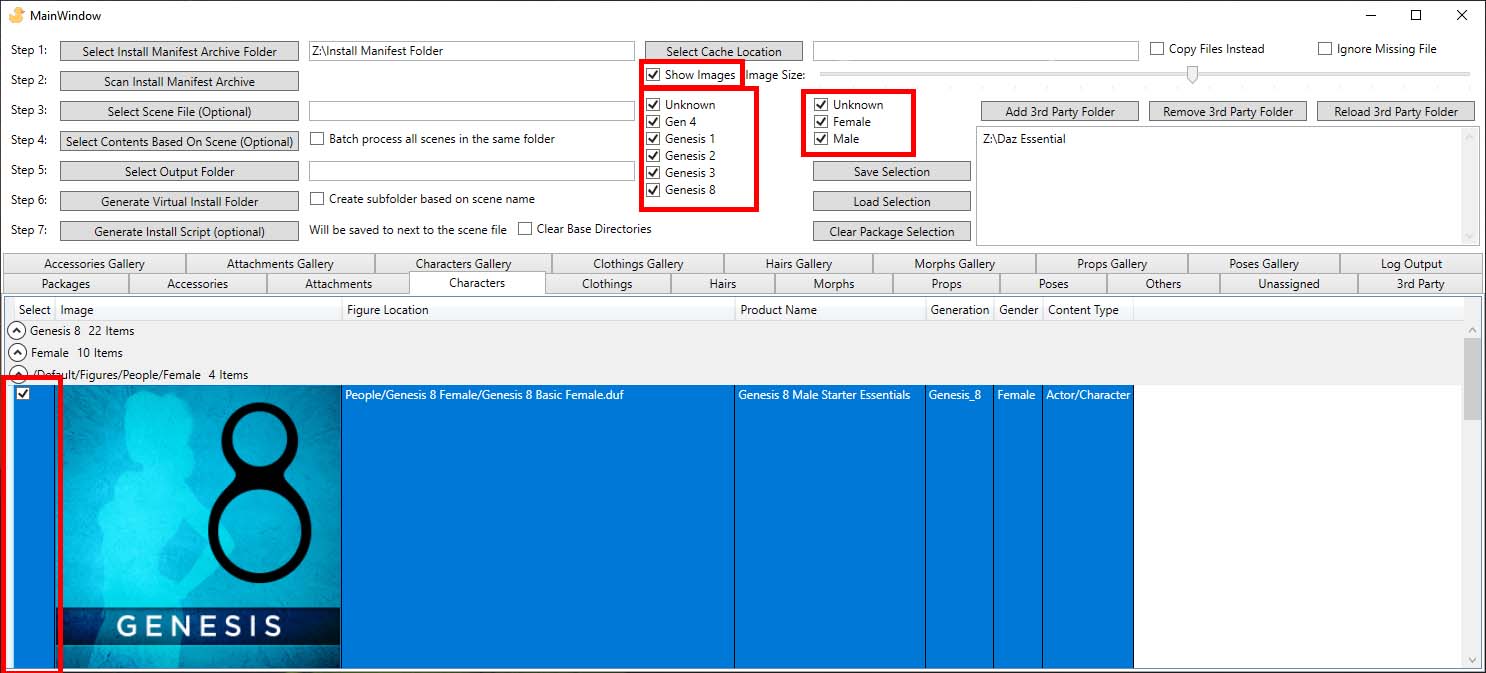
Items are generally sorted by order of Type -> Generation -> Gender -> Default installed to location. This is done using parsing metadata, some file might not be sorted correctly. Contents can by filtered by generation or gender by using the checkbox indicated in the middile of the screen. Hiding preview image may improve program performance.
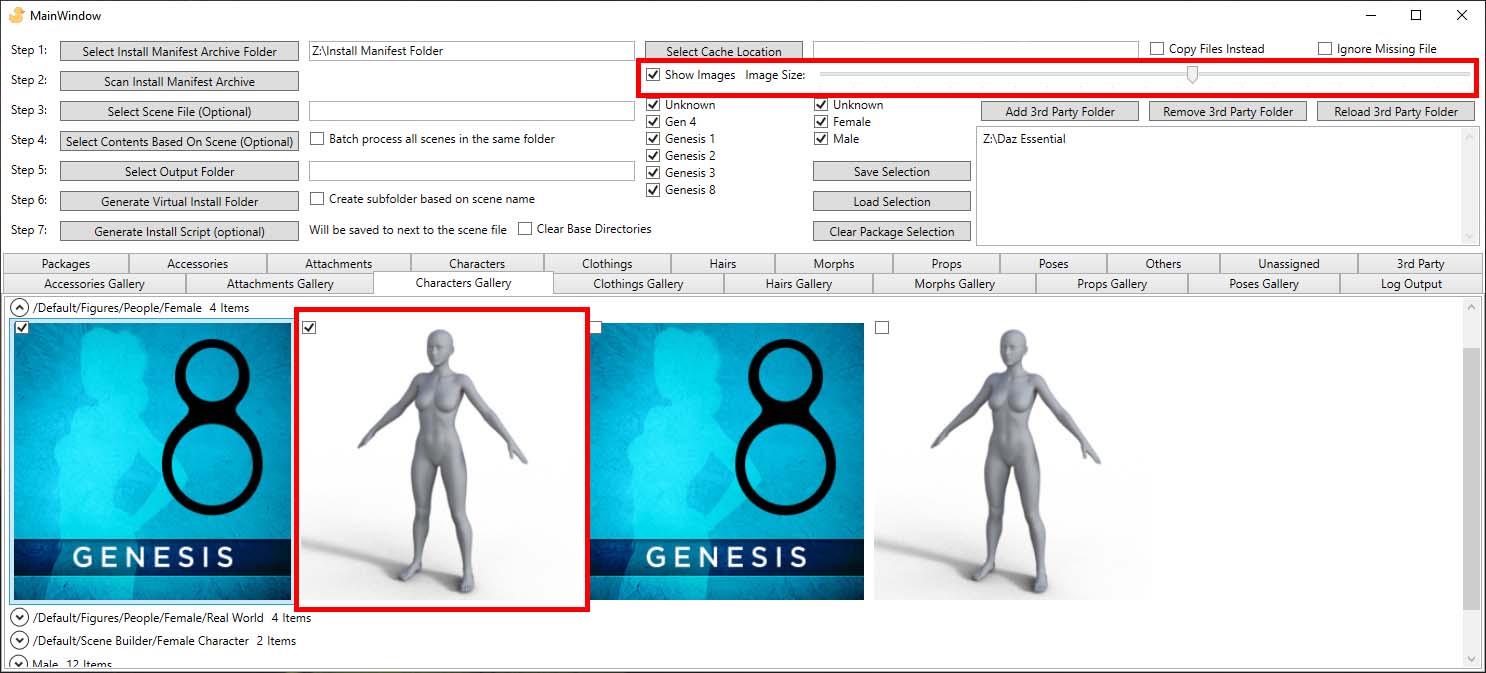
Gallery tab give you a compact view of preview images only.
Hover over the image to get the file name.
Image size can be adjusted by the image size slider. The btool tip image is used when possible that give better resolution, otherwise preview image is used.
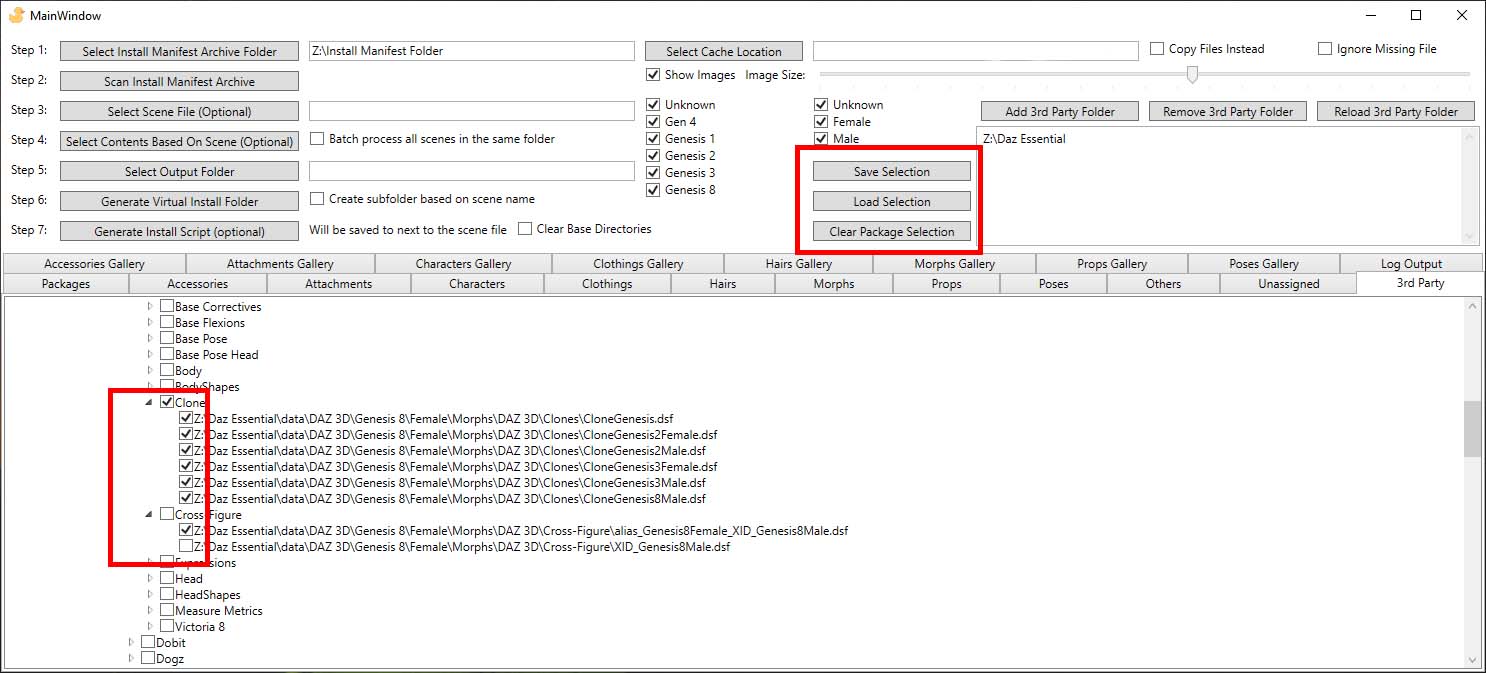
Third party contents can be accessed in the 3rd Party tab. Checkbox next to a file only select that individual file, checkbox for a folder select everything in the folder.
In the middle of the screen, there are buttons for save selection, load selection and clear selection.
One you have finished selecting all the files you want to include in the virtual folder, use "Step 5" and "Step 6" to create a folder containing virtual lines to the selected files. This folder can be used as a base directory, allowing you to only include files you want to use in Daz studio.
Make sure you have selected a folder on a local drive, network drive does not work. The location should be seperate from folders containing daz contents.
Select Create subfolder based on scene name to group the selection based on the file name selected in Step 5.
This way you can have multiple sets of selections you can swap over.
To delete virtual folder, simply delete the virtual folder using windows explorer.
Step 7: Generate Install Script can be used to generate a daz script that will add the virtual folder as a base directory and load the daz file.
This script can be used to open 1 click load the scene.
By default, the virtual folder is simply to the base directories list,
all currently added base directories would still be visible to Daz Studio and any morphs in it will be loaded.
Check Clear Base Directories to include a step that will clearing all base directories before adding virtual folder.
The approach taken is to create a virtual folder containing Symlink references to all the files needed by a scene. By using the virtual folder as Daz base folder, only morphs needed are visible to Daz, making the character load much faster.
It is also possible to select manually which packages to install.
This program also serves as a product manager that allows you to view all items with a much bigger preview image than shown in Daz.
The algorithm:
- Scan Daz install manifest archive to find all installed packages.
- Scan a scene file to find all the files it needs.
- Select all the packages containing the required files.
- Create a virtual folder with Symbolic link to all the files.
Warning: Do not save the scene while the virtual folder is not added as a base folder. After opening a scene using Virtual folder, texture images might be resolved using the virtual folder link. Saving the scene while the virtual folder is removed will cause daz to save the image path as absolute path. This will cause missing texture issue when you next open the scene without the virtual folder added. Save the scene again with the virtual folder added will fix the issue.
-
Only run on Windows 10 and later.
-
Require .net 5 download link
-
Need to run with developer mode or admin privilege. Due to the permission required to create symbolic link
-
Works best with packages installed by DIM/Central and have an install manifest.
-
Character detection depends on default metadata.
Change Log:
V1.10.0
- More error handling around file IO.
- Exporting product ID, package ID, and product name when saving selection.
- Bulk processing now recursively scan scene folder
V1.9.0
- Add handling more types of Daz files.
- Add ability to handle uncompressed Daz file.
- Find uv_set files.
V1.8.1
- Fix 3rd party crash
V1.8
- Better 3rd party tab presentation and internal changes.
V1.7
- Add ability to save/load selection to file.
V1.6.1
- add 3rd party folder button now work correctly.
- select the whole folder when selecting a 3rd party file in case other files in the folder are transitively referenced.
- Improved GUI text.
V 1.6.0:
- Add ability to handle files not installed using DIM.
- Refactor to use async.
- Better error handling.
V 1.6.0:
- Add ability to handle files not installed using DIM.
- Refactor to use async.
V 1.5.0:
- Rearranged how content is organised on display.
- Change the way contents are sorted, to be more user friendly.
- Add filtering by gender for package.
V 1.4.0: New Features:
- Image gallery for character, clothing, hair, and poses.
- Performance improvement by grouping items.
V 1.3.4: Bugfix:
- Disable canceling scan (was not working before).
- Better error handling when parsing metadata file.
V 1.3.0: New Features:
- Can browse accessories, attachments, characters, clothings, hairs, morpsh, props, poses
- Performance Improvements including more efficient processing and filtering contents.
- More robust error handling.
- Better error reporting.
V 1.2.0: New Features:
- Images are not resizable.
- Hide Image. This improve UI speed.
- Detect asset compatibility with Daz figure generation.
- Able to sort by figure generation.
- Show package content types (for content types that are implemented).
- Performance improvement.
WIP:
- Character gender detection not implemented.
V 1.1.0: Bug fix.
- Able to find poses.
- Improved Performance
V 1.0.0: Basic Functionality.
Bugfix:
- Sort by selected.
Duck Icon from https://iconarchive.com/show/free-flat-sample-icons-by-thesquid.ink/rubber-duck-icon.html under CC Attribution 3.0 Unported