This tutorial shows how to use the DHT11 and DHT22 temperature and humidity sensors with the ESP32 using Arduino IDE.
In the first part, we'll go through a quick introduction to these sensors, pinout, wiring diagram, and finally the Arduino sketch.
In the second part, we'll see how to connect out DYI weather station to AWS IoT in order to store the data, visualize it and run some analytics on it.


- ESP32 Board
- Breadboard
- Jumper Wires
- DHT11 or DHT22 Temp & Humidity Sensor
- 10k Ohm resistor
EDIT: Or use this KIT from WayinTop that already contains everything

The DHT11 and DHT22 sensors are used to measure temperature and relative humidity. These are very popular among makers and electronics hobbyists.
These sensors contain a chip that does analog to digital conversion and spit out a digital signal with the temperature and humidity. This makes them very easy to use with any microcontroller.
The DHT11 and DHT22 are very similar, but differ in their specifications.
The DHT22 sensor has a better resolution and a wider temperature and humidity measurement range. However, it is a bit more expensive, and you can only request readings with 2 seconds interval.
The DHT11 has a smaller range and it's less accurate. However, you can request sensor readings every second. It's also a bit cheaper.
Despite their differences, they work in a similar way, and you can use the same code to read temperature and humidity. You just need to select in the code the sensor type you're using.
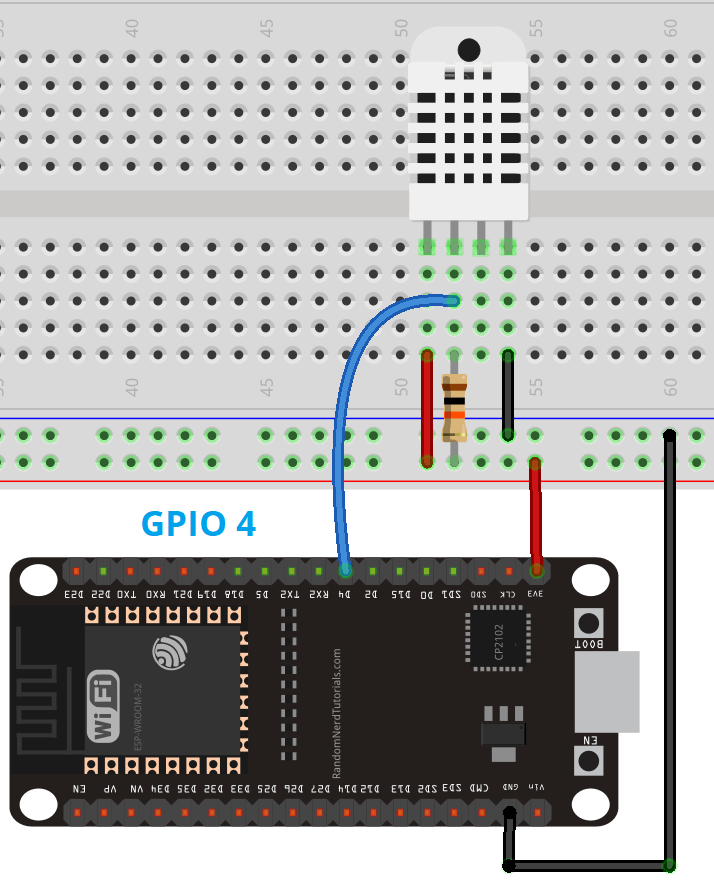
Wire the DHT11 or DHT22 sensor to the ESP32 development board as shown in the following schematic diagram.
To read from the DHT sensor, we'll use the DHT library from Adafruit. To use this library you also need to install the Adafruit Unified Sensor library. Follow the next steps to install those libraries.
Open your Arduino IDE and go to Sketch > Include Library > Manage Libraries. The Library Manager should open.
Search for "DHT" on the Search box and install the DHT library from Adafruit.

After installing the DHT library from Adafruit, type "Adafruit Unified Sensor" in the search box. Scroll all the way down to find the library and install it.

After installing the libraries, restart your Arduino IDE.
Rename the file secret.h.public to secret.h and edit it with your information:
- 1. Select your thing from this page
- 2. From the left menu, select Security and click the button "Create Certificate"
- 3. Now download both files *.cert.pem and *.private.key and replace their content in the secret.h. And don't forget to activate your Certificate.
- 4. Back to the left menu, click Interact and copy the HTTPS link then paste it into secret.h as well.
Finally, open the file esp32-aws-weather-station.ino with Arduino IDE
Now that parts are connected and the libraries are installed, it's time to setup the AWS part.
As you see in the diagram below, the ESP board will be sending data through an MQTT topic to AWS IoT Core, we will be applying rules on the raw data and invoking a Lambda that writes the data to a dynamoDB table. Afterwards, we can read that data and display it on a webpage