Connected Smart Irrigation System with Arduino Uno board, Soil capacitive sensor, ESP8266 WiFi module and AWS IOT
This repo accompanies the "Connected Irrigation System" YouTube series. it contains the code, libraries, diagrams, and more information that I promised in the videos.
Video 1: Building an IoT Irrigation System with Arduino, and Soil sensor

- Arduino Uno
- Breadboard
- Jumper Wires
- 4 Channel Relay
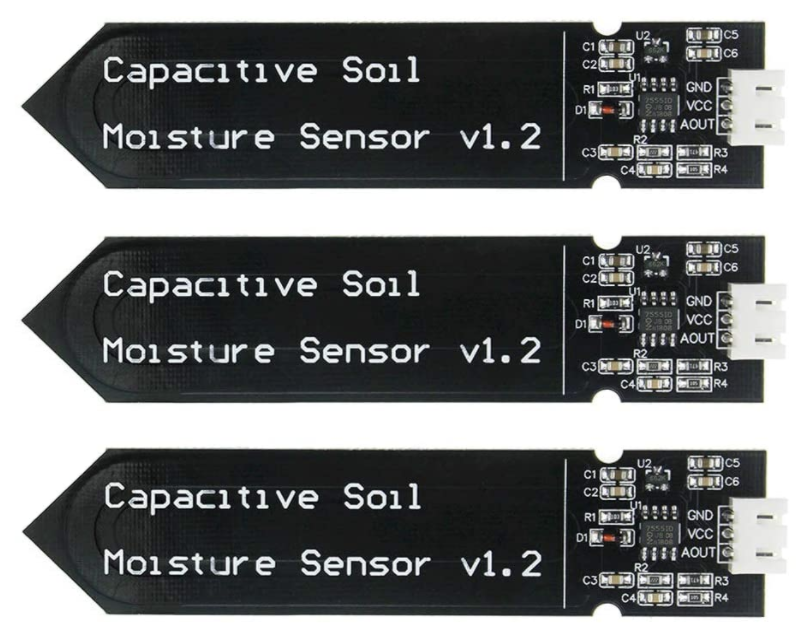
- Capacitive Soil Moisture Sensor
- Submersible Mini Water Pumps
- 2 AA Battery Holder with Switch
- Hardware / Storage Cabinet Drawer
- ESP8266 ESP-01 WiFi Module
- ESP8266 ESP-01 programmable USB
- ESP8266 ESP-01 Breadboard Adapter
There is now an ensemble kit that includes most of the required hardware: WayinTop Automatic Irrigation DIY Kit. But you still need to purchase the 2 AA Battery Holder, the Arduino Uno and the Jumper Wires PS: This guide works for both options
This is an extremely popular DIY project because it automatically waters your plants and flowers according to the level of moisture in the soil. The list of items above combines the development board (Arduino Uno), Mini pump, Tubing, Soil Moisture Sensors and a 4 Channel 5V Relay Module, which is all you need to build an automated irrigation system.
You can always go ahead and buy a ready to use a solution like this Self Watering System for roughly the same cost. But if you're looking to learn Arduino development while doing a fun and useful project in the meantime, then stick around
Moisture is the presence of water, often in trace amounts. Small amounts of water may be found, for example, in the air (humidity), in foods, and in some commercial products. Moisture also refers to the amount of water vapor present in the air.
Inserted into the soil around the plants. This sensor can check whether your plant is thirsty by measuring the level of moisture in the soil
There are a number of connections to be made. Lining up the display with the top of the breadboard helps to identify its pins without too much counting, especially if the breadboard has its rows numbered with row 1 as the top row of the board. Do not forget, the long yellow lead that links the slider of the pot to pin 3 of the display. The potentiometer is used to control the contrast of the display.
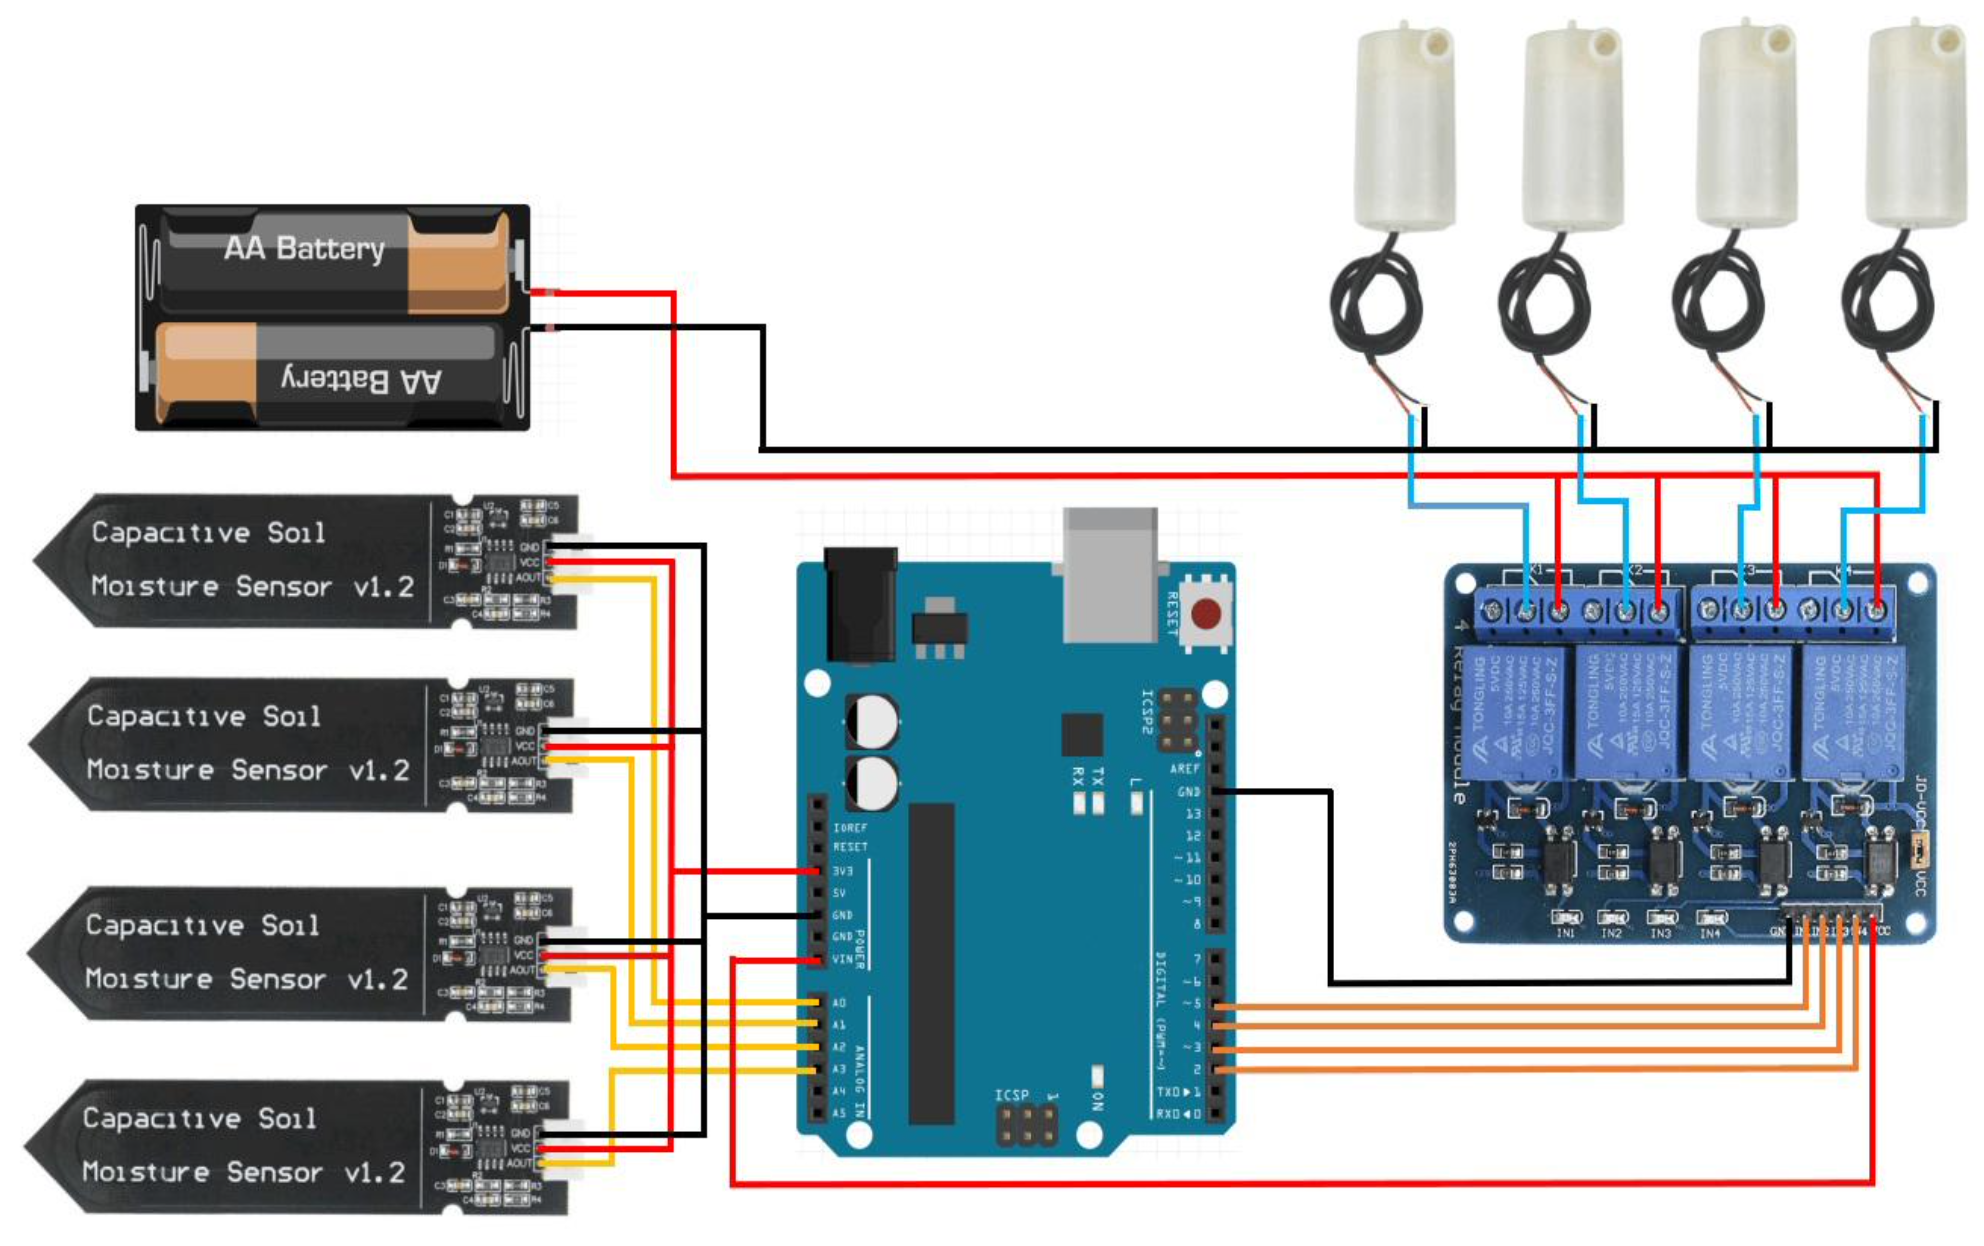
In order to use Arduino to control the four-channel relay, we need to define four control pins of the Arduino.
int IN1 = 2;
int IN2 = 3;
int IN3 = 4;
int IN4 = 5;
Since the value detected by the soil moisture sensor is an analog signal, so four analog ports are defined.
int Pin1 = A0;
int Pin2 = A1;
int Pin3 = A2;
int Pin4 = A3;
We need to use a variable to store the value detected by the sensor. Since there are four sensors, we define four variables.
float sensor1Value = 0;
float sensor2Value = 0;
float sensor3Value = 0;
float sensor4Value = 0;
In the setup() function, mainly using Serial.begin() function to set the serial port baud rate, using the pinMode function to set the port input and output function of arduino. OUTPUT indicates output function and INPUT indicates input function.
void setup() {
    Serial.begin(9600);

    pinMode(IN1, OUTPUT);
    pinMode(IN2, OUTPUT);
    pinMode(IN3, OUTPUT);
    pinMode(IN4, OUTPUT);

    pinMode(Pin1, INPUT);
    pinMode(Pin2, INPUT);
    pinMode(Pin3, INPUT);
    pinMode(Pin4, INPUT);

    digitalWrite(IN1, HIGH);
    digitalWrite(IN2, HIGH);
    digitalWrite(IN3, HIGH);
    digitalWrite(IN4, HIGH);

    delay(500);
}
Finally, in the loop() function, cycle use the Serial.print() function to output the prompt information in the serial monitor, use the analogRead function to read the sensor value. Then use the if function to determine the sensor value, if the requirements are met, turn on the relay and using the digitalWrite function to operate the pump, if not, then turn off the relay.
void loop() {
   Serial.print("Plant 1 - Moisture Level:");
   sensor1Value = analogRead(Pin1);
   Serial.println(sensor1Value);

   if (sensor1Value > 450) {
       digitalWrite(IN1, LOW);
   } else {
       digitalWrite(IN1, HIGH);
   }
   ...
}
PS:
There are total four lines of if(value4>550) in the loop() function. This is the statement that controls the start of the pump. The values inside need to be reset according to the water needs of the plants and flowers.
For code that goes into the WiFi board (ESP8266 ESP01) and more explanation, please head out to this repo: https://github.com/MecaHumArduino/esp8266-01-aws-mqtt