

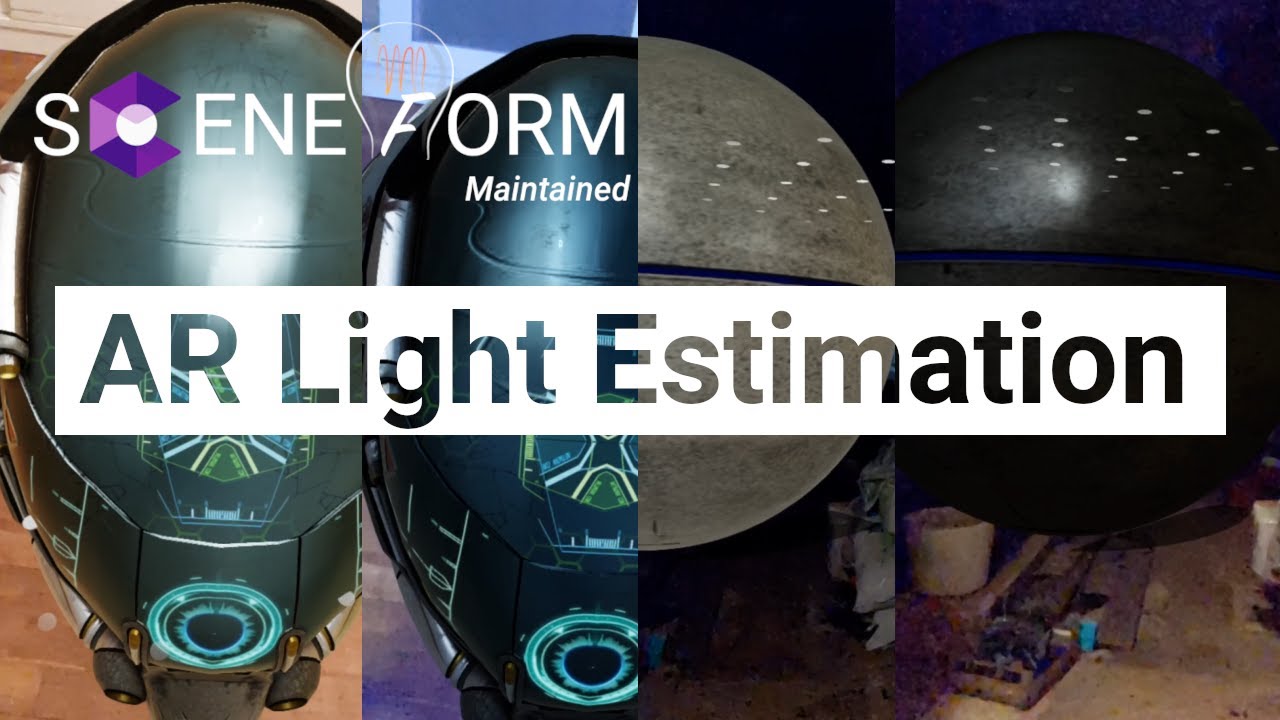
Sceneform Maintained is an ARCore Android SDK with Google Filament as 3D engine. This is the continuation of the Archived Sceneform
Android Augmented Reality library: AR Model Viewer, Augmented Images, Augmented Faces, Video, Depth, Cloud Anchors, Instant Placement, Light Estimation and much more in Kotlin and Java

(Please don't use it for issues, go to the GitHub Issues section instead)
- Sceneform - Java Continuation : Here
- SceneView - Kotlin Successor : SceneView/sceneview-android
- No plugin needed: Use gltf and glb 3D models files directly from assets, res/raw, local file or http/https url instead of sfa, sfb, fbx, obj,...
- Latest versions of ARCore SDK and Google Filament
- Latest gradle dependencies including AndroidX, LifecycleScope/Coroutines (SceneView only),...
- Available as
mavenCentral()dependency - Augmented Images supported
- Augmented Faces supported
glborgltffor 3D models (animations supported)hdrorktxfor Environement (IndirectLight + Skybox)- 3D only usage supported and single dependency without ARCore (SceneView only)
- VideoNode for MediaPlayer (mp4, avi,...) Video 3D Node
- Horizontal/Vertical Plane Placement
- Depth occlusion and placement (SceneView only)
- InstantPlacement (SceneView only)
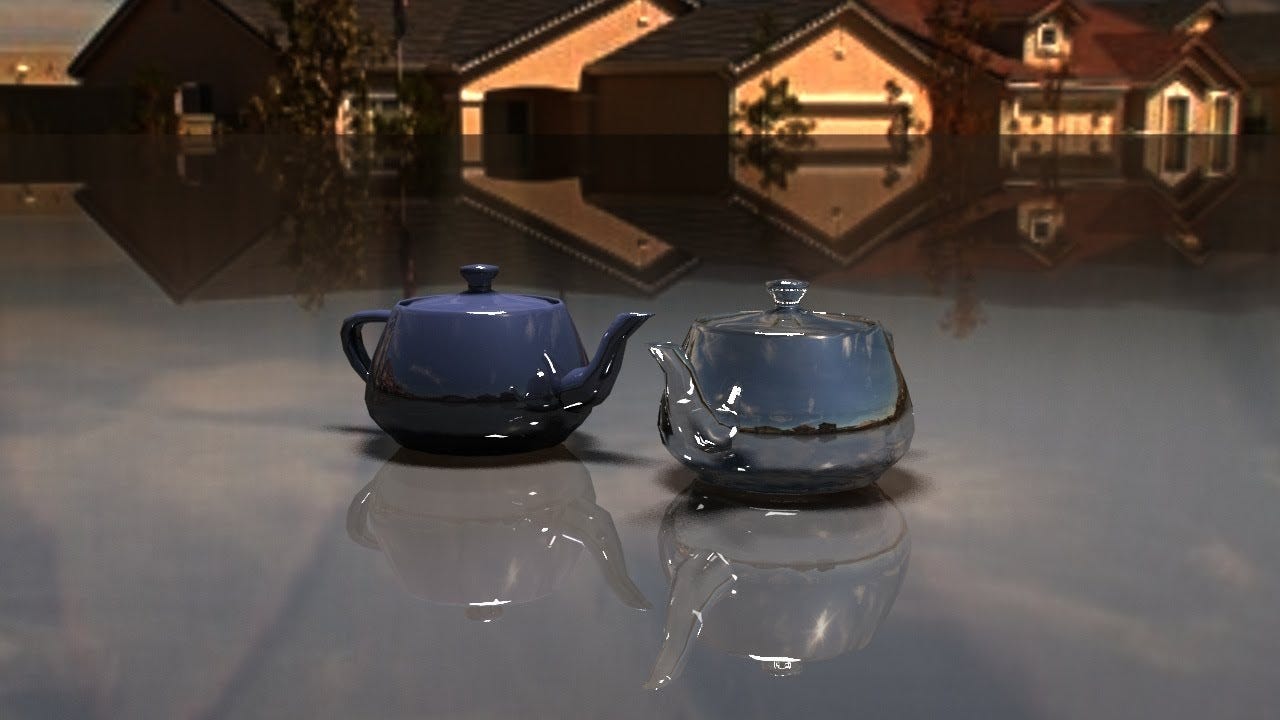
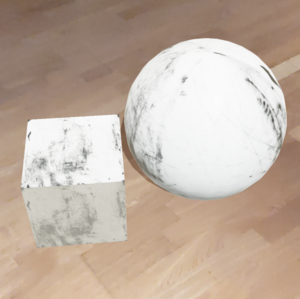
- HdrLightEstimation with adjustements between more Spectacular or Realistic
- Simple Model Viewer for basic usage, with only ArSceneView parameters (SceneView only)
- Less OpenGL knowlege needed
This repository was originaly a fork of Sceneform Copyright (c) 2021 Google Inc. All rights reserved.
app/build.gradle
dependencies {
     implementation "com.gorisse.thomas.sceneform:sceneform:1.23.0"
}AndroidManifest.xml
<uses-permission android:name="android.permission.CAMERA" />

<application>
    ...
    <meta-data android:name="com.google.ar.core" android:value="optional" />
</application>res/layout/main_activity.xml
<androidx.fragment.app.FragmentContainerView
    android:id="@+id/arFragment"
    android:name="com.google.ar.sceneform.ux.ArFragment"
    android:layout_width="match_parent"
android:layout_height="match_parent" />src/main/java/.../MainActivity.java
override fun onCreate(savedInstanceState: Bundle?) {
    super.onCreate(savedInstanceState)

    // Load model.glb from assets folder or http url
    (supportFragmentManager.findFragmentById(R.id.arFragment) as ArFragment)
        .setOnTapPlaneGlbModel("model.glb")
}
Or
src/main/java/.../MainFragment.java
override fun onViewCreated(view: View, savedInstanceState: Bundle?) {
    super.onViewCreated(view, savedInstanceState)

    // Load model.glb from assets folder or http url
    (childFragmentManager.findFragmentById(R.id.arFragment) as ArFragment)
        .setOnTapPlaneGlbModel("https://storage.googleapis.com/ar-answers-in-search-models/static/Tiger/model.glb")
}screen-20210701-184737_2.mp4
arFragment.setOnTapArPlaneListener { hitResult, plane, motionEvent ->
    // Create the Anchor
    arFragment.arSceneView.scene.addChild(AnchorNode(hitResult.createAnchor()).apply {
        // Create the transformable model and add it to the anchor
        addChild(TransformableNode(arFragment.transformationSystem).apply {
            renderable = model
            renderableInstance.animate(true).start()
        })
    })
} |
 |
 |
|---|
arFragment.apply {
    setOnSessionConfigurationListener { session, config ->
        if (session.isDepthModeSupported(Config.DepthMode.AUTOMATIC)) {
            config.depthMode = Config.DepthMode.AUTOMATIC
        }
    }
    setOnViewCreatedListener { arSceneView ->
        // Available modes: DEPTH_OCCLUSION_DISABLED, DEPTH_OCCLUSION_ENABLED
        arSceneView.cameraStream.depthOcclusionMode =
            CameraStream.DepthOcclusionMode.DEPTH_OCCLUSION_ENABLED
    }
}
 |
 |
 |
|---|
A Blender file augmented face template is available here and can be used to create your own models:
The four bones in the skeleton are moved to the corresponding ARCore poses at runtime. It is possible to attach objects to the bones or assign weight to vertices to position the objects or modify a larger mesh according to the ARCore poses. The positions of the bones in the Blender file give a general idea of how the end result will look like so the relative transform of the attached objects is important.

A face texture should be prepared as a separate file. For creating a face texture this template can be used: canonical_face.png
You can also change the model shape based on the skeleton and weights assigned to vertices, moving some small objects around the head, scaling them, etc...
You can even animate all that.
 |
 |
|---|
// Create a new anchor = the pose of which ARCore will try to resolve using the ARCore Cloud Anchor service and the provided cloudAnchorId
sceneView.session?.resolveCloudAnchor(cloudAnchorId)?.let { resolvedAnchor ->
  sceneView.scene.addChild(AnchorNode(resolvedAnchor).apply {
      addChild(VideoNode(context, MediaPlayer.create(context, R.raw.restaurant_presentation).apply {
                  this.start()
              },null)
      )
  })
} |
 |
 |
|---|---|---|
 |
 |
 |
video_2021-12-03_19-29-12.mp4
// Use this mode if you want your objects to be more like if they where real
arSceneView.lightEstimationConfig = LightEstimationConfig.REALISTIC
// Use this mode if you want your objects to be more spectacular
arSceneView.lightEstimationConfig = LightEstimationConfig.SPECTACULAR// Use this mode if you only want to apply ARCore lights colors and intensity
arSceneView.lightEstimationConfig = LightEstimationConfig.AMBIENT_INTENSITY// Use this mode if you want to disable all ARCore light estimation lights
arSceneView.lightEstimationConfig = LightEstimationConfig.DISABLED |
 |
 |
|---|
arFragment.setOnTapArPlaneListener { hitResult, plane, motionEvent ->
    // Create the Anchor
    arFragment.arSceneView.scene.addChild(AnchorNode(hitResult.createAnchor()).apply {
        addChild(VideoNode(context, MediaPlayer.create(context, R.raw.video).apply {
            start()
        }, chromaKeyColor, null))
    })
} |
 |
|---|
 Youtube Youtube |
 Youtube Youtube |
|---|


If your app requires ARCore (AR Required) and is not only (AR Optional), use this manifest to indicates that this app requires Google Play Services for AR (AR Required) and results in the app only being visible in the Google Play Store on devices that support ARCore:
<uses-permission android:name="android.permission.CAMERA" />
<uses-feature android:name="android.hardware.camera.ar" android:required="true"/>

<application>
    ...
    <meta-data android:name="com.google.ar.core" android:value="required" />
</application>To add a node or multiple nodes to the Scene when the user press on a surface, you can override the onTapPlane function from a BaseArFragment.OnTapArPlaneListener:
arFragment.setOnTapArPlaneListener(::onTapPlane)arFragment.setOnTapArPlaneListener { hitResult, plane, motionEvent ->
// Create the Anchor
arFragment.arSceneView.scene.addChild(AnchorNode(hitResult.createAnchor()).apply {
// Create the transformable model and add it to the anchor.
addChild(TransformableNode(arFragment.transformationSystem).apply {
renderable = model
renderableInstance.animate(true).start()
// Add child model relative the a parent model
addChild(Node().apply {
// Define the relative position
localPosition = Vector3(0.0f, 1f, 0.0f)
// Define the relative scale
localScale = Vector3(0.7f, 0.7f, 0.7f)
renderable = modelView
})
})
})
}anchorNode.anchor = nullnode.parent = nullnode.enabled= falseThe Update-Rate of the rendering is limited through the used camera config of ARCore. For most Smartphones it is 30 fps and for the Pixel Smartphones it is 60 fps. The user can manually change this value (you should know what you are doing).
arFragment.setOnViewCreatedListener { arSceneView ->
    // Set a higher bound for the frame rate
    arSceneView.setMaxFramesPerSeconds(60)
}
The default value is 60.
Until now, only RenderableInstance are animtable. Below model corresponds to a RenderablaInstance returned from a node.getRenderableInstance()
On a very basic 3D model like a single infinite rotating sphere, you should not have to use ModelAnimator but probably instead just call:
model.animate(repeat).start();If you want to animate a single model to a specific timeline position, use:
ModelAnimator.ofAnimationFrame(model, "AnimationName", 100).start();ModelAnimator.ofAnimationFraction(model, "AnimationName", 0.2f, 0.8f, 1f).start();ModelAnimator.ofAnimationTime(model, "AnimationName", 10.0f)}.start();The animation names are definied at the 3D model level.
You can compare it to a track playing something corresponding to a particular behavior in you model.
For example, on Blender "AnimationName" can correspond to
- An action defined inside the
Non linear Animation View Port

- A single object behavior in the
Timeline ViewPort
To know the actual animation names of a glb/gltf file, you can drag it on a glTF Viewer like here and find it in the animation list.
- A single time, frame, fraction value will go from the actual position to the desired value
- Two values means form value1 to value2
- More than two values means form value1 to value2 then to value3
If the model is a character, for example, there may be one ModelAnimation for a walkcycle, a second for a jump, a third for sidestepping and so on:
AnimatorSet animatorSet = new AnimatorSet();
animatorSet.playSequentially(ModelAnimator.ofMultipleAnimations(model, "walk", "run"));
animatorSet.start();Here you can see that no call to animator.cancel() is required because the
animator.setAutoCancel(boolean) is set to true by default
ObjectAnimator walkAnimator = ModelAnimator.ofAnimation(model, "walk");
walkButton.setOnClickListener(v -> walkAnimator.start());

ObjectAnimator runAnimator = ModelAnimator.ofAnimation(model, "run");
runButton.setOnClickListener(v -> runAnimator.start());For a synchronised animation set like animating a complete scene with multiple models
time or sequentially, please consider using an AnimatorSet with one
ModelAnimator parametrized per step
AnimatorSet completeFly = new AnimatorSet();

ObjectAnimator liftOff = ModelAnimator.ofAnimationFraction(airPlaneModel, "FlyAltitude",0, 40);
liftOff.setInterpolator(new AccelerateInterpolator());

AnimatorSet flying = new AnimatorSet();
ObjectAnimator flyAround = ModelAnimator.ofAnimation(airPlaneModel, "FlyAround");
flyAround.setRepeatCount(ValueAnimator.INFINITE);
flyAround.setDuration(10000);
ObjectAnimator airportBusHome = ModelAnimator.ofAnimationFraction(busModel, "Move", 0);
flying.playTogether(flyAround, airportBusHome);

ObjectAnimator land = ModelAnimator.ofAnimationFraction(airPlaneModel, "FlyAltitude", 0);
land.setInterpolator(new DecelerateInterpolator());

completeFly.playSequentially(liftOff, flying, land);Assuming a character object has a skeleton, one keyframe track could store the data for the position changes of the lower arm bone over time, a different track the data for the rotation changes of the same bone, a third the track position, rotation or scaling of another bone, and so on. It should be clear, that an ModelAnimation can act on lots of such tracks.
Assuming the model has morph targets (for example one morph target showing a friendly face and another showing an angry face), each track holds the information as to how the influence of a certain morph target changes during the performance of the clip.
In a glTF context, this {@link android.animation.Animator} updates matrices according to glTF animation and skin definitions.
- Updating matrices in
TransformManagercomponents according to the model animation definitions. - Updating bone matrices in
RenderableManagercom ## Animations
Every PropertyValuesHolder that applies a modification on the time position of the animation
must use the ModelAnimation.TIME_POSITION instead of its own Property in order to possibly cancel
any ObjectAnimator operating time modifications on the same ModelAnimation.
Please see the LICENSE file.
The Sceneform trademark is a trademark of Google, and is not subject to the copyright or patent license grants contained in the Apache 2.0-licensed Sceneform repositories on GitHub. Any uses of the Sceneform trademark other than those permitted in these guidelines must be approved by Google in advance.
These guidelines exist to ensure that the Sceneform project can share its technology under open source licenses while making sure that the "Sceneform" brand is protected as a meaningful source identifier in a way that's consistent with trademark law. By adhering to these guidelines, you help to promote the freedom to use and develop high-quality Sceneform technology.
Because we are open-sourcing the Sceneform technology, you may use the Sceneform trademark to refer to the project without prior written permission. Examples of these approved references include the following:
- To refer to the Sceneform project itself;
- To refer to unmodified source code or other files shared by the Sceneform repositories on GitHub;
- To accurately identify that your design or implementation is based on, is for use with, or is compatible with the Sceneform technology.
Examples:
- "[Your Product] for Sceneform."
- "[Your Product] is a fork of the Sceneform project."
- "[Your Product] is compatible with Sceneform."
- The Sceneform name may never be used or registered in a manner that would cause confusion as to Google's sponsorship, affiliation, or endorsement.
- Don't use the Sceneform name, or a confusingly similar term, as part of your company name, product name, domain name, or social media profile.
- Other than as permitted by these guidelines, the Sceneform name should not be combined with other trademarks, terms, or source identifiers.
- Don't remove, distort or alter the Sceneform name. That includes modifying the Sceneform name, for example, through hyphenation, combination, or abbreviation. Do not shorten, abbreviate, or create acronyms out of the Sceneform name.
- Don't display the Sceneform name using any different stylization, color, or font from the surrounding text.
- Don't use the term Sceneform as a verb, or use it in possessive form.
By downloading the Sceneform SDK for Android, you agree that the Google APIs Terms of Service governs your use thereof.
You must disclose the use of Google Play Services for AR (ARCore) and how it collects and processes data, prominently in your application, easily accessible to users. You can do this by adding the following text on your main menu or notice screen: "This application runs on Google Play Services for AR (ARCore), which is provided by Google LLC and governed by the Google Privacy Policy".