- Command Line Tools
- Files and Folder Structure
- Dart and Flutter
Data Types, Function, Operators, Class, Constructor, Maps, List, ...spread operator, const vs final, getter, string interpolation, String methods, Parsing etc.
- Analyze main.dart
- Widgets
MaterialApp, Scaffold, Text, Row, Column, ElevatedButton, TextButton, OutlinedButton
- Stateless vs Stateful Widget
- Github Workflow | Build for Web automatically
- Adding Custom Assets | Media | Fonts
More Widgets, Styling, Adding Logic(Personal Expense App)
- App/Page Widgets
- Layout Widgets | Container | Row | Column
- Responsive Widgets | FractionallySizedBox | Flexible | FittedBox | Expanded
- Content Containers | Stack | Card
- Repeat Elements Widgets | ListView | GridView
- Content Type Widgets | Text | Image | Icon
- User Input Widgets | TextField | Buttons | GestureDetector | InkWell
- ThemeData | SizedBox | Divider | CircleAvatar | ClipRRect | Switch
- Flutter Methods to show Widgets
- Access methods of StatefulWidget from State Widget
- List/Map Methods | Switch-Case
Responsive and Adaptive UI(Personal Expense App)
- Get Device Screen Size | Media Query
- Orientation | Portrait | Landscape
- Know Size given to a specific Widget | LayoutBuilder
- UI based on Platform | Adaptive UI
Flutter Internals and Performance
- Flutter Under the Hood
- Avoid unnecessary Widget rebuild
- Extracting Widgets
- Widget Lifecycle | initState | didUpdateWidget | dispose | didChangeDependencies
- App Lifecycle
- Context
- Key | Solve List State Problems
Navigation and Multiple Screens(Meals App)
- Gradient
- Navigator
- NavigationBar at Top | TabBar
- BottomNavigationBar
- Drawer
- Stack of Pages
- ListTile with trailing Switch | SwitchListTile
- Pass Data through Route
- Problem with passing Data through Routes
- State Management | Provider
- Inheritance(extends) vs Mixins(with)
- Creating provider for a List of items | Provider Constructors
- Using Consumer instead of Provider
- PopupMenuButton
- Some Map Methods
- Using multiple Providers | MultiProvider
- Resolve Collision of same Class Name from different imports
- Slide-to-delete | Dismissible Widget
User Inputs and Forms(Shop App)
- Popup that slides from Bottom | Snackbar
- AlertDialog
- Forms
- Image Previewer
- Saving and Validating Form
Sending HTTP Requests(Shop App)
- Setting up Firebase Realtime Database
- How to Send http Requests
- Sending data (POST)
- Future and Async | try-catch
- Fetching Data (GET)
- Pull-to-Refresh | RefreshIndicator
- Updating(PATCH) & Deleting(DELETE) Data
- Fetch Data every time the State changes | FutureBuilder
- How Authentication works
- Firebase Real Time Database Rules
- User SignUp/SignIn | Firebase Auth REST API
- Handling Authentication Error
- Storing Token Locally | Memory
- Passing Provider as arguments to Another Provider | ChangeNotifierProxyProvider
- Setting Favorite Status per User
- Filtering Products by Creator
- Logout Manually/Automatically when Token expires
- Auto-login Users | Shared Preferences
- Manually Controlled Animation
- AnimatedBuilder
- AnimatedContainer
- CurvedAnimation | FadeTransition | SlideTransition | FadeInImage | Hero
- Fancy Scrolling | Slivers
When scrolled, the image at top will gradually become smaller, until it transforms into an appBar with given title
- Custom Route Transition
Using Native Device Features like Camera, Maps, Location(Great Places App)
- Place Class
- Taking A Photo | ImagePicker
- Storing Image on Memory | Copy File
- Storing Image in Filesystem using SQLlite
- Taking Current Location as Input
- Entering Custom Location
- Saving location to SQLite
Firebase, Image Upload, Push Notifications(Chat App)
- Firebase SDK Setup
- Rendering Firestore data with StreamBuilder()
- Adding data to Firestore
- Firebase Auth | User Authentication | Signup/Signin
- DropdownButton | Logout
- Firebase Firestore Security Rules
- Sending/Listening messages to/from Firestore
- Firebase Storage | Uploading Image
- Firebase Cloud Messaging | On-demand Push Notifications
- Firebase Cloud Functions | Trigger Push Notification by user
# To create new project
flutter create my_project_name

# To check for missing requirements
flutter doctor| Folder/File | Use | Development |
|---|---|---|
| .idea | Used by android studio for development purposes | Passive |
| android | Android Project Folder for development and production | Rarely Active |
| ios | IOS Project Folder for development and production | Rarely Active |
| build | Holds output of flutter application | Passive |
| lib | Contain our dart files | Active |
| test | Automate tests for app | Rarely Active |
| .gitignore | Ignore files while committing and pushing to github | Rarely Active |
| .packages | Auto Generated to manage internal dependency and packages | Passive |
| project_name.iml | Auto manage some internal functioning of flutter | Passive |
| .metadata | Flutter saves information used for building the app | Passive |
| pubspec.yml | Configure third party dependency, assets | Active |
| pubspec.lock | Auto generated form pubspec.yml | Passive |
Note: Active means used by programmer, Passive means Flutter manages automatically
void main(){
  // Starting of program
  // Everything should be here
}

// Data types and Variables
bool k = True; // or False
int a = 1;
double e = 10; // or 10.2002
num d = 10; // or 10.2002
String c = "Hello!";
var f;

// Functions
int addNumbers(num a,num b){
  return a+b;
}

// Dynamic Function(bad practice)
subNumbers(a,b){
  print(a-b);
}

if(expression){
  print("expression is true");
}else{
  print("expression is false ");
}

// Ternary Operator
expression ? print("expression is true") : print("expression is false");

// Null (to reset or indicate that any type of variable doesn't have a value)
var name; // default uninitialized variable is null
if(name == null){
  print("Name doesn't have any value")
}

// Private Properties(leading underscore to class or variable)
// So we can't access them from other file
class _Quiz{
  // Its a private class
}
var _qsnIndex = 0;
// Class
class Person{
String name = "Ilene Dover";
int age = 30;
}
var p1 = Person(); // Instantiate an object
p1.name; // Access the object data
// Constructor
class Person{
String name;
int age;
Person(String name, required int age){
this.name = name;
this.age = age;
// @required means age is compulsory to pass
// and works only with Flutter
}
// Alternative
Person({this.name,required this.age});
// Alternative(positioned argument)
Person(this.name,required this.age)
}
// Position doesn't matter in named parameter
var p1 = Person(name: "Max", age: 20);
// Position Matters
var p2 = Person("Sam",20);// Multiple Constructors
class Person{
String name;
int age;
Person.old(this.name){
age = 60;
}
Person.young(this.name){
age = 20;
}
}
main(){
Person.old("Max");
print(Max.age)// 60
}// Arrow function(only if one statement is available)
void main() => runApp(MyApp());
// Execute function immediately
onPressed: fxn()
// Execute function only on certain event
onPressed: fxn,
// Anonymous function (execute only on certain event)
onPressed: ()=>print("ans chosen!"),
onPressed: (){
// for other than one line statement
fxn()
print("ans chosen");
},
// Anonymous Function (execute immediately)
onPressed: (){
// for other than one line statement
fxn()
print("ans chosen");
}(),// Maps (key:value pairs)
var qsns = [
{
'qsn':'What is your favorite animal?',
'ans' : ['Dog','Cat']
},
{
'qsn':'What is your favorite color?',
'ans' : ['Black','Red']
}
];
qsns[0]['qsn'] // access 1st qsn
qsns[0]['ans'] // access 1st list of ans
// To get List of Answer Widgets
...(qsns[_qsnIndex]['ans'] as List<String>).map((ans) {
return Answer(_ansQsn, ans);
}).toList()
// qsns[_qsnIndex]['ans'] as List<String> -> dart doesn't know that ans is a list, So we need to specify it
// List.map((ans){}) -> iterate through every element inside the list and can take that element as argument
// return Answer(_ansQsn,ans); -> Based on iterations, Answer widgets are generated
// .toList() -> All the answer Widgets are converted back to list cause Column take list of Widgets
// ... -> spread operator takes a list and pull all values fo list and add them to surrounding list
// Example
Column(
children : [
...(qsns[_qsnIndex]['ans'] as List<String>).map((ans) {
return Answer(_ansQsn, ans);
}).toList()
]
),
// Equivalent to (without ...spread operator)
Column(
children : [
[
Answer(_ansQsn, qsns[_qsnIndex]['ans'][0]),
Answer(_ansQsn, qsns[_qsnIndex]['ans'][1]),
]
]
),
// With ...spread operator (nested list got removed)
Column(
children : [
Answer(_ansQsn, qsns[_qsnIndex]['ans'][0]),
Answer(_ansQsn, qsns[_qsnIndex]['ans'][2]),
]
),
// returning a copy of list but not reference to the list
List<Product> get items {
return [..._items];
}const qsns; // values doesn't change, (compile-time constant)
final qsns; // values doesn't change once it receives initial value, (run-time constant) value
var txt = const ['Hello'] // value is constant but not variable, txt is unmodifiable
txt.add('Max');
print(txt); // error, if const is removed then, Hello Max
txt = ['Hello Max'] // allowed cause txt is not constant// Getter(mixture of method and property), can't receive arguments
returnType get getterName {
// do something
return something;
}
getterName // call/reference to getter// String Interpolation
a = 10;
print('a = $a'); // a = 10
tx.amount = 100; // tx is instance of a class with amount as property
print('amount = \$${tx.amount}) // amount = \$100');
// String methods
value.startsWith('https') // returns true if value String starts with https
value.endsWith('.png') // returns true if value String ends with .png
// Parsing
double.parse('123hello'); // 123
double.tryParse('hello'); // null as no number is there to parse// import needed packages from Flutter
import 'package:flutter/material.dart';
void main() {
// runApp provided by material.dart
// takes object which is MyApp() in this case
// runs and calls build method of MyApp class
runApp(MyApp());
}
// MyApp inherits StatelessWidget provided by Flutter or material.dart
class MyApp extends StatelessWidget {
// Define Class properties like variables and functions/methods in here
@override // optional, annotation used to mark an instance member as overriding an inherited class member
// build method to return a Widget(class)
// takes a required argument of type BuildContext
// to handle location of widget in widget tree
Widget build(BuildContext context) {
// Define variables and functions that needs to reset and build when rebuilding the interface
// MaterialApp is root widget
return MaterialApp(
home: Text("Hello"),
body: Scaffold(),
);
}
}MaterialApp, Scaffold, Text, Row, Column, ElevatedButton, TextButton, OutlinedButton
// Widgets are classes with Constructor that takes named parameters
// Widgets(), this is object of Widget Class
// Press 'ctrl+space' inside () brackets of Widget to get the list of named parameters
// Always add comma after each parameter to make the code pretty

// Root Widget
MaterialApp(
  // Scaffold is the base Styling Widget (backgroundColor, appBar , navigationBar)
  home: Scaffold(
    appBar: AppBar(
      title: Text(
        'Ultimate Flutter App',
      ),
      actions: [
        IconButton(),
        IconButton(),
        Text(),
      ],
      // automaticallyImplyLeading: false, // to not add auto generated back button
    ),
    body: Text("Body, You can add any Widget here!"),
  ),
)

// Layout and Control Widgets(Invisible)
Row(), Column(), ListView(), Container(), ...

// Output and Input Widgets(Visible)
RaisedButton(), Text(), Card(), ... // Also Container() with some styling

// Row() to arrange Widgets in Row
Row(
  mainAxisAlignment: MainAxisAlignment.center, // horizontal axis
  crossAxisAlignment: CrossAxisAlignment.center, // vertical axis
  mainAxisSize: MainAxisSize.min, // size of row will be as big as its children need to be

  children: [
    Text("Row1"),
    Text("Row2"),
    Text("Row3"),
  ],
),

// Column() to arrange Widgets in Column
Column(
  mainAxisAlignment: MainAxisAlignment.center, // vertical axis
  crossAxisAlignment: CrossAxisAlignment.center, // horizontal axis
  mainAxisSize: MainAxisSize.min, // size of column will be as big as its children need to be

  children: [
    Text("Column1"),
    Text("Column2"),
    Text("Column3"),
  ],
),

// ListView() to arrange Widgets in Row or Column but is Scrollable
// Container() is like box-model of css

// RaisedButton(), FlatButton(), OutlineButton() are deprecated but can be used
// New Buttons are pre-styled but can be overwritten
// onPressed: null disables the buttons

// RaisedButton() to ElevatedButton()
ElevatedButton(
  onPressed: null,
  child: Text("Elevated Btn"),
  style: ButtonStyle(
    foregroundColor: MaterialStateProperty.all(Colors.purple), // text and icon
    backgroundColor: MaterialStateProperty.all(Colors.red),
  ),

  // Alternative style Property
  style: ElevatedButton.styleFrom(
      primary: Colors.red, // bg (for elevated btn bg is primary thing)
      onPrimary: Colors.white, // foreground (what should be on primary)
      shape: RoundedRectangleBorder(
        borderRadius: BorderRadius.circular(30),
      ),
      padding:
          EdgeInsets.symmetric(horizontal: 30.0, vertical: 8.0),
    ),
),

// FlatButton() to TextButton()
TextButton(
  onPressed: null,
  child: Text("Text Btn"),
  style: ButtonStyle(
      foregroundColor: MaterialStateProperty.all(Colors.purple), // text and icon
  )

  // Alternative style property
  style: TextButton.styleFrom(
    primary: Colors.orange, // text (primary thing is text in TextButton)
    tapTargetSize: MaterialTapTargetSize.shrinkWrap, // Shrinks the tap target size to the minimum provided by the Material specification.(removes extra margin)
  ),
),

// OutlineButton() to OutlinedButton()
OutlinedButton{
  onPressed: null,
  child: Text("Outlined Btn"),
  style: BorderStyle(),

  // Alternative style property
  style: OutlinedButton.styleFrom(
    primary: Colors.red // text
    side: BorderSide(
      color: Colors.black, // borderColor
    ),
  ),
}

// For Icons along with above buttons
// TextButton.icon(), ElevatedButton.icon(), OutlinedButton.icon()In both, data can change externally and build method is called or the UI re-renders when data change
| StatelessWidget | StatefulWidget |
|---|---|
| Input Data -> Widget -> Renders UI | Input Data -> Widget & Internal State -> Renders UI |
| Gets re-rendered when input data changes | Gets re-rendered when input data or local State changes |
| Immutable UI | Mutable UI |
// StatefulWidget (combination of 2 classes)

class Quiz extends StatefulWidget {
  @override
  // Setup connection to State class *
  _QuizState createState() => _QuizState();
}

// State is generic class
// It is persistent and is attached to above StatefulWidget
// Stores the state
// State<Quiz> tells flutter that below State class belongs to Quiz class *
class _QuizState extends State<Quiz> {
  // context can be accessed here without passing from build method unlike stateless Widget
  setState((){
    // Write code that changes the UI
    // Calls build again but update only changed Widget
  });
  @override
  Widget build(BuildContext context) {}
}Use Github Actions to auto build the github-pages as soon as you push to github.
- Inside project folder or repository, add a new folder '/.github/workflows'.
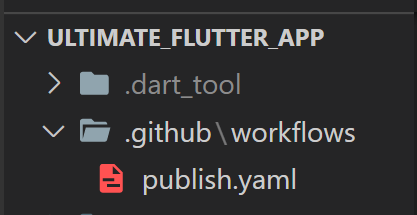
- Under workflows, create publish.yaml file
name: Gh-Pages

on:
  push:
    branches: [master]

jobs:
  build:
    runs-on: ubuntu-latest

    steps:
      - uses: actions/checkout@v2 # Only works with v2
      - uses: subosito/flutter-action@v1
- uses: erickzanardo/flutter-gh-pages@v6- Commit and Publish it to github.
- Navigate to 'actions' tab of the github repo. There, we can see the action going on.
- After that action is completed, new branch 'gh-pages' will be created.
- Go to 'Settings' of the repo, then 'Pages' and Under Branch: dropdown, select 'gh-pages'
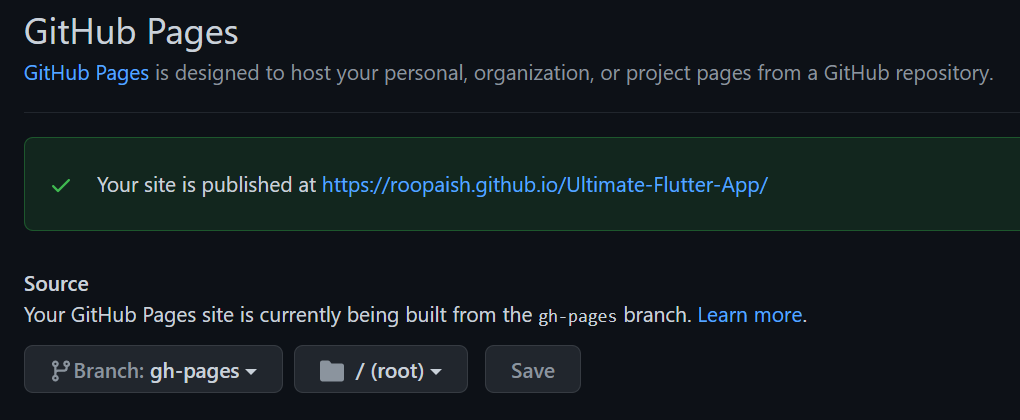
- Now the site will publish to 'https://your_user_name.github.io/your_repo_name'
Note: In case you use custom url or the webpage reside in the root directory of custom url, below steps are not necessary
- Now finally you have to open 'gh-pages' branch and change 'index.html'
- Inside head tag find base url
<head>
  .....
  <base href="/" />
  .....
</head>- Change base url to your repo name (or directory name in case of custom website)
<head>
  .....
  <base href="/your-repo-name/" />
  .....
</head>
Done
Use Custom fonts and images or any multimedia
- Make a folder assets on root directory of project
`2 ├── ... ├── assets # root folder for all the assets to be used in your app │ ├── images # All your images │ ├── fonts # All you custom fonts └── ...
2. update pubspec.yml and save

```yml
flutter:
  assets:
    - assets/images/ # for images
  fonts:
    - family: CustomFont
      fonts:
        - asset: fonts/CustomFont-Regular.ttf
        - asset: fonts/CustomFont-Italic.ttf
          style: italic
    - family: CustomFont2
      fonts:
        - asset: fonts/CustomFont2.ttf
        - asset: fonts/CustomFont2.ttf
          weight: 700
- Now assets can be used
Image.asset('assets/images/waiting.jpg') // using the image

Text(
  'Hello Peter!',
  style: TextStyle(fontFamily: 'CustomFont'), // using the font
  softWrap: true, // wraps text
  overflow: TextOverflow.fade, // handle visual text overflow
);// All Widget Wrapper
MaterialApp()
CupertinoApp()
// Styling overall app
Scaffold()
CupertinoPageScaffold()
// Container()
// Wrapper for other widgets, alignment and styling(border, padding, margin) , takes one child, flexible size
// To style other Widgets
Container(
  alignment: Alignment.centerLeft,
  margin: EdgeInsets.symmetric(
    vertical: 10,
    horizontal: 15,
  ),
  decoration: BoxDecoration(
    border: Border.all(
      color: Colors.purple,
      width: 2,
    ),
  // transform container, rotating element in Z axis
  // transform wants a Matrix4, but translate returns void
  // In dart, the last method return value is taken
  // by applying .., we make sure that the return value of method after .. isn't accountable but the method before is accountable to return a value
  // and here rotationZ returns a Matrix4
  transform: Matrix4.rotationZ(-8 * pi / 180)
    ..translate(-10.0),
  ),
  padding: EdgeInsets.all(10),
  child: Text(
    '\$${tx.amount}',
    style: TextStyle(
      fontWeight: FontWeight.w600,
      fontSize: 20,
      color: Colors.purple,
    ),
  ),
),

// Row()
// Arrange Widgets horizontally , takes multiple child , alignment only, takes full width
// Wrap with SingleChildScrollView() to avoid warning bars and make it scrollable
Row(
  crossAxisAlignment: CrossAxisAlignment.center,
  children: [
    Widget(),
    Widget(),
    Widget(),
  ]
)

// Column()
// Arrange Widgets vertically , takes multiple child , alignment only , takes full height
// Wrap with SingleChildScrollView() to avoid warning bars and make it scrollable
Column(
  crossAxisAlignment: CrossAxisAlignment.end,
  children: [
    Widget(),
    Widget(),
    Widget(),
  ]
)// FractionallySizedBox()
// Takes fraction of size of parent of any width
FractionallySizedBox(
heightFactor: spendingPctOfTotal,
child: Container(
decoration: BoxDecoration(
color: Theme.of(context).primaryColor,
borderRadius: BorderRadius.circular(10),
),
),
),
// Flexible()
// Like flexbox of CSS
// Control how a child of Row or Column or Flex flexes
Flexible(
fit: FlexFit.tight, // force the child to fill the available space
child:Text("hello"),
)
// Example of Flexible use case
Column(
children: [
Flexible(
fit: FlexFit.tight, // takes remaining spaces
// flex: 1; by default because of fit property, takes 1/3 part of available space
child: Container(
height: 100,
color: Colors.blue,
),
),
Flexible(
flex:2, // takes 2/3 part of available space cause total flex = 1+2 = 3
fit:FlexFit.loose, // takes width of child
// because of loose, the size of Container is equal to size of child
// but flex:2; will still be in account which may cause white spaces
// if the child is smaller than 2/3 part of available space
child: Container(
height: 100,
color: Colors.red,
),
),
Container(
// not flexible, so takes the width of its child
height: 100,
color: Colors.pink,
),
],
)
// FittedBox()
// Scales and positions its child Widget
// By default it shrinks the child if space is not enough
FittedBox(
child: Text('\$${spendingAmount.toStringAsFixed(0)}'),
),
// Expanded() is Flexible() with FlexFit.tight,
Expanded(
// can have flex property
child: Container(
height: 100,
color: Colors.blue,
),
),//Stack()
// Widgets on top of each other
Stack(
clipBehavior: Clip.none, // overflow will be visible
children = [
Widget(),
Widget(),
Positioned( // only as a children of stack to position Widgets
bottom: 20,
right: 10,
child: Container(),
),
]
)
// Card()
// Container with some default styling
// Needs Parent or Child for its size, eg: Container
Card(
shape: RoundedRectangleBorder(
borderRadius: BorderRadius.circular(
15,
),
elevation: 4,
child: Text(),
)// ListView()
// Make contents Scrollable (either row or column)
// It is a Column() or Row() with SingleChildScrollView() but doesn't have fix size , have infinite size
// Wrap ListView() or ListView.builder() with Container with certain height, so that it will have a limited height (Container's height)
// ListView() renders children even when they are offscreen but ListView.builder() only renders what's visible
// ListView() for limited items and ListView.builder() fro many infinite items (or many)
ListView(children:[])
ListView.builder(
reverse: true, // In reverse order
itemBuilder: (ctx,index){
return text(transaction[index].title); // build Children Widgets
}
itemCount: transaction.length, // Number of Widgets to be build
)
// List.generate()
// Generate 7 list items
List.generate(7, (index) {
final weekDay = DateTime.now().subtract(Duration(days: index));
var totalSum = transaction[index].amount;
return {
'day': DateFormat.E().format(weekDay).substring(0, 1), // gives short form of days' name (through intl package)
'amount': totalSum,
};
});
// ListTile()
// Used as return value for ListView()
ListTile(
leading: Text('Left most element'),
title: Text('Middle Top element'),
subtitle: Text('Middle Bottom element'),
trailing: Text('Right most element'),
),
// GridView()
// Align contents in both row and column
GridView(
padding: const EdgeInsets.all(25),
children: [],
gridDelegate: SliverGridDelegateWithMaxCrossAxisExtent(
maxCrossAxisExtent: 200,
childAspectRatio: 3 / 2, // for 200 width, height will be 300
crossAxisSpacing: 20, // spacing between items
mainAxisSpacing: 20,
),
// Slivers are scrollable area on the screen and Grid is scrollable like ListView
// gridDelegate provides layout for the grid
// SliverGridDelegateWithMaxCrossAxisExtent allows to define max Width for each grid item
// Grid will automatically fit as many items with 200px width on the provided screen
// SliverGridDelegateWithFixedCrossAxisCount is used for showing defined number of items in the grid
gridDelegate: SliverGridDelegateWithFixedCrossAxisCount(
crossAxisCount: 2,
childAspectRatio: 3 / 2,
crossAxisSpacing: 10,
mainAxisSpacing: 10,
),
)
// GridView.builder() for many elements
GridView.builder(
padding: const EdgeInsets.all(10),
itemCount: products.length,
gridDelegate: SliverGridDelegateWithFixedCrossAxisCount(
crossAxisCount: 2,
childAspectRatio: 3 / 2,
crossAxisSpacing: 10,
mainAxisSpacing: 10,
),
// GridTile can be used anywhere but works well with GridView
itemBuilder: (ctx, i) => GridTile(
child: Image.network(ImageUrl),
// GridTileBar is like ListTile
footer: GridTileBar(
backgroundColor: Colors.black54,
leading: IconButton(icon: Icon(Icons.favorite),onPressed: () {}, color: Colors.red),
title: AnyWidget(),
trailing: IconButton(onPressed: () {}, icon: Icon(Icons.shopping_cart)
),
),
)// Text()
Text(
'\$${transactions[index].amount.toStringAsFixed(2)}', // show number up to 2 decimal places
style: TextStyle(
fontWeight: FontWeight.w600,
fontSize: 20,
color: Colors.purple,
),
textAlign: TextAlign.center,
)
// Image()
// Add image from assets folder
Image.asset(
'assets/images/empty.jpg',
fit: BoxFit.cover, // squeeze the image to the size of parent
),
// Add image from url
Image.network(
imageUrl,
height: 250,
width: double.infinity,
fit: BoxFit.cover,
),
Icon(
Icons.delete,
size: 24,
)// TextField()
// Forms InputFields
// Two ways of accessing the input
// one with normal variable and onChanged or similar property
// other with TextEditingController
// String amountInput = '';
final amountController = TextEditingController();
TextField(
// textCapitalization: TextCapitalization.sentences,
// autocorrect: true,
// enableSuggestions: true,
decoration: InputDecoration(labelText: 'Amount'), // Placeholder
// onChanged: (val) => amountInput = val,
controller: amountController, // watch and store every input inside this TextField
keyboardType: TextInputType.number, // only accepts numbers
onSubmitted:(_)=>submitData, //_ means it takes argument but not needed
),
amountController.clear(); // To clear the input field
print(double.parse(amountController.text)); // prints text stored in controller as a double
// Buttons // Mentioned in above section#1
RaisedButton()
FlatButton()
IconButton()
// GestureDetector()
// Detect gestures on the child
// Register event for double tap, tap on visible/invisible widgets
GestureDetector(
onTap: () {},
child: NewTransaction(_addNewTransaction),
behavior: HitTestBehavior.opaque,
);
// InkWell()
// GestureDetector() with ripple effect
InkWell(
onTap: (){},
child: Text("Click"),
),// ThemeData()
// Global theme for flutter app, declared inside MaterialApp widget with theme property
ThemeData(
primarySwatch: Colors.indigo, // Takes a color and auto-generate similar colors(shades) for other widgets
backgroundColor: Colors.deepPurple,
accentColor: Colors.blueGrey,
accentColorBrightness: Brightness.dark,
buttonTheme: ButtonTheme.of(context).copyWith(
buttonColor: Colors.indigo,
textTheme: ButtonTextTheme.primary,
shape: RoundedRectangleBorder(
borderRadius: BorderRadius.circular(20),
),
),
canvasColor: Color.fromRGBO(255, 255, 255, 1),
fontFamily: 'Raleway',
appBarTheme: AppBarTheme(
textTheme: ThemeData.light().textTheme.copyWith(
headline6: TextStyle(
fontSize: 20,
),
),
),
textTheme: ThemeData.light().textTheme.copyWith(
headline1: TextStyle(
fontSize: 16,
),
),
),
Text(
"hello",
style: TextStyle(
color: Theme.of(context).primaryColor, // access global theme data
),
)
Text(
"hello",
style: Theme.of(context).textTheme.headline1,
),
// SizedBox()
// Empty spaces
SizedBox(
height: 4,
// width: 10,
),
// Horizontal line
Divider(),
// CircleAvatar()
// Make the child round
CircleAvatar(
backgroundImage: NetworkImage()(userAvatarUrl),
child: Text('hello'),
// backgroundColor: Colors.red
radius: 30,
),
// manage border for child elements
// Clip Rounded Rectangle
ClipRRect(
borderRadius: BorderRadius.only(
topLeft: Radius.circular(15),
topRight: Radius.circular(15),
),
child: Image.network(imageUrl),
),
// Switch()
var _showChart = true;
Switch(
value: _showChart,
onChanged: (val) { // val is true or false based on switching
setState(() {
_showChart = val;
});
},
),
_showChart ? Text('Switch is enabled'): Text('Switch is Disabled')// showModelBottomSheet()
// Slides from bottom
showModalBottomSheet(
context: ctx,
builder: (_) {
return AnyWidget();
},
);
// showDatePicker()
showDatePicker(
context: ctx,
initialDate: DateTime.now(),
firstDate: DateTime(2021),
lastDate: DateTime.now(),
);
// showSnackBar() // in later sectionsclass NewTransaction extends StatelessWidget {
final Function addTx;
@override
_NewTransactionState createState() => _NewTransactionState();
}
class _ExpenseAppState extends State<ExpenseApp> {
void submit(){
widget.addTx(); // widgets give access to class properties
Navigator.push(context).pop(); // clear the current Widget or return back
}
@override
Widget build(BuildContext context) {
return TextButton(
child: Text('Add Transaction'),
onPressed: submit,
);
}
}// fold method reduces a collection to a single value by iteratively combining each element of the collection with an existing value
// List<Map<String, Object>> groupedTransactionValues;
groupedTransactionValues.fold(0.0, (previousValue, element) {
return previousValue + (element['amount'] as double);
});
// where() allows to run a function on every item in the list, and if that function returns true, the item is kept in newly returned list
// tx.date.isAfter(other date) => if tx.date is after 'other date', it returns true
// DateTime.now() gives current date and time, .subtract subtracts current date and time with 7days
_userTransactions.where((tx) {
return tx.date.isAfter(
DateTime.now().subtract(
Duration(days: 7),
),// returns true if tx.date is after Today minus 7days
// Only transaction younger than 7 days will be included
);
// Iterates and Returns only one item from the list when found and stops
final selectedMeal = Dummy_Meals.firstWhere((meal) => meal.id == mealId);
// Reverse a list
_userTransactions.reversed.toList();
// Remove item from list
_userTransactions.removeWhere((tx) => tx.id == id);
// Remove item at given index
_userTransactions.removeAt(existingIndex);
// get index of element on list
_userTransactions.indexWhere((tx) => tx.id == txId);
// add first element to list _favoriteMeals from Dummy_meals for which the fxn returns true
_favoriteMeals.add(Dummy_Meals.firstWhere((meal) => meal.id == mealId))
// Check condition for items in lists and stop if found any
_favoriteMeals.any((meal) => meal.id == id);
// Returns true if categories list has categoryId
categories.contains(categoryId)// switch case
switch (compexity) {
case Complexity.Simple:
return 'Simple';
case Complexity.Challenging:
return 'Challenging';
case Complexity.Hard:
return 'Hard';
default:
return 'Unknown';
}Responsive for different screen sizes. Adaptive for different operating system.
MediaQuery.of(context).size.height // get full height of screen
MediaQuery.of(context).size.width // get full width of screen
appBar.preferredSize.height // get height of certain widget, appBar is final variable with AppBar Widget
MediaQuery.of(context).padding.top // get height of status bar
MediaQuery.of(context).viewInsets.bottom // size of anything that's lapping in our view, eg: keyboard pops up when we type overlapping certain parts of app
SafeArea() // Wrap full app body with this to avoid widgets getting in System status bar or bottom navigation bar// Force portrait mode even if screen is rotated
import 'package:flutter/services.dart';
void main(){
WidgetsFlutterBinding.ensureInitialized();
SystemChrome.setPreferredOrientations([
DeviceOrientation.portraitUp,
DeviceOrientation.portraitDown,
]); // Disable landscape mode
runApp(MyApp());
}
// To render a widget on condition
final isLandscape = MediaQuery.of(context).orientation == Orientation.landscape;
if(isLandscape) Widget(),
if(isLandscape) _usersTransaction.isEmpty ? Widget1() : Widget2() // Render Widget2 if device is on landscape mode and _userTransactions is not emptyTo get the space available for a given Widget in the overall app
// constraints is an object containing height and width of widget
LayoutBuilder(builder: (ctx, constraints) {
  return Column(
    children: [
      Container(height: constraints.maxHeight * 0.15,) // take 15 % of given height
      Container(height: constraints.maxWidth * 0.15,) // take 15 % of given width
    ]
  );
}Switch.adaptive() // Render switch based on OS
// To know platforms where app is running
import 'dart:io';
Platform.isIOS // Boolean, True is OS is IOS else false
Platform.isAndroid
Platform.isLinux
Platform.isMacOS
Platform.isWindows
// Cupertino Widgets
import 'package:flutter/cupertino.dart';
CupertinoApp( // MaterialApp() alternative
home: CupertinoPageScaffold( // Scaffold alternative
child: pageBody,
navigationBar: CupertinoNavigationBar( // AppBar() alternative
middle: Text('Expense App'),
trailing: Row(
mainAxisSize: MainAxisSize.min,
children: [
GestureDetector(
child: Icon(CupertinoIcons.add),
onTap: () => _startAddNewTransaction(context),
),
],
),
),
),
)
CupertinoTextField(placeholder: 'placeholder',)
CupertinoButton(
child: Text(
'Choose Date'
),
style: TextStyle(),
onPressed: (){},
)
// Custom Adaptive Widget
// Create a adaptive_widget.dart file
// Create Different Adaptive Widgets by checking platform and defining widgets accordingly
// Use them on other files, using their constructors
// Avoiding duplicationFlutter paints the UI 60fps. If some information is not change flutter takes the old info and paints on the screen which is fast and very efficient when refreshing the UI.
Widget Tree => configuration (rebuilds frequently) ELement Tree => Links widgets' rendered objects (rarely rebuild)) Render Tree => Rendered objects on the screen (rarely rebuilds)
Element is a object managed by flutter in memory which holds the reference to Widgets. Element is created for all widgets.
On encountering a StatefulWidget, it creates an Element and then it also calls the createState method to create State Object which is also connected to Element. So One StatefulElement holds reference to both StatefulWidget and State Object. When setState() is called, old StatefulWidget is replaced by new StatefulWidget but State object is same. Same happens to all child widget. Old reference is updated but if some data is same, then only data that has been changed is re-rendered.
Element which hasn't been rendered to the screen yet, is rendered to the screen. SO Element has pointer to Element on the Screen and Widget holding Configuration.
build method is triggered when setState is invoked ,UI refreshes ,MediaQuery changes or softKeyboard appears.
Widgets are objects of classes which have their own build method which is triggered when new instance of Widget Classes are created. So first constructor is called then build method is invoked when we create new instance of Widgets.
For bigger apps, it can boost performance. Using const constructors for Widgets which doesn't change(immutable) will not recreate object(Widget) when re-build. This doesn't work with dynamic values for Class property.
const Text("This never change and the text is not dynamic."),
const CharBar(this.label,this.fxn),Extracting Widgets makes the code readable but can also boost some performance in some cases. Eg: If certain number of widgets depends on MediaQuery, it is good to make a separate widget containing those widgets.
Builder Methods
// Define a fxn to build certain part of app
Widget _buildLandscapeContent(){
  return Container();
}

List<Widget> _buildTransactionList(MediaQueryDta media){
  return [ListTile(), Container()];
}

// Use the content in builder fxn
if(isLandscape) _buildLandscapeContent(),Stateless Widget : Constructor() -> build()
Stateful Widget : WidgetConstructor() -> createState() -> StateConstructor() -> initState() -> build(), setState() -> didUpdateWidget() -> build(), dispose() initState() runs when State object is created for the first time didUpdateWidget() in State object is triggered when the widget belonging to this state is updated dispose() runs when Widget is destroyed
Only the WidgetConstructor is called when creating new instance of Stateful Widget afterward i.e. createState() -> StateConstructor() -> initState() this does not happen again. It means the State is not recreated when Widget rebuilds automatically instead it sticks around and hold reference of the element which manages the State and is updated to point at the new Widget.
// Inside State class
// @override because these exists in parent class and we are deliberately changing them
// super refers to parent object
@override
void initState(){
  super.initState(); // runs initState() of parent State
  // execute as soon as State Object is created
  // used for fetching initial data for app
  // context can't be accessed but there's a workaround using Future (see in 'Fetching data' part)
}

@override
void didUpdateWidget(NewTransaction oldWidget){
  super.didUpdateWidget(oldWidget); // runs didUpdateWidget() of parent State
  // execute when the Widget changes or rebuilds
  // less used
  // to refetch data or fetch new data
}

@override
void dispose(){
  super.dispose(); // runs dispose() of parent State
  // execute when Widget leaves the screen
  // used for cleaning up
  // like cleaning up connection with server when not needed
}

@override
  void didChangeDependencies() {
    // can be used instead of initState when we require context of State
    // cause initState runs immediately and all the configuration is not wired up properly
    // so context is not available
    // this fxn also runs before build, but we can access context anyway
    super.didChangeDependencies();
}Lifecycle State Name inactive : App is inactive(not in background), no user input received but not fully cleared from memory paused : App is not visible to user but running in background resumed : App is again visible, responds to user inputs suspending : App is about to be suspended
Listen to App Cycle events
class _Chart extends State<Chart> with WidgetsBindingObserver{
  @override
  void initState(){
    super.initState();
    WidgetsBinding.instance.addObserver(this);
    // when AppLifecycle changes it goes to certain observer and calls didChangeAppLifecycleState() method
    // this means this class
  }

  @override
  void didChangeAppLifecycleState(AppLifecycleState state){
    // called when AppLifecycle changes
    print(state); // prints AppLifecycleState.paused if app is on recent
  }

  @override
  dispose(){
    super.dispose() ;
    WidgetsBinding.instance.removeObserver(this); // to avoid memory leaks
    // to clear all listener for AppLifecycle changes
    // Don't do it in main State Widget which will shutdown the whole app
    // Do in child Widget
  }
}Every widget has its own context attached to it. Context stores meta information on the Widget and its location in the Widget Tree. Skeleton of widget tree.
Context know about each other, they know where Widgets are and what other widgets revolve around them. They communicate with each other.
Context has all the information about position of widget, overall Widget tree and establish direct communication between channels behind the scenes to exchange data between Widgets.
Most Widgets don't need a key specially Stateless Widget.
Example where we need it: Lists and Stateful Widgets Widget Tree (Widgets from top to bottom) : ListView(children:[item1, item2])
Element Tree (Reference to above Widgets): &ListView(reference to ListView Widget which hold info about its children too) &item1(reference to both item1 StatefulWidget and State Object) &item2(reference to both item2 StatefulWidget and State Object)
When item1 is deleted. Flutter checks from top to bottom. First &ListView and ListView are checked. If both present, its items in ListView are checked. Secondly, item is checked in the same level as item1(which is deleted). Since its a list,item2 moves up to the place left by item1. So Flutter answer as yes cause it finds an item where old item was. So now &item1 update reference to the item2.
Now &item2 does not find any fitting Widget as item2 move up, so &item2 is deleted along its State.
Solution: Using keys will delete both item1 and &item1 when item1 is deleted. TL;DR: Without key, FLutter checks the type of Widget that ELement is referencing to. With key, Flutter checks the Widget with certain key value that is equal to key value of Element. Key helps to identify connected Widget with key value rather than the type of Widget.
import 'dart:math'; // for Random class
Color _chosenColor;

@override
void initState(){
  const availableColors = [Colors.blue, Colors.red, Colors.purple ];
  // generate random between 0, 1, 2, 3
  _bgColor = availableColors[Random().nextInt(4)] // assigned to background color for List Items
  // Doesn't need to wrap in setState() cause initState() is called before build method
  super.initState();
}

ListView(
  children: transaction.map((tx) => TransactionItem(key: ValueKey(tx.id), transaction: tx)).toList(),
  // key should be defined for parent Widget
  // key: UniqueKey() generate unique key to identify each items for every build or change in state of UI
  // key: ValueKey(id) give provided key or id which does not changes
)

class TransactionItem extends StatefulWidget{
  const TransactionItem({Key key, @required this.transaction}) : super(key: key);
  // super forward key of TransactionItem to StatefulWidget key, so it knows what to do with it, its a constructor for StatefulWIdget (parent Widget)
  ...
  ...
}
// LinearGradient() gives gradient background for the container
Container(
padding: const EdgeInsets.all(15),
child: Text(title),
decoration: BoxDecoration(
  gradient: LinearGradient(
    colors: [
      color.withOpacity(0.7),
      color,
    ],
    begin: Alignment.topLeft,
    end: Alignment.bottomRight,
  ),
  borderRadius: BorderRadius.circular(15),
),
)// Navigate between pages
// Needs to be connected to context, to know what current screen is and to know what to add on top of it or remove
// add new page on top of current page, transition to CategoryMealsScreen() from current page
// Back button will be added automatically in CategoryMealsScreen()
Navigator.of(ctx).push(
MaterialPageRoute(
builder: (_) {
return CategoryMealsScreen();
},
),
);// Named Routes
// Switch to CategoriesMealsScreen() and also pass data without constructor through map
// 1st define the routes
MaterialApp(
routes: {
'/categories': (context) => CategoriesScreen
'/category-meals': (context) => CategoriesMealsScreen(),
}
),
// 2nd Create Navigator for the defined route and pass the arguments
Navigator.of(context).pushNamed('/category-meals', arguments: {
'id': id,
'title': title,
});
//3rd Access arguments inside build method of CategoriesMealsScreen() Widget
final routeArgs = ModalRoute.of(context).settings.arguments as Map<String, String>;
final categoryTitle = routeArgs['title'];
final categoryId = routeArgs['id'];// Properties of MaterialApp(), onGenerate and unUnkown takes settings about the route and returns a route
// CategoriesScreen() will appear for any route that is not registered in routes: (for named Routes)
onGenerateRoute: (settings){
if(settings.name == '/meal-detail'){
return MaterialPageRoute(builder:(ctx) => MealScreen());
}
return MaterialPageRoute(builder:(ctx) => CategoriesScreen());
}
// When certain page can't be found
// Can be used for 404 error screen
onUnknownRoute:(settings){
if(settings.name == '/meal-detail'){
return MaterialPageRoute(builder:(ctx) => MealScreen());
}
return MaterialPageRoute(builder:(ctx) => CategoriesScreen());
}Navigator.of(context).pop(); // get rid of current page or return back
Navigator.of(context).popAndPushNamed('/meals-app'); // pop and push to new page
Navigator.of(context).canPop(); // check if you can go back, (is there something below this on stack)
// pop and send some arguments to the new page
// popping statement
Navigator.of(context).pop(id);
// pushing and receiving the result i.e. id from the popped page to a new page(or page that is one step below in stack)
// .then fxn runs when a page i.e. MealDetailScreen is popped
Navigator.of(context)
.pushNamed(
MealDetailScreen.routeName,
arguments: id,
)
.then((result) {
print(result);
});// The widget can be either stateful or stateless
// DefaultTabController is needed for TabBar below AppBar
DefaultTabController(
initialIndex: 1, // Start screen with favorite, default is 0
length: 2,
child: Scaffold(
appBar: AppBar(
title: Text('Meals'),
bottom: TabBar(
tabs: [
Tab(
icon: Icon(Icons.category),
text: "Categories",
),
Tab(
icon: Icon(Icons.favorite),
text: "Favorites",
),
],
),
),
body: TabBarView(
// Children must match the order of tabs defined above in TabBar()
children:[
CategoriesScreen(),
FavoritesScreen(),
],
),
),
)// Should be StatefulWidget
class TabsScreen extends StatefulWidget {
const TabsScreen({Key? key}) : super(key: key);
@override
_TabsScreenState createState() => _TabsScreenState();
}
class _TabsScreenState extends State<TabsScreen> {
final List<Map<String, Object>> _pages = [
{'page': CategoriesScreen(), 'title': 'Categories'},
{'page': FavoritesScreen(), 'title': 'Favorites'},
];
int _selectedPageIndex = 0;
void _selectPage(int index) {
setState(() {
_selectedPageIndex = index;
});
}
@override
Widget build(BuildContext context) {
return Scaffold(
appBar: AppBar(
title: Text(_pages[_selectedPageIndex]['title'] as String),
),
drawer: Drawer(),
body: _pages[_selectedPageIndex]['page'] as Widget,
bottomNavigationBar: BottomNavigationBar(
onTap: _selectPage,
backgroundColor: Theme.of(context).primaryColor,
selectedItemColor: Colors.white,
unselectedItemColor: Theme.of(context).accentColor,
currentIndex: _selectedPageIndex,
// type: BottomNavigationBarType.shifting,
// type animates the switching between tabs
// Items should be styled differently
// i.e. backgroundColor of BottomNavigationBar does not work in BottomNavigationBarItem, so they should have their own backgroundColor
items: [
BottomNavigationBarItem(
// backgroundColor: Theme.of(context).primaryColor,
icon: Icon(Icons.category),
label: 'Categories',
),
BottomNavigationBarItem(
// backgroundColor: Theme.of(context).primaryColor,
icon: Icon(Icons.favorite),
label: 'Favorites',
),
],
),
);
}
}Scaffold(
drawer: Drawer(
child: Container(),
),
),// Navigating from page1 to page2 creates a stack where page1 is under page 2
// and then returning back to page1 with back button, will clear the page2 in the stack
// i.e page2 is replaced by page1, Thus optimizing performance
// But Navigating from page1 to page2 and then to page1 again through some link can create stack of page1|page2|page1
// here, previous page1 and page2 doesn't get cleared from the stack
// i.e. New page is added on top of each other instead of replacing, Thus performance can be degraded
// instead of push and pushName, we use pushReplacement and pushReplacementNamed respectively to solve this issue
// there will be no back button or you won't be able to go back cause there's nothing on stack
// Can be used for logging into the app, where once logged in you can't go back to login screen
Navigator.of(context).pushReplacement();
Navigator.of(context).pushReplacementNamed();VoidCallback = void Function
SwitchListTile(
  title: Text('Gluten-free'),
  value: _glutenFree,
  subtitle: Text('Only include glute-free meals'),
  onChanged: (newValue) {
    setState(() {
      _glutenFree = newValue;
    });
  },
),// Passing _setFilter fxn from main app screen to FiltersScreen
MaterialApp(
routes: {
FilterScreen.routename: (ctx) => FiltersScreen(_setFilters),
}
)
// In FiltersScreen Widget
final Function saveFilters;
FiltersScreen(this.saveFilters)Passing data through routes created on fly when required can make it hard to manage the project. We have to pass data through constructors. So, if page1 has data1 which is transferred to page2 (where data1 is not used) then to page3 (where data1 will be used). So it's not an ideal way of transferring data. It leads to long chain of passing data.
So named routes are ideal.
We need to define all data in top level file (main.dart), so to pass data around different Widgets. And if some data changes in main.dart then the whole app rebuilds, which is not great for performance. That's where state management is needed.
State is data which affects UI(and which might change over time). User interface is function of data(state). If State changes, UI changes.
App-wide State: affects entire app or significant parts of app (like authentication)Widget(Local) State: affects only a widget (like loading spinner)
- Provider Package (Provided by flutter as a dependency for State management)
A global or central State/Data Provider("Container") is attached to certain Widget. Now all child Widget of that Widget can listen to that provider. Without passing data through constructor, we can add listener to child Widget with of(context). Here, only the build() method of child Widget where listener is applied is executed. So, not all Widgets will rebuild.
// create a provider class
class Products with ChangeNotifier{
  // Here Products class property is mixed with ChangeNotifier class provided by flutter
  // It's called mixin
  // ChangeNotifier establish communication tunnel with the help of context object which is needed to pass data around
  // ChangeNotifier is used by provider
  void addProduct(){
    notifyListeners(); //notify listeners to rebuild the UI, like setState for Provider Package
  }
}
// Wrap the top level Widget in where child widgets are defined which needs data from provider
// below is defined in build of MyApp
ChangeNotifierProvider(
create: (ctx) => Products(), // provide instance of Products() in all child widgets
child: MaterialApp(),
);
// Now if something is changed in the Product class and we call notifyListeners() and only the child widgets which are listening will be rebuild
// Accessing data provided by provider to direct or indirect child
// .of is generic type and we only want Products here
// Since Products is provided by ChangeNotifierProvider with create property, we can access it here
// Only ProductsGrid will rebuild if Products is changed
class ProductsGrid extends StatelessWidget {
@override
Widget build(BuildContext context) {
final productsData = Provider.of<Products>(context); // instance of Products(), object
final products = productsData.items;
}
}final loadedProduct = Provider.of<Products>(
context,
listen: false, // Default is true, this widget will not rebuild when Products is changed i.e. notifyListener() will not act on it.
)// Mixin
mixin Agility{
var speed = 10;
void sitDown(){
print("Sit Down!");
}
}
class Mammal{
void breathe(){
print("Breathe in.. Breathe out..");
}
}
// Inheritance + Mixin
class Person extends Mammal with Agility{
String name;
Person(this.name);
@override
void breathe(){
// override the methods of Mammal
}
}
void main(){
final person = Person('Sam');
print(person.name);
person.breathe();
print(person.speed);
person.sitDown();
}
// Mixin is just to get utility methods
// Mixin doesn't define a stronger connection like Inheritance
// Multiple mixin can be added in one class
// Multiple inheritance is not supported in dart
// Mixins allows reusing a class’s code in multiple class hierarchies.
// If class a extends class b all properties, variables, functions implemented in class b are also available in class a. Additionally you can override functions etc.// here products is a list of Product() objects
// Creating provider for each Product() object
GridView.builder(
...
itemBuilder: (ctx, i) => ChangeNotifierProvider(
create:(ctx) => products[i],
child: ProductItem(),
),
)Alternative Syntax
// Alternative syntax if we are not using ctx
// place a placeholder, if the data does not need context
GridView.builder(
  ...
  itemBuilder: (ctx, i) => ChangeNotifierProvider(
    create:(_) => products[i],
    child: ProductItem(),
  ),
)

// Or use different constructor
GridView.builder(
  ...
  itemBuilder: (ctx, i) => ChangeNotifierProvider.value(
    value: products[i],
    child: ProductItem(),
  ),
)
Best Practices: Use .value provider, for list or grid item. See key .value constructor solves the issue that key is solving. With create, it can create bugs as soon as we have more items that go outside the screen.
Use create approach when using a object for one time. And use .value approach, when same object is reused again and again for efficiency and avoid bugs.
// With Provider
Widget build(BuildContext context) {
  final product = Provider.of<Product>(context);
  return Text(product.title);
}

// With Consumer
Widget build(BuildContext context) {
  return Consumer<Product>(
    builder: (ctx, product, child) => Text(product.title),
  );
}
Provider: When provider.of is used whole build method will re-run whenever data(Product) changes.
Consumer:Only run subpart of Widget tree, which is wrapped in Consumer whenever data(Product) changes.
Can be used together
// Child is defined for certain part which does not re-render when data changes
Widget build(BuildContext context) {
  return Consumer<Product>(
    builder: (ctx, product, child) => Scaffold(
      appBar: AppBar(title: child)
    ),
    child: Text("Does not change"),
  );
}// Button which when clicked creates a dropdown of PopupMenuItems
PopupMenuButton(
onSelected: (int selectedValue) {
print(selectedValue);
},
icon: Icon(Icons.more_vert),
itemBuilder: (_) => [
PopupMenuItem(
child: Text('Only Favorites'),
value: 0,
),
PopupMenuItem(
child: Text('Show All'),
value: 1,
),
],
),// _items is a map
// _items.containsKey(productId) checks if the key exists in the map
// _items.update() updates existing key with new value
// _items.putIfAbsent adds a new key-value pair to map
if (_items.containsKey(productId)) {
_items.update(
productId,
(existingCartItem) => CartItem(
id: existingCartItem.id,
title: existingCartItem.title,
quantity: existingCartItem.quantity + 1,
price: existingCartItem.price,
));
} else {
_items.putIfAbsent(
productId,
() => CartItem(
id: DateTime.now().toString(),
title: title,
quantity: 1,
price: price,
));
}
}
// Loop through every element of map or list
_items.forEach((key, value) {});
// Remove a key-value pair from map where key is matched
_items.remove(key);// Some List Methods
// Insert new items at first index
// 0 means insert at 0 index
_orders.insert(
0,
OrderItem(
id: DateTime.now().toString(),
amount: total,
products: cartProducts,
dateTime: DateTime.now(),
),
);// Providers Products() and Cart() are added to entire child Widget Tree
MultiProvider(
providers: [
ChangeNotifierProvider(
create: (ctx) => Products(),
),
ChangeNotifierProvider.value(
value: Cart(),
)
],
child: Widgets(),
)// Here both cart.dart and cart_item.dart has CartItem class defined which are different
// Now when using CartItem(), error happens
import '../providers/cart.dart';
import '../widgets/cart_item.dart';
// Fix using as prefix
import '../providers/cart.dart';
import '../widgets/cart_item.dart' as ci;
ci.CartItem() // refers to CartItem from cart_item.dart
// Using show prefix
// If we only use Cart but not CartItem from cart.dart, we can use show prefix
// Now if we use CartItem, the one from cart_item.dart is used
import '../providers/cart.dart' show Cart;
import '../widgets/cart_item.dart';// Swipe a Widget to remove it from screen
Dismissible(
key: ValueKey(id),
background: Text('Widget that appears while dismissing'),
direction: DismissDirection.endToStart, // restricting right to left swipe
onDismissed: (direction) {
Provider.of<Cart>(context, listen: false).removeItem(productId);
},
child: Text('Widget that is dismissible'),
confirmDismiss: (direction) {
// More on AlertDialog() below
return Future.value(true); // Dismiss, if false then it won't dismiss
}
)// Connect to nearest Scaffold
Scaffold.of(context)
// Open Drawer of the nearest Scaffold
Scaffold.of(context).openDrawer();
// Snackbar : popup that slides from bottom, whenever something happens on screen
Scaffold.of(context).hideCurrentSnackBar(); // hides previous SnackBar immediately if new one is requested
Scaffold.of(context).showSnackBar(SnackBar(
content: Text('Added item to cart!'),
duration: Duration(seconds: 2),
action: SnackBarAction(
label: 'UNDO',
onPressed: () {
cart.removeSingleItem(product.id);
},
),
),);
// Above methods are depreciated, Scaffold is replaced with ScaffoldMessenger
ScaffoldMessenger.of(context).hideCurrentSnackBar(); // hides previous SnackBar immediately if new one is requested
ScaffoldMessenger.of(context).showSnackBar(SnackBar());// showDialog is used to show any type of Dialog like AlterDialog
Dismissible(
confirmDismiss: (direction) {
return showDialog(
context: context,
builder: (ctx) => AlertDialog(
title: Text('Are you sure?'),
content: Text('Do you want to remove the item from the cart?'),
actions: [
TextButton(
child: Text('No'),
onPressed: () {
Navigator.of(ctx).pop(false); // Pop back with false value, as the fxn wants a Future boolean as a return
},
),
TextButton(
child: Text('Yes'),
onPressed: () {
Navigator.of(ctx).pop(true); // Pop back with true value
},
),
],
),
);
},
)
// We remove any kind of overlay with
Navigator.of(context).pop();// FocusNode to shift focus from one Field to another
final _priceFocusNode = FocusNode();
final _descriptionFocusNode = FocusNode();
// FocusNode must be disposed before leaving screen
// because they are stored in memory and can lead to memory leak
@override
void dispose() {
_priceFocusNode.dispose();
_descriptionFocusNode.dispose();
super.dispose();
}
Form(
child: ListView(
children: [
TextFormField(
// autocorrect: true,
// textCapitalization: TextCapitalization.words,
// enableSuggestions: false,
initialValue: 'Initial text written on the field', // initialValue and controller can't be used simultaneously
decoration: InputDecoration(labelText: 'Title'), // placeholder + title
textInputAction: TextInputAction.next, // Adds next key on bottom right corner of soft keyboard
// Shifting focus to next Input field with focusNode = _priceFocusNode, on enter or next button is pressed
onFieldSubmitted: (_) {
FocusScope.of(context).requestFocus(_priceFocusNode);
},
),
TextFormField(
// obscureText: true, // hides the info, used for passwords
decoration: InputDecoration(labelText: 'Price'),
textInputAction: TextInputAction.next,
keyboardType: TextInputType.number,
focusNode: _priceFocusNode,
onFieldSubmitted: (_) {
FocusScope.of(context).requestFocus(_descriptionFocusNode);
},
),
TextFormField(
decoration: InputDecoration(labelText: 'Description'),
maxLines: 3, // height of input box is equal to 3 lines, which is also scrollable
keyboardType: TextInputType.multiline, // pressing enter will lead to newline
focusNode: _descriptionFocusNode,
),
],
),
),// Image Url field to preview Image after focus is shifted
// TextEditingController.text is available after pressing enter or confirming the Input Field which updates the UI but not when focus is shifted
// So, with the help of listener and hasFocus method, we can update the UI so that TextEditingController.text will be available
// Adding custom listener when Image Text Field loses focus
// Defined inside State class connected to StatefulWidget
final _imageUrlController = TextEditingController();
final _imageUrlFocusNode = FocusNode();
@override
void initState() {
_imageUrlFocusNode.addListener(_updateImageUrl); // adding listener to FocusNode, _updateImageUrl will be executed whenever focus changes
super.initState();
}
@override
void dispose() {
_imageUrlFocusNode.removeListener(_updateImageUrl); // removing listener to avoid memory leak
_imageUrlController.dispose();
_imageUrlFocusNode.dispose();
super.dispose();
}
void _updateImageUrl() {
if (!_imageUrlFocusNode.hasFocus) {
setState(() {}); // calling setState() to update the UI, not stating by ourself but since _imageUrlController has changed, the changes will be reflected on UI
}
}
Widget build(BuildContext context) {
return Form(
child: Row(
children: [
Container(
width: 100,
height: 100,
margin: EdgeInsets.only(top: 8, right: 10),
decoration: BoxDecoration(
border: Border.all(
width: 1,
color: Colors.grey,
)),
child: _imageUrlController.text.isEmpty
? Text('Enter a URL')
: FittedBox(
child: Image.network(
_imageUrlController.text,
fit: BoxFit.cover,
),
),
),
Expanded(
child: TextFormField(
decoration: InputDecoration(labelText: 'Image URL'),
keyboardType: TextInputType.url,
textInputAction: TextInputAction.done,
controller: _imageUrlController,
focusNode: _imageUrlFocusNode,
onFieldSubmitted: (_) {
// Save Form or any thing
},
),
),
],
),
)
}// defining a global key for Form, so to access Form Widget in the code
final _form = GlobalKey<FormState>();
var _editedProduct = Product(
id: '',
title: '',
price: 0,
description: '',
imageUrl: '',
);
void _saveForm() {
final isValid = _form.currentState!.validate(); // runs Validator on all Field
if (!isValid) {
return;
}
_form.currentState!.save();
// .save() will trigger a method 'onSaved' on every FormField which allows to take the value entered in the FormField
// and do whatever we want
}
@override
Widget build(BuildContext context) {
return Form(
autovalidateMode: AutovalidateMode.onUserInteraction, // auto-validate Form and FormField only after each User Interaction
// AutovalidateMode.always to auto-validate without any userInteraction, .disabled to disable
key: _form;
child: ListView(
children: [
TextFormField(
....
onSaved: (value) {
_editedProduct = Product(
id: _editedProduct.id,
title: value.toString(),
description: _editedProduct.description,
price: _editedProduct.price,
imageUrl: _editedProduct.imageUrl,
);
},
// Validating inputs
validator: (value) {
if(value!.isEmpty){
return 'This is wrong!'; // text is treated as error text which is shown to user
}
return null; // null means input is correct
},
),
],
),
);
}Create a Firebase Project, then create a realtime database by selecting a server. Choose Start in test mode, to enable all read and writes to your database.
Then we will be presented to a Data screen containing the URL which is used to talk to the web server that runs query on Database.
Typically, we will be communicating with the REST(or RESTful) APIs when working with backend in flutter app. REST is a common way of communicating in most frontend apps. REST APIs follow a default approach regarding how incoming requests should be structured/set up.
Convention:
Http Endpoint (URL) + Http Verb = Action
Http Endpoint is the URL which connects to server that we talk to. Http Verb are request methods on data.
Common Request Methods:
GET (Fetch data), POST (Store data), PATCH (Update data), PUT (Replace data), DELETE (Delete data)
Server sends status code to tell if the operation succeeded or not.
Status Codes:
200, 201 -> everything works
300 -> redirected
400 -> Something went wrong
500 -> Something went wrong
http package throws an error if we receive status code greater or equal to 400.
To make http requests, 'http' package is needed, which is available at pub.dev.
import 'package:http/http.dart' as http;// Creating a collection of products in Database
// dart:covert provides some methods for json (instance of JsonCodec)
import 'dart:convert';
// this url will create a database collection for products
// 'url = https://dummy.firebasedatabase.app/products.json' this creates products collection (firebase specific)
final url = Uri.https('dummy.firebasedatabase.app', '/products.json');
http.post(
url, // where to append new data
// headers: , // To provide metadata attach to http request
// body receives a json and stores it in the database
// json.encode converts a map (which in here, is made up of product object properties) to json
body: json.encode({
'title': product.title,
'description': product.description,
'imageUrl': product.imageUrl,
'price': product.price,
'isFavorite': product.isFavorite,
}),
)
.then((response) {
print(json.decode(response.body));
// response is sent by firebase after post is finished
// response.body = {'name':'Uniquely Generated entry name'}
}var result = 1 + 1; // this is immediately available
// Future class (In JS, it's called Promise)
// Future runs a fxn, that when done, executes .then() fxn
// However, dart executes .then() fxn on Future, which is a asynchronous code, only after going through all synchronous code, even if the Future's fxn is done
var myFuture = Future((){
return 'hello';
});
print('This runs first');
myFuture.then((result){
print(result);
});
print('This also runs before future is done!');
// Alternative code
// http.get() returns a Future, (http package)
http.get().then((response){});
// .then() also returns a new Future, so we can add other .then() block
myFuture.then((response){}).then((_){});
// Futures can also fail returning error
// catching error after then block
myFuture.then((_){}).catchError((error){}); // Here, catchError also wil catch error of myFuture and .then(), if error is caught in myFuture, .then() will not execute
myFuture.catchError((error){}).then((_){}); // Here, even if error is caught on myFuture, .then() will execute// throwing error
myFuture.then((_){}).catchError((error){
throw error; // throw is like return, which stops the execution of following lines
});
// catching above error from another part of code, where above fxn is used
Provider.of<Products>(context).addProduct(_editedProduct)
.catchError((error){
return showDialog<Null>(context: context, builder: (ctx)=>AlertDialog(
title: Text('An error occurred!'),
content: Text(error.toString()), // error.toString() makes the error readable
);
)
}
).then((_){})
// showDialog also returns a Future, so after we click ok, .then() will execute// Widget to show loading spinner
CircularProgressIndicator()// Async and Await
// ALternative code but same functionality
// More readable
try{
// code that might fail
} catch{
// code to execute when try block fail
} finally{
// code that always executes, no matter the success or failure.
}
// Comparing code changes
// Using .then().catchError()
Future<void> addProduct(Product product) {
final url = Uri.https(
'dummy.firebasedatabase.app',
'/products.json');
return http
.post(url, body: ,)
.then((response) => print(json.decode(response.body));)
.catchError((error) {
throw error;
});
}
// Using async, and try catch block
// async makes the whole block Future, so no need to return any Future
Future<void> addProduct(Product product) async {
final url = Uri.https(
'dummy.firebasedatabase.app',
'/products.json');
try {
final response = await http.post(url, body:); // await will stop the execution of following lines until its finished
print(json.decode(response.body))
} catch (error) {
throw error;
}
}// Function to fetch products,
// While fetching add a method .toDouble(), for double values else error will be thrown on android.
// However, it worked fine without double in web
Future<void> fetchAndSetProducts() async {
var url = Uri.https(
'flutter-roadmap-default-rtdb.asia-southeast1.firebasedatabase.app',
'/products.json');
try {
final response = await http.get(url);
final extractedData = json.decode(response.body) as Map<String, dynamic>;
final List<Product> loadedProducts = [];
extractedData.forEach((prodId, prodData) {
loadedProducts.insert(
0,
Product(
id: prodId,
title: prodData['title'],
price: prodData['price'].toDouble(),
description: prodData['description'],
imageUrl: prodData['imageUrl'],
isFavorite:
favoriteData == null ? false : favoriteData[prodId] ?? false,
));
});
_items = loadedProducts;
notifyListeners();
} catch (error) {
throw error;
}
}Typically data is fetched in initState() as it runs immediately and only once as soon as we enter a Widget.
// Using Provider in initState() with listen: false
void initState(){
  Provider.of<Products>(context, listen: false).fetchAndSetProducts(); // this works
  super.initState();
}

// Using Provider in initState() without listen: false
void initState(){
  Provider.of<Products>(context).fetchAndSetProducts(); // this does not work
  super.initState();
}

// Workaround to use Provider without listen: false, in initState()
// Using Future.delayed(), the order of execution is different
// So that Future.delayed() is set to execute at last after initialization
// so we can access context
void initState() {
  Future.delayed(Duration.zero).then((_) {
    Provider.of<Products>(context).fetchAndSetProducts();
  });
  super.initState();
}

// Another Workaround using didChangedDependencies()
// Unlike initState(), didChangedDependencies() runs more often
// When using this, use a helper(_isInit) so to execute the code only once
var _isInit = true;
void didChangedDependencies(){
  if(_isInit){
    // this code will run only once, as initState();
  }
  _isInit = false;
}// Asynchronous function to fetch data
Future<void> _refreshProducts(BuildContext context) async {
await Provider.of<Products>(context, listen: false).fetchAndSetProducts();
}
// Typically used in body of scaffold
RefreshIndicator(
onRefresh: () => _refreshProducts(context), // wait until data is fetched
child: Text('shown after refresh'), // shown when Future fxn is completed
)// under products collection, the url will go to each item, where id = uniquely generated name of item in firebase
// We can change any key-value pair in database
final url = Uri.https(
'dummy.firebasedatabase.app',
'/products/$id.json');
http.patch(url,
body: json.encode({
'title': newProduct.title,
'description': newProduct.description,
'imageUrl': newProduct.imageUrl,
'price': newProduct.price,
}));// Optimistic updating
// if product failed to delete, it will be re-added to the _items List
final existingProductIndex = _items.indexWhere((prod) => prod.id == id);
var existingProduct = _items[existingProductIndex]; // reference to product in memory
_items.removeAt(existingProductIndex);
notifyListeners();
try {
await http.delete(url);
} catch (error) {
_items.insert(existingProductIndex, existingProduct); // re-adding product if error occurs
notifyListeners();
throw error;
}// Implements
// Custom Exception class (not really needed, only for demonstration of implements)
// Creating a class that implements Exception
// Implements can be used if you want to create your own implementation of another class or interface.
// We don't inherit class code, but we only inherit the class type
// We should implement all functions defined in the class(which we are implementing) to a new class(where we are implementing)
class HttpException implements Exception {
final String message;
HttpException(this.message);
@override
String toString() {
return message;
}
}
// Now we can use the custom Exception class
if (response.statusCode >= 400) {
throw HttpException('Could not delete product');
}// Use FutureBuilder instead of initState()
// So that we can use StatelessWidget to fetch data and change State using provider
// To fetch data
// defined inside build method of StatelessWidget
FutureBuilder(
future:
Provider.of<Orders>(context, listen: false).fetchAndSetOrders(), // future from where we send requests
builder: (ctx, dataSnapshot) {
// dataSnapshot is data currently returned by the future, is async
if (dataSnapshot.connectionState == ConnectionState.waiting) {
// Runs while the future is getting data
return Center(
child: CircularProgressIndicator(),
);
} else {
// When future is done getting data
if (dataSnapshot.error != null) {
// If future returns a error
return Center(
child: Text('No orders placed yet!'),
);
} else {
// When everything is fine
return Consumer<Orders>(
// Consumer to build only this portion if data changes
builder: (ctx, orderData, child) => ListView.builder(
itemCount: orderData.orders.length,
itemBuilder: (ctx, i) => OrderItem(orderData.orders[i]),
),
);
}
}
},
)
// However if other part of UI needs to be updated, the future will run again and again whenever UI change i.e. build method is called
// This creates multiple futures which is not good
// Solution
// Convert the Widget to StatefulWidget
// We now store the future to a reference variable as a property of State class, and use that reference in FutureBuilder
// so that it will be free from build method and won't create multiple futures
// Add these to state class
Future _ordersFuture;
Future _obtainOrdersFuture(){
return Provider.of<Orders>(context, listen: false).fetchAndSetOrders();
}
@override
void initState((){
_ordersFuture = _obtainOrdersFuture;
super.initState();
});
// defined in build method of StatefulWidget
FutureBuilder(
future: _ordersFuture;
builder: ....
)In web development, session is created in server to make entry in database that logs user with given id. In browser, we store cookies that identifies that session, so we can check the data in browser and session to know that the user is logged in.
But in flutter and many web apps, it works differently with the help of Stateless RESTful APIs. Stateless means, the server does not care about the individual client connected to it. The server doesn't store anything that tells a certain user or app is authenticated. The API's job is to provide endpoint to send requests and return an answer. We don't care about who is authenticated and who is not.
When an user is logged in, a token is generated on the server and is only known to the server. So token can't be faked. And that token is sent to the app which then is stored in user's device. So even if app restarts, we would still be able to log in.
Now for every http request, we should provide token.
// Configuring Firebase Real time Database rules
// auth != null tells firebase that, only authenticated users will be able to read/write data
{
  "rules": {
    ".read": "auth != null",
    ".write": "auth != null"
  }
}
Do this after setting up everything.
// Implying full security
{
  "rules": {
    "products": {
      // Read access for only authenticated users
      ".read": "auth != null",
      // Specifying a child to index to support ordering and querying.
      ".indexOn": ["creatorId"],
      // Giving write access to authenticated users with user id equal to 'creatorId' field, something like: /products/prod-id['creatorId'] == userId
      "$prodId": {
        ".write": "root.child('products').child($prodId).child('creatorId').val() === auth.uid"
      }
    },

    // Giving read and write access to authenticated users with user id = orders/some-id
    "orders": {
      "$uid": {
        ".read": "$uid === auth.uid",
        ".write": "$uid === auth.uid"
      }
    },

    "userFavorites": {
      "$uid": {
        ".read": "$uid === auth.uid",
        ".write": "$uid === auth.uid"
      }
    }
  }
}
Now in Authentication, choose a sign-in method. For eg: Email/Password and enable Email then save it.
Firebase Auth REST API
For Email/Password signUp, we should send request to following url with api_key provided by firebase available in project setting.
url = https://identitytoolkit.googleapis.com/v1/accounts:signUp?key=api_key to sign up
url = https://identitytoolkit.googleapis.com/v1/accounts:signInWithPassword?key=api_key to sign in
It's ok to expose Firebase API_KEY.
// we add {'key':'api_key'} for url followed by ?key=api_key

Future<void> _authenticate(
    String email, String password, String urlSegment) async {
  final url = Uri.https(
      'identitytoolkit.googleapis.com',
      '/v1/accounts:$urlSegment',
      {'key': 'api_key'});

  final response = await http.post(url,
      body: json.encode({
        "email": email,
        "password": password,
        "returnSecureToken": true,
      }));
}

Future<void> signup(String email, String password) async {
  return _authenticate(email, password, 'signUp');
}

Future<void> login(String email, String password) async {
  return _authenticate(email, password, 'signInWithPassword');
}


// Following data is the response, we get when signing up
{
  kind: identitytoolkit#SignupNewUserResponse,
  idToken: too-long-token,
  email: test@test.com,
  refreshToken: long-refresh-token,
  expiresIn: 3600,
  localId: some-local-id
}

// Following data is the response, we get when logging in
{
  kind: identitytoolkit#VerifyPasswordResponse,
  localId: local-id,
  email: test@test.com,
  displayName: ,
  idToken: long-token,
  registered: true,
  refreshToken: refresh-token,
  expiresIn: 3600
}- Using environment variables at run time
flutter run --dart-define=API_KEY=SOME_VALUENow it will be replaced here,
final API_KEY = String.fromEnvironment('API_KEY', defaultValue: '');// sending http request and throwing errors
try {
final response = await http.post(url,
body: json.encode({
"email": email,
"password": password,
"returnSecureToken": true,
}));
final responseData = json.decode(response.body);
if (responseData['error'] != null) { // checking if error key exist in response
throw HttpException(responseData['error']['message']); // when the statusCode is below 400 but error like 'email exists', 'invalid passwords', 'weak passwords' etc. occurs
}
} catch (error) {
throw error;
}
// Authenticating and Showing errors if any
try {
if (_authMode == AuthMode.Login) {
// Log user in
await Provider.of<Auth>(context, listen: false).login(
_authData['email'] as String,
_authData['password'] as String,
);
} else {
// Sign user up
await Provider.of<Auth>(context, listen: false).signup(
_authData['email'] as String,
_authData['password'] as String,
);
}
} on HttpException catch (error) {
var errorMessage = 'Authentication failed';
if (error.toString().contains('EMAIL_EXISTS')) {
errorMessage = 'This email address is already in use.';
} else if (error.toString().contains('INVALID_EMAIL')) {
errorMessage = 'This is not a valid email address.';
} else if (error.toString().contains('WEAK_PASSWORD')) {
errorMessage = 'This password is too weak';
} else if (error.toString().contains('EMAIL_NOT_FOUND')) {
errorMessage = 'Could not find a user with that email.';
} else if (error.toString().contains('INVALID_PASSWORD')) {
errorMessage = 'Invalid password.';
}
_showErrorDialog(errorMessage);
} catch (error) {
var errorMessage = 'Could not authenticate you. Please try again later!';
_showErrorDialog(errorMessage);
}// defined after http request is successful
_token = responseData['idToken'];
_userId = responseData['localId'];
_expiryDate = DateTime.now().add(
Duration(
seconds: int.parse(responseData['expiresIn']),
),
);
notifyListeners();
// Storing token on Authentication
String get token {
if (_expiryDate != DateTime(0) &&
_expiryDate.isAfter(DateTime.now()) &&
_token != '') {
return _token;
}
return '';
}
// check if user is Authenticated
bool get isAuth {
return token != '';
}// Switching between different screen on the basis of authorization
Consumer<Auth>(
builder: (ctx, auth, _) =>
auth.isAuth ? ProductsOverviewScreen() : AuthScreen(),
);// Using ChangeNotifierProxyProvider
// It allows us to use previous provider in a new provider
MultiProvider(
providers: [
ChangeNotifierProvider(
create: (ctx) => Auth(),
),
// Auth -> Provider from where we need data
// Products -> Provider where we need data
ChangeNotifierProxyProvider<Auth, Products>(
// update function takes context, Instance of Auth, and previous instance of Providers(which is null at first)
// Here, auth (an instance of Auth) can be used as argument for Products provider
update: (ctx, auth, previousProducts) => Products(auth.token,
previousProducts == null ? [] : previousProducts.items),
create: (_) => Products('',[]),
),
]
)// Saving favorite status per user
final url = Uri.https(
'dummy.firebasedatabase.app',
'/userFavorites/$userId/$id.json', {'auth':authToken});
await http.put(
url,
body: json.encode(isFavorite), // equivalent to json.encode({$id: isFavorite})
);
// Here, new userFavorites entry will be created, with userId entries containing productId: boolean// Fetching the favorite status per user
// extracted Data is data received from another url dummy.firebasedatabase.app/products.json?auth=authToken
url = Uri.https(
'dummy.firebasedatabase.app',
'/userFavorites/$userId.json',
{'auth': authToken});
final favoriteResponse = await http.get(url);
final favoriteData = json.decode(favoriteResponse.body);
final List<Product> loadedProducts = [];
extractedData.forEach((prodId, prodData) {
loadedProducts.insert(
0,
Product(
id: prodId,
title: prodData['title'],
price: prodData['price'].toDouble(),
description: prodData['description'],
imageUrl: prodData['imageUrl'],
isFavorite: favoriteData == null ? false : favoriteData[prodId] ?? false,
));
});// Attach creatorId to each product when adding to database
// Only applicable for firebase
// Add a rule
// Add node that needs to be filtered as key
// Specify a list of keys by which filtering is applied, creatorId
{
"rules": {
".read": "auth != null", // 2021-11-10
".write": "auth != null", // 2021-11-10
"products": {
".indexOn": ["creatorId"]
}
}
}// Fetching products based on user/creatorId
// url = dummy.firebasedatabase.app/products.json?auth=authToken&orderBy="creatorId"&equalTo="userId"
var url = Uri.https(
'dummy.firebasedatabase.app',
'/products.json',
{
'auth': authToken,
'orderBy': "\"creatorId\"",
'equalTo': "\"$userId\"",
}
);
await http.get(url);// Logout manually
void logout() {
_token = '';
_userId = '';
_expiryDate = DateTime(0);
notifyListeners();
}// Logout automatically when token expires
import 'dart:async';
Timer _authTimer = Timer(Duration(seconds: 0), () {});
Future<void> _authenticate(){
...
_autoLogout();
}
void logout() {
_token = '';
_userId = '';
_expiryDate = DateTime(0);
if (_authTimer != Timer(Duration(seconds: 0), () {})) {
_authTimer.cancel();
_authTimer = Timer(Duration(seconds: 0), () {});
}
notifyListeners();
}
void _autoLogout() {
if (_authTimer != Timer(Duration(seconds: 0), () {})) {
_authTimer.cancel();
}
final timeToExpire = _expiryDate.difference(DateTime.now()).inSeconds;
_authTimer = Timer(Duration(seconds: timeToExpire), logout);
}Shared Preference
// Saving data when authenticating
import 'package:shared_preferences/shared_preferences.dart';

final prefs = await SharedPreferences.getInstance();
final userData = json.encode({
  'token': _token,
  'userId': _userId,
  'expiryDate': _expiryDate.toIso8601String(),
});
prefs.setString('userData', userData);
// Try to login when app launches
Future<bool> tryAutoLogin() async {
final prefs = await SharedPreferences.getInstance();
print(prefs.getString('userData'));
if (!prefs.containsKey('userData')) {
return false;
}
final extractedUserData = json.decode(prefs.getString('userData') as String)
as Map<String, dynamic>;
final expiryDate =
DateTime.parse(extractedUserData['expiryDate'].toString());
if (expiryDate.isBefore(DateTime.now())) {
return false;
}
_token = extractedUserData['token'] as String;
_userId = extractedUserData['userId'] as String;
_expiryDate = expiryDate;
print(_token);
print(_userId);
print(_expiryDate);
notifyListeners();
_autoLogout();
return true;
}
// Clearing preferences when logged out
Future<void> logout() async {
_token = '';
_userId = '';
_expiryDate = DateTime(0);
if (_authTimer != Timer(Duration(seconds: 0), () {})) {
_authTimer.cancel();
_authTimer = Timer(Duration(seconds: 0), () {});
}
notifyListeners();
final prefs = await SharedPreferences.getInstance();
// prefs.remove('userData');
prefs.clear();
}// Showing different screen based on the shared preferences data and authentication
class ShopApp extends StatelessWidget {
const ShopApp({Key? key}) : super(key: key);
@override
Widget build(BuildContext context) {
return Consumer<Auth>(
builder: (ctx, auth, _) => auth.isAuth
? ProductsOverviewScreen()
: FutureBuilder(
future: auth.tryAutoLogin(),
builder: (ctx, authResultSnapshot) =>
authResultSnapshot.connectionState == ConnectionState.waiting
? SplashScreen()
: AuthScreen(),
),
);
}
}Animations in flutter happens at 60fps changing the UI, so StatefulWidget is required.
// State Class connected to StatefulWidget

// SingleTickerProviderStateMixin is used for vsync:this to work
// Also it lets our widgets know when a 'frame update is due', which is needed by animations to play smoothly
class _AuthCardState extends State<AuthCard>
    with SingleTickerProviderStateMixin{

  late AnimationController _controller; // Controlling animation
  late Animation<Size> _heightAnimation; // What to animate

  // initializing above variables
  @override
  void initState() {
    _controller = AnimationController(
      vsync: this,
      // this is pointer to _AuthCardState, it watches it and only play animation when _AuthCard is visible
      // vsync is the [TickerProvider] for the current context. It can be changed by calling [resync].
      duration: Duration(milliseconds: 300), // how long animation lasts
    );

    _heightAnimation = Tween<Size>(
      // Tween between Sizes
      // What to animate
      begin: Size(double.infinity, 260), // Size(width,height)
      end: Size(double.infinity, 320),
    ).animate(
      // How to animate
      CurvedAnimation(
        parent: _controller,
        curve: Curves.linear, // how duration is split or managed
      ),
    );

    _heightAnimation.addListener(() => setState(() {})); // Listener to call setState whenever _heightAnimation updates

    super.initState();
  }

  @override
  void dispose() {
    _controller.dispose(); // disposing controller when widget exits
    super.dispose();
  }

  void _switchAuthMode() {
    if (_authMode == AuthMode.Login) {
      setState(() {
        _authMode = AuthMode.Signup;
      });
      _controller.forward(); // animation starts
    } else {
      setState(() {
        _authMode = AuthMode.Login;
      });
      _controller.reverse(); // animation reverses
    }
  }

  @override
  Widget build(BuildContext context) {
    return Container(
      height: _heightAnimation.value.height,
      constraints: BoxConstraints(minHeight: _heightAnimation.value.height),
      ...
      // Some button to call _switchAuthMode
    );
  }
}

// Flaw: build re-runs for every frames, everything inside container changes for every frame// Includes above code without listener: _heightAnimation.addListener(() => setState(() {}));
// Only height of container will change on every frame
@override
Widget build(BuildContext context) {
return AnimatedBuilder(
animation: _heightAnimation,
builder: (ctx, child) => Container(
height: _heightAnimation.value.height,
constraints: BoxConstraints(minHeight: _heightAnimation.value.height),
width: deviceSize.width * 0.75,
padding: EdgeInsets.all(16.0),
child: child, // Widget that should not change
),
child: Text('Widget that should not change on animation'),
)
}// Built-in widget that controls and animates every change inside the container
AnimatedContainer(
duration: Duration(milliseconds: 300),
curve: Curves.easeIn,
height: _authMode == AuthMode.Signup ? 320 : 260,
constraints:
BoxConstraints(minHeight: _authMode == AuthMode.Signup ? 320 : 260),
child: ...
)Note: Don't use too much animation, it can hamper the performance
late Animation<Offset> _slideAnimation;
late Animation<double> _opacityAnimation;

@override
void initState() {
  _slideAnimation = Tween<Offset>(
    begin: Offset(0, -1),
    end: Offset(0, 0),
  ).animate(
    CurvedAnimation(
      parent: _controller,
      curve: Curves.linear,
    ),
  );

  _opacityAnimation = Tween(
    begin: 0.0,
    end: 1.0,
  ).animate(
    CurvedAnimation(
      parent: _controller,
      curve: Curves.easeIn,
    ),
  );
}

AnimatedContainer(
  // Just to get rid of empty space left by opacity of 0 from FadeTransition
  duration: Duration(milliseconds: 300),
  constraints: BoxConstraints(
      minHeight: _authMode == AuthMode.Signup ? 60 : 0,
      maxHeight: _authMode == AuthMode.Signup ? 120 : 0),
  curve: Curves.easeIn,
  child: FadeTransition(
    opacity: _opacityAnimation,
    child: SlideTransition(
      position: _slideAnimation,
      child: TextFormField()
    )
  )
)
// fades in from placeholder to image when image is fetched
FadeInImage(
placeholder: AssetImage('assets/images/product-placeholder.png'),
image: NetworkImage(product.imageUrl),
fit: BoxFit.cover,
)// Behavior: List of items with images(products), one item when click takes you to another screen with that image(product detail)
// Now with Hero, the item image will expand and shift to another screen with big image(product detail)
// From where to animate
Hero(
tag: product.id, // should be unique
child: Image.network()
)
// To where to animate
Hero(
tag: loadedProduct.id,
child: Image.network()
)
// product.id should be equal to loadedProduct.id// When scrolled, the image at top will gradually become smaller, until it transforms into an appBar with given title
// Defined as body of Scaffold
Scaffold(
body: CustomScrollView(
slivers: [
SliverAppBar(
expandedHeight: 300, // height of appBar when not scrolled, maxHeight
pinned: true, // appBar will be always visible, stick to top
flexibleSpace: FlexibleSpaceBar(
title: Text(loadedProduct.title),
background: Hero(
tag: loadedProduct.id,
child: Image.network(
loadedProduct.imageUrl,
fit: BoxFit.cover,
),
),
), // what should be inside appbar and how it should change
),
SliverList(
delegate: SliverChildListDelegate(
[
SizedBox(height: 10),
Text(
'\$${loadedProduct.price}',
style: TextStyle(
color: Colors.grey,
fontSize: 20,
),
textAlign: TextAlign.center,
),
SizedBox(height: 10),
Container(
padding: EdgeInsets.symmetric(horizontal: 10),
width: double.infinity,
child: Text(
loadedProduct.description,
textAlign: TextAlign.center,
softWrap: true,
),
),
SizedBox(
height: 800,
)
],
),
),
],
),
)// Create CustomRoute class
import 'package:flutter/material.dart';
class CustomRoute<T> extends MaterialPageRoute<T> {
CustomRoute({
required WidgetBuilder builder,
}) : super(
builder: builder,
);
@override
Widget buildTransitions(
BuildContext context,
Animation<double> animation,
Animation<double> secondaryAnimation,
Widget child,
) {
return FadeTransition(
opacity: animation,
child: child,
); // override return with any transition
}
}// Apply on single routing
Navigator.of(context).pushReplacement(
CustomRoute(
builder: (ctx) => OrdersScreen(),
),
);// Apply on all routing
class CustomPageTransitionBuilder extends PageTransitionsBuilder {
@override
Widget buildTransitions<T>(
PageRoute<T> route,
BuildContext context,
Animation<double> animation,
Animation<double> secondaryAnimation,
Widget child,
) {
return FadeTransition(
opacity: animation,
child: child,
);
}
}
// Now add this as a property of themedata
pageTransitionsTheme: PageTransitionsTheme(builders: {
// All works for web and checks the underlying OS
TargetPlatform.android: CustomPageTransitionBuilder(),
TargetPlatform.iOS: CustomPageTransitionBuilder(),
TargetPlatform.windows: CustomPageTransitionBuilder(),
TargetPlatform.linux: CustomPageTransitionBuilder(),
TargetPlatform.macOS: CustomPageTransitionBuilder(),
}),import 'dart:io'; // To access File
class PlaceLocation {
final double latitude;
final double longitude;
final String address;
PlaceLocation({
required this.latitude,
required this.longitude,
this.address = '',
});
}
class Place {
final String id;
final String title;
final PlaceLocation? location;
final File image;
Place({
required this.id,
required this.title,
required this.location,
required this.image,
});
}We use ImagePicker package for this.
There are some extra configuration (for version 0.8.4+3) to be made when using it with ios.
Add following keys to Info.plist located at:
<project root>/ios/Runner/Info.plist
NSMicrophoneUsageDescription is not required as we are not taking videos.
<dict>
	<key>NSPhotoLibraryUsageDescription</key>
	<string>We need to access gallery!</string>

	<key>NSCameraUsageDescription</key>
	<string>We need to take a picture!</string>

	<key>NSMicrophoneUsageDescription</key>
	<string>We need to record audio!</string>
</dict>
import 'dart:io';
import 'package:image_picker/image_picker.dart';
import 'package:flutter/foundation.dart';
// Taking picture
Widget? image;
Future<void> _takePicture() async {
// pickImage should be called with instance of ImagePicker
final imageFile = await ImagePicker().pickImage(
source: ImageSource.camera,
maxWidth: 600,
imageQuality: 50, // from 1 to 100
);
setState(() {
if (kIsWeb) {
image = Image.network(
imageFile!.path,
fit: BoxFit.cover,
width: double.infinity,
);
} else {
image = Image.file(
File(imageFile!.path),
fit: BoxFit.cover,
width: double.infinity,
);
}
});
}Two packages required: Path Provider helps with finding path. Path helps with constructing path.
import 'package:path/path.dart' as path;
import 'package:path_provider/path_provider.dart' as syspath;

final appDir = await syspath.getApplicationDocumentsDirectory(); // default app directory

final fileName = path.basename(imageFile!.path);
// .basename returns image-filename with extension from file path

final savedImage =
    await File(imageFile.path).copy('${appDir.path}/$fileName');
// copy cached imageFile to app directory

// previous location: /data/user/0/com.example.ultimate_flutter_app/cache/image-01.jpg
// current location: /data/user/0/com.example.ultimate_flutter_app/app_flutter/image-01.jpgWe use SQLite plugin for Flutter. to work with sql database for android and ios.
import 'package:sqflite/sqflite.dart';
import 'package:path/path.dart' as path;

class DBHelper {

  // Creating database
  static Future<Database> database() async {
    // finds path for both ios and android
    final dbPath = await getDatabasesPath();

    // Opening or Creating database places.db if not exist
    // onCreate runs only when creating database i.e. only one time at first
    return openDatabase(path.join(dbPath, 'places.db'),
        onCreate: (db, version) {
      // Creating table user_places
      return db.execute(
          'CREATE TABLE user_places(id TEXT PRIMARY KEY, title TEXT, image TEXT)');
    }, version: 1); // We can have multiple versions of same database
  }

  // Function to insert data
  static Future<void> insert(String table, Map<String, Object> data) async {
    final db = await DBHelper.database();
    db.insert(
      table,
      data,
      conflictAlgorithm: ConflictAlgorithm.replace, // overwrite existing entries if changes are coming for same id
    );
  }

  // Function to retrieve data
  static Future<List<Map<String, dynamic>>> getData(String table) async {
    final db = await DBHelper.database();
    return db.query(table);
  }
}

// We used DBHelper. to access the static fxn even if we are inside the class cause its static
// Inserting data to user_places table
DBHelper.insert('user_places', {
'id': newPlace.id,
'title': newPlace.title,
'image': newPlace.image.path
});
// Retrieving data from user_places table
Future<void> fetchAndSetPlaces() async {
final dataList = await DBHelper.getData('user_places');
_items = dataList
.map((item) => Place(
id: item['id'],
title: item['title'],
image: File(item['image']),
location: null,
))
.toList();
}For this, we use Location package. Configurations(for package version 4.2.0): Android: Add the following to AndroidManifest.xml located at: android\app\src\main\AndroidManifest.xml inside of manifest and outside of application
<manifest ...>
  <uses-permission android:name="android.permission.FOREGROUND_SERVICE" />
  <uses-permission android:name="android.permission.ACCESS_BACKGROUND_LOCATION"/>
  <application ...>...</application>
</manifest>
IOS: Add the following to info.plist located at ios\Runner\Info.plist
<dict>
  <key>NSLocationWhenInUseUsageDescription</key>
	<string>We need to get a location!</string>

  <key>NSLocationAlwaysAndWhenInUseUsageDescription</key>
	<string>We need to get a location!</string>
</dict>
NSLocationWhenInUseUsageDescription -> This is probably the only one you need. Background location is supported by this -- the caveat is that a blue badge is shown in the status bar when the app is using location service while in the background. I'm using this only.
NSLocationAlwaysAndWhenInUseUsageDescription -> Use this very carefully. This key is required only if your iOS app uses APIs that access the user’s location information at all times, even if the app isn't running.
Using Api to generate Static Map Image using longitude and latitude. Since Google Cloud Platform requires credit card, I used MapBox.
// get token from MapBox after signing up for free
// This static function returns a Image URL containing map with marker 'A', with given coordinates
// Preview Image => https://api.mapbox.com/styles/v1/mapbox/streets-v11/static//pin-s-a+a724cc($lng,$lat)/${lng},${lat},17/1080x600?access_token=$accessToken

class LocationHelper {
  static String generateLocationPreviewImage(
      {required double lat, required double lng}) {
    return 'https://api.mapbox.com/styles/v1/mapbox/streets-v11/static/pin-s-a+a724cc($lng,$lat)/$lng,$lat,17/1080x600?access_token=$accessToken';
  }
}

// Calling the function
final locData = await Location().getLocation(); // get currentLocation from location package
final staticMapImageUrl = LocationHelper.generateLocationPreviewImage(
  lat: locData.latitude as double,
  lng: locData.longitude as double,
);Render dynamic maps with Google Maps😑. But I have no credit card -> No Api Key -> Not implementing If you want to implement using Google Maps, you will need Google Maps Flutter package. There are some configurations to be made, which are explained in README there.
Instead I will give the user the choice to input location address or coordinates. I'll be using MapBox API again to change address to coordinates and vice-versa.
// Get Place Address => https://api.mapbox.com/geocoding/v5/mapbox.places/${lng},${lat}.json?access_token=$accessToken
// Get Place Coordinates => https://api.mapbox.com/geocoding/v5/mapbox.places/${place}.json?access_token=$accessToken

// This will be used to show place address on places_list_screen, and also to save to sqlite
static Future<String> getPlaceAddress(double lat, double lng) async {
  final url = Uri.https(
      "api.mapbox.com", "/geocoding/v5/mapbox.places/$lng,$lat.json", {
    'access_token': '$accessToken',
  });
  final response = await http.get(url);
  final place = json.decode(response.body)['features'][0]['place_name'];
  return place;
}

// This can be used if the user enter place name instead of coordinates
// So, this will generate coordinates which will be helpful, to generateLocationPreviewImage
static Future<List> getPlaceCoordinates(String place) async {
  final url =
      Uri.https("api.mapbox.com", "/geocoding/v5/mapbox.places/$place.json", {
    'access_token': '$accessToken',
  });
  final response = await http.get(url);
  final coordinates =
      json.decode(response.body)['features'][0]['geometry']['coordinates'];
  return [coordinates[1], coordinates[0]];
}We have to modify our previous sqlite in order to accept location.
// We have to add certain fields to table
// REAL is for double
static Future<Database> database() async {
  final dbPath = await getDatabasesPath();
  return openDatabase(path.join(dbPath, 'places.db'),
      onCreate: (db, version) {
    return db.execute(
        'CREATE TABLE user_places(id TEXT PRIMARY KEY, title TEXT, image TEXT, loc_lat REAL, loc_lng REAL, address TEXT)');
  }, version: 1);
}
// Changing how I added and fetch data
Future<void> addPlace(
String pickedTitle,
File pickedImage,
PlaceLocation pickedLocation,
) async {
// Getting a readable address from coordinates
final address = await LocationHelper.getPlaceAddress(
pickedLocation.latitude, pickedLocation.longitude);
// updating location to add address argument, as only latitude and longitude were available at first
final updatedLocation = PlaceLocation(
latitude: pickedLocation.latitude,
longitude: pickedLocation.longitude,
address: address,
);
final newPlace = Place(
id: DateTime.now().toString(),
image: pickedImage,
title: pickedTitle,
location: updatedLocation,
);
_items.add(newPlace);
notifyListeners();
DBHelper.insert('user_places', {
'id': newPlace.id,
'title': newPlace.title,
'image': newPlace.image.path,
'loc_lat': newPlace.location!.latitude, // storing each location property separately
'loc_lng': newPlace.location!.longitude,
'address': newPlace.location!.address,
});
}
Future<void> fetchAndSetPlaces() async {
final dataList = await DBHelper.getData('user_places');
_items = dataList
.map((item) => Place(
id: item['id'],
title: item['title'],
image: File(item['image']),
location: PlaceLocation(
latitude: item['loc_lat'],
longitude: item['loc_lng'],
address: item['address'],
), // Fetching location by making PlaceLocation object
))
.toList();
}Using Rest API, We can't use all its services efficiently. So firebase, provides us with SDK to make it easier. Behind the scene, sdk manages all the http requests. Find more about firebase with flutter in here.
Firebase is a fully managed backend service. Firebase consists of services like Database, File Storage, Authentication, Push Notifications, Analytics, On-demand Server-Side Code(Cloud Functions) etc. It also provides APIs and SDK(which can be installed in flutter app to simplify things)
Create a new project in firebase.
For Android:
Add an app, android, fill the form with
Android Package Name: com.example.ultimate_flutter_app can be found in android/app/build.gradle and register the app.
Add the provided google_services.json file in android/app.
Click continue, Now inside android/build.gradle, add lines as provided. Again in android/app/build.gradle, add the lines provided.
Scroll a bit for the fix of the error that might occur with android
For Web:
Add a web app. Choose config and Copy the given script and go to web/index.html. Paste the code inside body tag before any other script, then initialize firebase using this command firebase.initializeApp(firebaseConfig);. Wrap this code with script tag.
Also add firebase cdns with same version before this script. The packages should also be installed through pubspec.yaml to use the cdn.
<!-- The core Firebase JS SDK is always required and must be listed first -->
<script src="https://www.gstatic.com/firebasejs/8.6.1/firebase-app.js"></script>

<!-- Add for Cloud Firestore: https://pub.dev/packages/cloud_firestore-->
<script src="https://www.gstatic.com/firebasejs/8.6.1/firebase-firestore.js"></script>

<!-- Add for Firebase Storage: https://pub.dev/packages/firebase_storage
<script src="https://www.gstatic.com/firebasejs/8.6.1/firebase-storage.js"></script>
 -->

<!-- Add for Firebase Auth: https://pub.dev/packages/firebase_auth
<script src="https://www.gstatic.com/firebasejs/8.6.1/firebase-auth.js"></script>
-->

<!-- Add for Firebase Messaging: https://pub.dev/packages/firebase_messaging
<script src="https://www.gstatic.com/firebasejs/8.6.1/firebase-messaging.js"></script>
-->

<!-- Add for Firebase Analytics: https://pub.dev/packages/firebase_analytics
<script src="https://www.gstatic.com/firebasejs/8.6.1/firebase-analytics.js"></script>
-->

<!-- Add for Cloud Functions: https://pub.dev/packages/cloud_functions
<script src="https://www.gstatic.com/firebasejs/8.6.1/firebase-functions.js"></script>
-->

<script type="module">
  const firebaseConfig = {
    apiKey: "...",
    authDomain: "[PROJECT_NAME].firebaseapp.com",
    databaseURL: "https://[PROJECT_NAME].firebasedatabase.app",
    projectId: "[PROJECT_NAME]",
    storageBucket: "[PROJECT_NAME].appspot.com",
    messagingSenderId: "...",
    appId: "...",
    measurementId: "G-...",
  };

  // Initialize Firebase
  firebase.initializeApp(firebaseConfig);
</script>
Now add a package Cloud Firestore ^2.5.4, which helps to communicate with firestore database.
Now Go to firebase console, and create database in 'firestore database'. Add a collection, then a document(piece of data in collection). For eg: 'chats' collection with 'chat-rooms document',each chat-rooms document cah have a collection named 'messages' containing 'individual messaging document'. So its like nesting of Collection > Documents > Collections > Documents and so on. Document can have fields and collection. Collection has a name, Document has a ID.
// How to if everything is working?
// Fetching the data from firestore
import 'package:cloud_firestore/cloud_firestore.dart';

FirebaseFirestore.instance
    .collection('chats/') // Access the collection
    .snapshots() // returns a stream, emits new values whenever data changes
    .listen((data) { // setting up listener for snapshots
  print(data);
});

// If Instance of '_JsonQuerySnapshot' or alike is printed on the debug, then everything is fine
If you get an error like this in android:
com.android.builder.dexing.DexArchiveMergerException: Error while merging dex archives:
Go to android/app/build.gradle. Inside defaultConfig, add this line at the end multiDexEnabled true.
Also inside dependencies, add this at the end implementation 'com.android.support:multidex:1.0.3'. Save and re-run.
android{
  ...
  defaultConfig{
    ...
    multiDexEnabled true
  }
  ...
}

dependencies{
  ...
  implementation 'com.android.support:multidex:1.0.3'
}StreamBuilder<QuerySnapshot>(
stream: FirebaseFirestore.instance
.collection('chats/doc-id/messages')
.snapshots(), // Stream of data
builder: (ctx, streamSnapshot) {
// This runs every time the stream changes
if (streamSnapshot.connectionState == ConnectionState.waiting) {
return Center(
child: CircularProgressIndicator(),
);
}
final docs = streamSnapshot.data!.docs; // access the documents from the stream
return ListView.builder(
itemCount: docs.length,
itemBuilder: (ctx, index) => Container(
padding: EdgeInsets.all(8),
child: Text(docs[index]['text']), // Getting field 'text', one by one from each documents
),
);
},
),Use FutureBuilder with return type DocumentSnapshot to work with firestore.
FutureBuilder<DocumentSnapshot>
// Adding new documents inside messages collection with text field
FirebaseFirestore.instance
  .collection('/chats/doc-id/messages')
  .add({
    'text': 'This was added by user',
  }); // doc-id will auto generate
// Hide the soft keyboard, or shift the focus from inputfields to nothing
FocusScope.of(context).unfocus();We need firebase_auth package for this. Also, In firebase console, go to Authentication and add a sign-in method. I chose Email/Password. As mentioned above in Firebase Setup for web, add the firebase-auth script to index.html.
// AuthScreen
// Token will be received and added to requests automatically by firebase sdk
final _auth = FirebaseAuth.instance;

void _submitAuthForm(
  String email,
  String password,
  String userName,
  bool isLogin,
  BuildContext ctx, // Receiving context of a Widget which has a Scaffold surrounding it, so to show SnackBar
) async {
  UserCredential userCredential;

  try {
    if (isLogin) {
      // Signing in existing user
      userCredential = await _auth.signInWithEmailAndPassword(
        email: email,
        password: password,
      );

    } else {
      // Creating new account
      userCredential = await _auth.createUserWithEmailAndPassword(
        email: email,
        password: password,
      );

      // Store username in firestore
      // This will create a new collection 'users' if not found, and add a document with ID = userId, and store username and email
      await FirebaseFirestore.instance
            .collection('users')
            .doc(userCredential.user!.uid)
            .set({
          'username': userName,
          'email': email,
        });
        // userid generated by firebase for the user

    }
    // For firebase specific exception
  } on FirebaseException catch (err) {
    var message = 'An error occured, Please check you credentials';

    if (err.message != null) {
      message = err.message.toString();
    }

    // Showing a snackbar to display errors
    ScaffoldMessenger.of(ctx).showSnackBar(SnackBar(
      content: Text(message),
      backgroundColor: Theme.of(ctx).errorColor,
    ));
  } catch (err) {
    // any exception, except that of firebase
    print(err);
  }
}

AuthForm(_submitAuthForm); // Passing refrence to Auth widgetAuthForm(this.submitFn); // Receiving the fxn refrence
// Above received fxn will bound to below function submitFn
final void Function(
String email,
String password,
String userName,
bool isLogin,
BuildContext ctx,
) submitFn;
// Passing data to submitFn -> _submitAuthForm from State class
widget.submitFn(
_userEmail.trim(), // trim() removes whitespaces before and after
_userPassword.trim(),
_userName.trim(),
_isLogin,
context, // Passing context to AuthScreen, cause this widget is inside the Scaffold of AuthScreen
);DropdownButton(
icon: Icon(Icons.more_vert),
items: [
DropdownMenuItem(
child: Container(
child: Row(
children: [
Icon(Icons.exit_to_app),
SizedBox(
width: 8,
),
Text('Logout'),
],
),
),
value: 'logout',
underline: Container(), // get rid of underline
)
],
onChanged: (itemIdentifier) {
if (itemIdentifier == 'logout') {
FirebaseAuth.instance.signOut(); // Clears the token
}
},
),// Switch between two screens, based on Authdata
// Logout will emit a signal, and stream will be known that token is not available, so AuthScreen() will be seen
final Future<FirebaseApp> _initialization = Firebase.initializeApp();
return FutureBuilder(
// Initialize FlutterFire:
future: _initialization, // Listen to auth data changes
builder: (context, appSnapshot) {
return StreamBuilder(
stream: FirebaseAuth.instance.authStateChanges(),
builder: (ctx, userSnapshot) {
if (userSnapshot.hasData) {
return ChatScreen();
}
return AuthScreen();
},
);
},
);Locking database down to authenticated users.
// Rough look at rules
match path-to-which-requests-are-send{
  rules applied to such a requests
}

// Match any request to /chats,
match /chats{
  // allow read and write if user is authenticated
  allow read, write: if request.auth != null
}
App will be a group chat. So Database path looks like: /chat/docs/
// Setting up rules
rules_version = '2';
service cloud.firestore {
  match /databases/{database}/documents {
    // Allowing write access to the user if authData is not null
    // And {uid}, i.e. doc-id under collection 'users', should be equal to auth userId
    // Here matching uid is possible, cause when creating doc-id for 'users', I used auth userId
  	match /users/{uid}{
    	allow write: if request.auth != null && request.auth.uid == uid;
    }

    // Allowing read access to all authenticated users
    match /users/{uid}{
    	allow read: if request.auth != null;
    }

    // Allowing all authenticated users to read and create all documents(also nested) in chats collection
    match /chat/{document=**} {
    	allow read, create: if request.auth != null;
    }
  }
}// Whenever new doc with text field is added in the chat collection of database
// Changes will appear automatically with the help of StreamBuilder
// Sorted the documents by the filed 'createdAt' in descending order
StreamBuilder<QuerySnapshot>(
stream: FirebaseFirestore.instance.collection('chat').orderBy('createdAt', descending:true,).snapshots(),
builder: (ctx, chatSnapshot) {
if (chatSnapshot.connectionState == ConnectionState.waiting) {
return Center(
child: CircularProgressIndicator(),
);
}
final chatDocs = chatSnapshot.data!.docs;
return ListView.builder(
itemCount: chatDocs.length,
itemBuilder: (ctx, index) {
return Text(chatDocs[index]['text']);
},
);
},
)// Send message
final user = await FirebaseAuth.instance.currentUser;
final userData = await FirebaseFirestore.instance
.collection('users')
.doc(user!.uid)
.get();
FirebaseFirestore.instance.collection('chat').add({
'text': _eneteredMessage,
'createdAt': Timestamp.now(), // To sort by time, Timestamp is made available by cloud_firestore
'userId': user!.uid, // To know if the message is send by us or not, so to render UI differently
'username': userData['username'], // username is stored along with message, so that we can fetch and render username only once, rather than fetching it in a FutureBuilder
// 'userImage': userData['image_url'], to show userImage alongside the message
});Add Storage in firebase console and setup some rules. bucket is like collection in firestore and paths can be subfolders and files.
rules_version = '2';
service firebase.storage {
  match /b/{bucket}/o {
    match /{allPaths=**} {
      allow read, create: if request.auth != null;
    }
  }
}
We need to use firebase storage for this.
<!-- Add this to use firebase_storage in web/index.html -->
<script src="https://www.gstatic.com/firebasejs/8.6.1/firebase-storage.js"></script>
// Uploading image, image file should be of type XFile? in order to work for web
// XFile? is available in image_picker package
// ref will hold a refrence to /user_image/uid.jpg
final ref = FirebaseStorage.instance
.ref()
.child('user_image')
.child(userCredential.user!.uid + '.jpg');
// Converting the image to Bytes and uploading as image/jpg
if (image != null) {
if (image != null) {
final data = await image.readAsBytes();
await ref.putData(data, SettableMetadata(contentType: 'image/jpg'));
}
}
final url = await ref.getDownloadURL(); // get a public url for that imageFixing Image URL of FirebaseStorage to get accessed by any domain
- Open the GCP console and start a cloud terminal session by clicking the >_ icon button in the top navbar.
- Click the pencil icon to open the editor, then create the cors.json file and add the following.
- Run
gsutil cors set cors.json gs://your-bucket
Now the imageUrl can be accessed by any domains.
[
  {
    "origin": ["*"],
    "method": ["GET"],
    "maxAgeSeconds": 3600
  }
]Firebase Cloud Messaging(FCM)
We need firebase_messaging package to push notifications.
Some configurations to be made for firebase_messaging: Check Here
Android: No configuration needed of Flutter >= 1.2 (google play services should be available)
Web: Add <script src="https://www.gstatic.com/firebasejs/8.6.1/firebase-messaging.js"></script> to /web/index.html
IOS: Check here
Now Setup Cloud Messaging in Firebase Console. Click Engage > Cloud Messaging > Send you first message. Write some notification messages you want to send, choose target system and follow ongoing steps and review.This can also be used when you, developer wants to send notifications to app users. The notification will be pushed automatically as you review if the app is in the background.
Handling Push Notifications
void initState() {
  // final fbm = FirebaseMessaging.instance; // for IOS
  // fbm.requestPermission(); // for IOS

  FirebaseMessaging.onMessage.listen((msg) {
    // called when an incoming FCM payload is received whilst the Flutter instance is in the foreground
    print(msg);
  });
  FirebaseMessaging.onMessageOpenedApp.listen((msg) {
    // when a user presses a notification message displayed via FCM
    print(msg);
  });
  FirebaseMessaging.onBackgroundMessage((msg) async {
    // message handler function which is called when the app is in the background or terminated
    print(msg);
  });
  super.initState();
}Notifications triggered by user can be done by using Firebase CLoud Functions which requires a billing-account. f... You'll also need node installed.