
The Wave Panel is an open-source acoustic treatment solution that combines diffusion and absorption into one 3D printable panel.
Current Version: V0.1
Please note, version 0.1 is an early prototype.
The Wave Panel is designed to be a fairly low-cost solution to tackle basic room acoustic issues. Acoustic treatment can cost anywhere from £10 for ugly looking foam to £100s for aesthetically pleasing solutions.
Wave Panel costs around £7.50 to £10 (USD $8.97 - $11.96) per 250mm panel and offers the unique computer aided design cues generated by exposed 3D printed infill patterns.
Absorption in the Wave Panel is handled by an insert of 25mm thick rockwool (or similar material) covered by a thin layer of acoustically transparant fabric for a splash of colour.
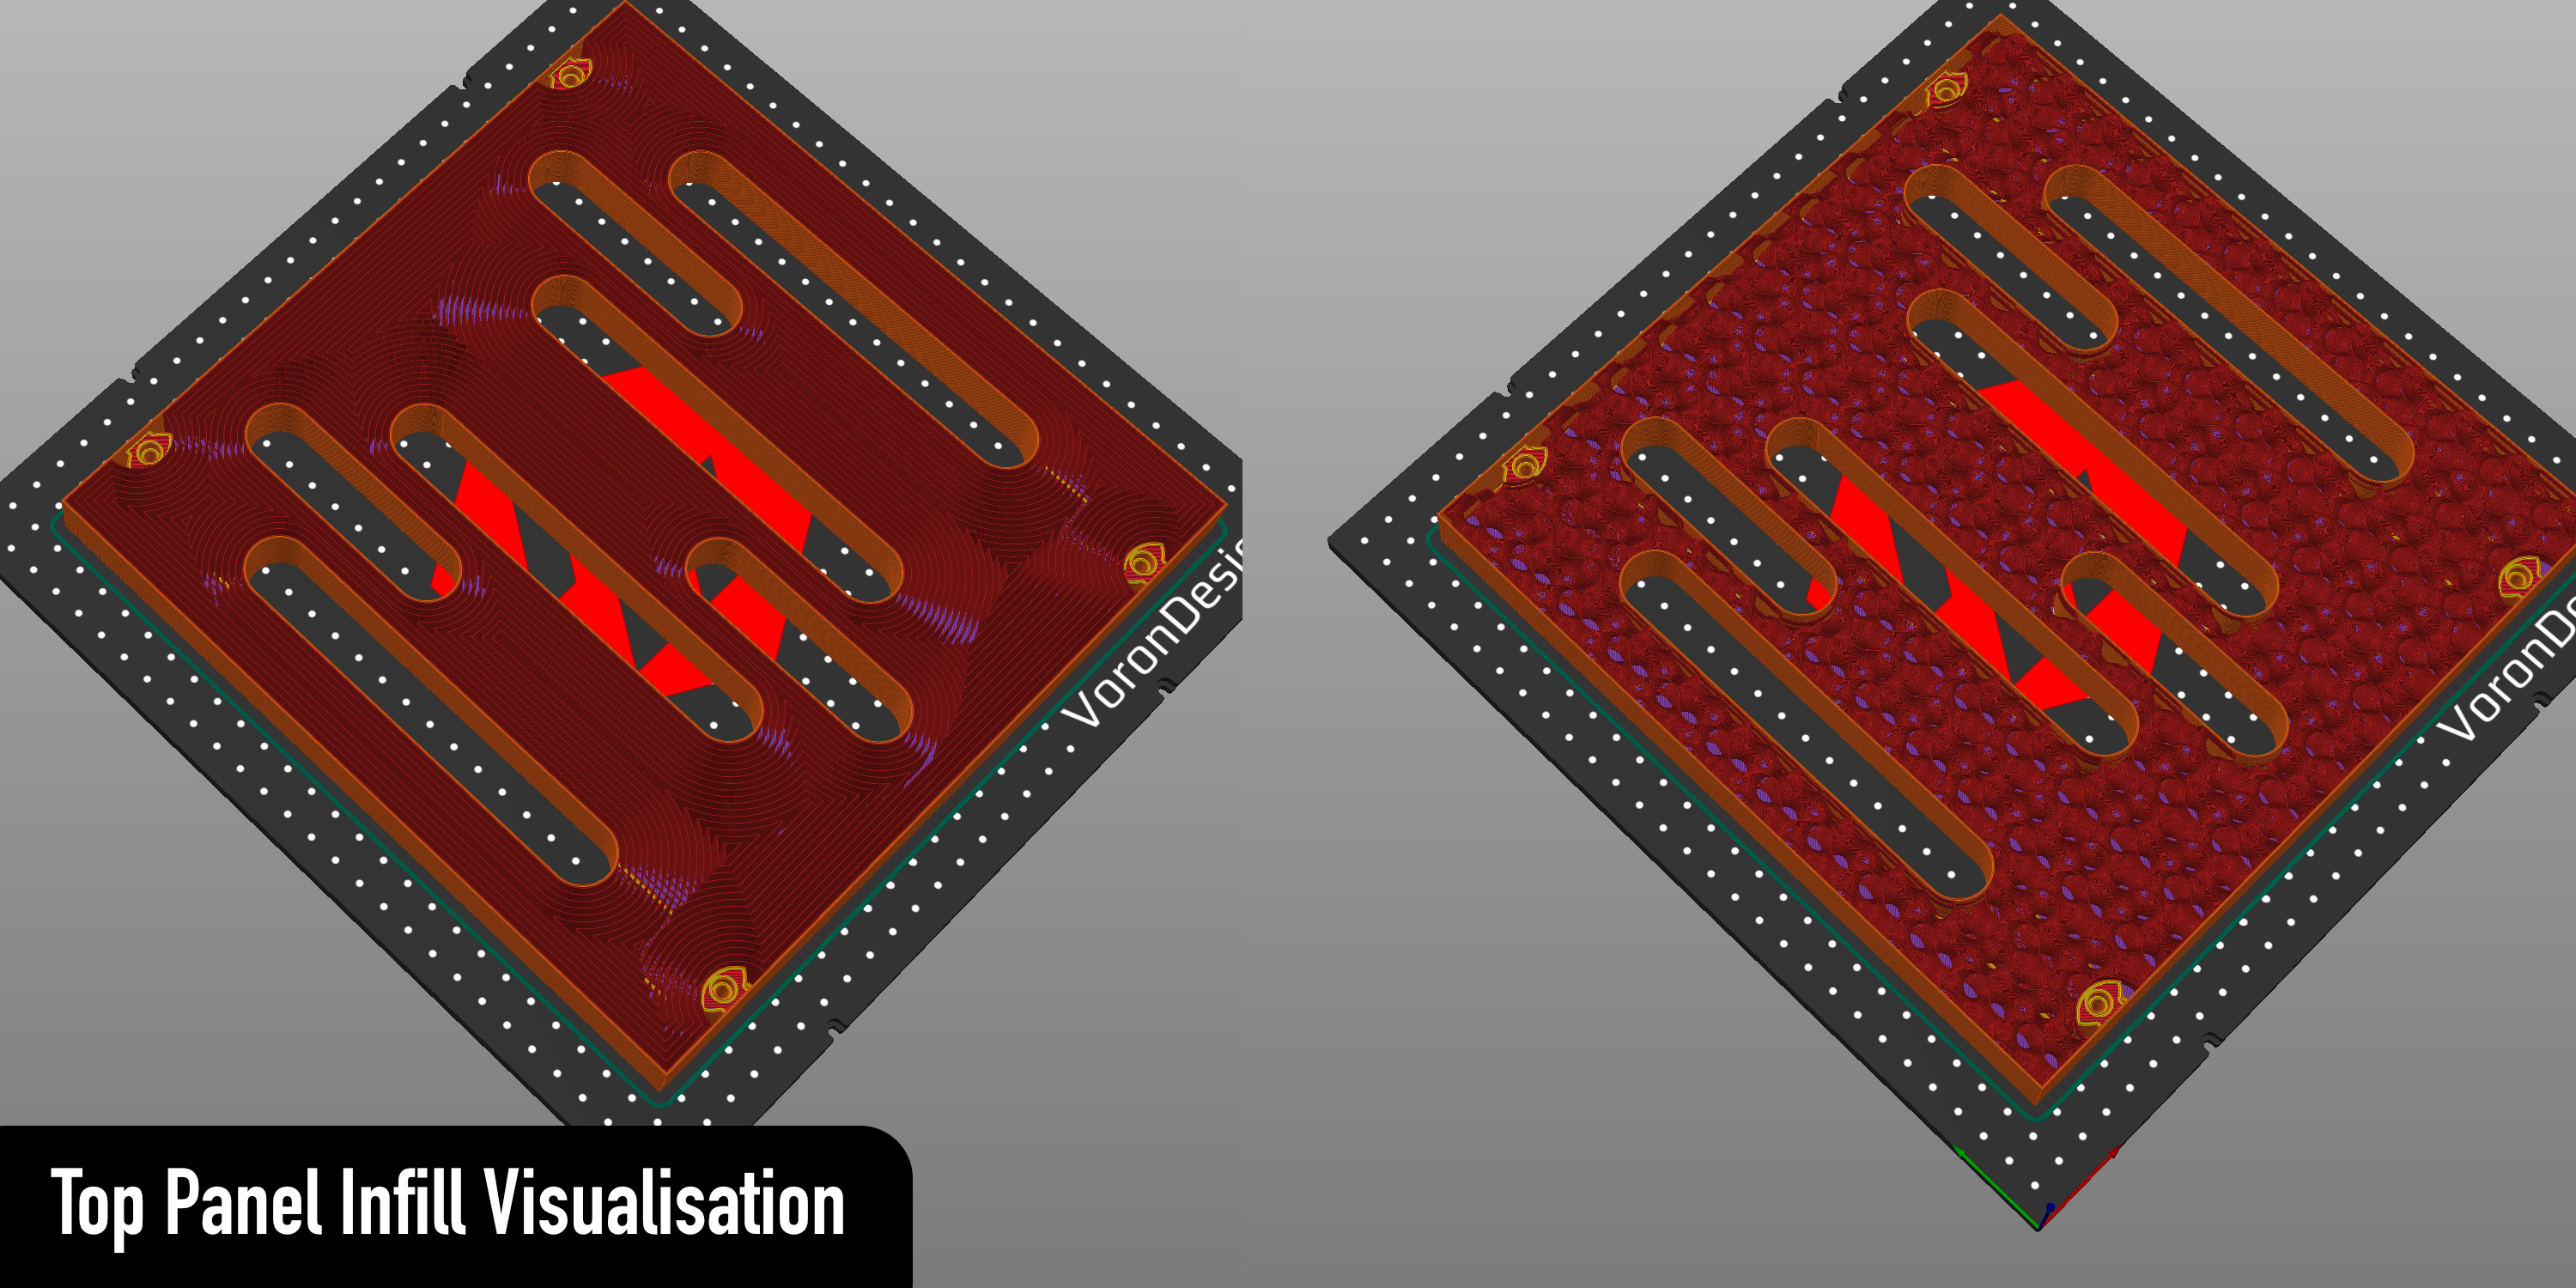
Diffusion in the Wave Panel is handled by the creation of 3D printed infill patterns. The infill pattern chosen is completely up to the user and can be configured in your slicer using the provided .3mf files. These .3mf files contain both the main Top Panel and the INFILL AREA model in the correct position. Each pattern will have it's own diffusion characteristics and once our research has been completed this will be available in the research section.
For information on how to configure your slicer for exposed infill, see the Infill section
Please Note: Calculate how many panels you require before purchasing any materials. Once you have this figure, multiply each item in your bill of materials with the number of panels.
- 4x M3 x 16 SHCS
- 4x M3 Heat Set Insert (should be no deeper than 5mm)
- 4x 6x3mm Magnet
- 245.6mm x 224mm x 25mm Rockwool (or similar)
- 300mm x 224mm of Acoustically Transparant Material - Colour/style doesn't matter.
- 4x T10 (Torx) 3.5mm x 19mm Self Tapping Countersunk Screws
- 270g of ABS/ASA/PETG Filament - Please Note: This value is an approximation based on a 0.4mm Nozzle, 3 Perimeters, 40% Gyroid Infill, 5 Bottom Layers, 6 Top Layers - Your mileage may vary!
- A 3D printer with the correct bed size for your chosen panel.
- A soldering iron (for heat set inserts)
- A drill/impact driver with a T10 bit.
- M3 Screwdriver/Allen Key
- Superglue (for the magnets)
- A knife
- Scissors
- Ruler/tape measure
- Spirit Level
Each size variant contains 2 printable files:
- TopPanel
- BottomPanel
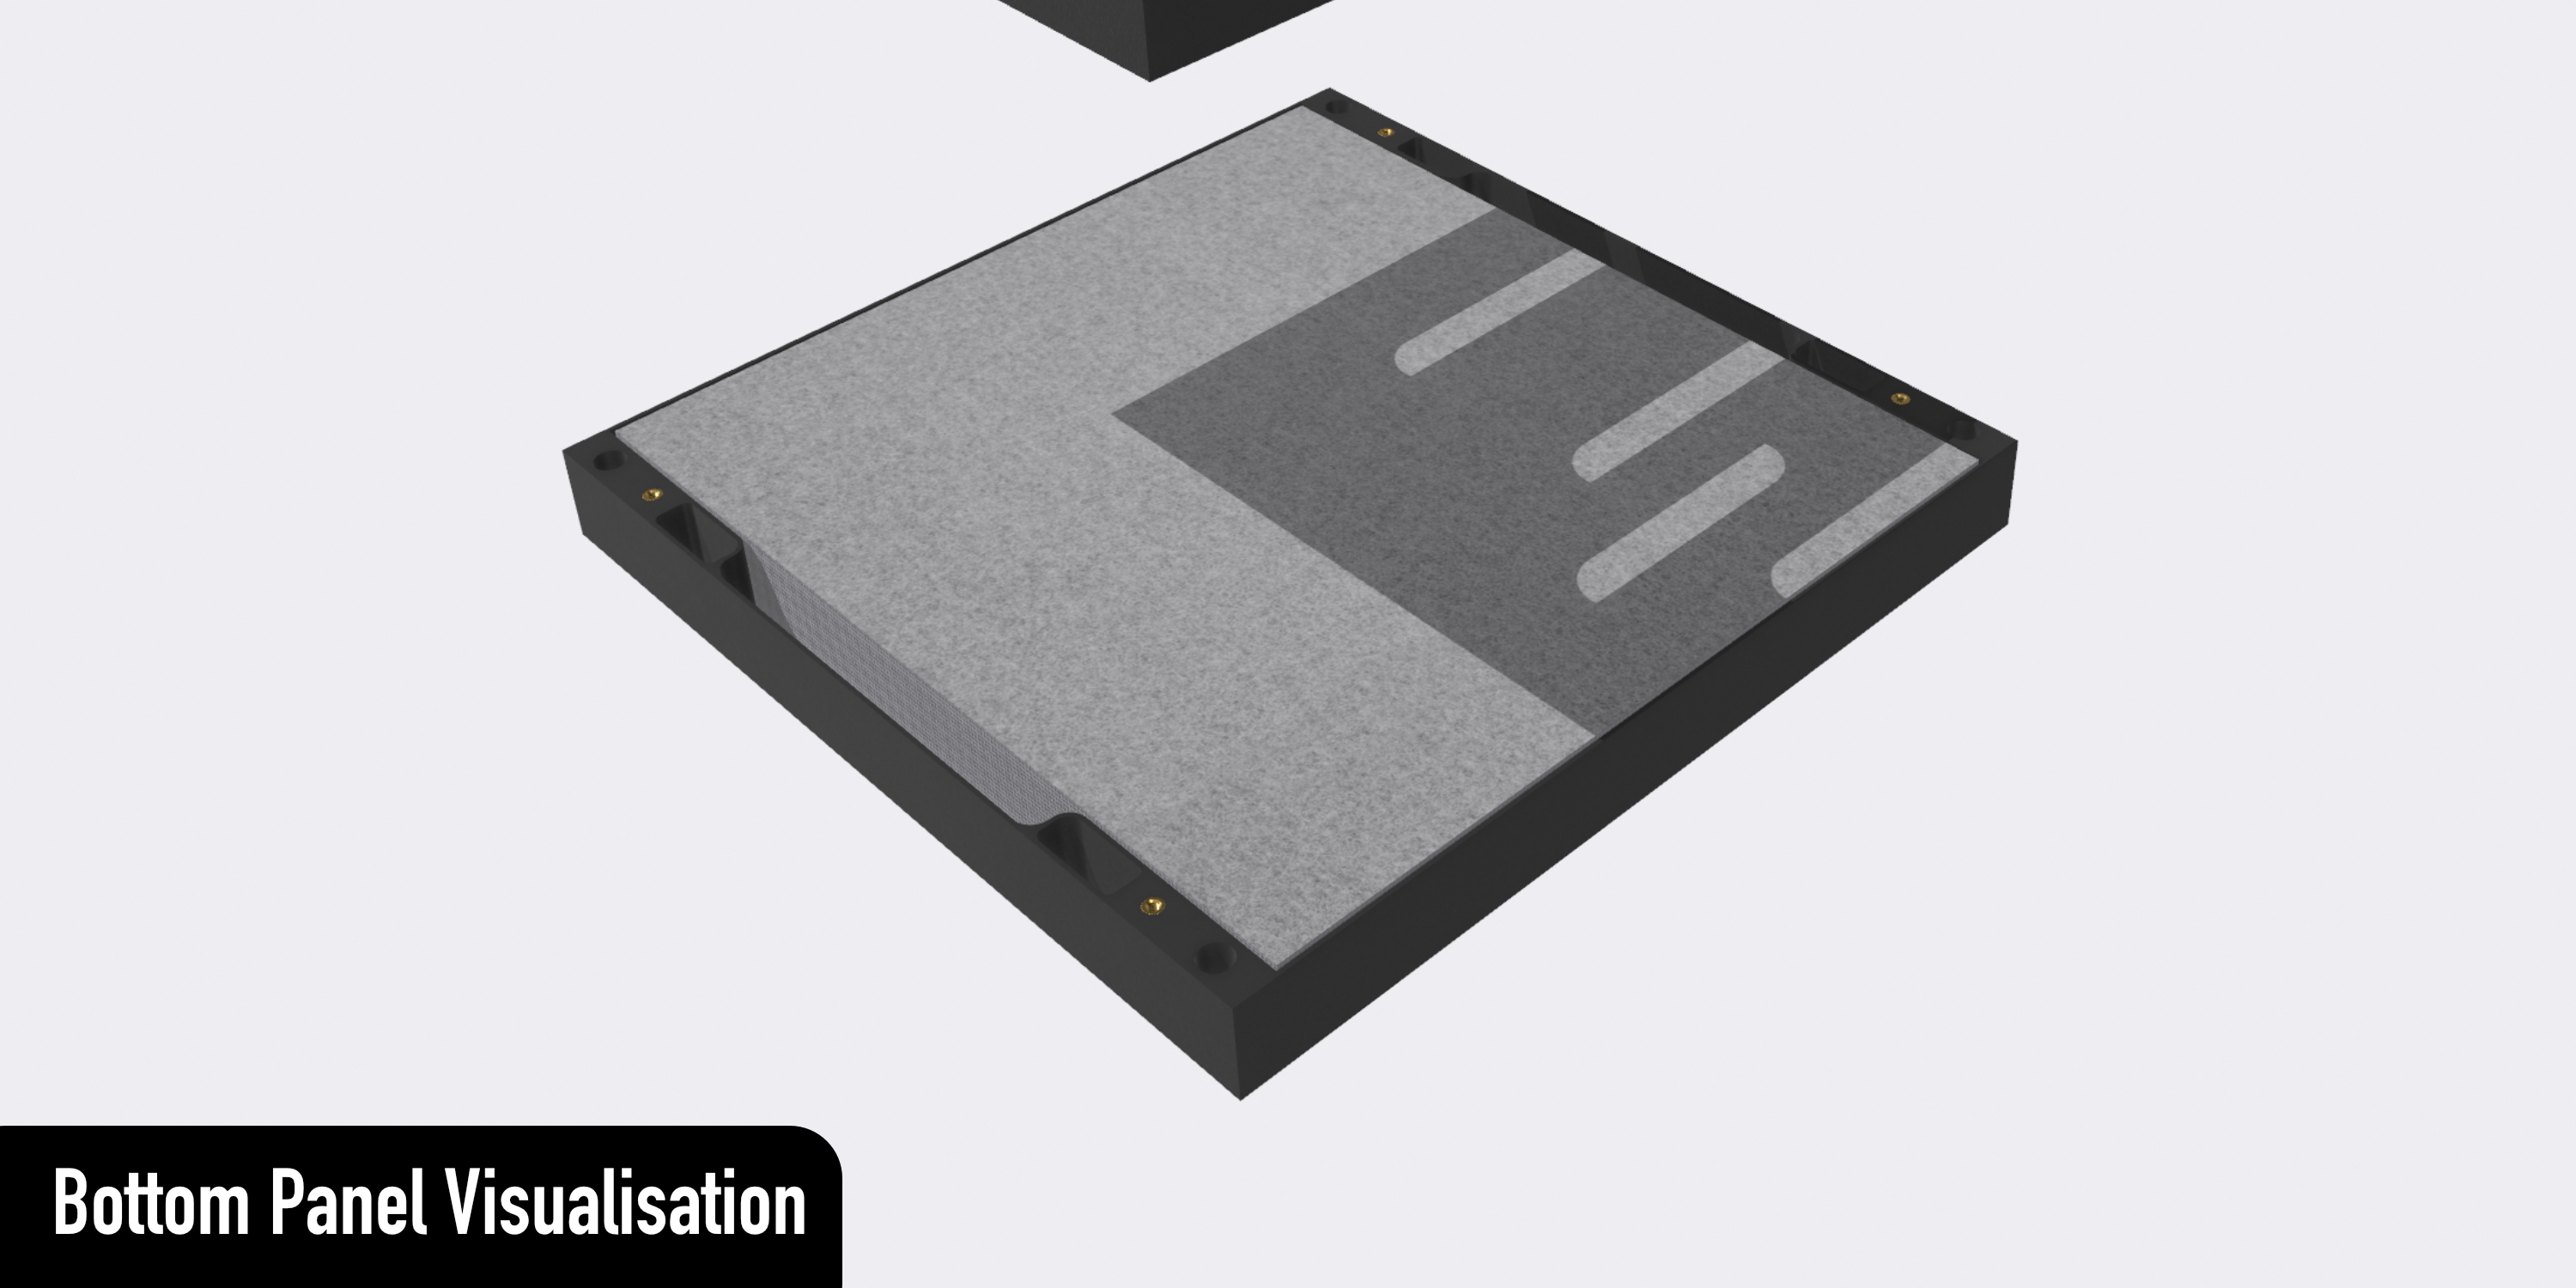
The Top Panel is the part that will attach to the bottom panel (once mounted on the wall and filled with treatment) and also contains your model for infill creation. This model with its infill will serve as 'diffusion'. See the guide on how to configure your slicer for this.
The Bottom Panel is the part that attaches to the wall and holds your acoustic treatment materials.
Configuring the infill object is a fairly simple task. The current guide only lists steps for PrusaSlicer and a Cura guide will be coming soon!
- Import the .3mf Top Panel file you require.
- When importing this a pop-up warning will appear. This warning will mention Multi-part Object Detected. Please click **YES** to import the models correctly at their respective positions as **1 object with 2 sub-objects**. Clicking no will result in the part being split into 2 separate objects which will cause incorrect slicing.

- Select the **INFILL_AREA** object in the part list. This will also highlight in plater.

- Right Click the **INFILL_AREA** object in the part list and select **Infill**

- Right Click the **INFILL_AREA** again in the part list and select **Layers & Perimeters**

- Now select the modifier for the **INFILL_AREA** object. This will contain the two modifiers we just added (Infill and Layer & Perimeters). Navigating just below this when selected will show the options for these parameters. For a nice Gyroid Infill Diffuser an example of the settings are below:

- INFILL
- Infill Density = 4% (you can type this manually - you don't have to use the values in the dropdown box)
- Fill Pattern = Gyroid
- LAYERS & PERIMETERS
- Bottom solid layers = 0
- Perimeters = 0
- Top Solide Layers = 0
Here we want to entirely disable top & bottom layers as well as all perimeter printing. We **only** want the infill.
- Printing Time!

- Print Up
- info@printup.xyz
- Main Contributor - Ben Weatherill
- Discord: Phalnix#3899 - https://discordapp.com/users/phalnix#3899
- Email: ben@printup.xyz