GoID fingerprint card
Table of Contents
- OpenSC installation
- Changing the PIN
- Changing or Initializing the Fingerprints
- Initializing SmartCardHSM
- Standard Use in PKCS#11, Minidriver and Tokend
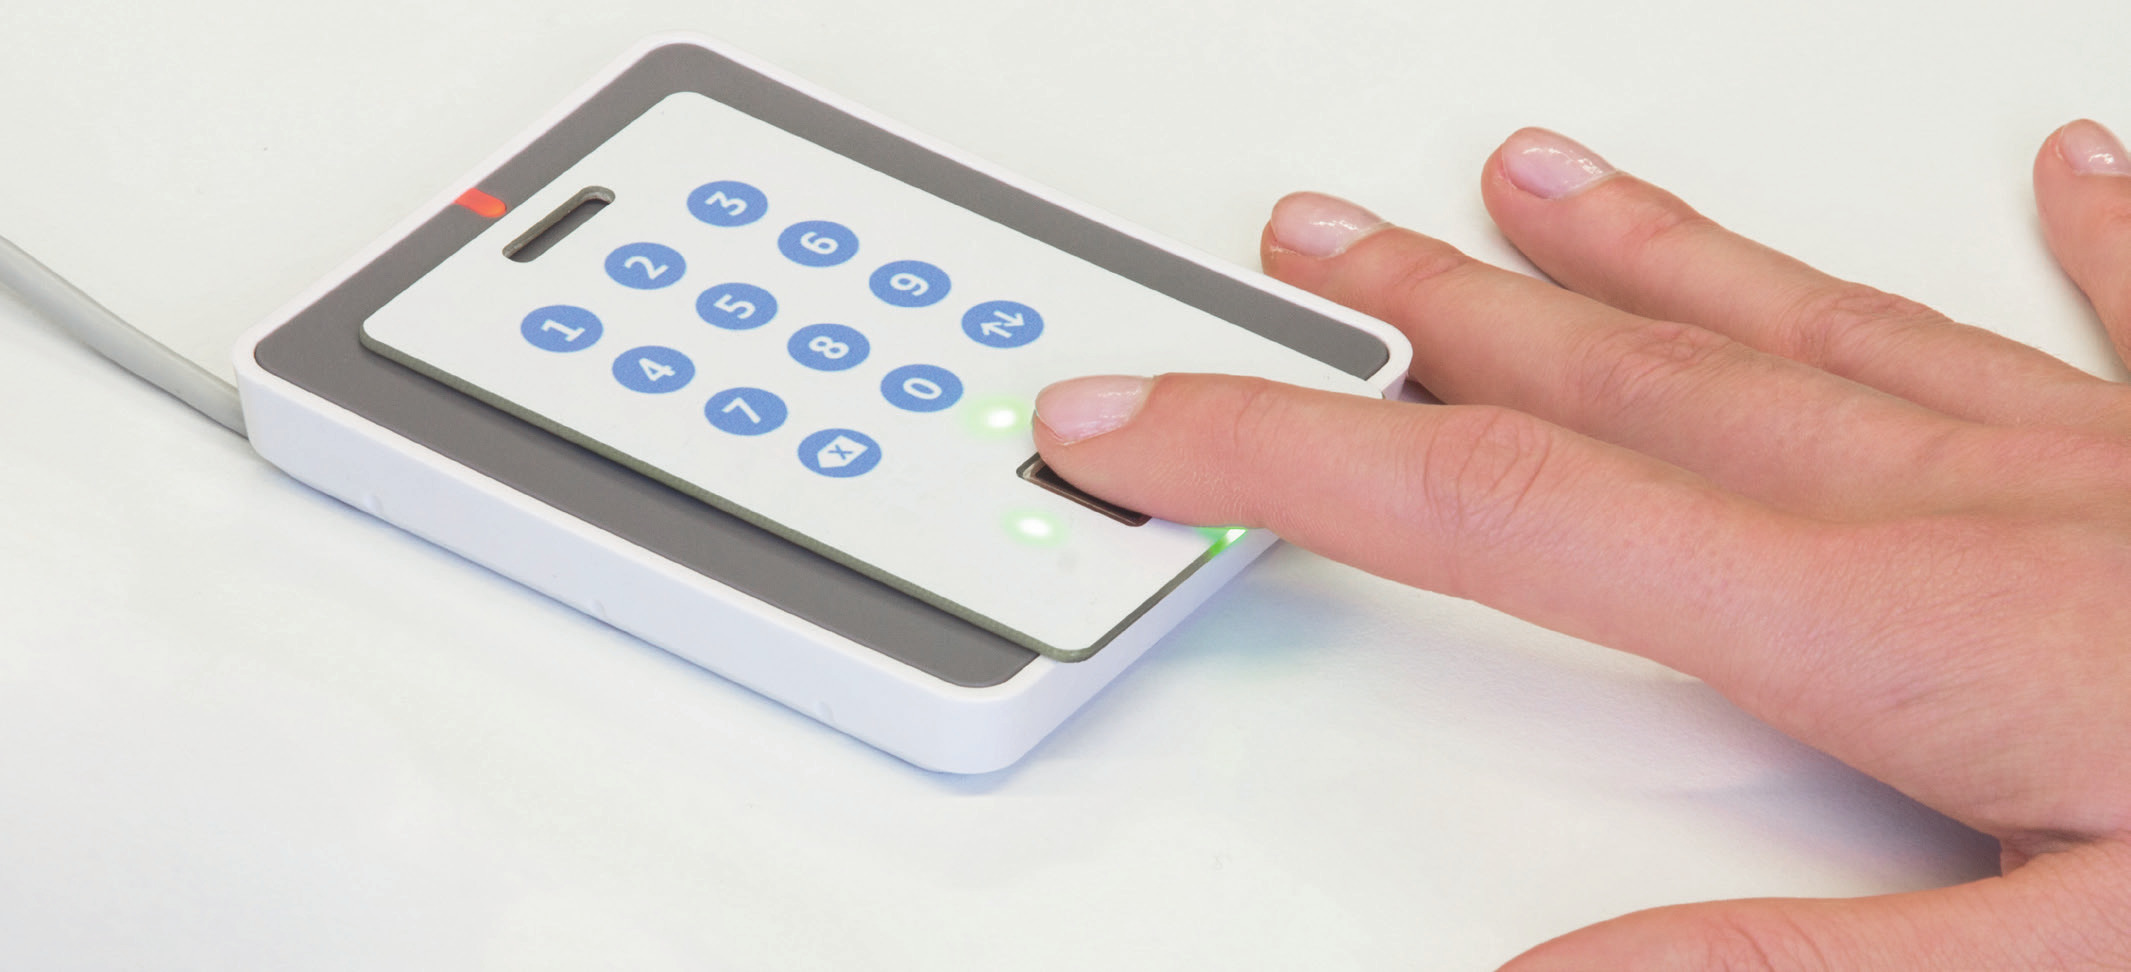
The GoID fingerprint card is a contactless smart card with an integrated fingerprint sensor and PIN pad for user authentication. The GoID is capable of hosting multiple on-card-applications. It is compatible with every contactless smart card reader (or phone) and complies with the ISO/IEC defined IDT form factor.
In the default configuration, the GoID card ships with the following on-card-applications:
- SmartCard-HSM as PKI application (available via PKCS#11, Minidriver, Tokend, CKT)
- PAccess for physical access control
The GoID has also been verified to be compatible with the following
- PKI applications:
- Classical Physical Access Control Systems:
Binaries of OpenSC with the recommended configuration for GoID is available here:
| Platform | Package |
|---|---|
| Windows (64 bit) | OpenSC-0.19.0_win64.msi |
| Windows (32 bit) | OpenSC-0.19.0_win32.msi |
| macOS | OpenSC-0.19.0.dmg |
| Source code | opensc-0.19.0.tar.gz |
For other platforms, the source code needs to be compiled along with its dependencies, in particular OpenSSL, OpenPACE. On Ubuntu, for example, this looks as follows:
sudo apt-get install libpcsclite-dev libssl-dev libtool gcc pkg-config gengetopt help2man
# install OpenPACE
wget https://github.com/frankmorgner/openpace/releases/download/1.0.3/openpace-1.0.3.tar.gz
tar xfvz openpace-*.tar.gz
cd openpace-*
./configure --prefix=/usr
make
sudo make install
cd ..
# install OpenSC
wget https://github.com/OpenSC/Nightly/blob/2019-06-03_3a192e2c/opensc-0.19.0.tar.gz?raw=true -O opensc-0.19.0.tar.gz
tar xfvz opensc-*.tar.gz
cd opensc-*
./configure --prefix=/usr --sysconfdir=/etc/opensc
make
sudo make install
Changing the PIN requires prior authentication of the (initial) PIN. (With
goid-tool --info you can verify the exact configuration of the card.) The new PIN must be verified twice.
To change the PIN from its current (initial) value, use the following command:
goid-tool --verbose --verify-pin --new-pin
The program will...
- Ask for the current (initial) PIN on the builtin PIN-pad
- Ask for the new PIN on the builtin PIN-pad
- Ask for verifying new PIN on the builtin PIN-pad
The card is capable of holding 16 fingerprint templates for authenticating the user. This allows initializing a single finger multiple times for extra robustness, e.g. in different positions. And multiple fingers can be used for extra convenience in different situations, e.g. the thumb for physical access while holding the card and the index finger for PKI use while the card is lying on a reader.
Changing or initializing one or more fingerprint templates requires prior
authentication of the PIN. (With goid-tool --info you can verify the exact
configuration of the card.) Each new finger print template must be verified three times.
For example, to initialize two finger print templates use the following command:
goid-tool --verbose --verify-pin --new-bio --new-bio
The program will...
- Ask for the current PIN on the builtin PIN-pad
- Ask twice for
- ... putting a finger on the builtin sensor
- ... verifying the finger in the same position two more times
Initializing - and thereby erasing all keys, certificates and data elements - requires the following command
sc-hsm-tool --initialize --so-pin 3537363231383830 --pin=648219 --bio-server1 80D276000172536F434D01 --bio-server2 40D276000172536F434D01
Unless stated otherwise, the SmartCard-HSM on the GoID is usually shipped uninitialized, meaning that no SO-PIN is set. You will first need to perform an initialization to set the SO-PIN and register the on-card user authentication. Any later initialization requires the presentation of the same SO-PIN.
The SO-PIN must be composed of 16 hexadecimal characters. The value is internally converted into an 8 byte key value. The SO-PIN has a retry counter of 15 and can not be unblocked. Blocking the SO-PIN will prevent any further token initialization.
Further personalization of the applet is described on the SmartCardHSM page. It's features include:
- Support for RSA and ECC
- Support for key backup and restore optionally using a n-of-m threshold scheme
For example, generating a RSA key with a self signed certificate could be done as follows:
export TYPE=rsa:2048
export LABEL=$TYPE
export ID=10
pkcs11-tool --login --keypairgen --key-type="$TYPE" --label="$LABEL" --id=$ID
certtool --generate-self-signed --outfile="$TYPE.cert" --provider="opensc-pkcs11.so" --load-privkey "pkcs11:object=$LABEL;type=private" --load-pubkey "pkcs11:object=$LABEL;type=public"
openssl x509 -inform PEM -outform DER -in "$TYPE.cert" -out "$TYPE.cert.der"
pkcs11-tool --write-object "$TYPE.cert.der" --type=cert --id=$ID --label="$LABEL"