This project won't get any new Updates
Currently only for german, english and france Optimized for a 16:9 screens with a resolution of 1080x1920 and nox app player even on 1080x1920. If you have a different screen look in the "Issues" section for help.
- What it does
- Requirements
- Installation
- Config
- About the Future
- Help me and others
- How to create a screen config
- Our Subreddit
This Bot is able to play one of the three selected adventures and destroys every ore once your factory is full. This is good to get high level creatures.
- Python 3.7
- Tesseract 4.0
- Minimal adb and fastboot
- Python-Packages:
– pure-python-adb
– pytesseract
The main logic is written in python.
Download
Tesseract is a optical character recognition engine which is used to detect the different states of the game by reading the text on your display.
Download
Wiki
This package is used to interact with the adb server.
This package is used to communicate with Tesseract
This is the host for the adb-server which is used to communicate with the mobile phone.
Download
-
Enable USB-Debugging on your device
-
Download and install python
-
Download and install Minimal adb and fastboot
-
Download the files from the repository and copy them to any folder.
-
Open CMD and type:
–pip install pure-python-adb
–pip install pytesseract -
Download and install Tesseract. Select in the installer your language pack for Tesseract
-
Copy the path of the installation directory from Tesseract and replace the given Path in the Config.cfg
-
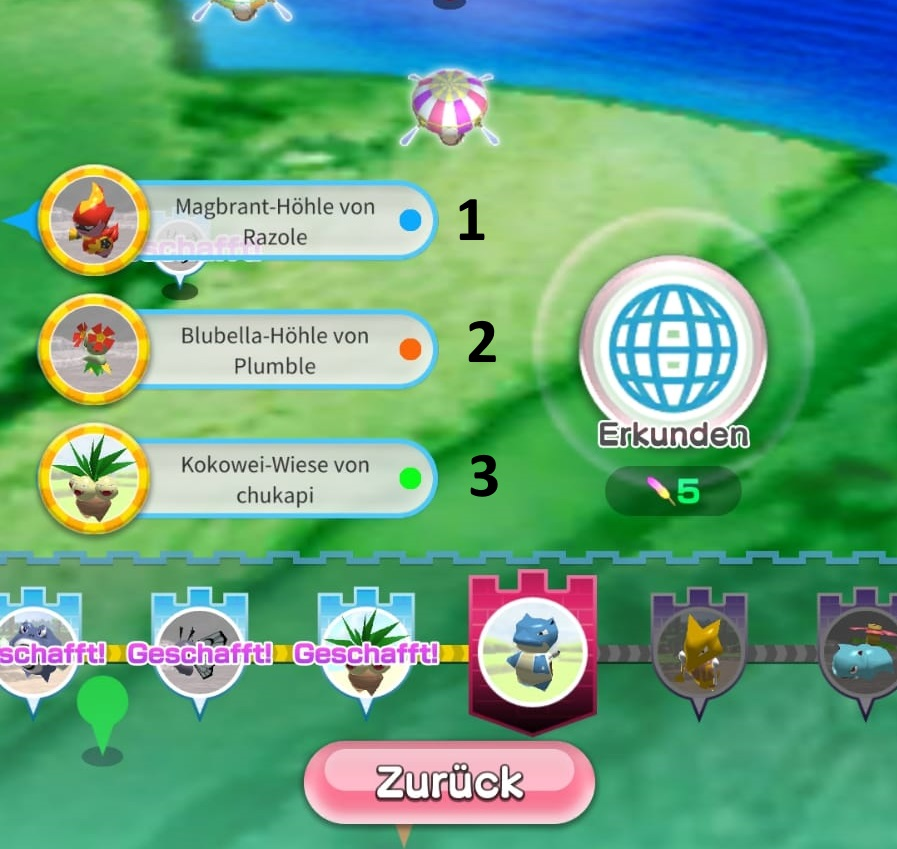
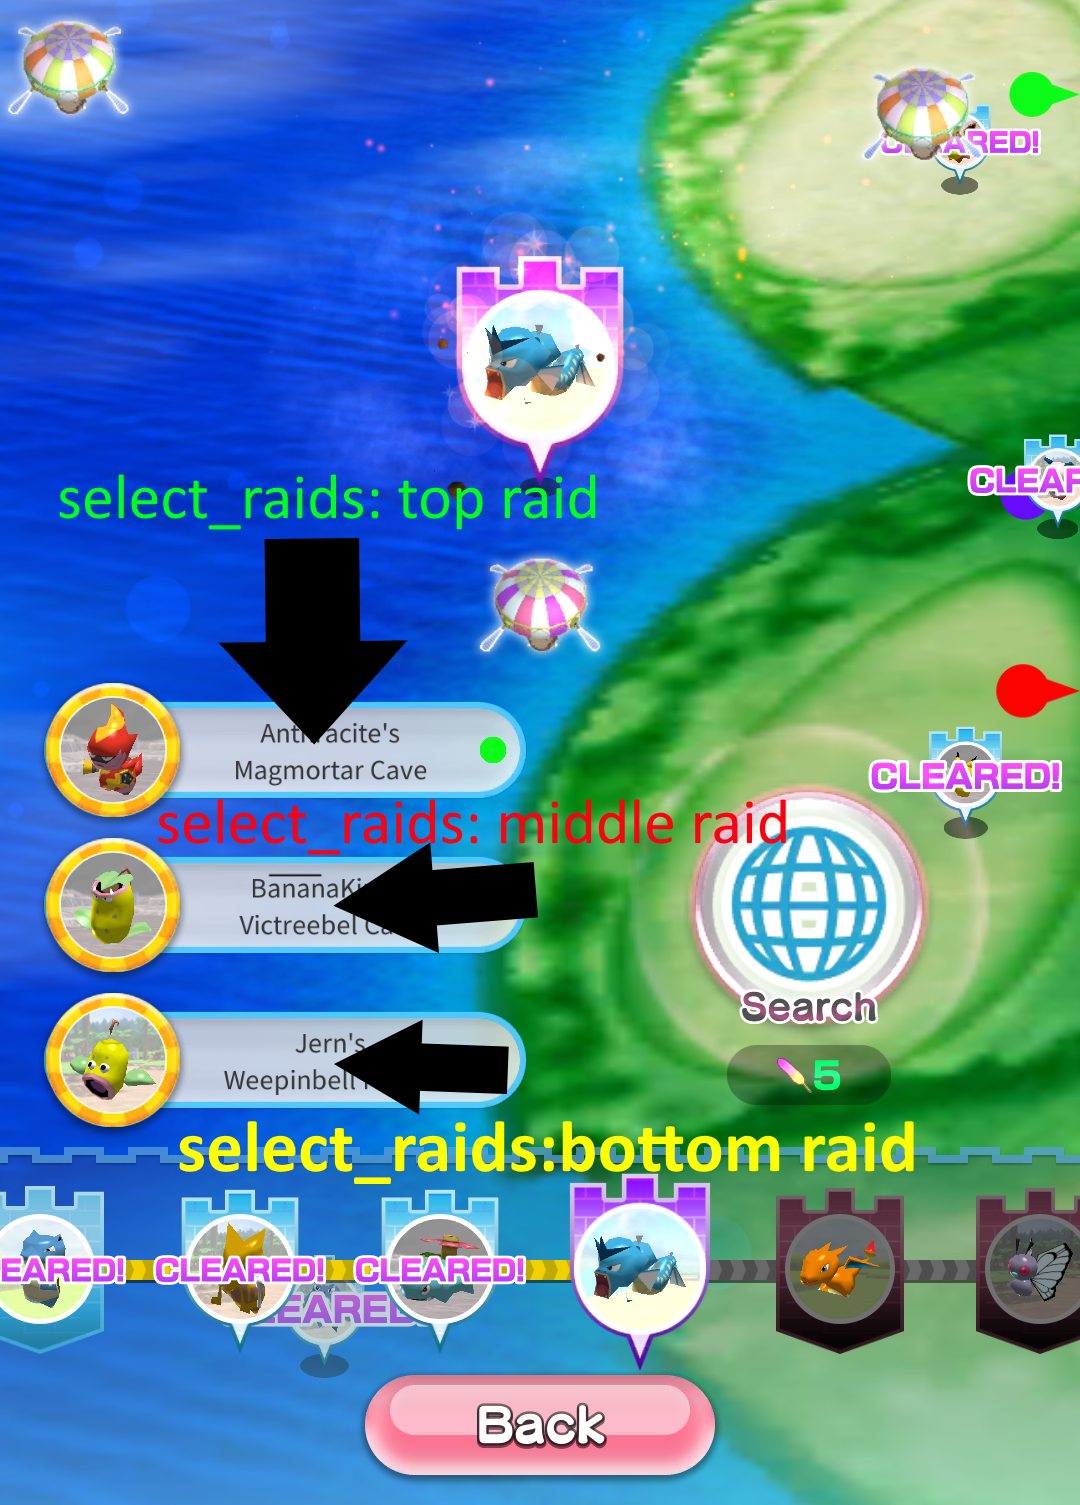
Edit the selected_raid variable in the config with a number between 1 and 3 depending on what raid should be played
-
Start Minimal adb and fastboot and type into the new window:
adb start-server -
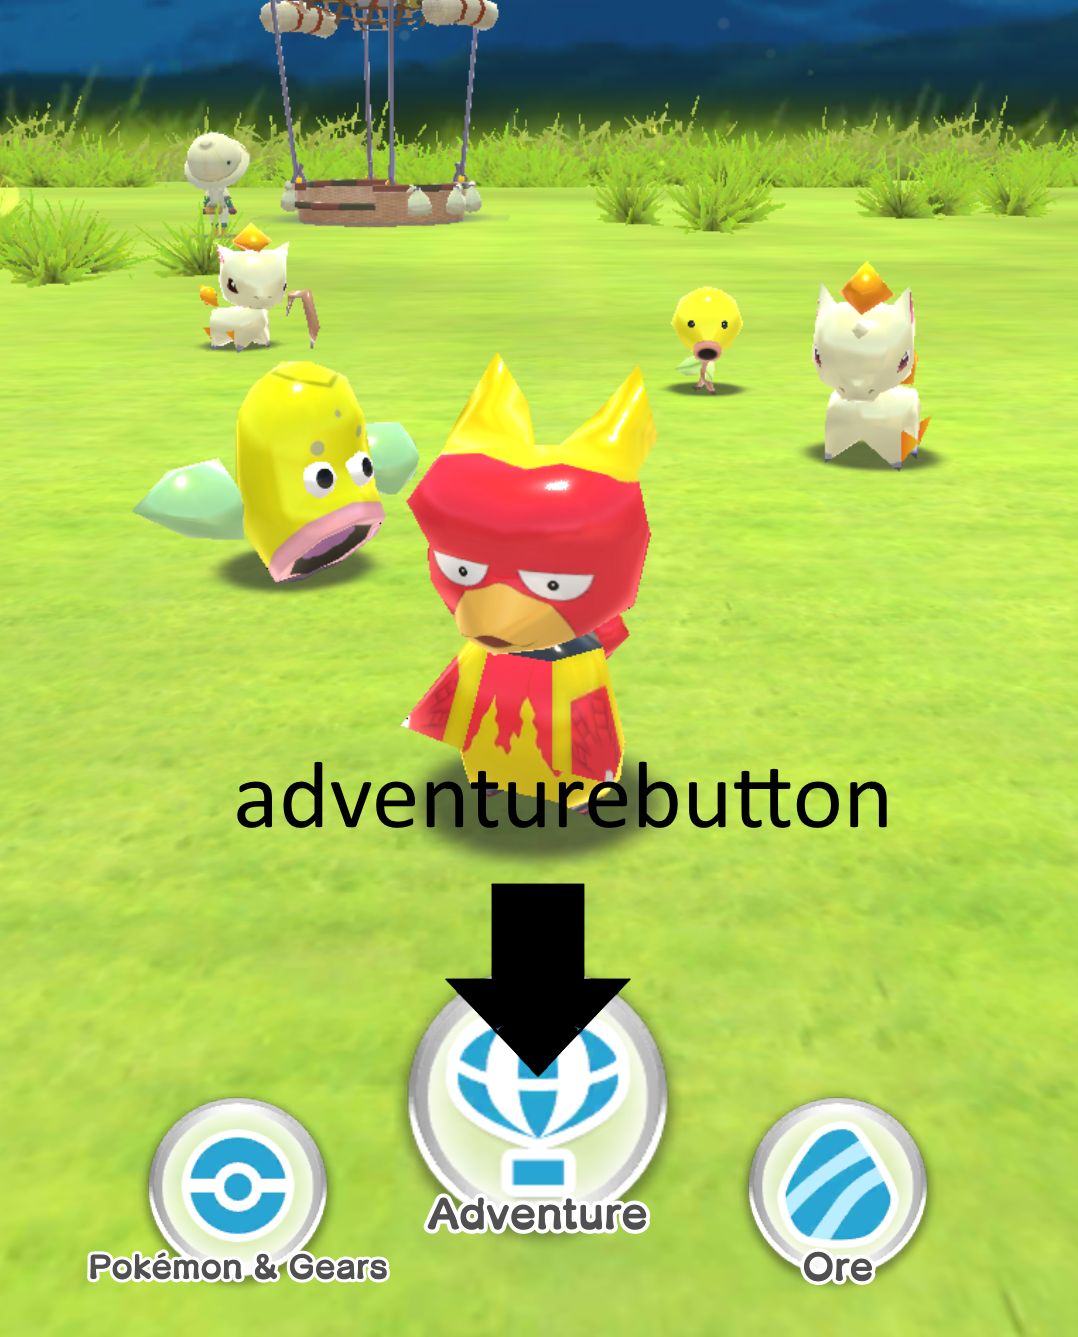
Open the Pokemon Rumble Rush app and go to the main menu
-
Go to the directory with the start.py file, click in the address bar, type
cmdand press enter. -
Now write:
python start.py -
Enjoy :)
Coming soon
The config is located in the conf folder and can be opend with the editor.
There you can change the language to your language. Possible values are explained in the config file. Currently are Englisch and German available (Default Value: DE)
You can also change the speed to make the bot grinds faster (CAUTION!!! if you are to fast it wont work anymore) or slow down if your handy isn´t the newest.
To select which Raid you want to play you have to edit the selected_raid row in the config. Choose 1, 2 or 3
If you want to help me or you have a problem you can also enable debuging
To change the rounds the bot should play change the value of rounds
If you would help me feel free contact me and we can work together. In the near future I want to add a config file for the button coordinates of different devices. It´s also planned to add more Tutorials with Pictures about writing the different configs.
In the middle future I plan to make a Windows Installer (If you know how this works contact me because I don´t know yet) and make tests with the bot on an raspberry pi 3b+.
Far away are things like a GUI.
This is my first Project I share with others. I try to give my best to make the bot more comfortable and stable. But to do this I will need help (or it take a long time). If you want to help me go to the project site on github and have a look what topics are open. Or write some new topics to me if you have good ideas. The best thing you can do is to help me programming the bot. If you want to then write a message to me on discord (Maxinger#1608) or create a pull-request. If you have any other idea how you can help me contact me. I am happy about every type of help. If you know how to fix common errors or something else about the bot feel free to write an article in the wiki
- Start the script with
python start.py --init. This will create a json with the name of your phone in the template folder inside the screens folder. - Go to the developer options in your settings and eneable the option "Pointer location". This will show you on the top of the screen a bar with the x and y coordinates of a touch on the display. If you have a notch you have to make a screenshot to see the y coordinate.
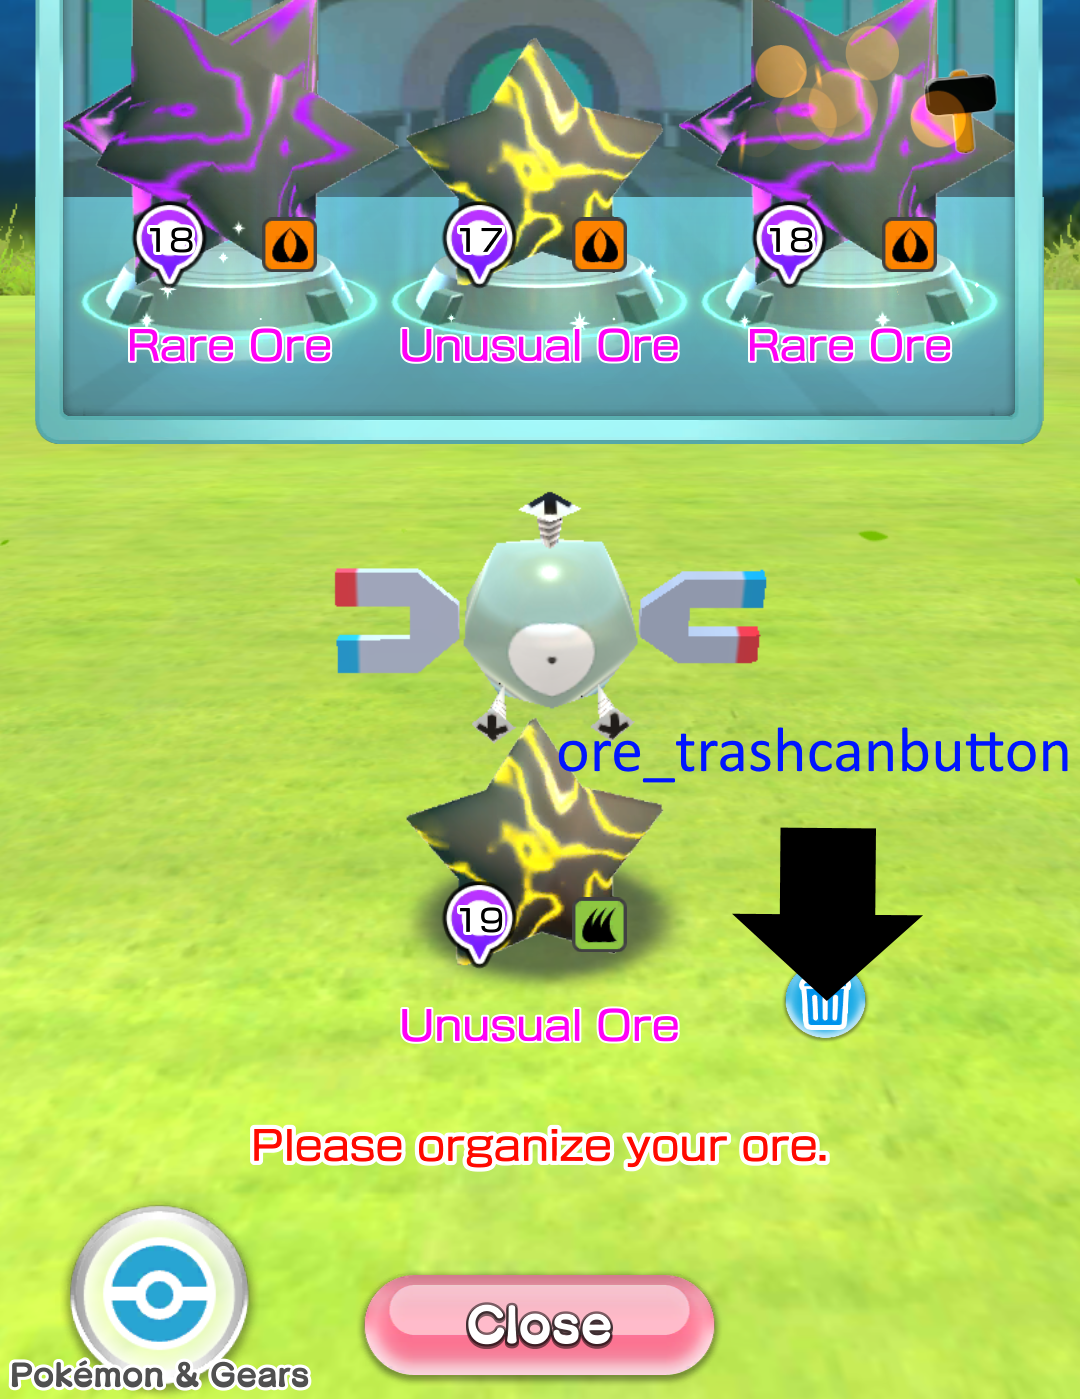
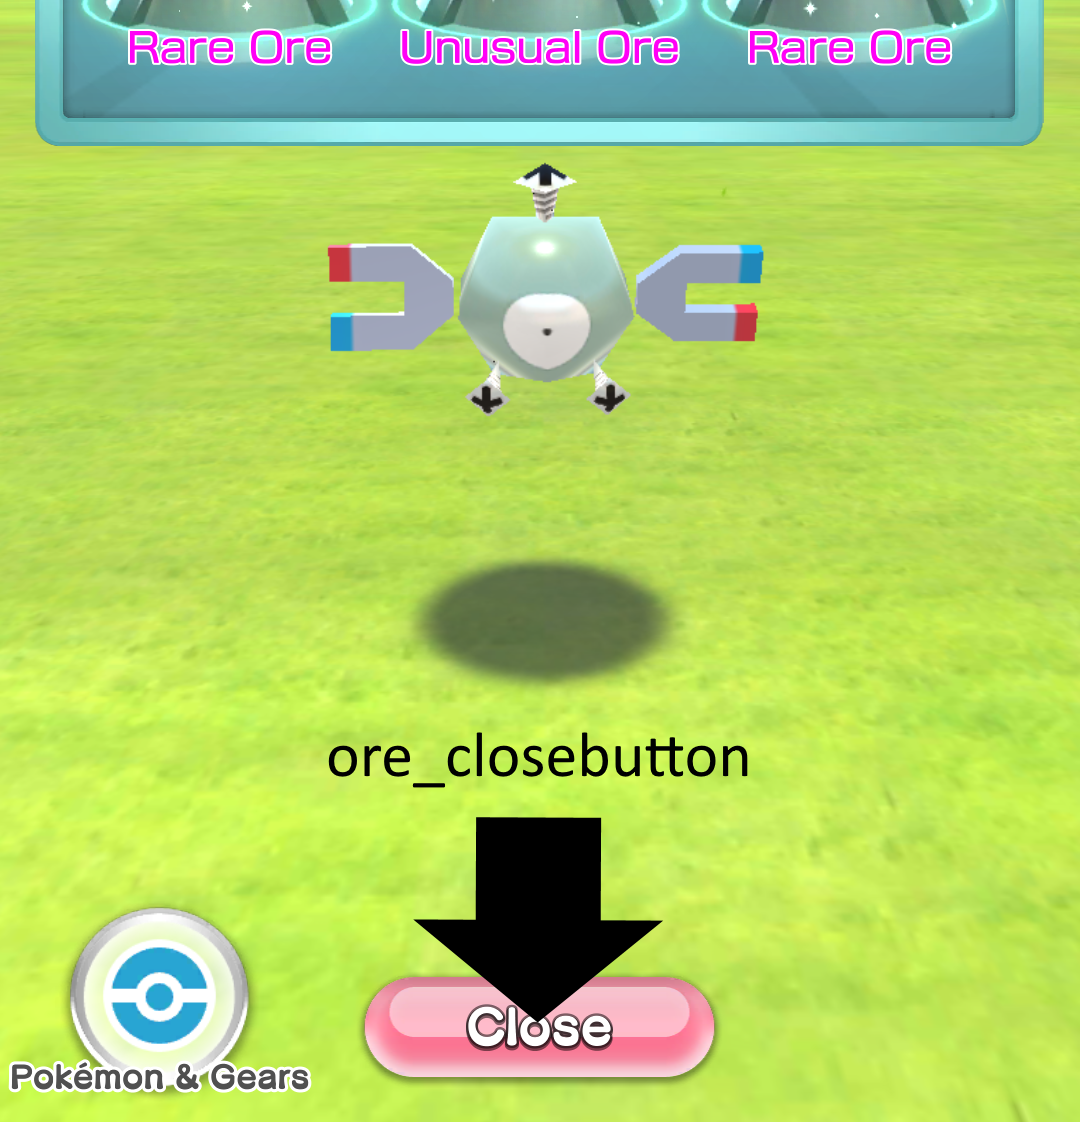
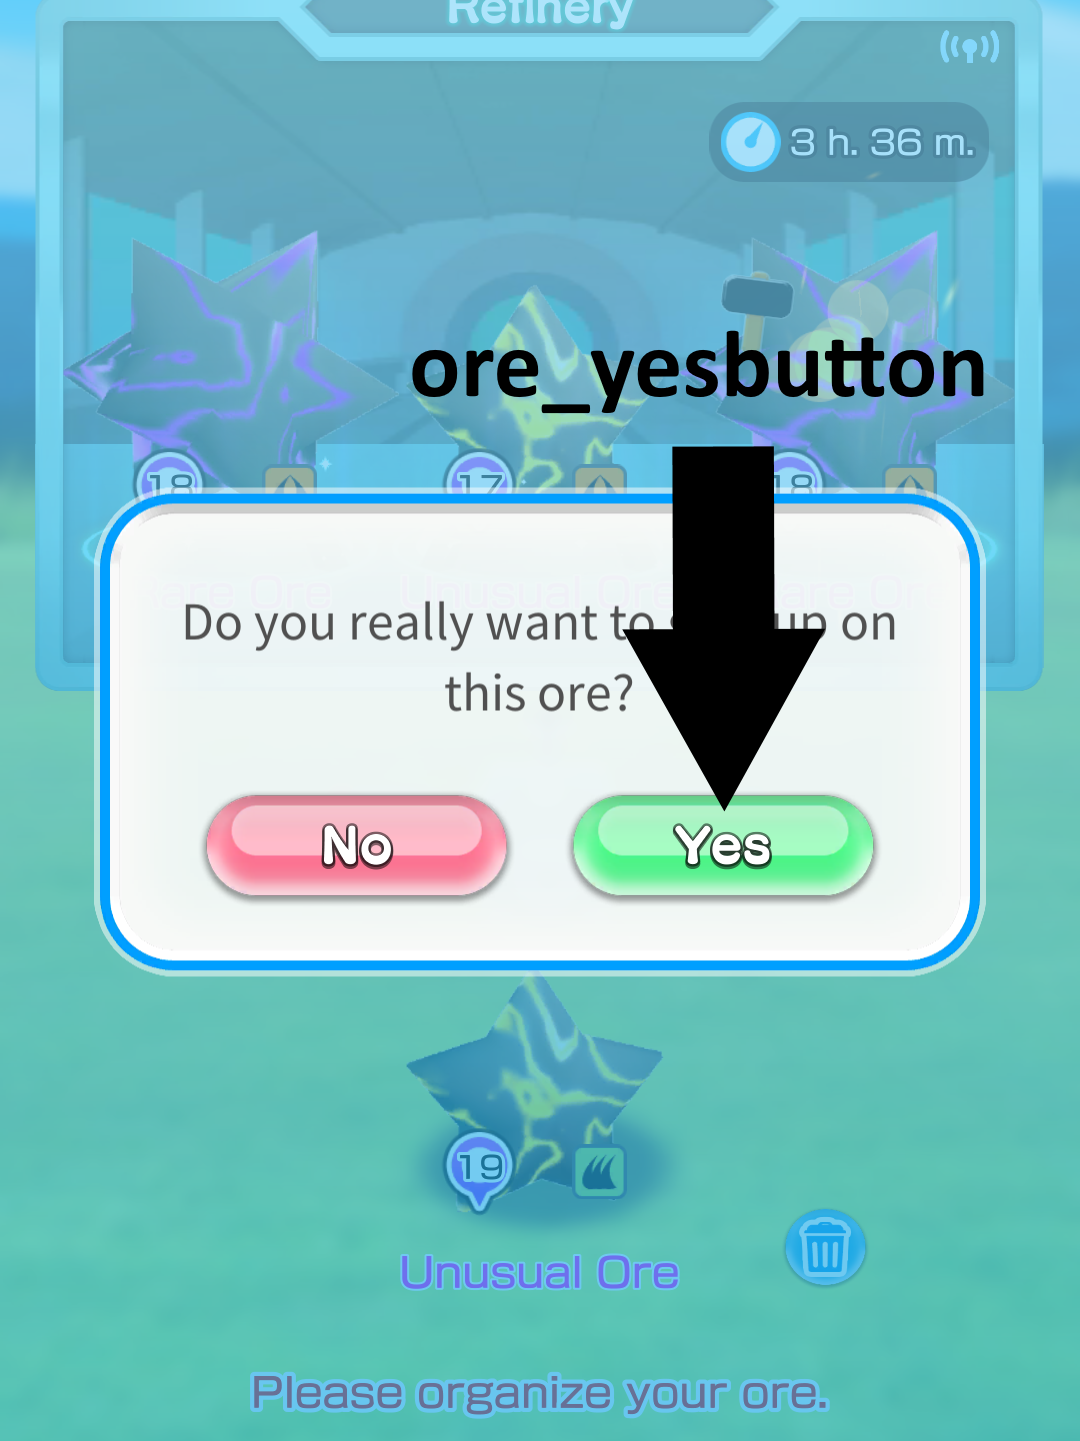
- The following images show you the name in the config and the point on the screen where you have to take the coordinates:
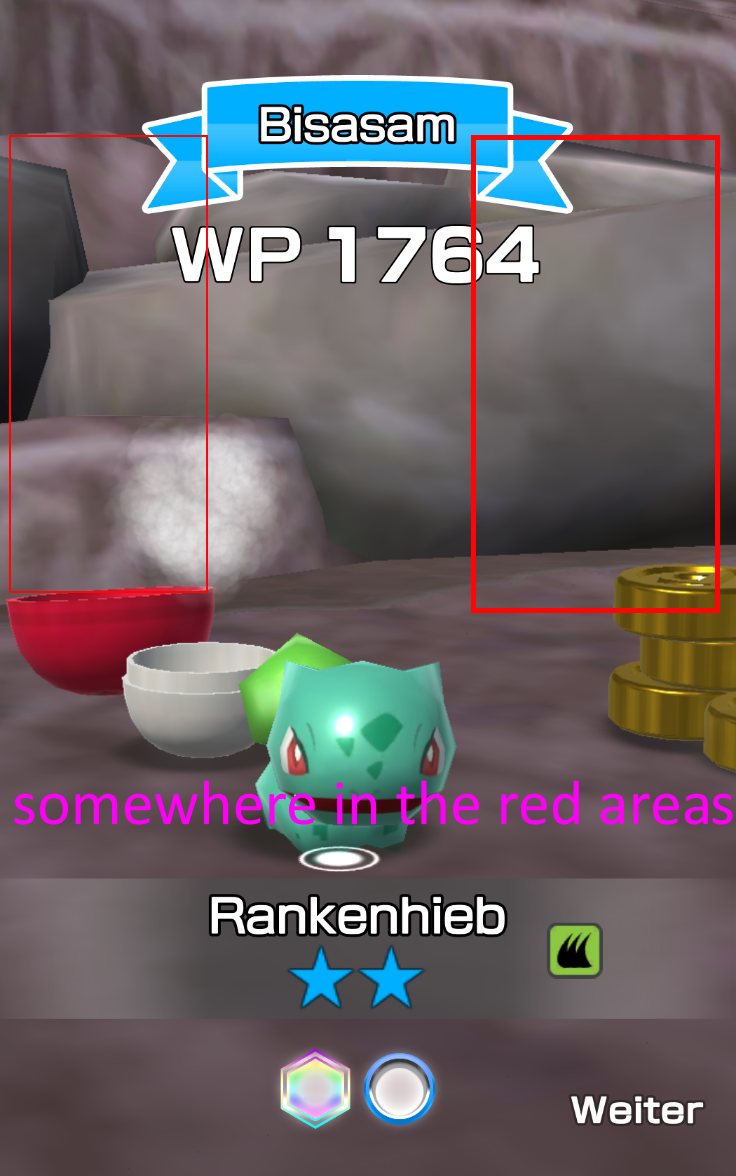
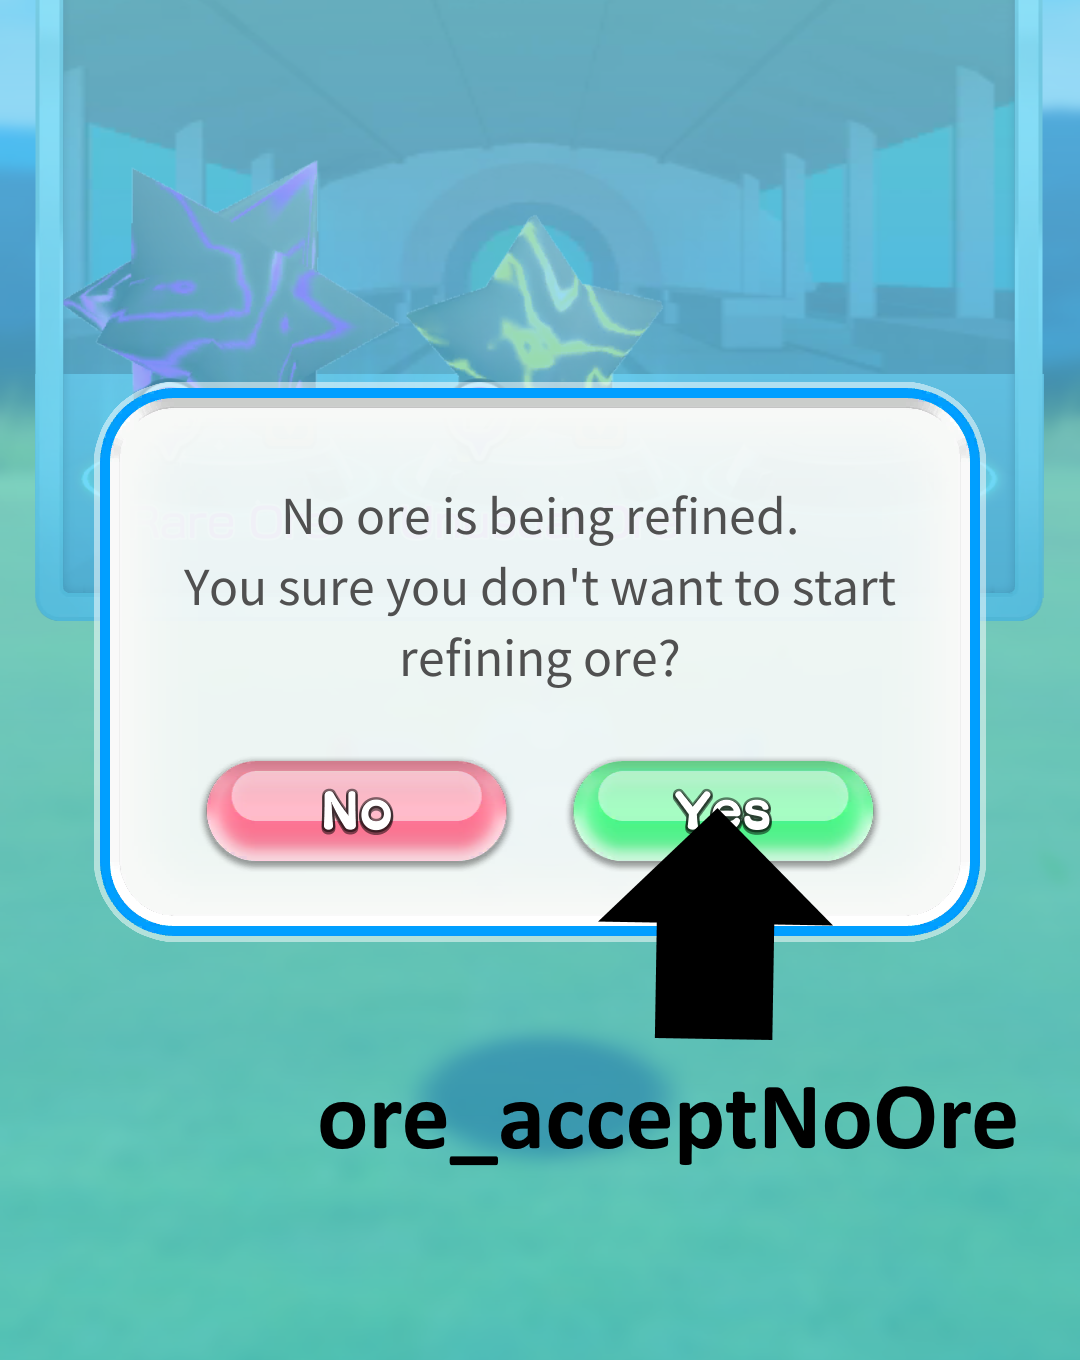
The ore_acceptNoOre don't need to be set at the begining. If you always have a ore working in your factory the message where this button is needed won't apear.
- Write your coordinates in the config. The first number is x the second is y
- If you have used the --init argument to create the config the program recognize it automaticly.
- If your config works commit it to the repo or post a link to the file to our subreddit