Proxy Imgur images using Cloudflare Workers
Roughly you'll follow these steps to install a wrangler-cdn instance to Cloudflare:
- Fork the wrangler-cdn repo to your personal (or organizational) GitHub account.
- Obtain Cloudflare API tokens and save them as secrets on your forked GitHub repository.
- Use the predefined GitHub Action in your forked repository to deploy the code to Cloudflare Pages, using the secrets from step 2.
- Make a few clicks on Cloudflare's dashboard to set up custom domains and configure some security settings.
- Done!
- Have a Cloudflare account. If you don't have one already, you can sign up for free at Cloudflare.com.
- Have a GitHub account. If you don't have one, you can sign up for free at GitHub.com.
Simply click on https://github.com/M3DZIK/wrangler-cdn/fork to fork the repository.
You may choose to modify the code in your forked repository in the future, but it's likely that you won't need to touch the code at all. Simply fork the repository and keep it synced for future use.
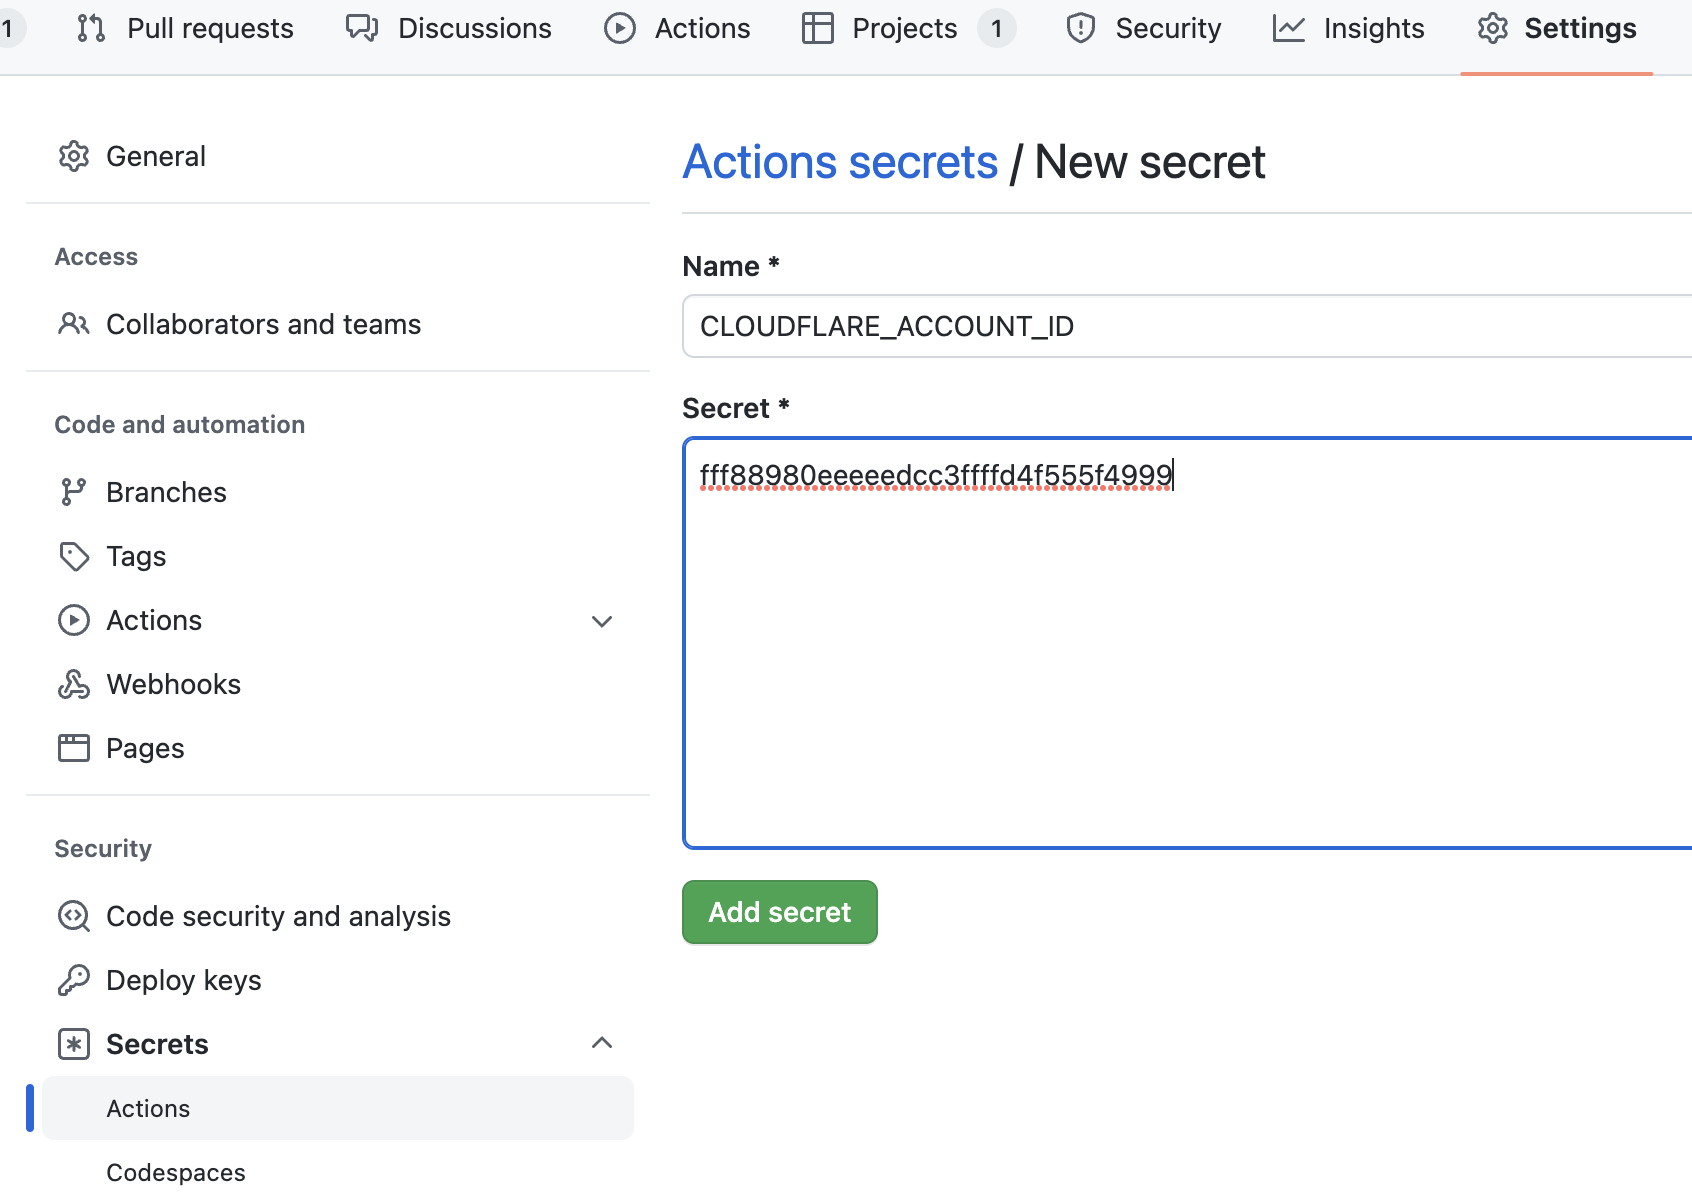
Go to your forked repo's Settings -> Secrets -> Actions, and create 3 secrets (click for more details). With these secrets in place, you'll be able to use GitHub Actions to deploy your wrangler-cdn instance to Cloudflare Pages.
CLOUDFLARE_ACCOUNT_ID
You can get your cloudflare account id from your dashboard's url:
After you login your Cloudflare account, you'll be redirected to a url like this
https://dash.cloudflare.com/[your-cloudflare-account-id-here]
The last part of the url is your cloudflare account id.
For example, if you see a url like this:
https://dash.cloudflare.com/fff88980eeeeedcc3ffffd4f555f4999
Then you'll set CLOUDFLARE_ACCOUNT_ID to fff88980eeeeedcc3ffffd4f555f4999:
CLOUDFLARE_API_TOKEN
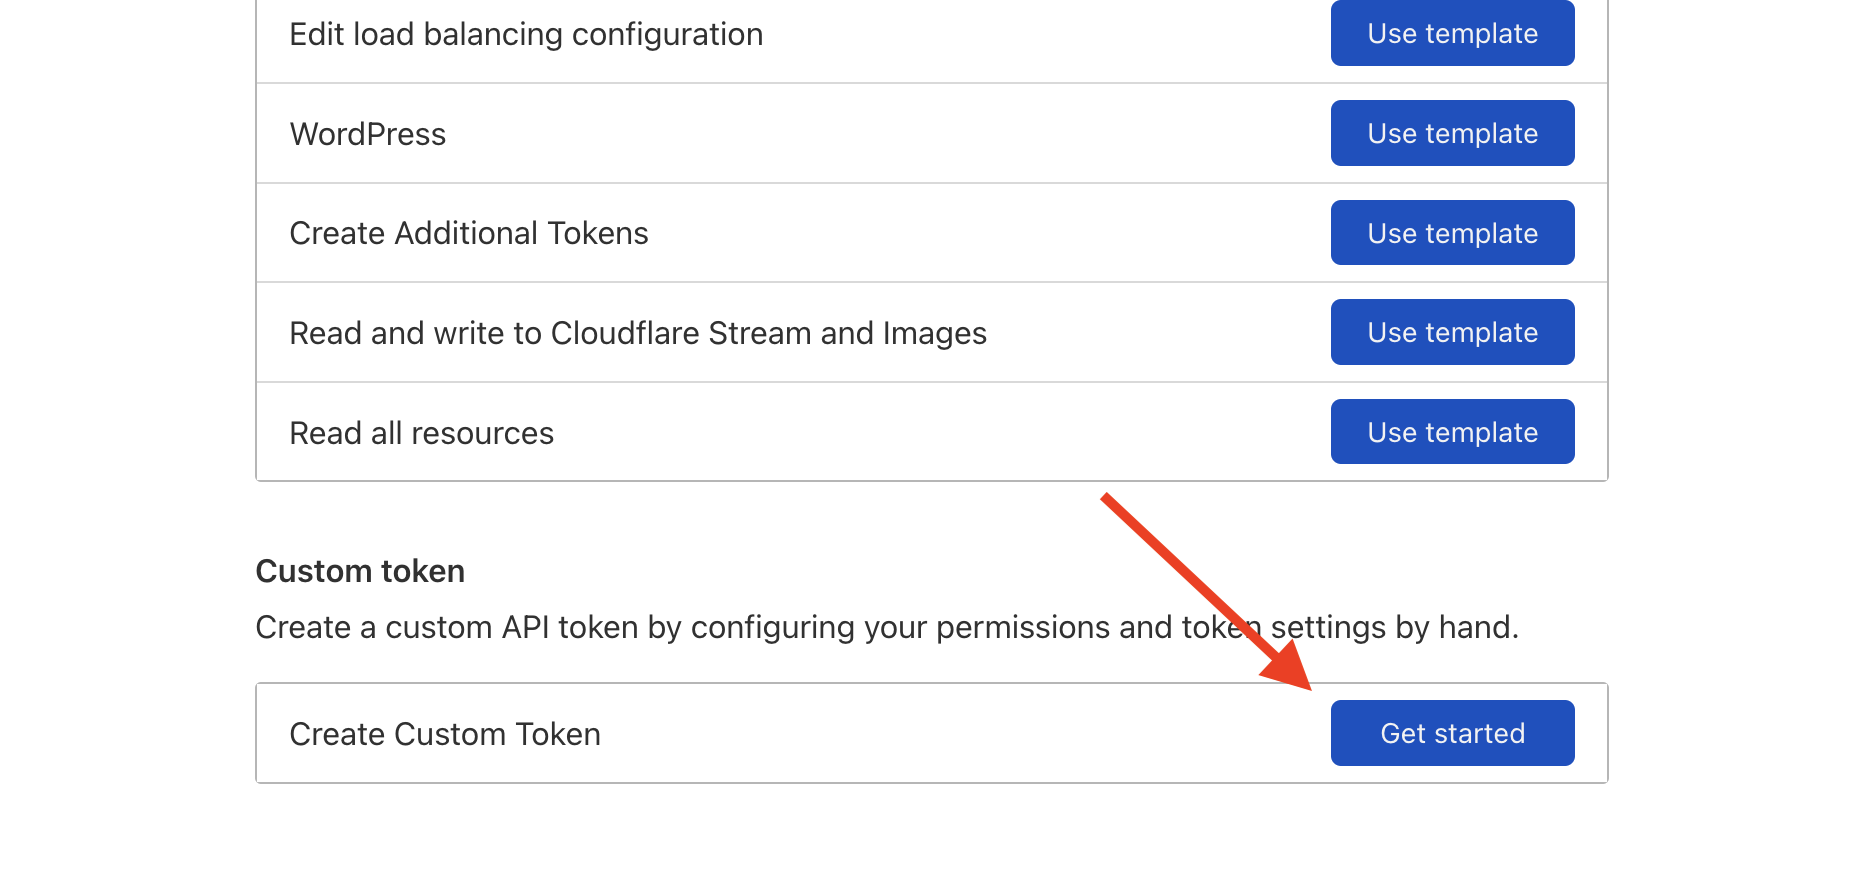
You'll need to create an API token here: https://dash.cloudflare.com/profile/api-tokens
Create a custom token:
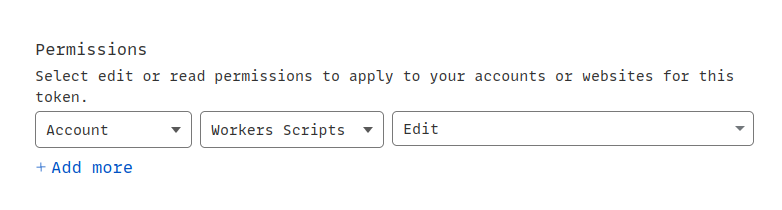
We need edit permission for Cloudflare workers scripts:
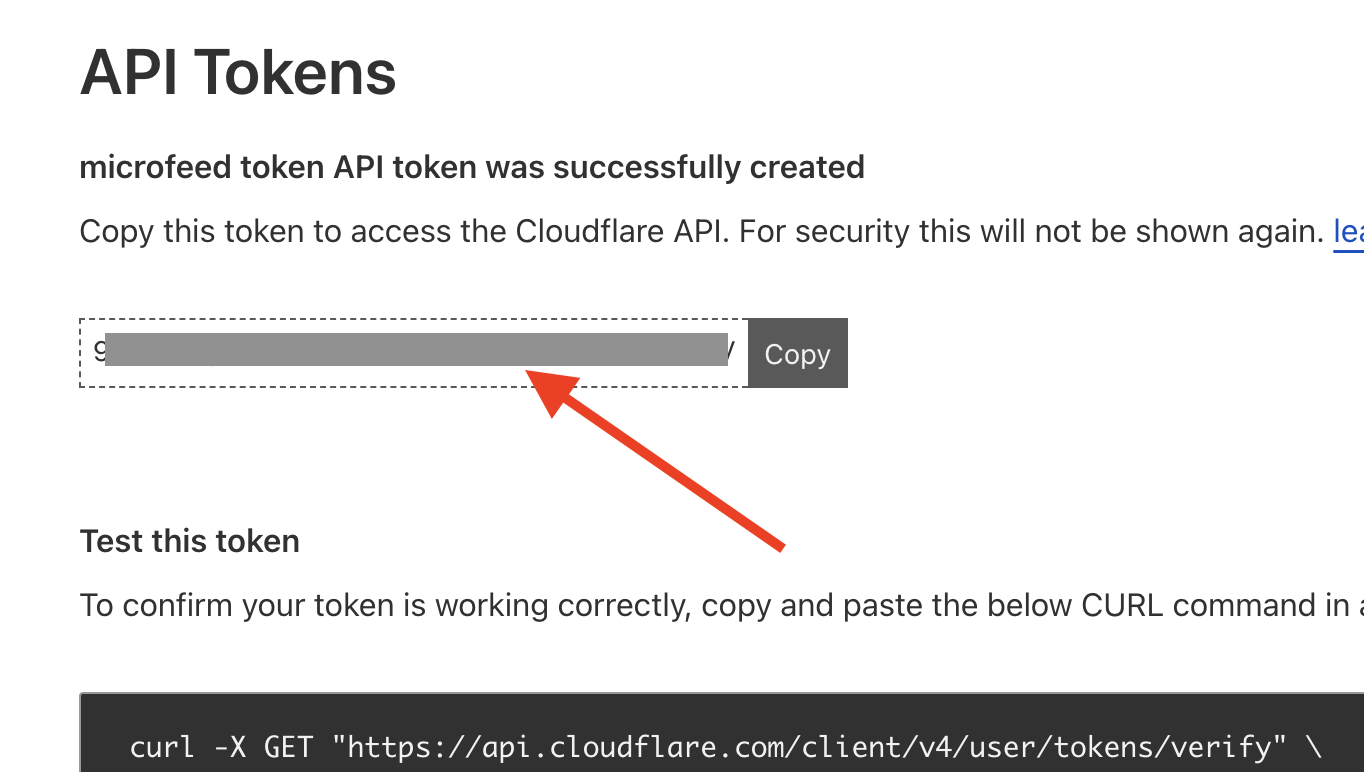
Finally, copy the API token here:
CLOUDFLARE_PROJECT_NAME
A legit project name should have these characters: [a-z], [A-Z], [0-9], and -
We recommend using the custom domain name that you'll use for this project and replace dot (.) with dash (-)
For example, if you use photos.mycustomdomain.com, then the project name should be photos-mycustomdomain-com
Note: Don't use underscore (_), space ( ), and other characters outside [a-z], [A-Z], [0-9] and -. Or Cloudflare Pages won't let you create a project.
Go to Actions -> Deploy to Cloudflare Pages and run Workflow

If you see the green checkmark, then the deployment is successful. And you can see a Pages project in your Cloudflare dashboard.
You can access the site via ${CLOUDFLARE_PROJECT_NAME}.pages.dev
Big thanks to Bad3r for creating the documentation!