IRMP2Keyboard is an easy-to-use Arduino firmware which allows you to create a reliable remote control receiver for your PC. It can either interface via PS2 or USB. The PC sees the receiver as regular keyboard. It's your choice which keypresses (or even key combinations) are executed on remote control button presses.
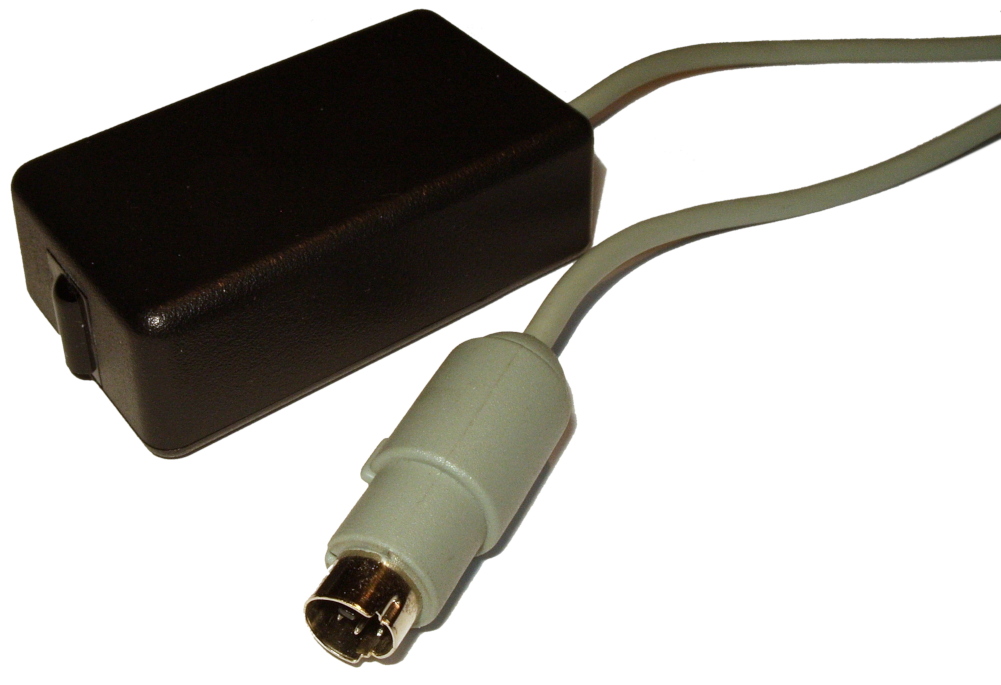
The special advantage of supporting the PS2 protocol is, that (even nowadays) many motherboards offer to boot via keyboard keypress. This usually only works if the keyboard is a PS2 keyboard!
Top features:
- Support for many remote controls, thanks to the IRMP library
- The only tool, you need to setup and configure your IRMP2Keyboard receiver, is the Arduino IDE.
- Both, PS2 and USB keyboards, can be "emulated"
- Trigger PC boot via remote control if your mainboard supports boot on PS2 keyboard keypress
- In "USB mode" it is possible to configure a "wakeup code" which will, when received, pull down pin A3 for some milliseconds. You can use this to trigger a Raspberry Pi to reboot. It may also be used to control an optocoupler to control the power button on PC mainboards.
- Full support for the FDC-3402 infrared keyboard
USB is only supported for the Arduino Pro Micro or Arduino Leonardo. Just wire your TSOP receiver in the following way:
- GND to GND
- VCC to VCC
- Data to D8 on the Arduino
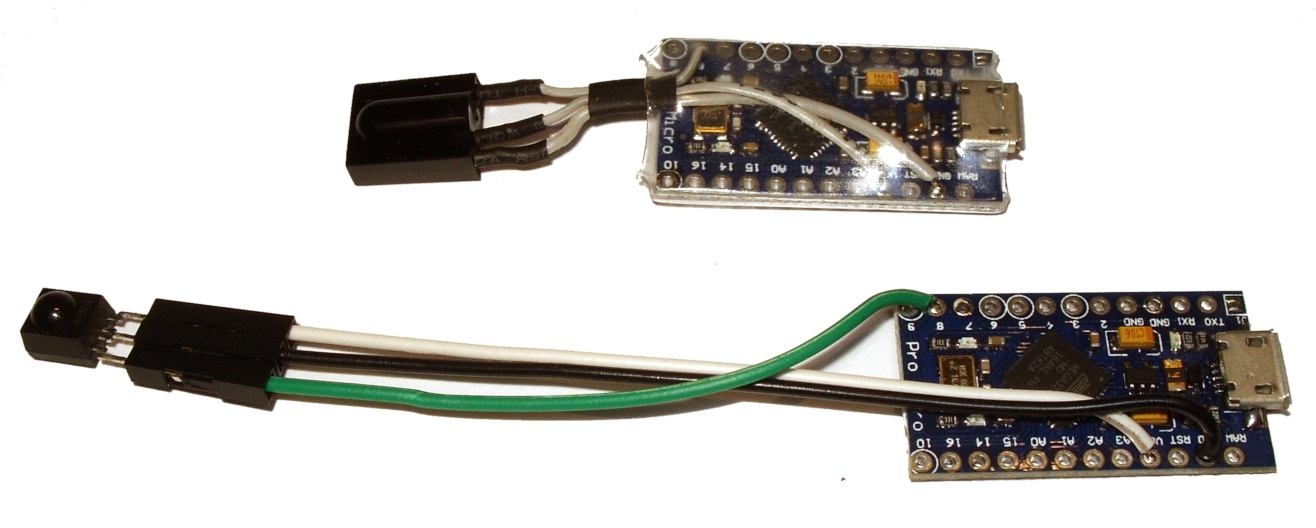
PS2 should work on nearly every Arduino as long as it is AVR (Atmel Atmega) based and uses 5V logic voltage, but recommended are Arduino Nano or Arduino Pro Micro.
The TSOP wiring depends on the Arduino, you use:
- GND to GND
- VCC to 5V (Nano) or VCC (Pro Micro)
- Data to D12 (Nano) or D8 (Pro Micro)
PS2-Wiring is always:
- Data to D2
- Clock to D3
- WARNING: If the PS2 port is directly connected to the Arduino, then uploading a bad/wrong sketch may damage your mainboard!
- The same applies if you connect both (PS2 and USB). Especially when doing this between two different PCs.
- NO WARRANTY at all!
- You have been warned!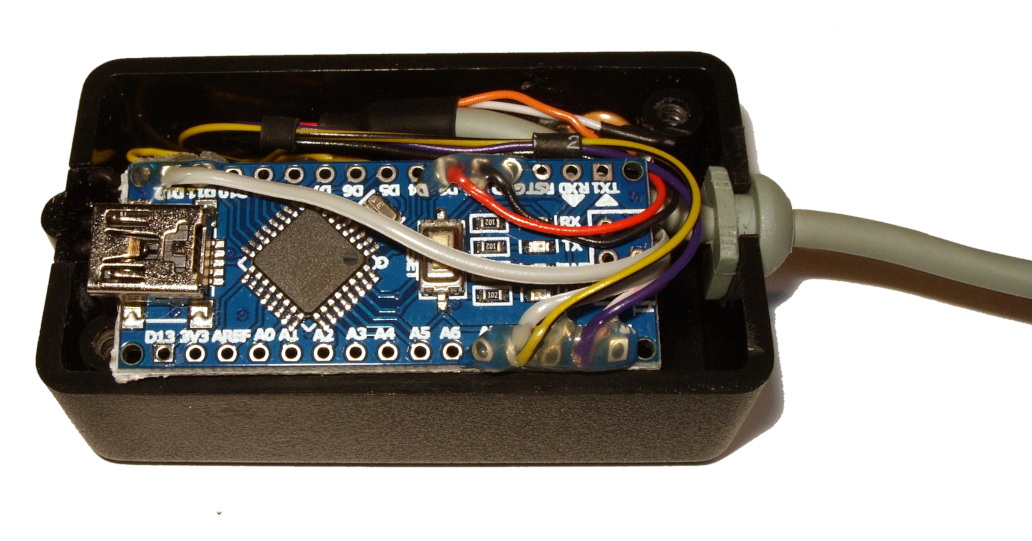
At first, search for the following libraries in the Arduino Library Manager and install them:
- TimerOne (always required)
- HID-Project (Required only if you build for USB support)
- USBStatus (only required if you enable the wakeup feature)
To make the receiver control the media software of your choice, you have to bind remote control buttons to keyboard keys. This is done in the config_keybindings.h file. This file already contains the bindings, that I use, as a reference.
You can find templates in the templates directory and some already "decoded" remote controls in the remotes directory.
Most probably you have to "decode" the remote control, you want to use, first. To do this, upload the irmpdump sketch first.
Now open the "Serial Monitor" and have the irmp2keyboard sketch ready for editing in a second Arduino IDE window.
With every keypress on your remote, you should see a code that looks similar to this:
0x02,0x7080,0x00c0,0x00
Select this line and switch to the Arduino IDE with your "irmp2keyboard" sketch. Enable the tab with "config_keybindings.h" in it. Here, you now have to create lines similar to this (and remove lines that aren't needed for your configuration):
{{0x02,0x7080,0x00c0,0x00}, MOD_NONE, KEY_0},
The first part is your code. Then the modifiers area follows. The last field is the actual key that has to be pressed. Allowed keys can be found in the PS2Keyboard.h tab in your Arduino IDE.
Example with modifiers (Ctrl + Alt + Entf)
{{0x02,0x7080,0x00c0,0x00}, MOD_CTRL|MOD_ALT, KEY_DELETE},
Allowed modifiers are:
- MOD_CTRL
- MOD_SHIFT
- MOD_ALT
- MOD_ALTGR
As soon as you have your combinations defined, switch over to "config.h" and decide which type of keyboard you want to emulate. This is set to PS2 by default (as that's what I'm using). If you want to create an USB keyboard, comment the line which defines PS2_KEYBOARD like so:
// Comment this line to build for USB support
//#define PS2_KEYBOARD
Now it's time to upload the irmp2keyboard sketch to your arduino and try out your new remote control receiver!

It is possible to recover a Raspberry Pi from "halt state" by pulling pin 5 to GND for a short period of time.
My project supports this feature in USB mode. The recommended board is the Arduino Pro Micro in the 5V version but with the jumper SJ1 not closed! So all you have to do is to comment "PS2_KEYBOARD", uncomment "WAKEUP_CODE" and set the code you want to have for triggering the wakeup.
Please note that enabling "WAKEUP_CODE" adds the "USBStatus" library as additional dependency. You find it in the Arduino library manager.
Then connect the following pins:
| Arduino pin | Raspberry pin |
|---|---|
| RAW | 2 |
| GND | 6 |
| A3 | 5 |
Please check that your SJ1 jumper on the Arduino Pro Micro is not closed! This is the jumper on the back side of the board which is meant to be closed for the 5V version. The chinese 5V versions usually have this jumper open but the original board from Sparkfun may have the bridge soldered closed. If so, remove the solder or you'll "backpower" the USB ports in "halt state" which may damage some components on the Pi.
After completely powering down, the Arduino keeps powered using our additional GND and 5V lines we connected. If you press the remote control button you configured with WAKEUP_CODE, pin 5 on the Raspberry is pulled low via Arduino pin A3. This allows to power on your Raspberry without power cycling.
If you configure standard Kodi shortcuts, then this whole thing works out of the box on a standard LibreELEC setup!