![]()
A graffiti wall canvas where paints look like actual paints.
https://leoyulinli.github.io/wall-canvas
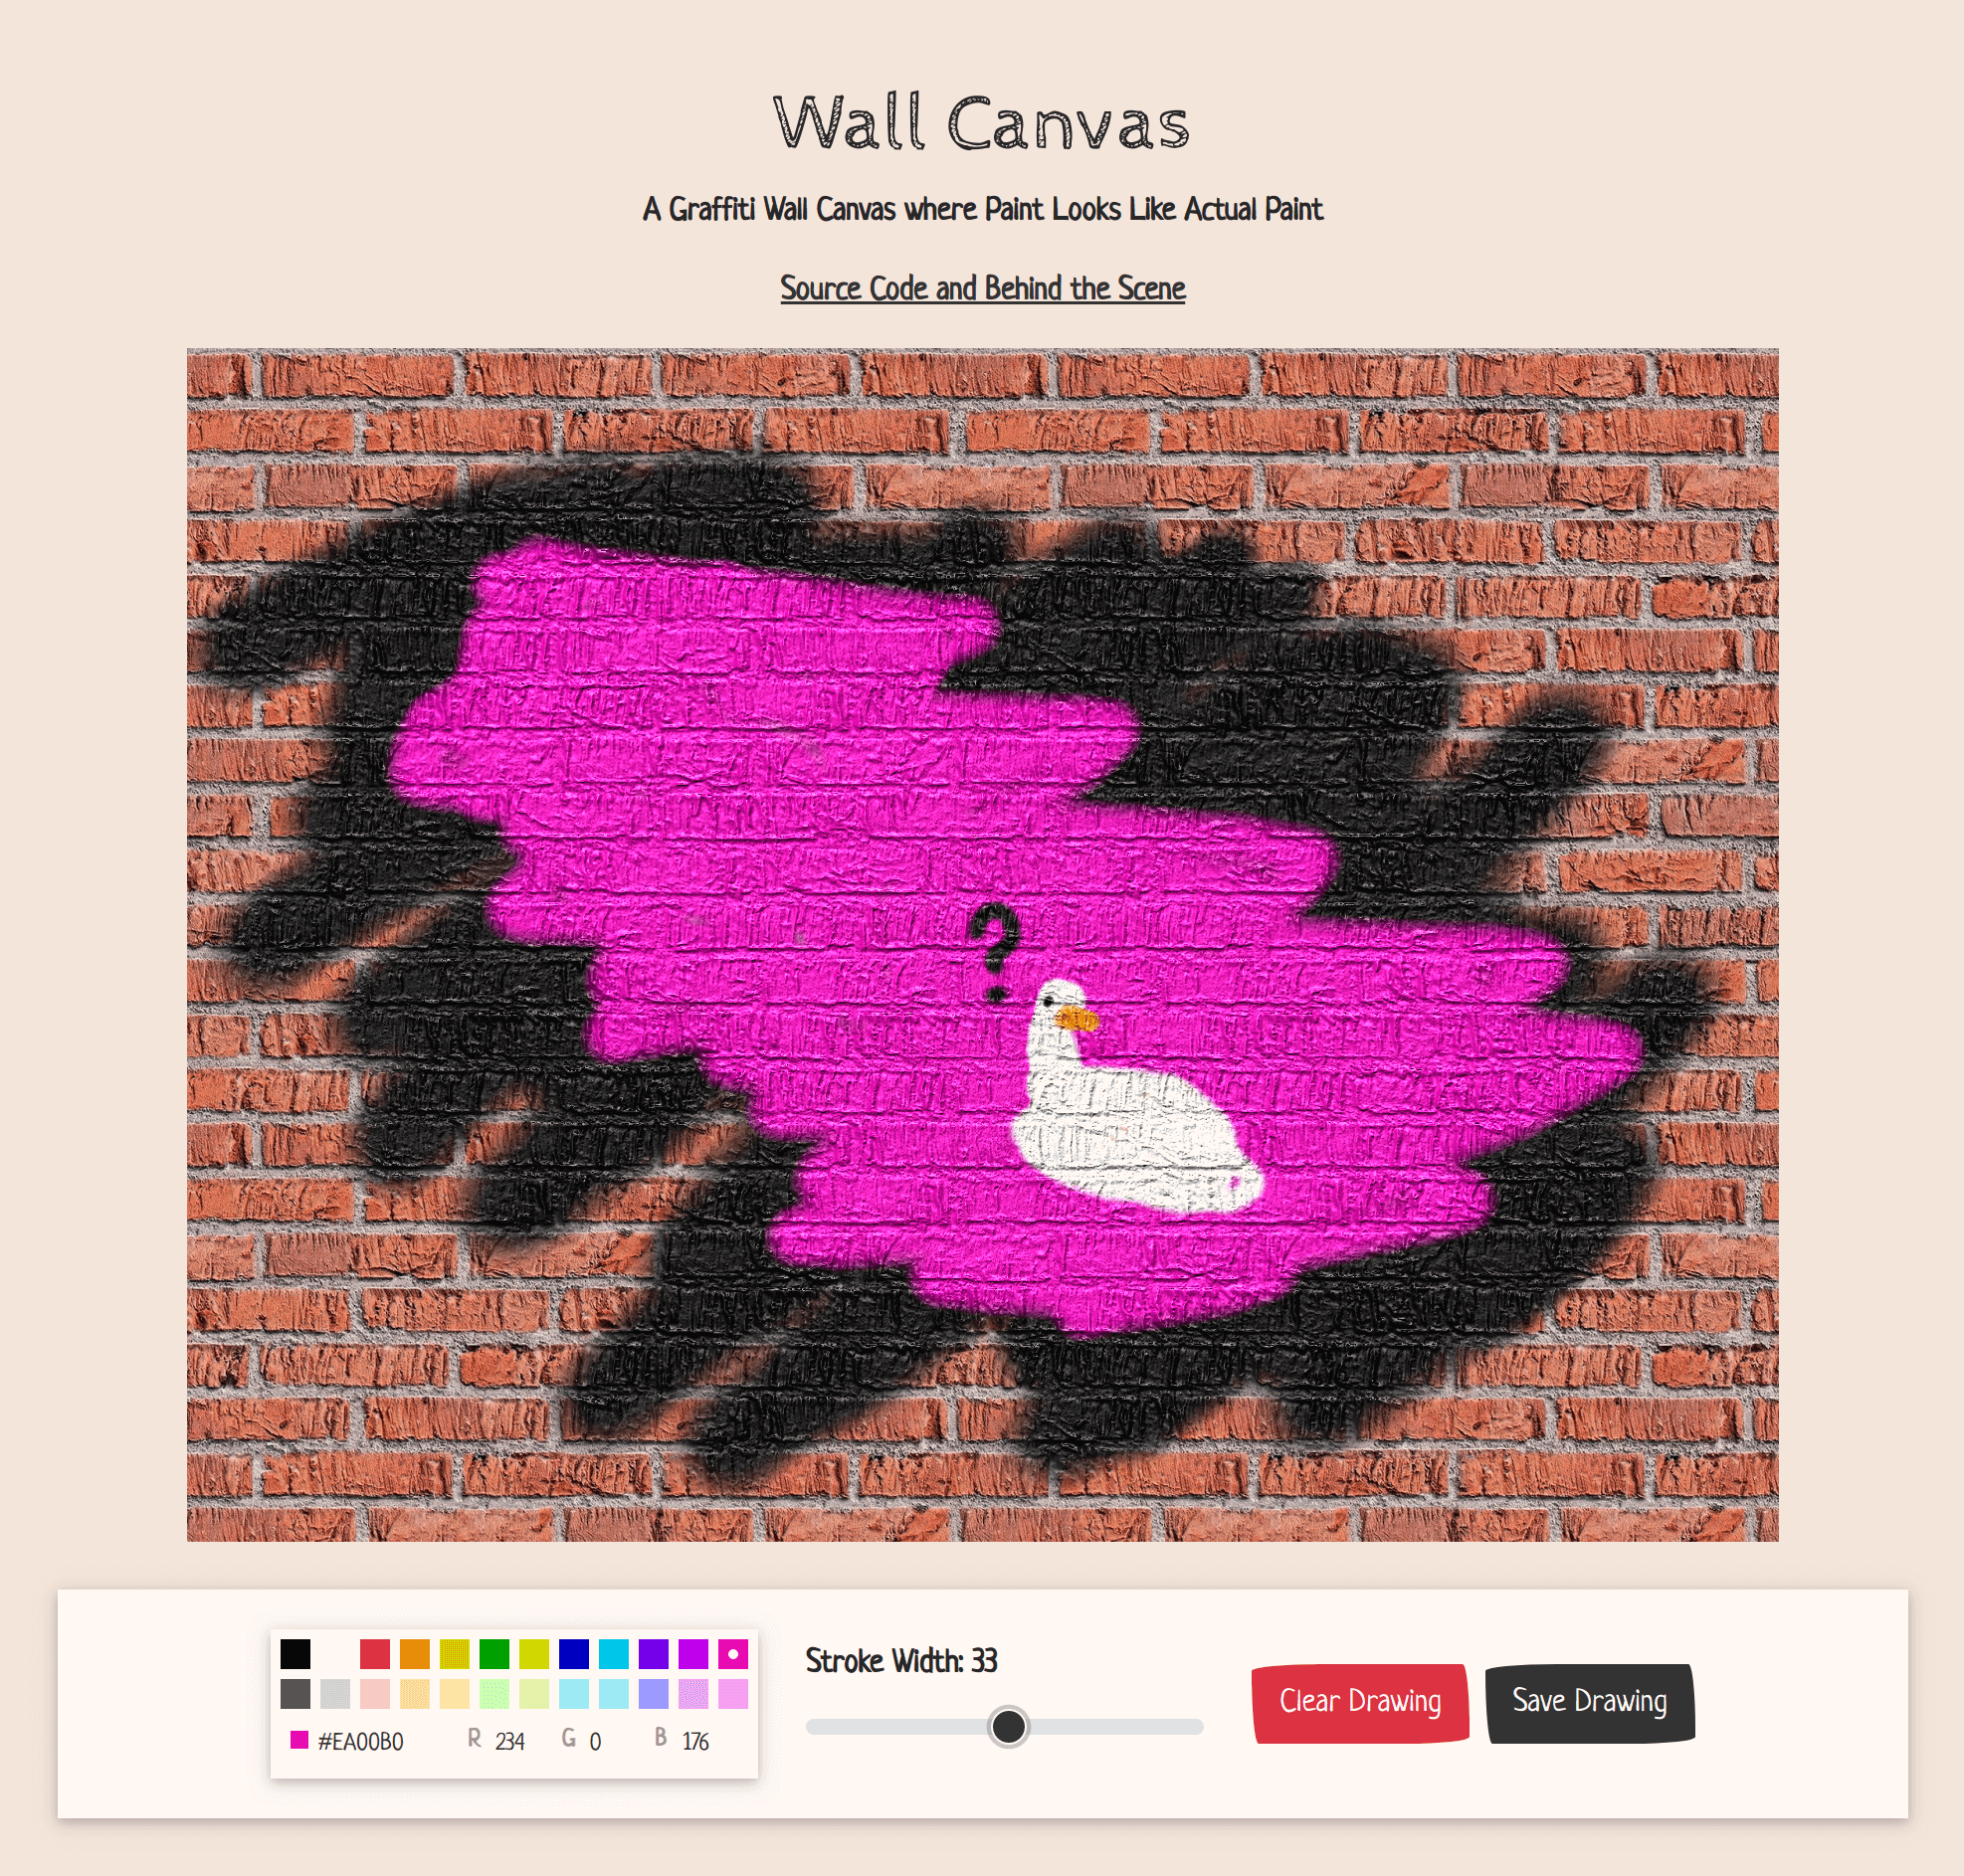
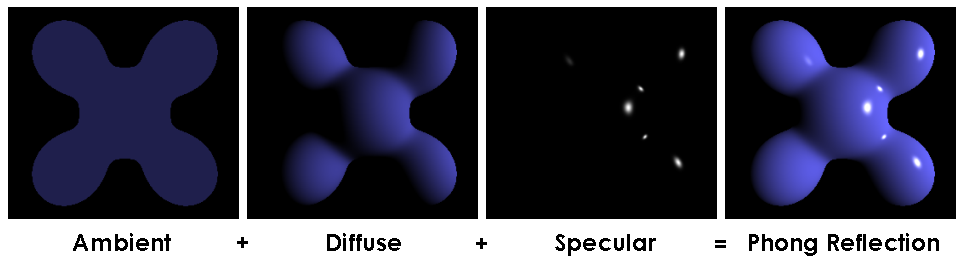
The wall is not flat, so paints on the wall probably should not be flat either. That is the main motive behind this project. Even though this project is built using HTML5 2d canvas, some 3D rendering techniques were used. The main technique was Phong reflection model.
(Image by Brad Smith)

(Image by Martin Kraus)
You can read more about Phong reflection model here: https://en.wikipedia.org/wiki/Phong_reflection_model
For this project, the texture (Tileable_Red_Brick_Texturise.jpg) and the normal map (Tileable_Red_Brick_Texturise_NORMAL.jpg) are used to compute the reflection model.
The normal map is encoded as an image, where the RGB values of each pixel represents the xyz value of a normal vector. Each value is ranging from 0 to 255 with a bias of 128.
For this project, the light is a constant vector for all points on the canvas, simulating a light source really far away.
const l = [1, 3, 6];This represents a light source from somewhere a little bit to the right, above, and almost directly behind the viewer.
In this project, the process of creating the ambient and diffuse component is combined by blending "shadows" directly onto the texture image.
The "shadows" are determined by the angle or the dot product between the light source vector (L) and the normal vector (N) for each pixel. The smaller the angle, the brighter that pixel will be. Any normal vector with an angle greater than 90 degrees to the light source will render the corresponding pixel completely black.
const dotProducts: number[] = [];
const l = [1, 3, 6];
const unitL = normalize(l);
const unitV = [0, 0, 1];
for (let i = 0; i < data.length; i += 4) {
  const n = [data[i] - 128, data[i + 1] - 128, data[i + 2] - 128];
  const unitN = normalize(n);
  const dotLN = dot(unitN, unitL);

  dotProducts.push(dotLN);
}
The final dotProducts array represents how bright a given pixel should be, ranging from 0 to 1. This array will later
be used to compute the brightness of the pixel values of both the wall and the paint.
const i_d = {
  r: alpha * (8 + drawingData[i * 4]) * shading[i],
  g: alpha * (8 + drawingData[i * 4 + 1]) * shading[i],
  b: alpha * (8 + drawingData[i * 4 + 2]) * shading[i]
};
The 8 + in this case is to compensate for the darkening effect of the shading and also makes paint with 0 rgb values
to work better with the shading (because 0 times anything is 0, making the shading not that effective)
for (let i = 0; i < diffuse.length / 4; i++) {
  diffuse[i * 4] = diffuse[i * 4] * shading[i];
  diffuse[i * 4 + 1] = diffuse[i * 4 + 1] * shading[i];
  diffuse[i * 4 + 2] = diffuse[i * 4 + 2] * shading[i];
}
The last component is the specular reflection. It is that extra bright highlights on shiny objects. Specular reflections show up when the angle between the viewing vector(V) and the reflection vector (R) is really small.
The vector V in this project is always [0, 0, 1], pointing out of the screen (after all we are just rendering 2D), and the R vector is the mirror to the L vector.
And the final result is:
const dotReflection: number[] = [];
const l = [1, 3, 6];
const unitL = normalize(l);
const unitV = [0, 0, 1];
for (let i = 0; i < data.length; i += 4) {
  const r: number[] = [];
  for (let a = 0; a < 3; a++) {
    r[a] = 2 * dotLN * (unitN[a] - unitL[a]);
  }
  const unitR = normalize(r);
  const dotRV = dot(unitR, unitV);

  dotReflection.push(Math.pow(dotRV, 3));

  data[i] = Math.floor(dotLN * 255);
  data[i + 1] = Math.floor(dotLN * 255);
  data[i + 2] = Math.floor(dotLN * 255);
}
In the end, we blend everything together to get the image to be painted onto the HTML canvas:
const i_s = alpha * specular[i] * 2000;

const i_d = {
  r: alpha * (8 + drawingData[i * 4]) * shading[i],
  g: alpha * (8 + drawingData[i * 4 + 1]) * shading[i],
  b: alpha * (8 + drawingData[i * 4 + 2]) * shading[i]
};

canvasData[i * 4] = i_d.r + i_s + (1 - alpha) * diffuse[i * 4];
canvasData[i * 4 + 1] = i_d.g + i_s + (1 - alpha) * diffuse[i * 4 + 1];
canvasData[i * 4 + 2] = i_d.b + i_s + (1 - alpha) * diffuse[i * 4 + 2];Another important factor in making paint looks real is the blurring effect on the edge. I took the code almost directly from this page, and they are doing a really good job explaining the process of how they came up with such a solution with interactive examples. If you want to know more, please check out: http://perfectionkills.com/exploring-canvas-drawing-techniques/
Pretty straight forward, just go try it :D
- Maybe allow the resize of canvas.
- Better color picker
- Improve UI
Well part of it was me being lazy at the beginning and were writing inefficient code, but since the shading are usually something happens in the rendering pipeline accelerated by hardware, being able to write something that works in pure JavaScript is a pretty fun experience for me already. There are some standard optimization I did to improve the performance, here are some of them:
const { x: xp, y: yp } = prev;
const { x: xc, y: yc } = current;

const x1 = xp < xc ? xp : xc;
const y1 = yp < yc ? yp : yc;

const x2 = xp < xc ? xc : xp;
const y2 = yp < yc ? yc : yp;

const x = x1 - strokeWidth;
const y = y1 - strokeWidth;
const dx = x2 - x + strokeWidth;
const dy = y2 - y + strokeWidth;
// ...
for (let t = 0; t < dx * dy; t++) {
  const u = t % dx;
  const v = Math.floor(t / dx);

  const a = x + u;
  const b = y + v;

  const i = a + b * width;
  // then use i as a regular index ...
}
so since I have access to where the mouse was for the last stroke, I computed a bounding box and runs the shader only in the bound of that box. This improved the frame rate of the program from ~2FPS to ~30FPS. The performance gain is even bigger on a large canvas.
const setMousePosition = useCallback(throttle(_setMousePosition, 20), []);Since the render happens every mouse event, the mouse even rate is limited to make the rendering code run less often. This does make the stroke look less smooth, but is a quick solution to the problem without having to deal with mouse position queues and alteration of existing logics.
I happened to have a screen with 200% scaling for my desktop, so I didn't realize the problem until I try my code on my laptop, which uses a non-integer scaling factor. Some methods do not expect floating-point numbers. Instead of yelling at you, they just do nothing, which made the the problem really hard to spot.Z