Home
Star-height is tool for astronomers made for planning observations. It will show the important data like sidereal time, elevation with included refraction and galactic coordinates. While searching for object it connects to Simbad database and shows the most important data of an object. The coordinates of an object with additional information can be saved for easy search in the future.
To install program download from the latest release star-height and Data.tar.gz files. star-height is already compiled program for processor x86_64 (so idk if it will work for you) so all you need to do with it is to move it. Go to the directory where files where downloaded and then run these commands
$ sudo mv ./star-height /usr/local/bin/
$ tar -xvzf ./Data.tar.gz
Moving binary file to /usr/local/bin/ will assure that you can run program form any other place in file system. After extracting Data directory it's time to move it to it's position
$ sudo mv ./Data/ /usr/local/
It's very important to move it to this position otherwise program won't work. Now you can just remove compressed file
$ rm ./Data.tar.gz
You can enjoy program by running
$ star-height
There's other method by compiling it yourself. First make sure you have installed qmake and git. On Ubuntu or Linux Mint run
$ sudo apt-get install qt5-default
$ sudo apt-get install git
On Manjaro or Arch use pacman
$ sudo pacman -S qt5-base
$ sudo pacman -S git
On Gentoo you don't need instructions
Then download code files and run installing script
$ git clone https://github.com/IamNotProgrammer/Star-height.git
$ cd ./Star-height/
$ ./star_install.sh
Installation script should automatically build and install program. After script is done that's everything you needed to do, you can check out program now.
There might be situation where your processor have different architecture and (maybe) it won't work properly at all.
The first thing you see is that window is divided to 2 parts. On the left are options and settings and on the right there is information about object.
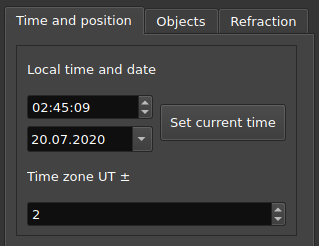
The left panel have 3 tab categories: Time and position, Objects and Refraction. Under that there's sub window called "Local time and date" where you can change time and time zone.
Under that we have Country and City, it's easier to set your position that way and it will automatically fill necessary information or by hand you can set longitude, latitude and altitude.
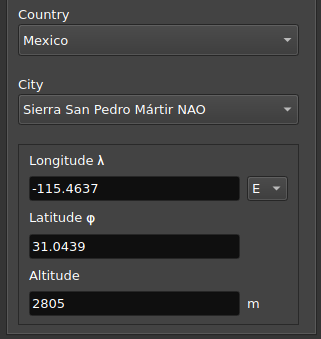
You can save specific position in top left corner choosing Options -> Add observatory.