Live coding is the best way to teach and share your knowledge with others but as you know this is not easy! The idea behind writing this extension is to have live coding with a hundred percent accuracy and less stressful moments!
You can achieve the goal in two different ways:
- Recording everything via macros.
- Replay a pre-defined script.
For the first approach, it is fast but not accurate because you are recording your mistakes too, so, I am using the second one to nail it!
You have full control of the script that you want to type:
- Move the cursor in any direction and number you want.
- Using predefined utility commands to simplify the typing process.
- Calling commands available in VS Code e.g. Format the document by
editor.action.formatDocument. - Present your code perfectly with manual and automatic pause/resume cycles.
To use this extension, first, you should create a .vscreplay file. Anything in this file will auto-type exactly as you have like all characters, new lines, spaces, and so on but you can change the way of typing with the operational characters and commands that are provided before.
replay and pause commands just work when you have a .vscreplay file in your active editor.
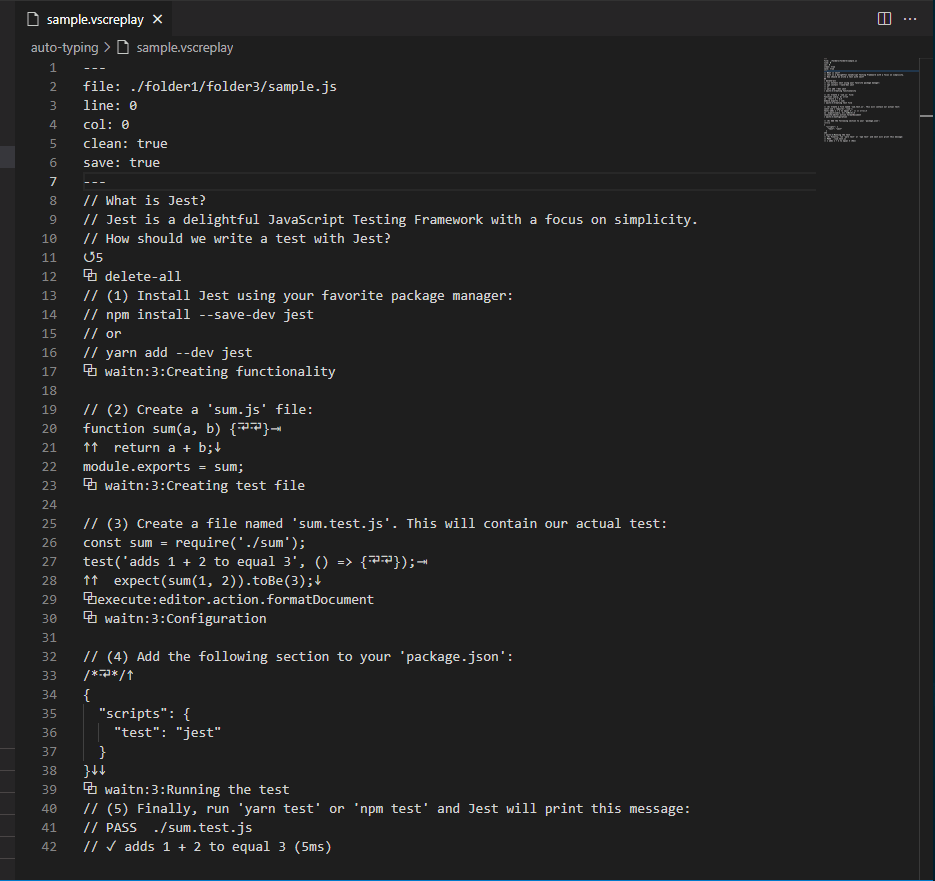
For example a file like:
---
file: ./folder1/folder3/sample.js
line: 0
col: 0
clean: true
save: true
---
// What is Jest?
// Jest is a delightful JavaScript Testing Framework with a focus on simplicity.
// How should we write a test with Jest?
⭯5
⧉ delete-all
// (1) Install Jest using your favorite package manager:
// npm install --save-dev jest
// or
// yarn add --dev jest
⧉ waitn:3:Creating functionality

// (2) Create a 'sum.js' file:
function sum(a, b) {⮒⮒}⇥
↑↑  return a + b;↓
module.exports = sum;
⧉ waitn:3:Creating test file

// (3) Create a file named 'sum.test.js'. This will contain our actual test:
const sum = require('./sum');
test('adds 1 + 2 to equal 3', () => {⮒⮒});⇥
↑↑  expect(sum(1, 2)).toBe(3);↓
⧉execute:editor.action.formatDocument
⧉ waitn:3:Configuration

// (4) Add the following section to your 'package.json':
/*⮒*/↑
{
  "scripts": {
    "test": "jest"
  }
}↓↓
⧉ waitn:3:Running the test
// (5) Finally, run 'yarn test' or 'npm test' and Jest will print this message:
// PASS  ./sum.test.js
// ✓ adds 1 + 2 to equal 3 (5ms)
The sample file is also accessible from here.
| Name | Description | |
|---|---|---|
| ↑ | up | Move the cursor up one line |
| ↓ | down | Move the cursor down one line |
| → | right | Move the cursor right one character |
| ← | left | Move the cursor left one character |
| ⤒ | first | Move the cursor to the beginning of the first line |
| ⤓ | last | Move the cursor to the beginning of the last line |
| ⇤ | begin | Move the cursor to the beginning of the line |
| ⇥ | end | Move the cursor to the end of the line |
| ⮒ | newline | Adding a new line |
| ⨷ | remove-newline | Removing next new line |
| ⟿ | whitespace | Adding a whitespace |
| ⌫ | backspace | Delete the character to the left of the cursor |
| ⭯ | pause | Pause the running process and ask the user to continue via dialog |
| ⧉ | command | Adding some useful functionality to your script |
| ↯ | boost | Sometimes you want to go to a specific part of the content with maximum speed. All waits and pauses will cancel until this character in your content. You can use this character just once in the whole of your script. |
| ↯↯ | double-boost | It works exactly the same as boost but with a pause. It means after reaching the double boost you should confirm for resume. |
You can use a number after the below operational characters to write less repetitive code:
| Name | Description | |
|---|---|---|
| ↑2 | up-more | Move the cursor up {N} lines |
| ↓10 | down-more | Move the cursor down {N} lines |
| →5 | right-more | Move the cursor right {N} characters |
| ←7 | left-more | Move the cursor left {N} characters |
| ⮒3 | newline-more | Adding {N} new lines |
| ⟿4 | whitespace-more | Adding {N} whitespace |
| ⌫8 | backspace-more | Delete {N} characters to the left of the cursor |
| ⭯6 | pause-more | Pause for {N} seconds |
If you set 0 for the count, the extension automatically considers it as 1.
| Name | Description | |
|---|---|---|
| ⧉ goto:1:5 | goto | Go to the specified line and column, you can use eol for end of line and ll for last line e.g goto:ll:eol |
| ⧉ delete:1 | delete-line | Delete the whole content of the line and line itself, you can use ll for last line |
| ⧉ empty:1 | empty-line | Delete the whole content of the line but keep the line empty, move the cursor to the beginning of the line, you can use ll for last line |
| ⧉ delete-after:1:5 | delete-after | Delete characters after the specified line and column, column {N} also deletes, the deletion applies only to the specified line, you can use eol for end of line and ll for last line |
| ⧉ delete-before:1:5 | delete-before | Delete characters before the specified line and column, column {N} also deletes, the deletion applies only to the specified line, you can use eol for end of line and ll for last line |
| ⧉ delete-area:1:5:2:9 | delete-area | Delete characters of the specified positions, you can use eol for end of line and ll for last line |
| ⧉ delete-all | delete-all | Delete whole content |
| ⧉ execute:editor.action.formatDocument | execute | Execute the specified command of VS Code. |
| ⧉ duplicate-line-after:1 | duplicate-line-after | Duplicate the line after it, you can use ll for last line |
| ⧉ duplicate-line-before:1 | duplicate-line-before | Duplicate the line before it, you can use ll for last line |
| ⧉ selectn:10:1:5:2:14 | selectn | Select the specified line and column for seconds, you can use eol for end of line and ll for last line |
| ⧉ copy:1:5:2:14 | copy | Copy the specified line and column, you can use eol for end of line and ll for last line |
| ⧉ cut:3:4:6:eol | cut | Cut the specified line and column, you can use eol for end of line and ll for last line |
| ⧉ paste:6:5:7:20 | paste | Paste the specified line and column, you can use eol for end of line and ll for last line |
| ⧉ waitn:10 ⧉ waitn:10:comment |
waitn | Waiting for {N} seconds with a comment if you set |
| ⧉ wait ⧉ wait:comment |
wait | Showing a Yes/No dialog with a comment if you set |
| ⧉ speed ⧉ speed:speed:delay |
speed | Control the speed and delay of typing |
| ⧉ memory:clip1:1:4:6:10 | save | Save the content of the specified area in memory with the variable name of clip1, variable name should start with a letter and contains letters & numbers, you can use eol for end of line and ll for last line |
| ⧉ restore:clip1:0:7:3:22 | restore | Restore the content of clip1 variable in the specified area, variable name should start with a letter and contains letters & numbers, you can use eol for end of line and ll for last line |
Each .vscreplay should have a setting on top of the .vscreplay file.
---
file: ./folder1/sample1.js
line: 0
col: 0
speed: 20
delay: 250
bspeed: 20
bdelay: 250
clean: true
next: ./sample2.vscreplay
save: true
info: true
---
...
| Name | Optional | Default | Description |
|---|---|---|---|
| file | No | - | The target file that you want to type into it. |
| line | Yes | 0 | The starting line for typing. |
| col | Yes | 0 | The starting column for typing. |
| speed | Yes | 20 | The speed of typing. (0 <= speed <= 200) |
| delay | Yes | 250 | The random delay between of typing. (0 <= speed <= 400) |
| bspeed | Yes | 20 | The backspace speed of typing. (0 <= speed <= 200) |
| bdelay | Yes | 250 | The random backspace delay between of typing. (0 <= speed <= 400) |
| clean | Yes | true | It Cleans the target file's content if it is true |
| next | Yes | - | The next .vscreplay file you want to call after finishing auto typing of this file. |
| save | Yes | true | Save the final result automatically if it is true |
| info | Yes | true | Show all info dialogs about pause times if it is true |
You should use the relative path for the file and next settings. The root of the starting point is your VS Code workspace folder.
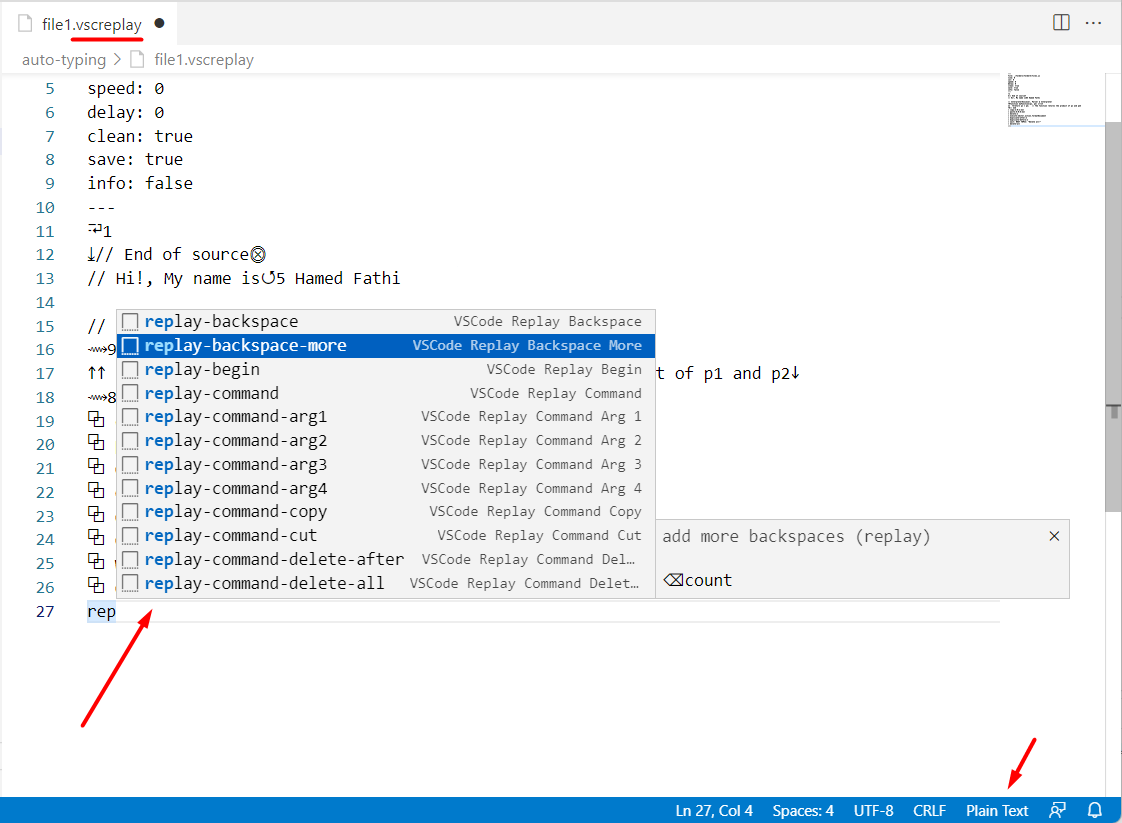
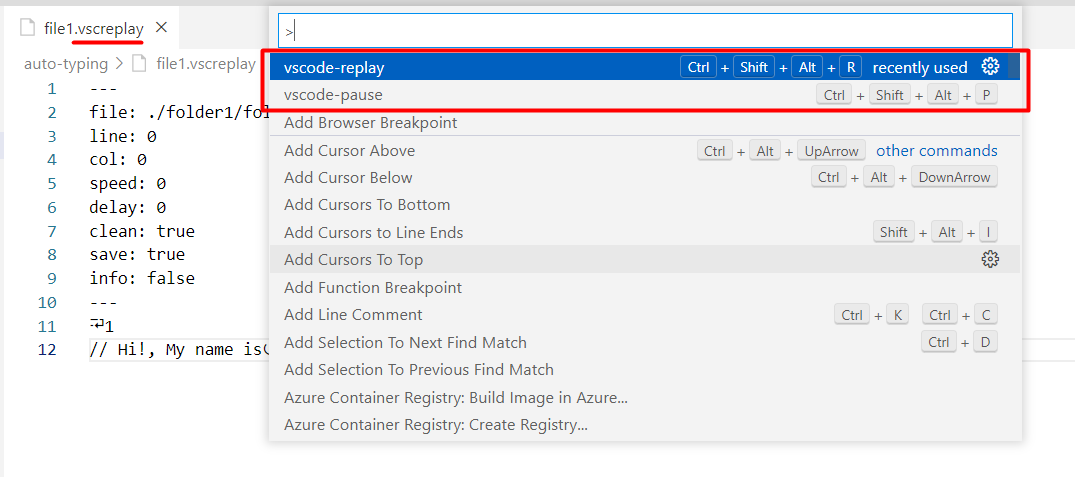
Copy and paste the characters from this tutorial is not a good way! To work easier you can use the below snippets.
| Name | Snippet |
|---|---|
| up | replay-up |
| down | replay-down |
| right | replay-right |
| left | replay-left |
| first | replay-first |
| last | replay-last |
| begin | replay-begin |
| end | replay-end |
| newline | replay-newline |
| remove-newline | replay-remove-newline |
| whitespace | replay-whitespace |
| backspace | replay-backspace |
| pause | replay-pause |
| up-more | replay-up-more |
| down-more | replay-down-more |
| right-more | replay-right-more |
| left-more | replay-left-more |
| newline-more | replay-newline-more |
| whitespace-more | replay-whitespace-more |
| backspace-more | replay-backspace-more |
| pause-more | replay-pause-more |
| boost | replay-boost |
| double-boost | replay-double-boost |
| command | replay-command replay-command-arg1 replay-command-arg2 replay-command-arg3 replay-command-arg4 |
| goto | replay-command-goto |
| delete-line | replay-command-delete-line |
| empty-line | replay-command-empty-line |
| delete-after | replay-command-delete-after |
| delete-before | replay-command-delete-before |
| delete-area | replay-command-delete-area |
| delete-all | replay-command-delete-all |
| execute | replay-command-execute |
| duplicate-line-after | replay-command-duplicate-line-after |
| duplicate-line-before | replay-command-duplicate-line-before |
| selectn | replay-command-selectn |
| copy | replay-command-copy |
| cut | replay-command-cut |
| paste | replay-command-paste |
| waitn | replay-command-waitn |
| wait | replay-command-wait |
| speed | replay-command-speed |
| memory | replay-command-memory |
| restore | replay-command-restore |
| Setting | replay-setting |
For manual control on auto typing, you can use the following shortcuts:
| Action | Window/Linux | Mac |
|---|---|---|
| Pause | alt+ctrl+shift+p | alt+cmd+shift+p |
| Resume | alt+ctrl+shift+r | alt+cmd+shift+r |
- The first release.
- The
boostoperational character is added.
- The
double-boostoperational character is added.
- The
selectncommand is added. - The
speedcommand is added. - The
esbuildbundler is added. - The
backspacespeed and delay configurations are added.
- The
memorycommand is added. - The
restorecommand is added. - The
ll(last line) is added.
I am heavily inspired by auto-type to implement this extension.