In this repo we are creating a manager and User website that will help them to detect parking space and in this system there are also reservation system for the parking system.
I this repo the Project is coded in the following Project:
- HTML
- CSS
- JavaScript
- Bootstrap
In this read me file you will learn to run this project on your computer and the basic understanding of the code.
To run this application on your computer you need to install the following software:
- Xampp
- Node JS
- VS Code
- Arduino IDE
For this application to run properly we also required hardware. The hardware will be providing the values. which will be displayed on the website.
To make your Hardware you need the following things:
- Arduino UNO Board
- Bread Board
- Male to Female Cables
- IR Sensors
- USB type B cable
Once all the hardware is here then assemble the hardware, Connect the IR sensor with the bread board and from bread board to Arduino UNO Board.
Then connect the USB type cable to the computer and load the code from the repo.
IR Sensor:
There are three pin in each sensor one is Ground, second is Power and the third one is Code line.
On a Sensor there are three labels
-
GNN
GNN present ground line
-
OUT
OUT line present Code
-
VCC
The VCC line Represent Power Line
Color Code list for Sensors:
-
Sensor 1:
Code Line Color: Orange
Pot number: 3
Power Color: White
Ground Color: Green
-
Sensor 2
Code Color Line: Red
Port number: 4
Power Color: White
Ground Color: Green
-
Sensor 3:
Code color: Yellow color
Port Number: 5
Ground: Yellow
Power: White:
Ground Color: Green
-
Sensor 4:
Code color: Blue
Port number: 7
Power Color: White
Ground color: Purple
Power For the Sensor:
In the UNO Board there are two power point, 3.5 Volt and 5 Volt Power.
The system is Powered by 5 Volt point.
- The connection between website and the hardware is done using the javascript. The problem with Arduino is that it can not connect to the website directly so we need a server and the server is designed in javascript, using a framework called Node js.
- Using Node Js we are using two libraries 1. Socket.io and 2. serialport
- Using both Libraries we can connect to the UNO board. The name of the file is called server.js, The server will run at the port of 3000.
To Install these Software you need to look the following articles:
- For Xampp: https://www.ionos.com/digitalguide/server/tools/xampp-tutorial-create-your-own-local-test-server/
- For Node Js: https://treehouse.github.io/installation-guides/windows/node-windows.html
- VS Code: https://medium.com/nerd-for-tech/install-visual-studio-code-fe3908c5cf15
- Arduino IDE: https://www.tutorialspoint.com/arduino/arduino_installation.htm
To run this application Follow the steps bellow:
-
Once all of the application are installed on your system then you need to clone this repo.
-
To clone this repo follow the picture bellow:
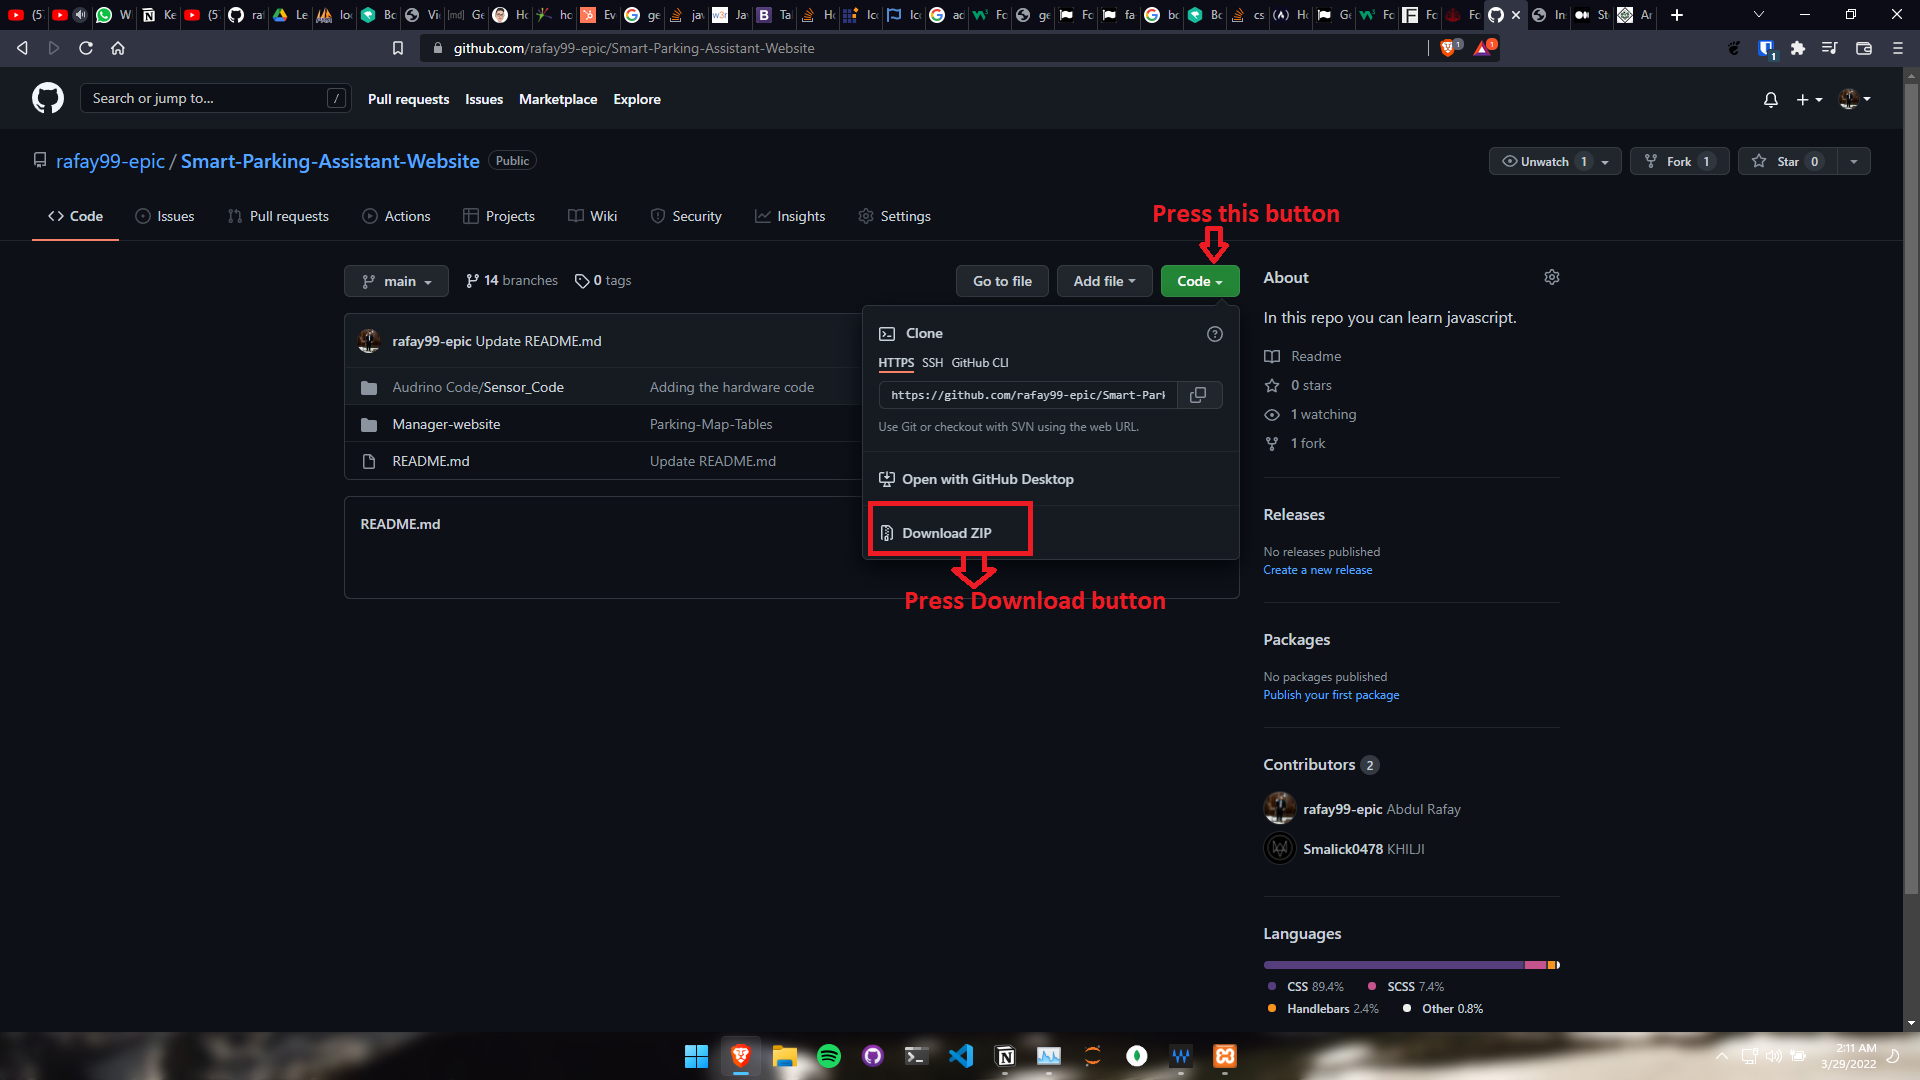
-
Now all of the files on your system.
- For this application to run we must upload the database as well. The database is in the followinf directory “Manager-Website/database”.
- The name of the file is “parking_data.sql”
- To upload the database open your Xampp Control Panel
- Once open then start the SQL Server and Appach Server
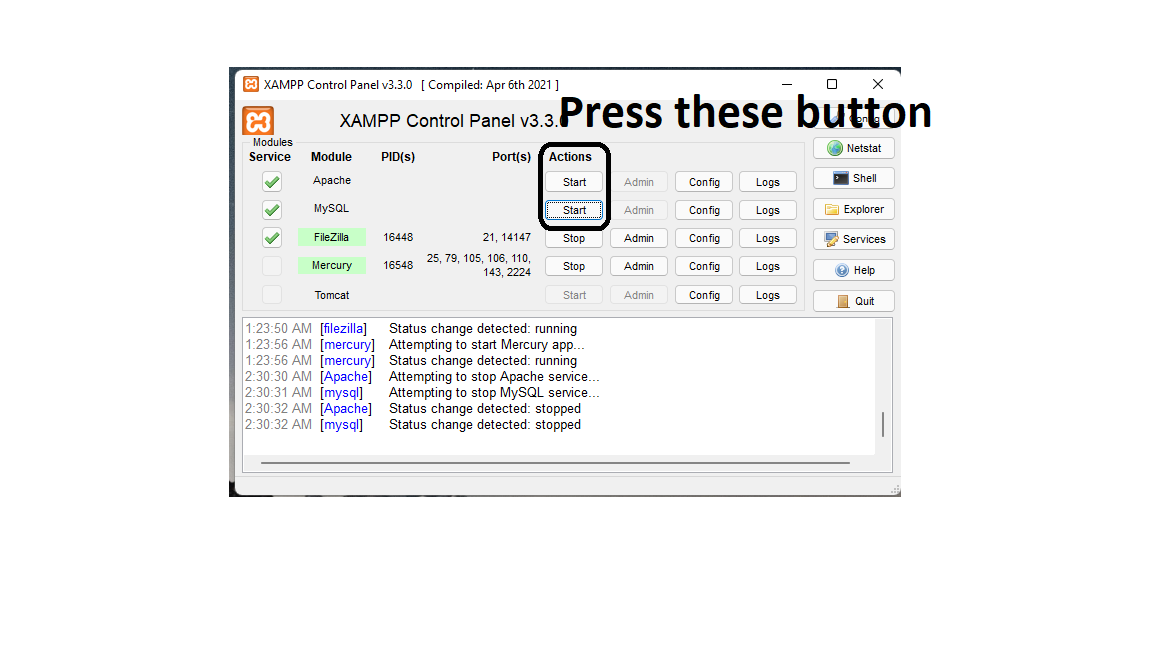
- Both will run and then open your Broswer and enter the following command: “localhost”
- Then press “myphpadmin” to open the SQL.
- Create a database called “parking_data”
- Once created the press the import button.
- A new window will be open.
- Once open the select the file and press Go.
- The database will be imported.
Now The database is active to enter the admin panel you need to a username and password which are stated bellow:
Email: 99marafay@gmail.com
Password: 19march1999
Email: mike.ross123@gmail.com
Password: mikeross
Note:
if facing any problem then follow this guide:
https://help.one.com/hc/en-us/articles/115005588189-How-do-I-import-a-database-to-phpMyAdmin-
In order for the application to display live location using Socket.Io we need a extension you can install this extension using the following Link:
CORS Unblock - Microsoft Edge Addons
- You need the hardware if you want the live location if the hardware is not present the Application will crash.
- You need to change the port number in the app.js file
- You can find the port number from the Arduino IDE. Once your hardware is connected then you will see the port number in the IDE.
- Open vs code.
- in Vs code open a terminal.
- To open the terminal check out the image bellow:
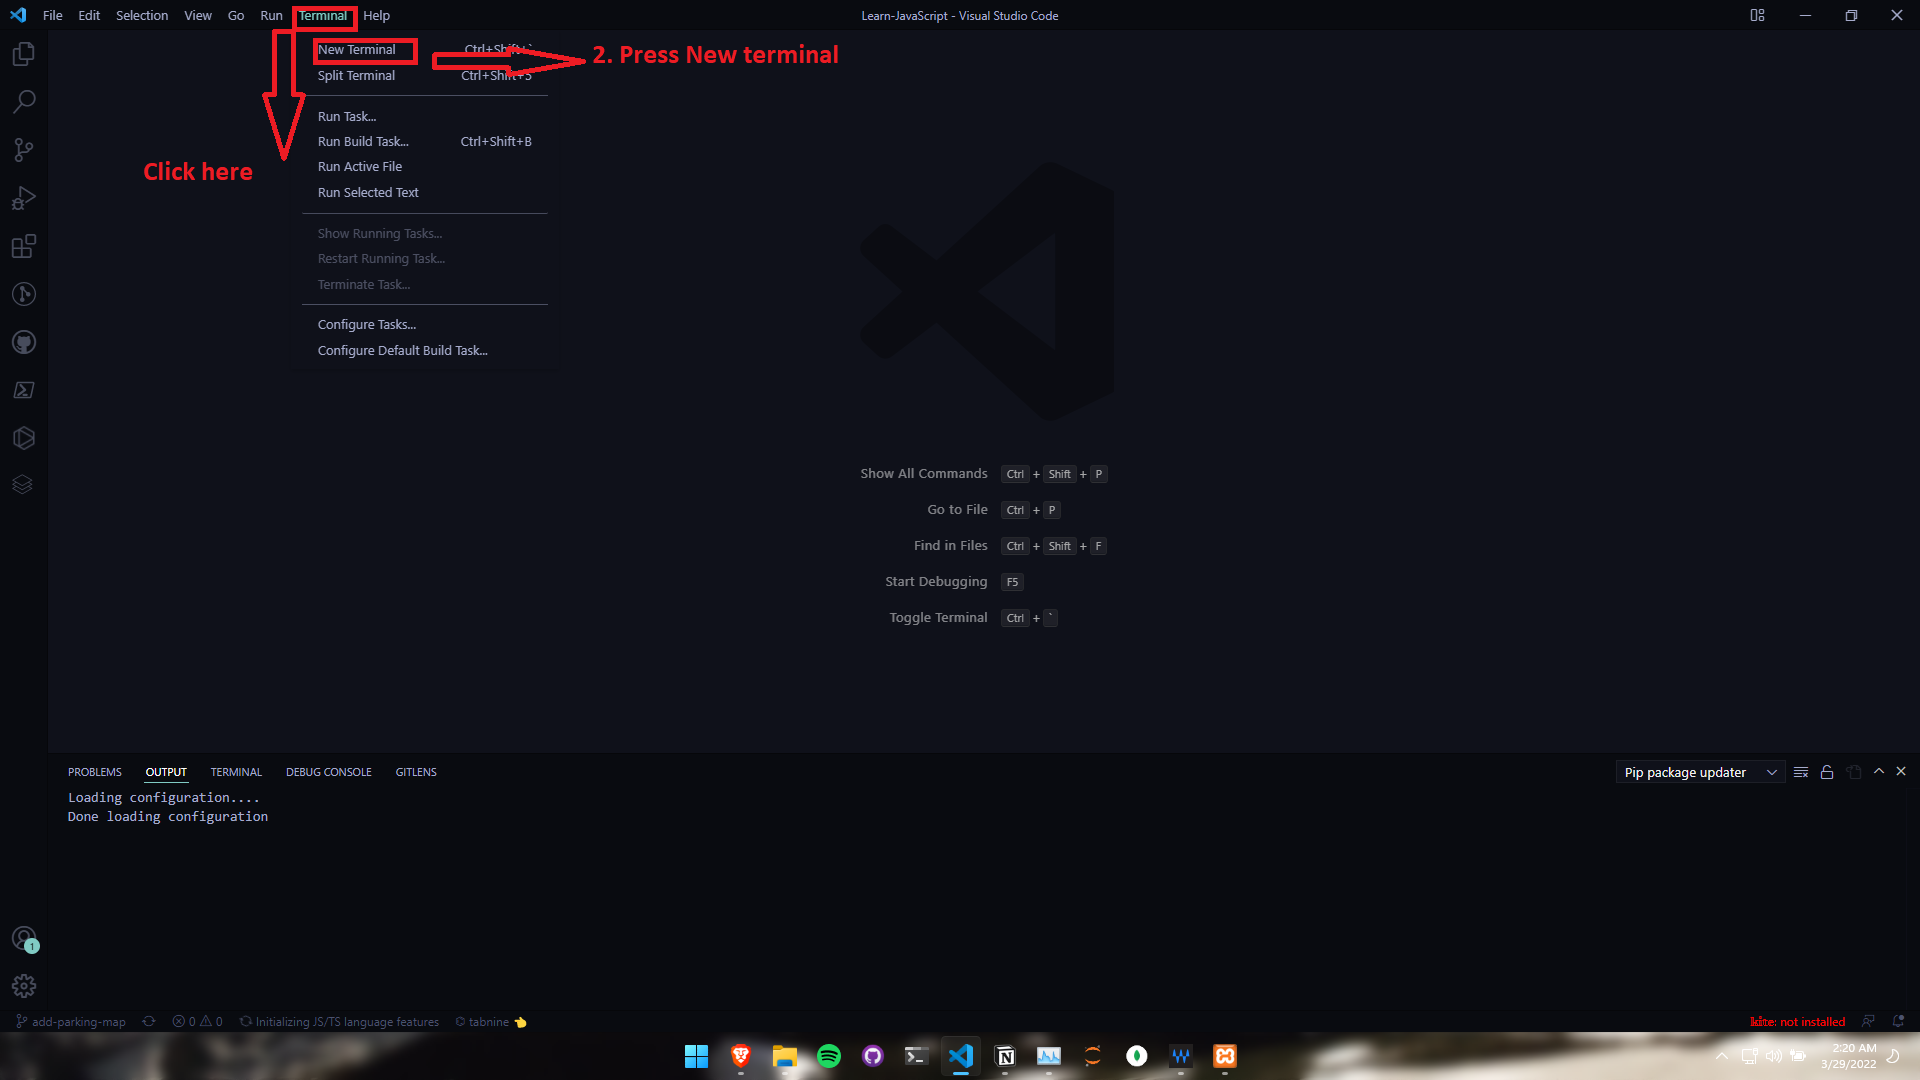
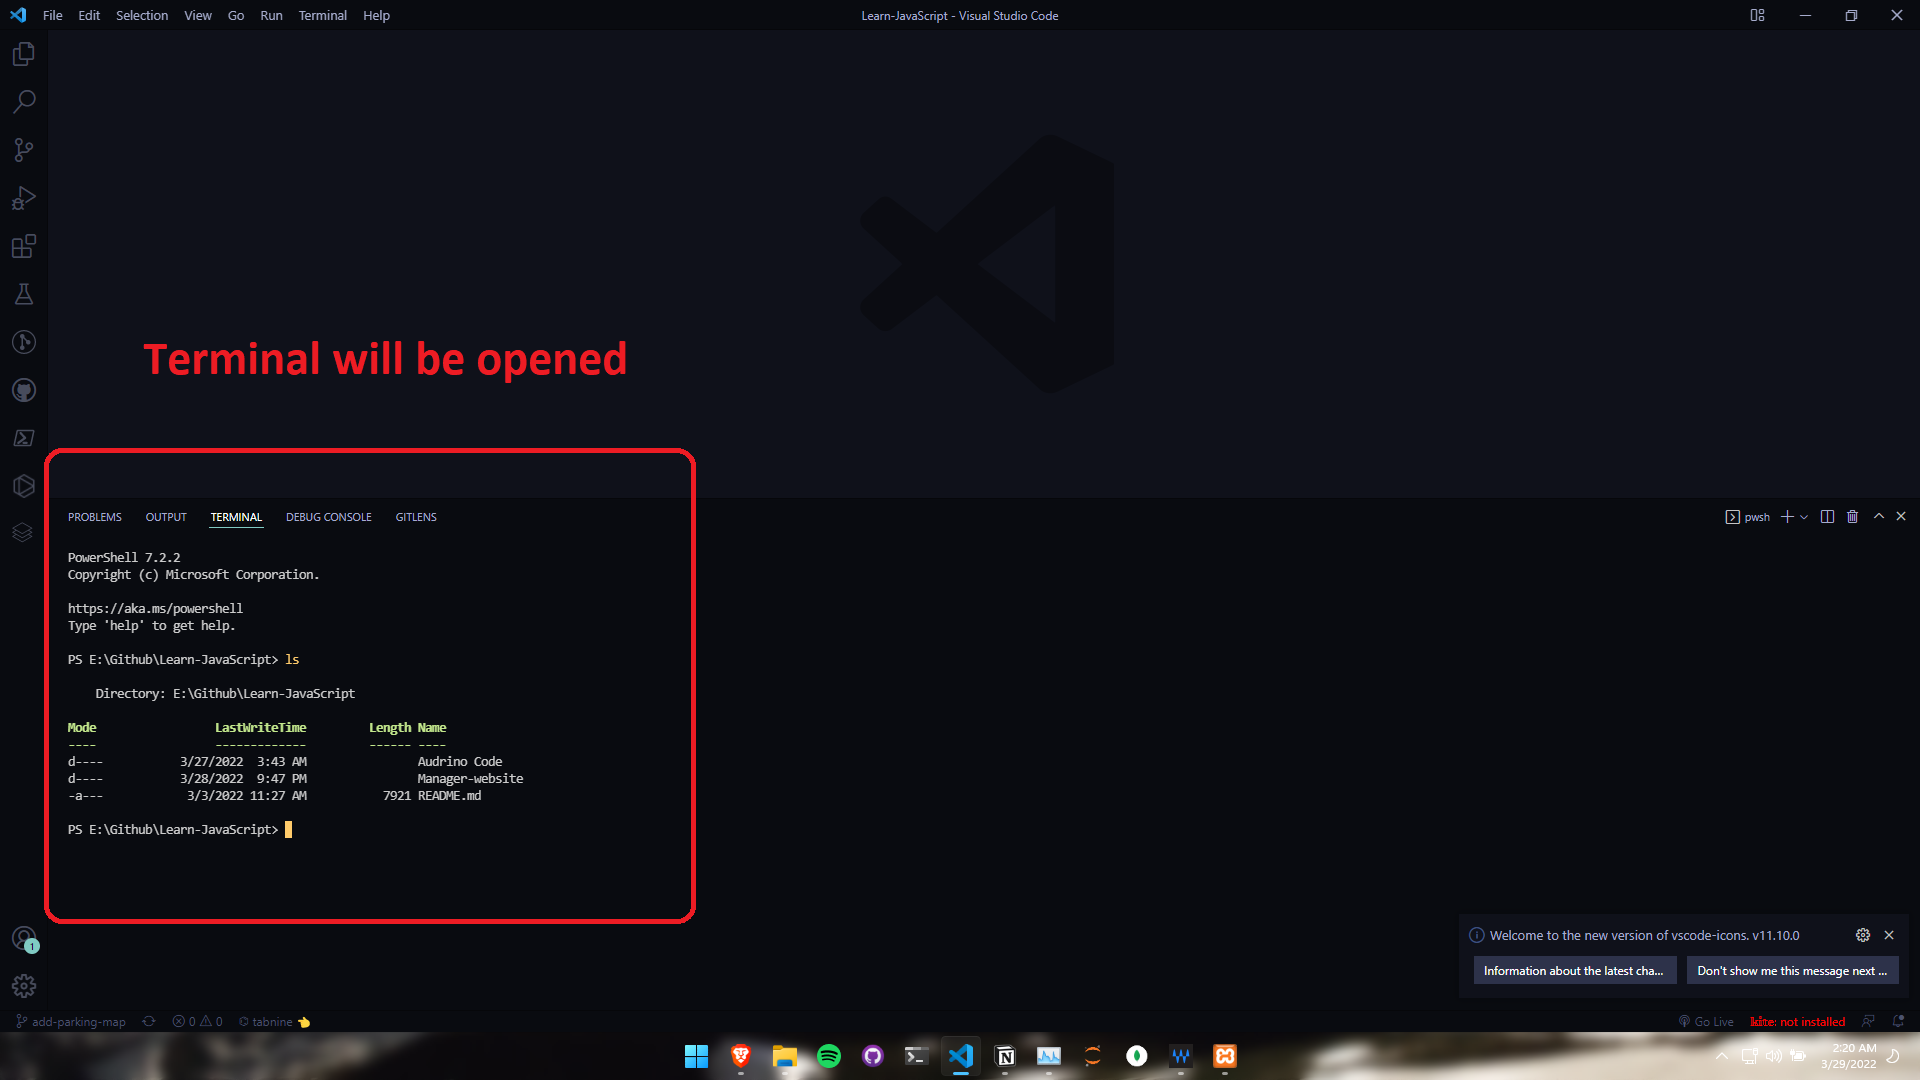
- Once terminal is opened then enter the following command
npm install
npm start- Once all all the command are enter the your application will run.
- To see the progress just enter the “localhost:5000” on your browser.
Author: Mohammad Abdul Rafay
Email: 99marafay@gmail.com