This tutorial describes how to create an IBM ODM Decision Bot for IBM RPA with Automation Anywhere on top of a Decision Service deployed in ODM Decision Server.
- Overview
- Before you begin
- Deploy the Decision Form
- Implement the Decision Bot
- Invoke the Decision Bot from an RPA task.
In the demo odm-rpa-invoicing-sample, we've shown how to delegate the decision logic of an RPA task to an IBM ODM Decision Service, using the ODM decision forms generator called from an RPA task.
In this tutorial, we give a step-by-step description of how to create a reusable Decision Bot for IBM RPA with Automation Anywhere encapsulating the invocation of a Decision Service via odm-decisions-forms.
We first show how to deploy a Decision Form on top of an ODM Decision Service.
Then, we demonstrate how to create a reusable RPA MetaBot to encapsulate the invocation of the Decision Form.
Finally, we show how the MetaBot can be easily invoked from an RPA task by the RPA author without requiring any knowledge of the underlying implementation.
Here are the software you need to install in order to run the tutorial:
- IBM Robotic Process Automation with Automation Anywhere (IBM RPA) leverages ODM to make it possible to automate desktop tasks that involve human judgements that can be captured as ODM decisions.
- IBM Operational Decision Manager (ODM) provides a complete, easy-to-use system for automating day-to-day operational decisions and allows business people and IT staff to collaborate on business rules by using an interface and a language that are comfortable and intuitive for both.
- NodeJS 8.x or greater: needed to run the npm package below
- ODM Decision Forms: an open source npm package provided by the ODM development team, that generates a form on top of a Decision Service.
You must have already deployed a Decision Service that you want to use in your RPA tasks to IBM ODM Decision Server.
As an example, you may deploy the Invoicing sample decision service provided in the odm-rpa-invoicing-sample demo.
We assume that your ODM Decision Server is running at http://localhost:9080. If this is not the case,
you must adapt the options of the odm-decision-forms command line, as described in
the Usage section.
Install the odm-decision-forms package:
npm install -g odm-decision-formsRun the Decision Form server.
odm-decision-formsOpen your browser at http://localhost:3000 to see a list of the available forms.
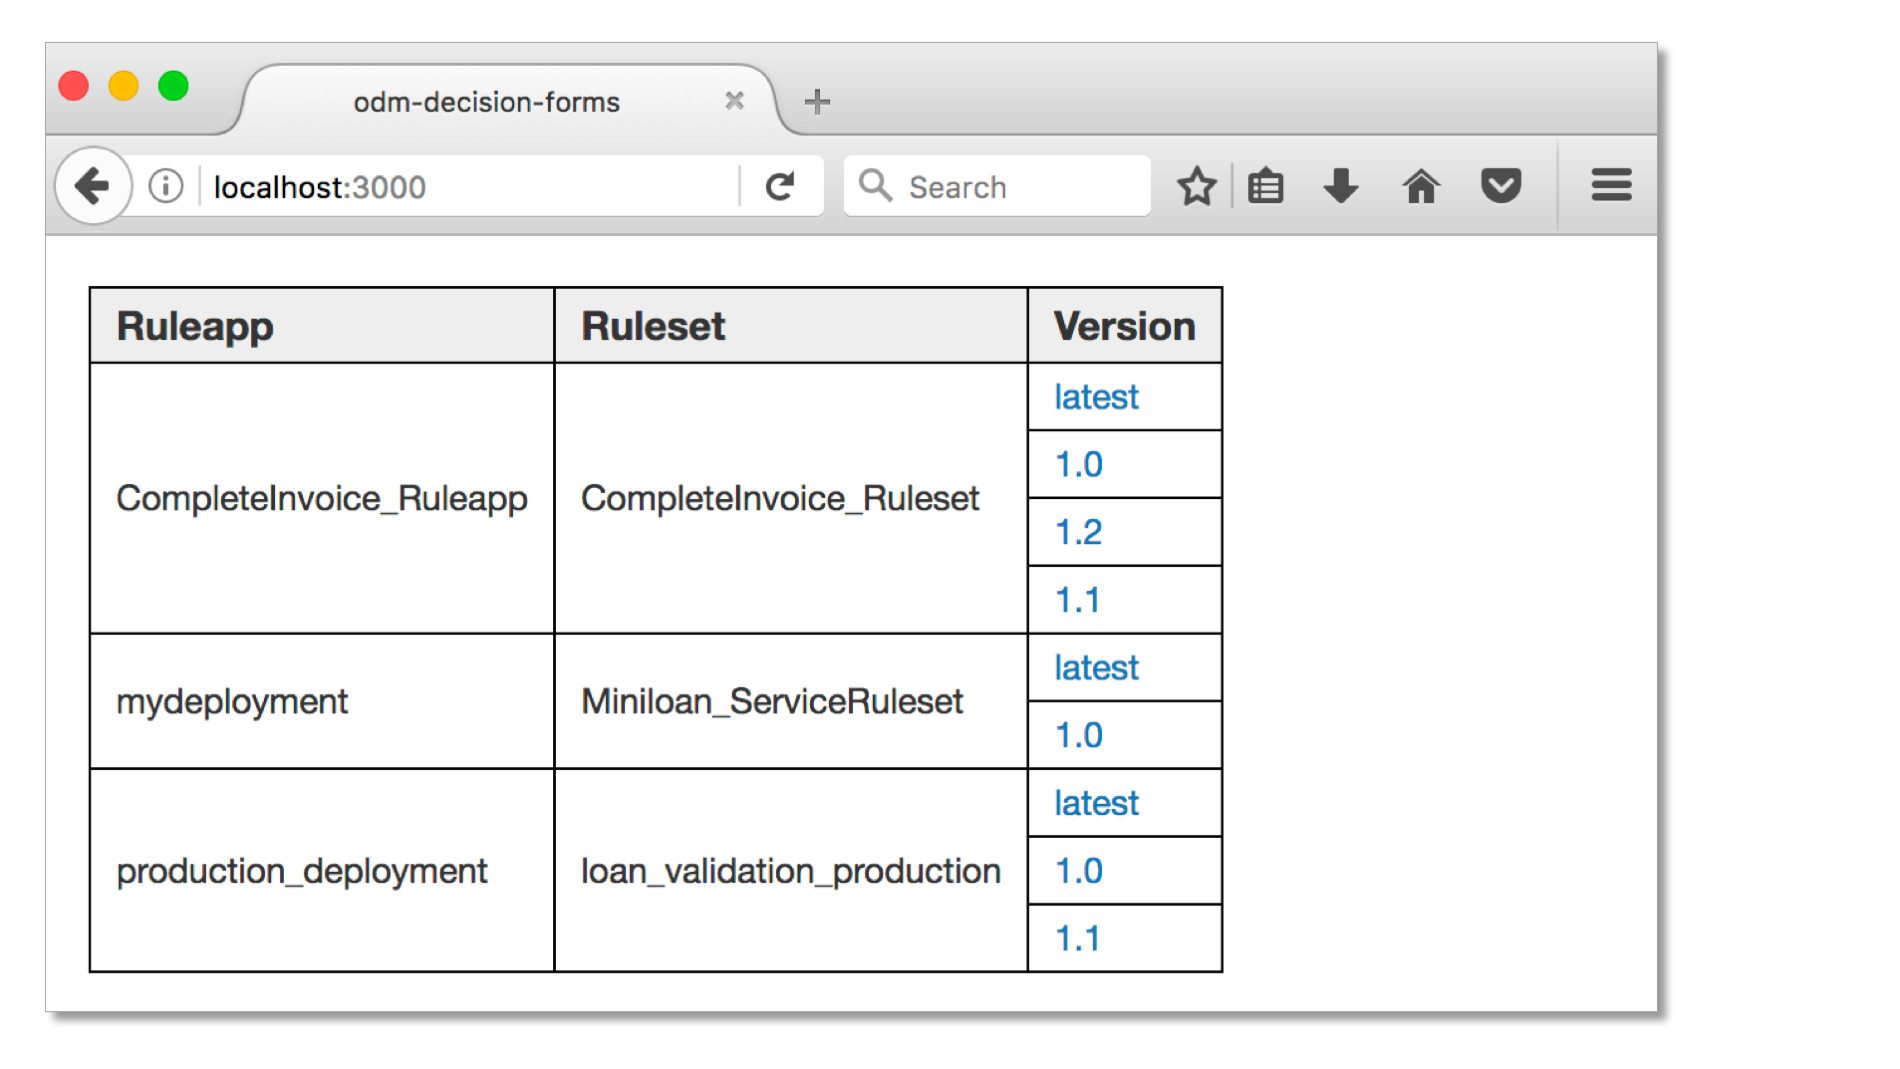
From the Version column, select the decision form you want to automate. Eg: http://localhost:3000/ruleapp/CompleteInvoice_Ruleapp/CompleteInvoice_Ruleset
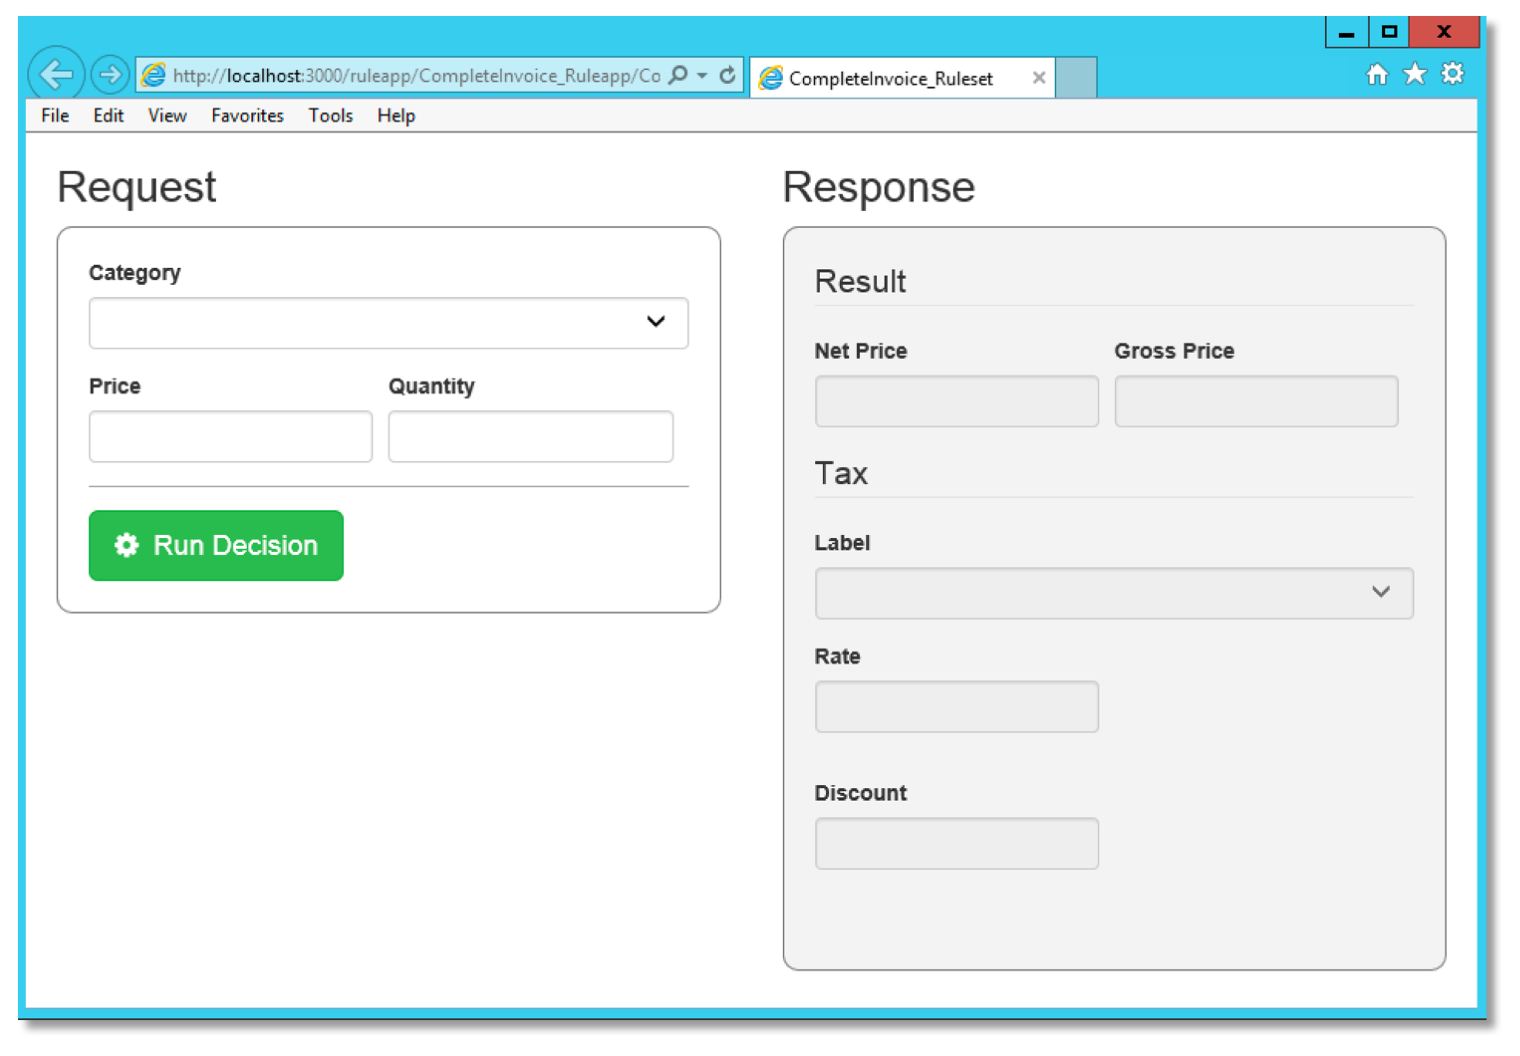
You can test the form, entering some values on the Request side and clicking Run Decision to get the results in the Response side.
Our Decision Bot is implemented as an Automation Anywhere MetaBot, which encapsulates the invocation of the Decision Form and exposes input and output variables, mapped to/from the Decision Service input/output parameters.
- Keep the Decision Form window open and close any other tab or browser instance.
- Open Automation Anywhere Client
- Go to the MetaBot tab and click New
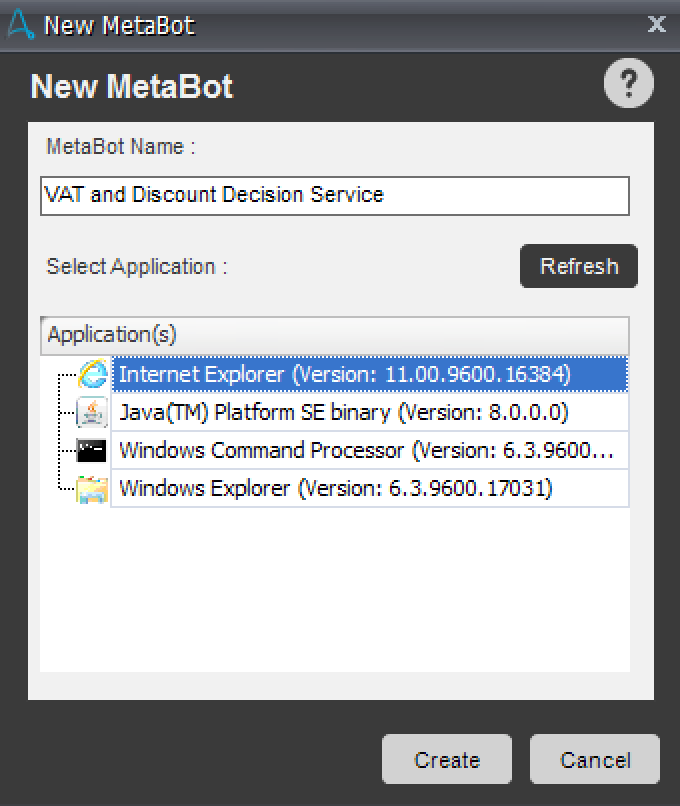
- Set a name for the MetaBot. Eg: Invoicing Decision Bot
- In the Applications list, Select Internet Explorer and click Create
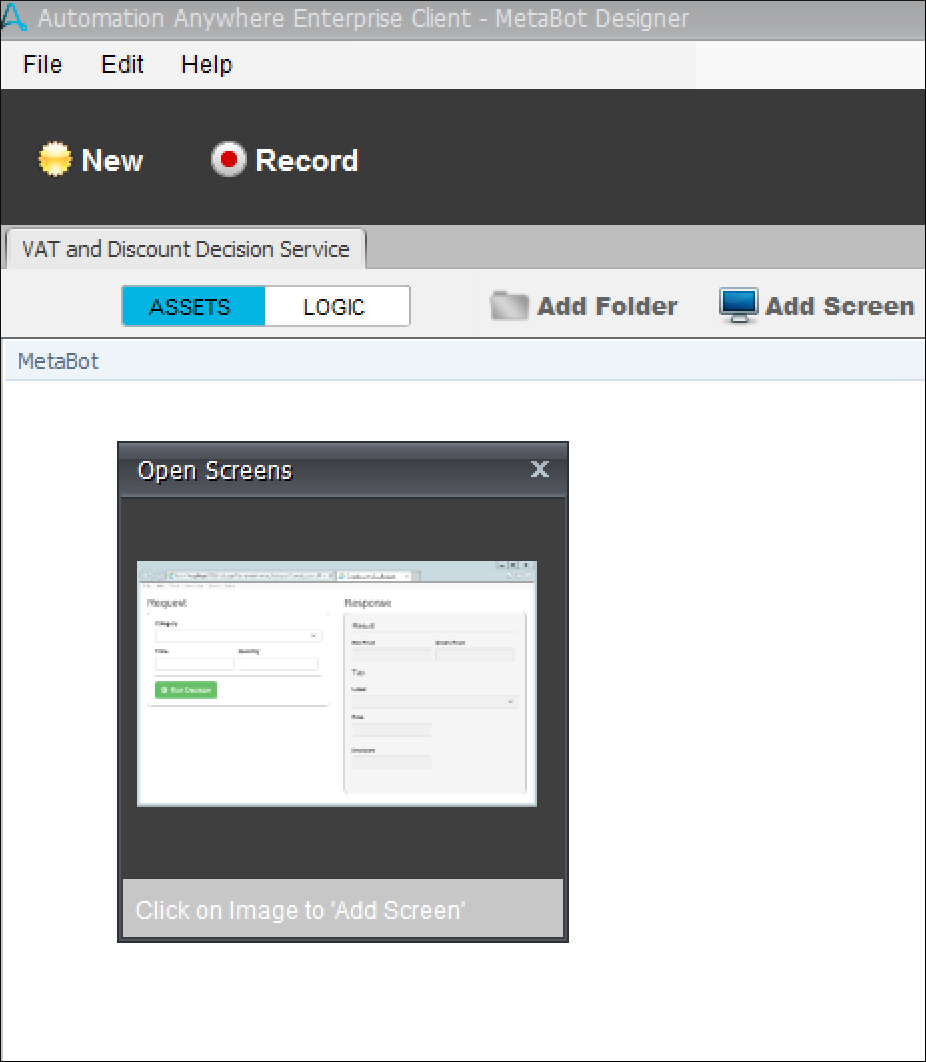
This opens the MetaBot editor. Click Add Screen and select the screen corresponding to the navigator displaying your Decision Form
We then edit a Logic object, defining in/out variables of the metabot, listing the steps required to enter input data in the form based on the MetaBot input variables, executing the Decision Service, and mapping the output result to the MetaBot output variables.
- Click on the Logic tab
- Click Add Logic. This opens the Logic Editor, showing the Internet Explorer window
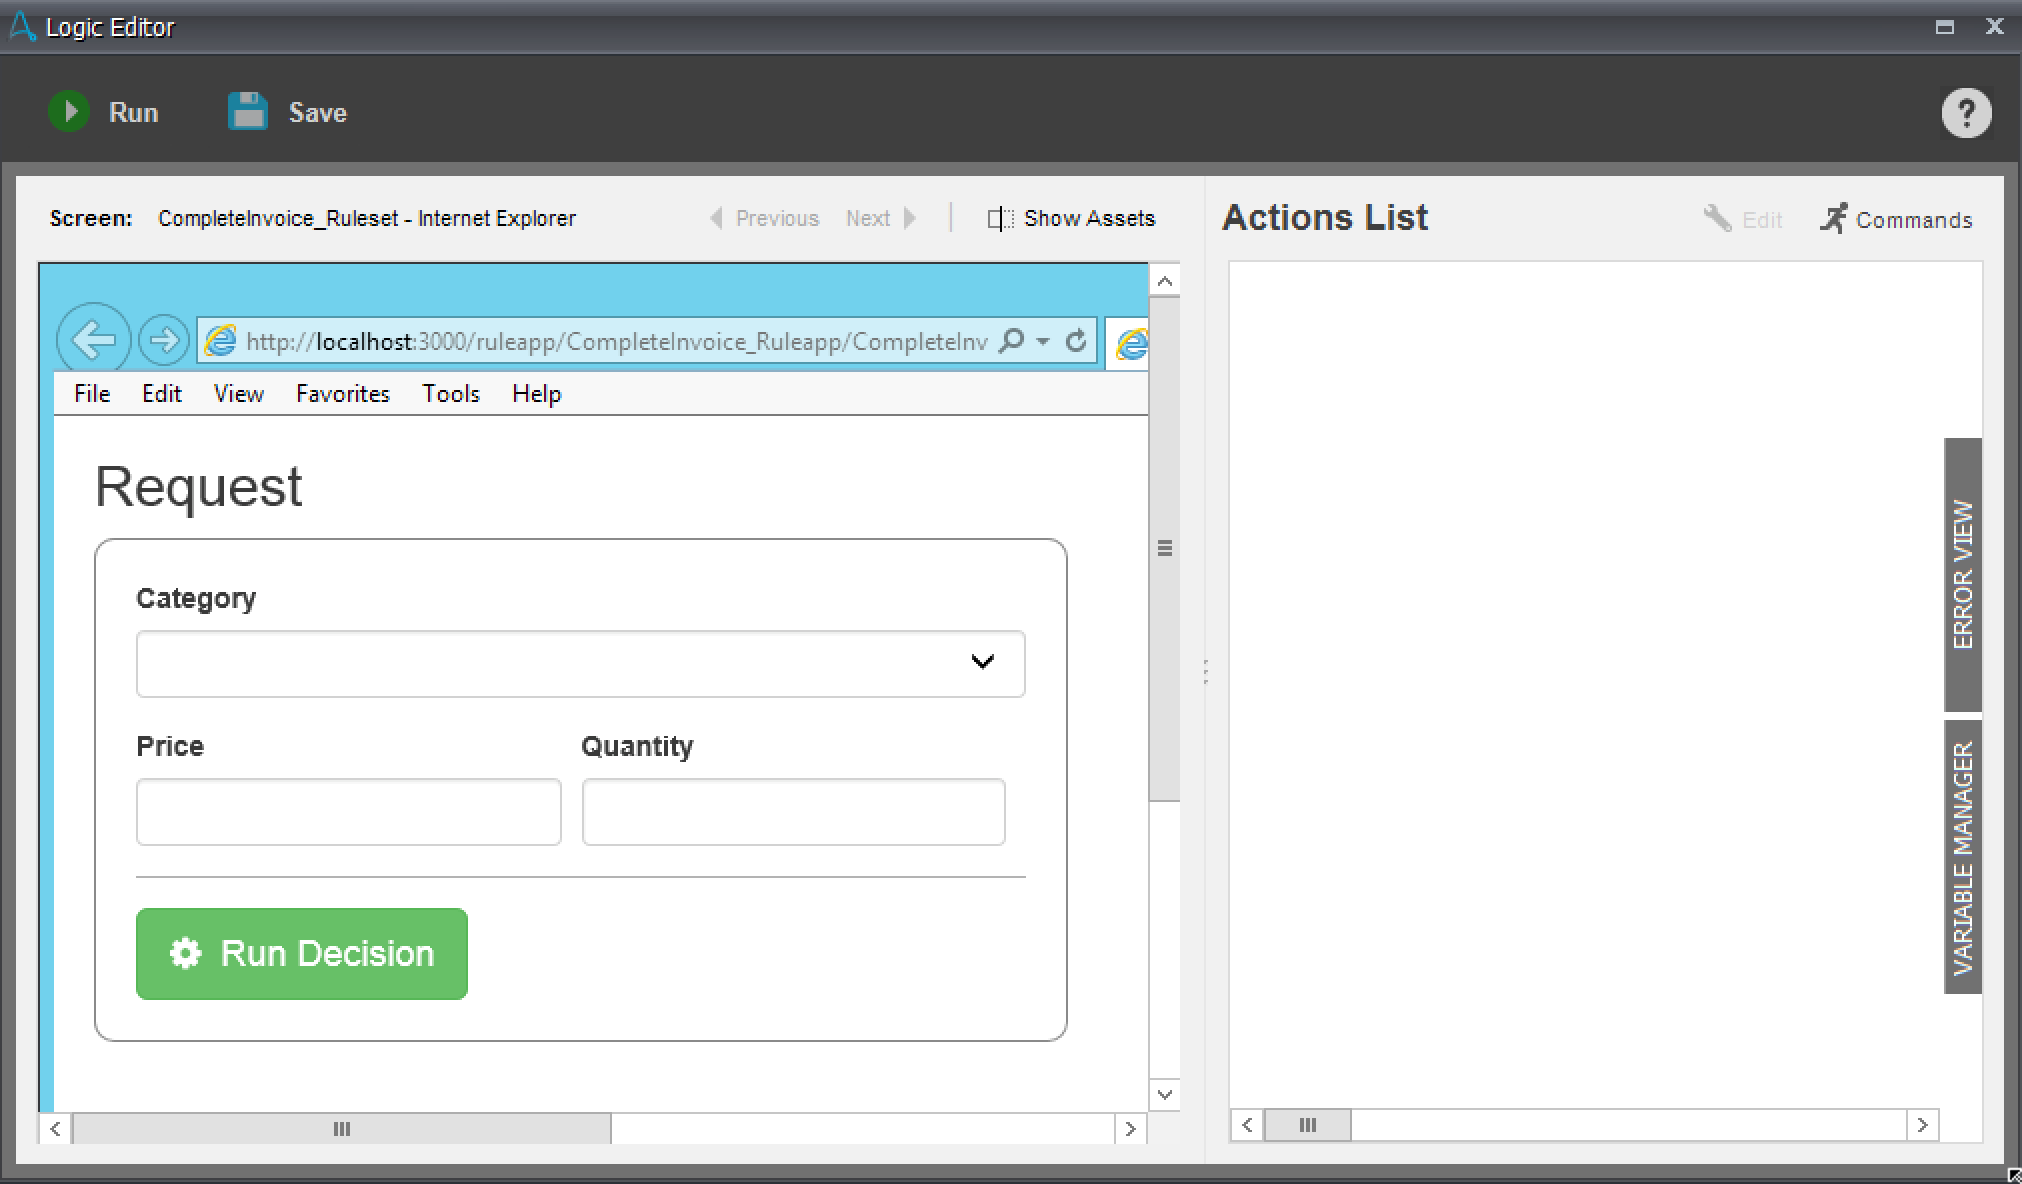
On the right hand side, expand the Variable Manager panel
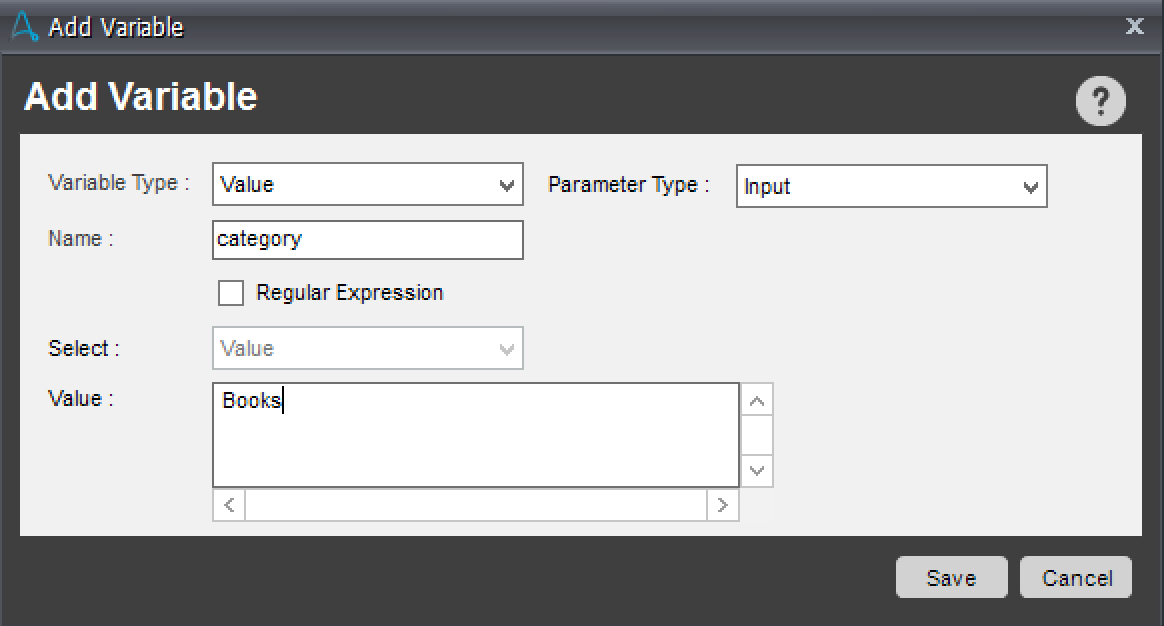
Create an input variable corresponding to each input field of the decision form (Request panel):
- Click 'Add'
- Give a name to the variable, similar to the field name
- Select 'Input' as the Parameter Type
- Enter a default Value in the value field, to be used for testing
- Repeat for each field in the 'Request' panel
Create an output variable corresponding for each output field of the decision form (Response panel):
- Click 'Add'
- Give a name to the variable, similar to the field name
- Select 'Output' as the Parameter Type
- Enter a default Value in the value field, to be used for testing
- Repeat for each field in the 'Response' panel
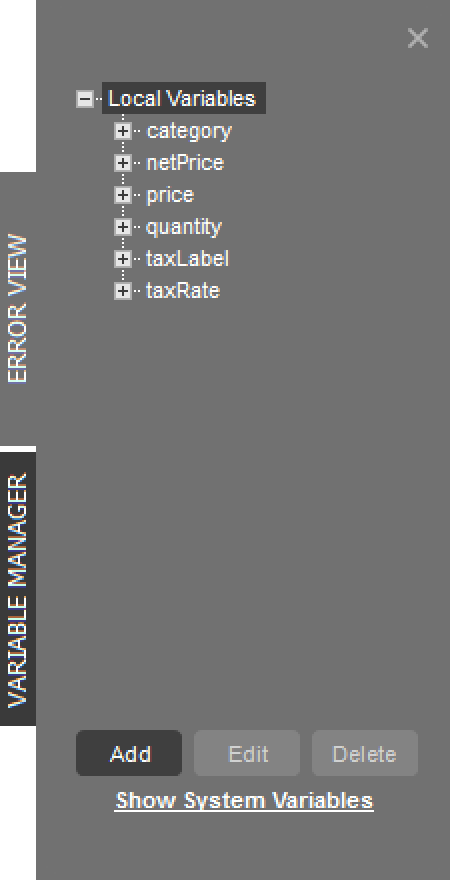
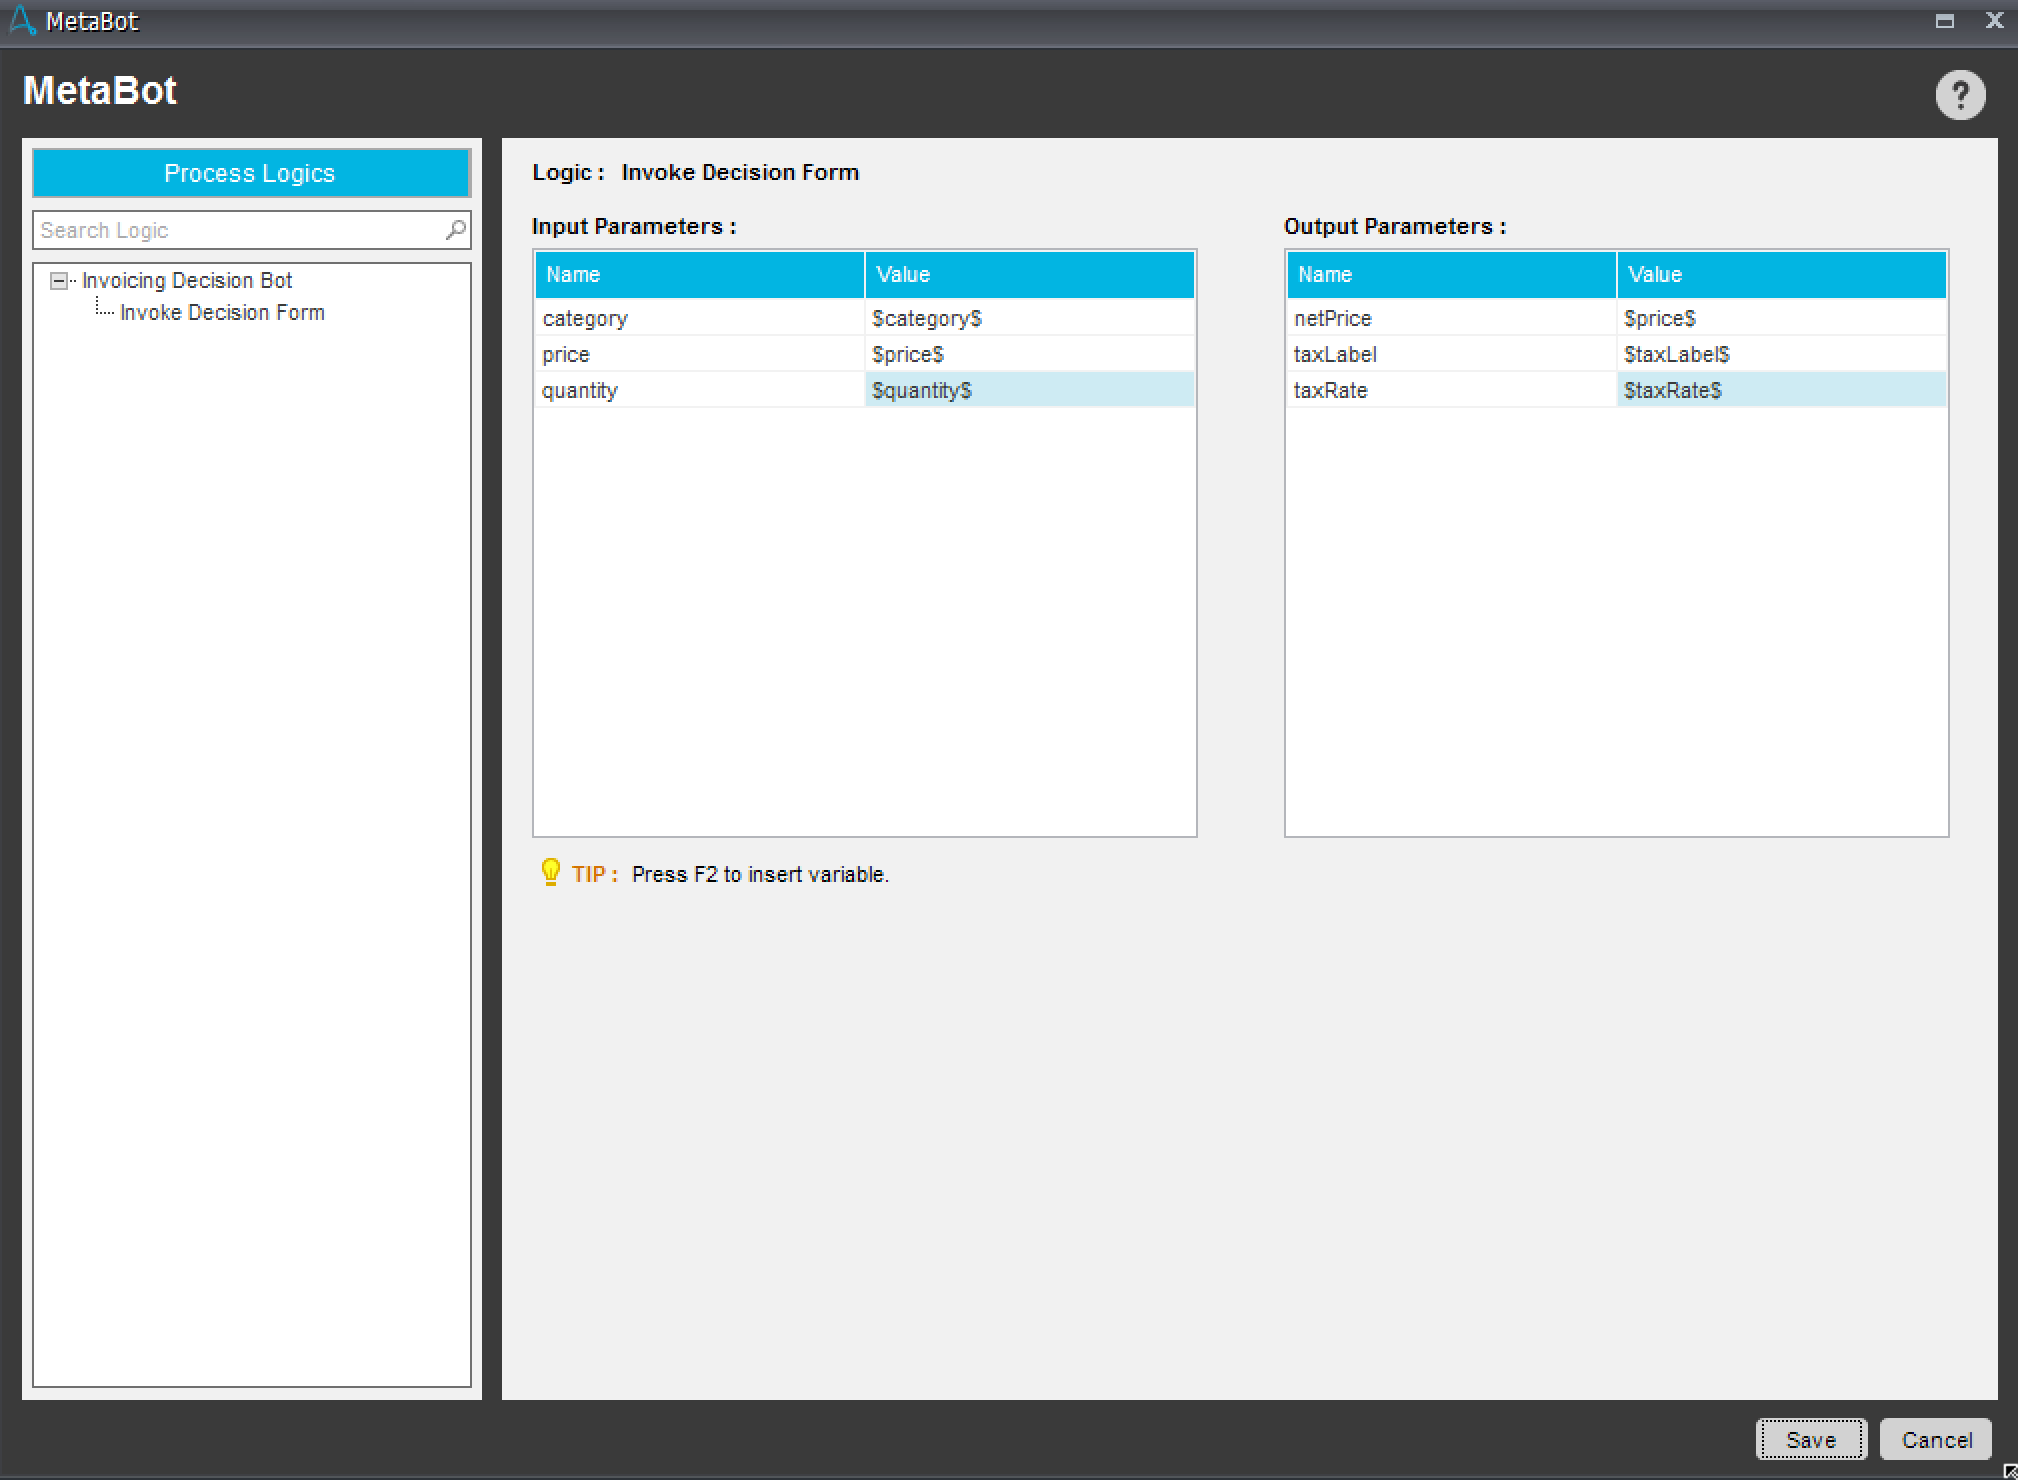
In our example, you will end up with 6 variables:
You must now create an input action for each input field of the Decision Service and fill it from a corresponding input variable.
-
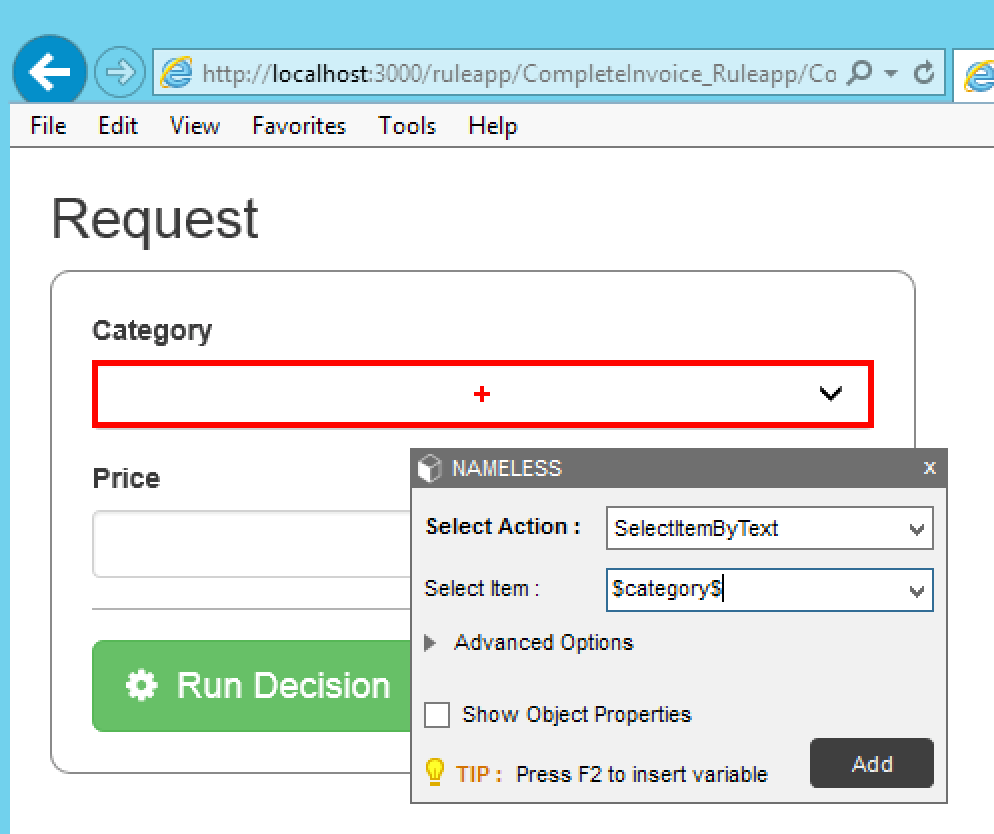
Map a Select (combo box):
- Click the Select element. This will highlight it in red.
- Set the Select Action field to SelectItemByText
- Set the Select Item field to the variable you want to map (you can hit F2 to see the list of available variables)
- Click Add
-
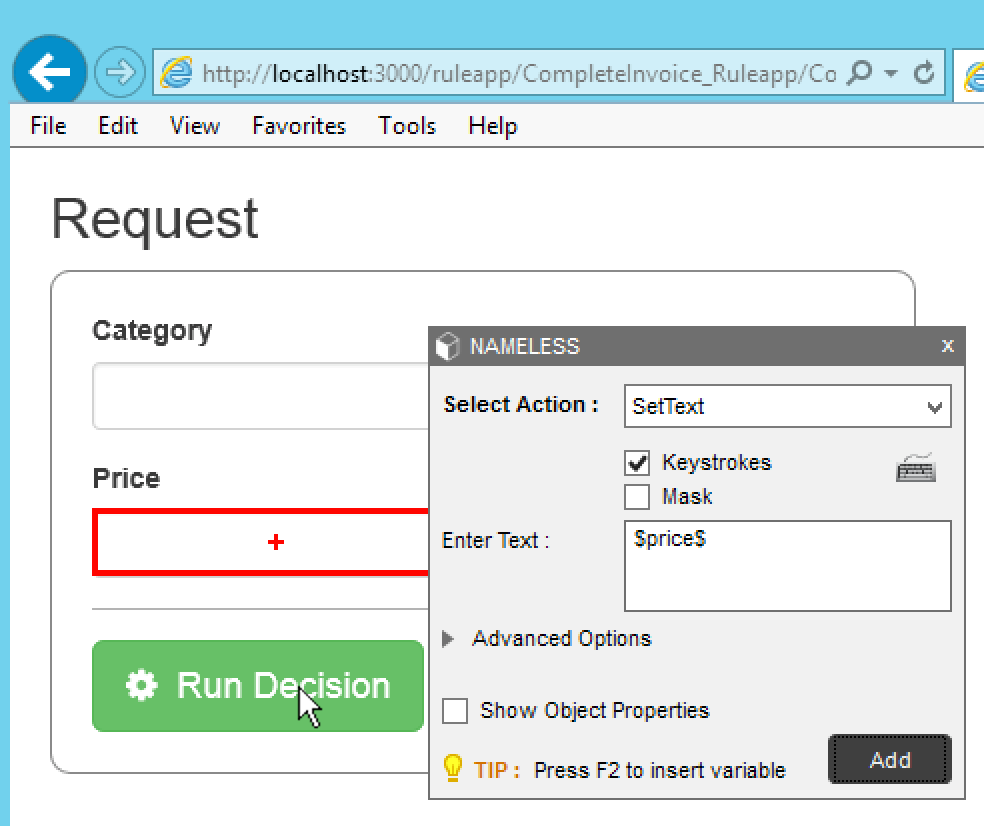
Map a Text field (input type="text"):
- Click the text field. This will highlight it in red.
- Set the Select Action field to SetText
- Check the Keystrokes checkbox - this is mandatory for odm-decision-forms
- Set the 'Enter Text' field to the variable you want to map (you can hit F2 to see the list of available variables)
- Click Add
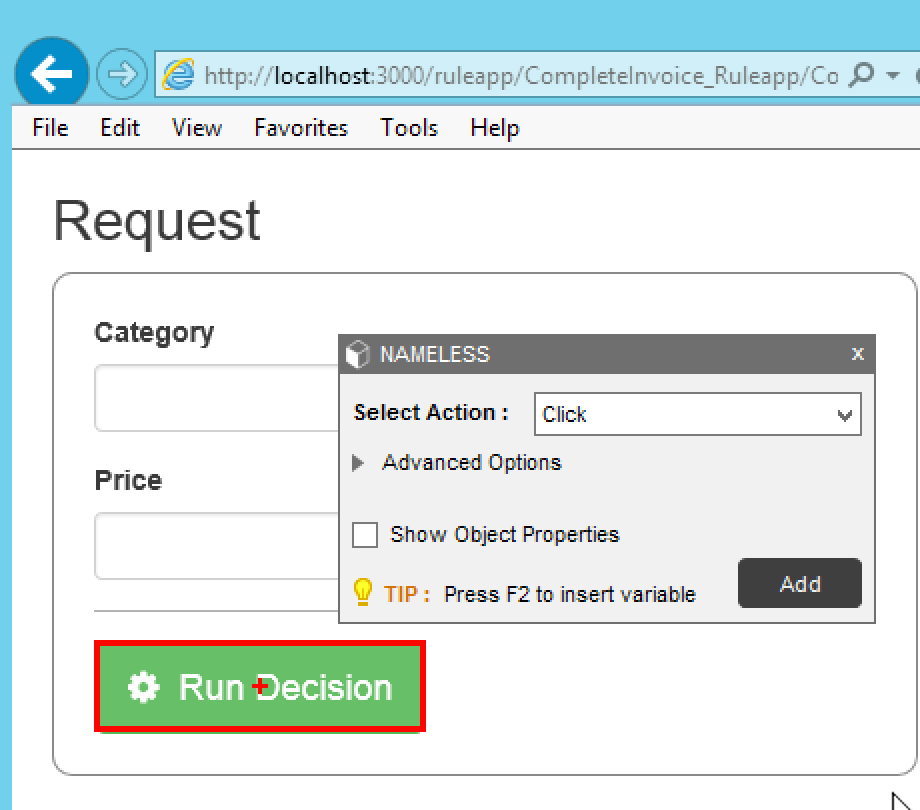
You can then ask the MetaBot to execute the decision:
- Click the Run Decision button. This will highlight it in red
- Set the 'Select Action' field to Click
- Click Add
You must map each output field of the Decision Service to a corresponding output variable.
-
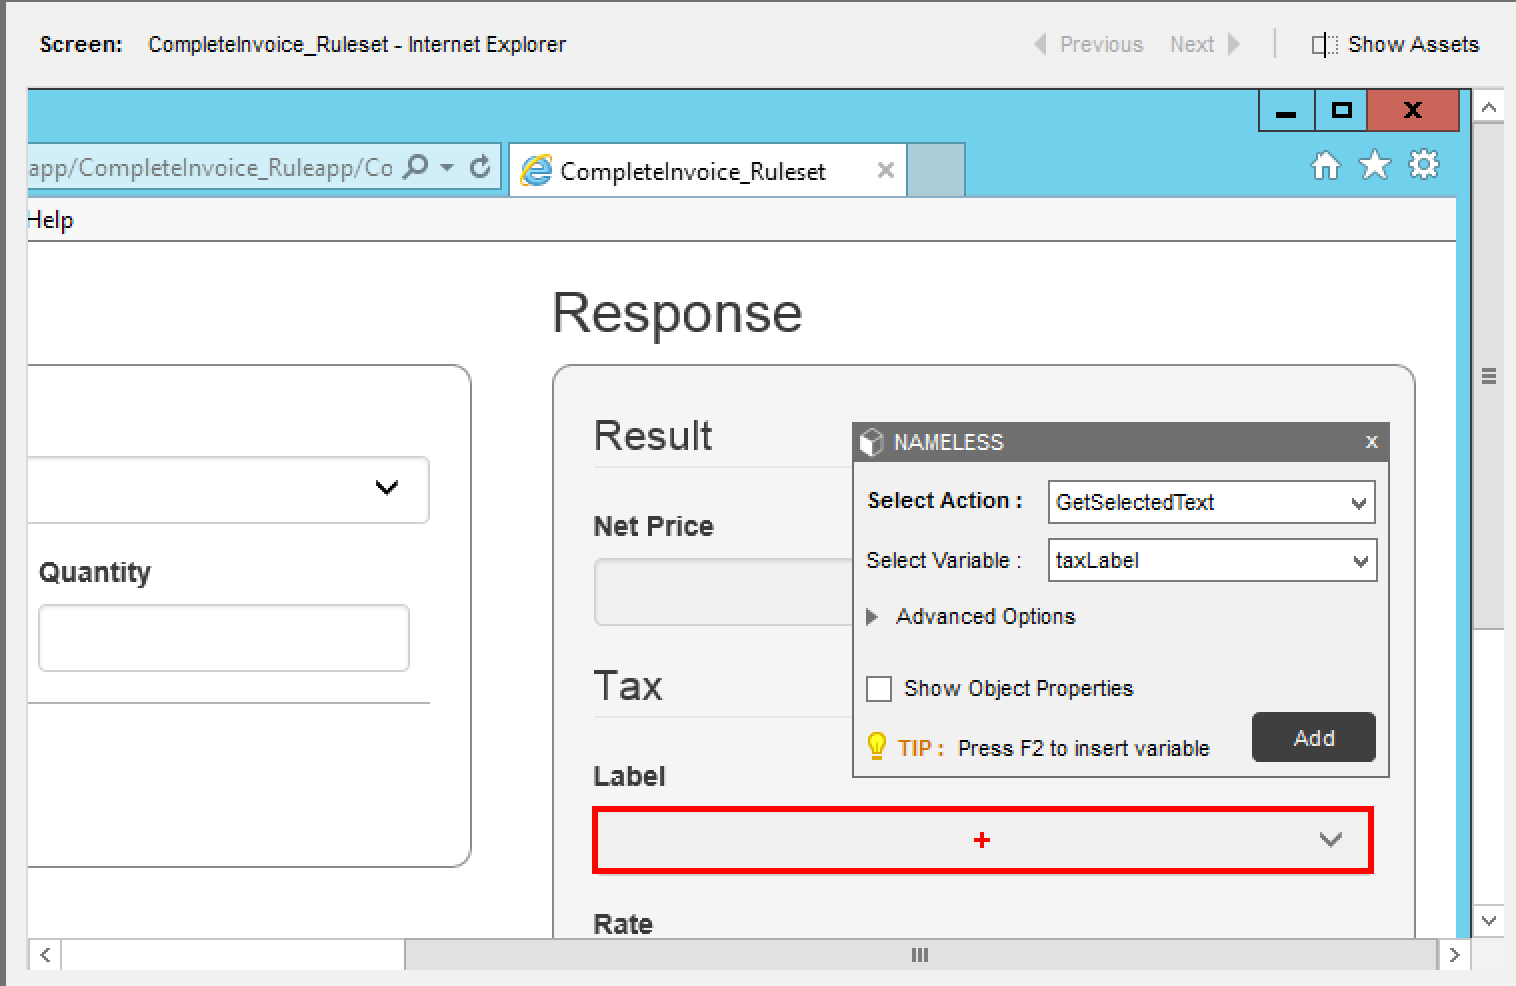
Map a Select (combo box):
- Click the Select. This will highlight it in red
- Set the Select Action field to GetSelectedText
- Set the Select Variable field to the variable you want to map (you can hit F2 to see the list of available variables)
- Click Add
-
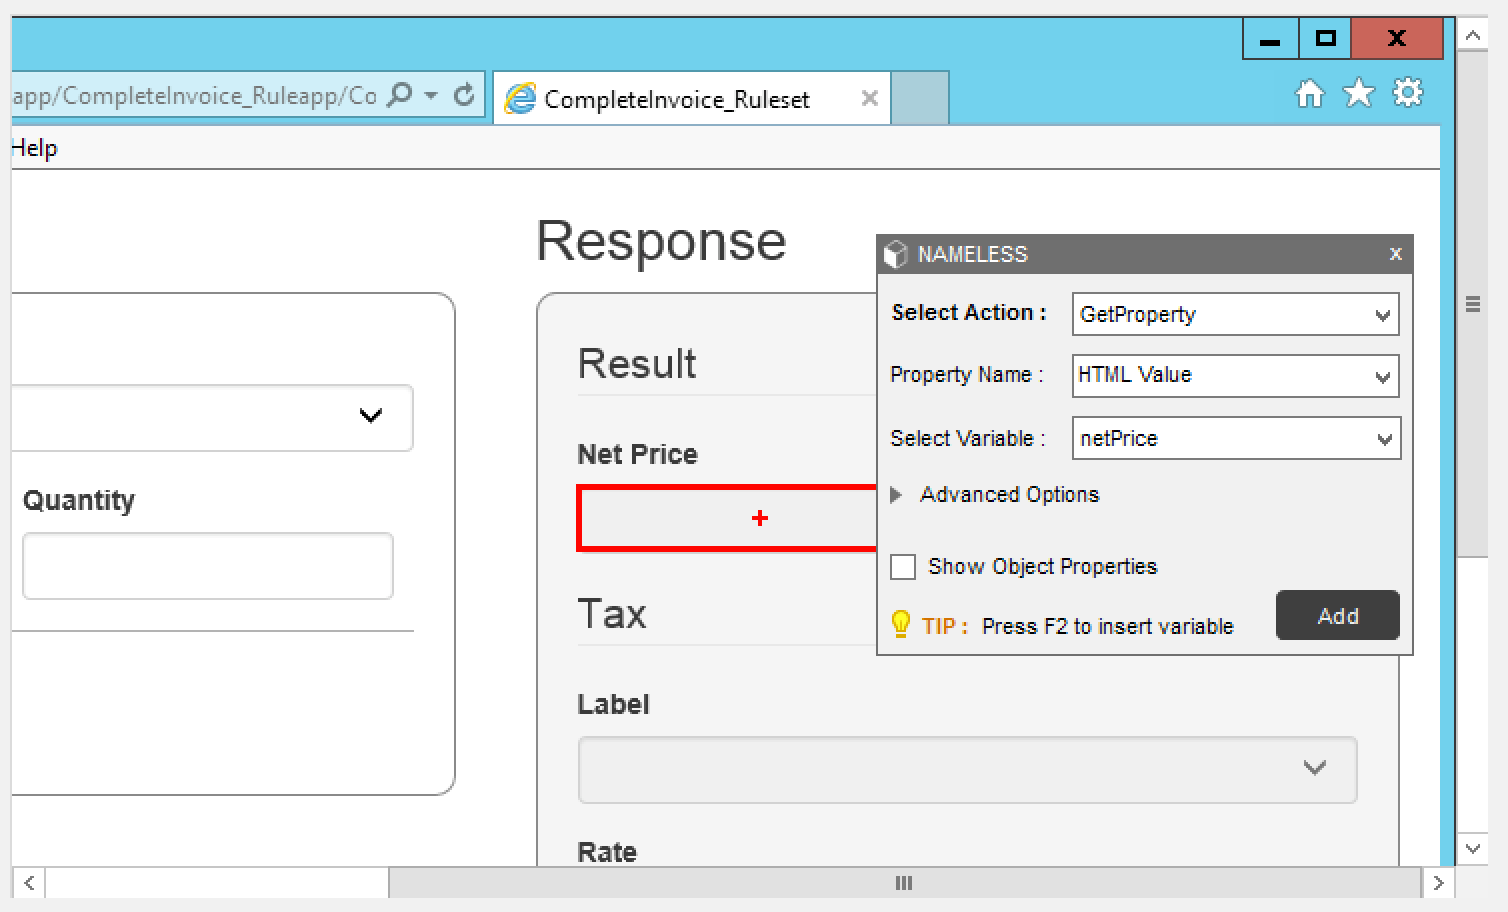
Map a Text field (input type="text"):
- Click in the text field. This will highlight it in red
- Set the Select Action field to Get Property
- Set the Property Name field to HTML Value
- Set the Select Variable field to the variable you want to map (you can hit F2 to see the list of available variables)
- Click Add
Once the variables are all created and mapped to input / output fields, you should see an 'Action List' similar to this:
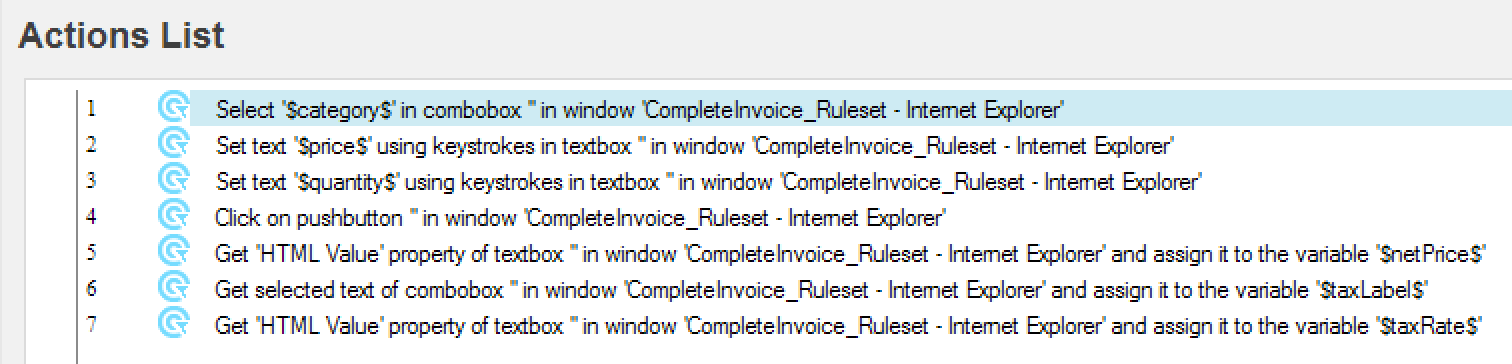
Save your logic (Save Button) and give it a name. Eg: Invoicing Decision Service.
Now that the ODM Decision Service execution is encapsulated in a MetaBot, it is very easy to call that MetaBot from an RPA task.
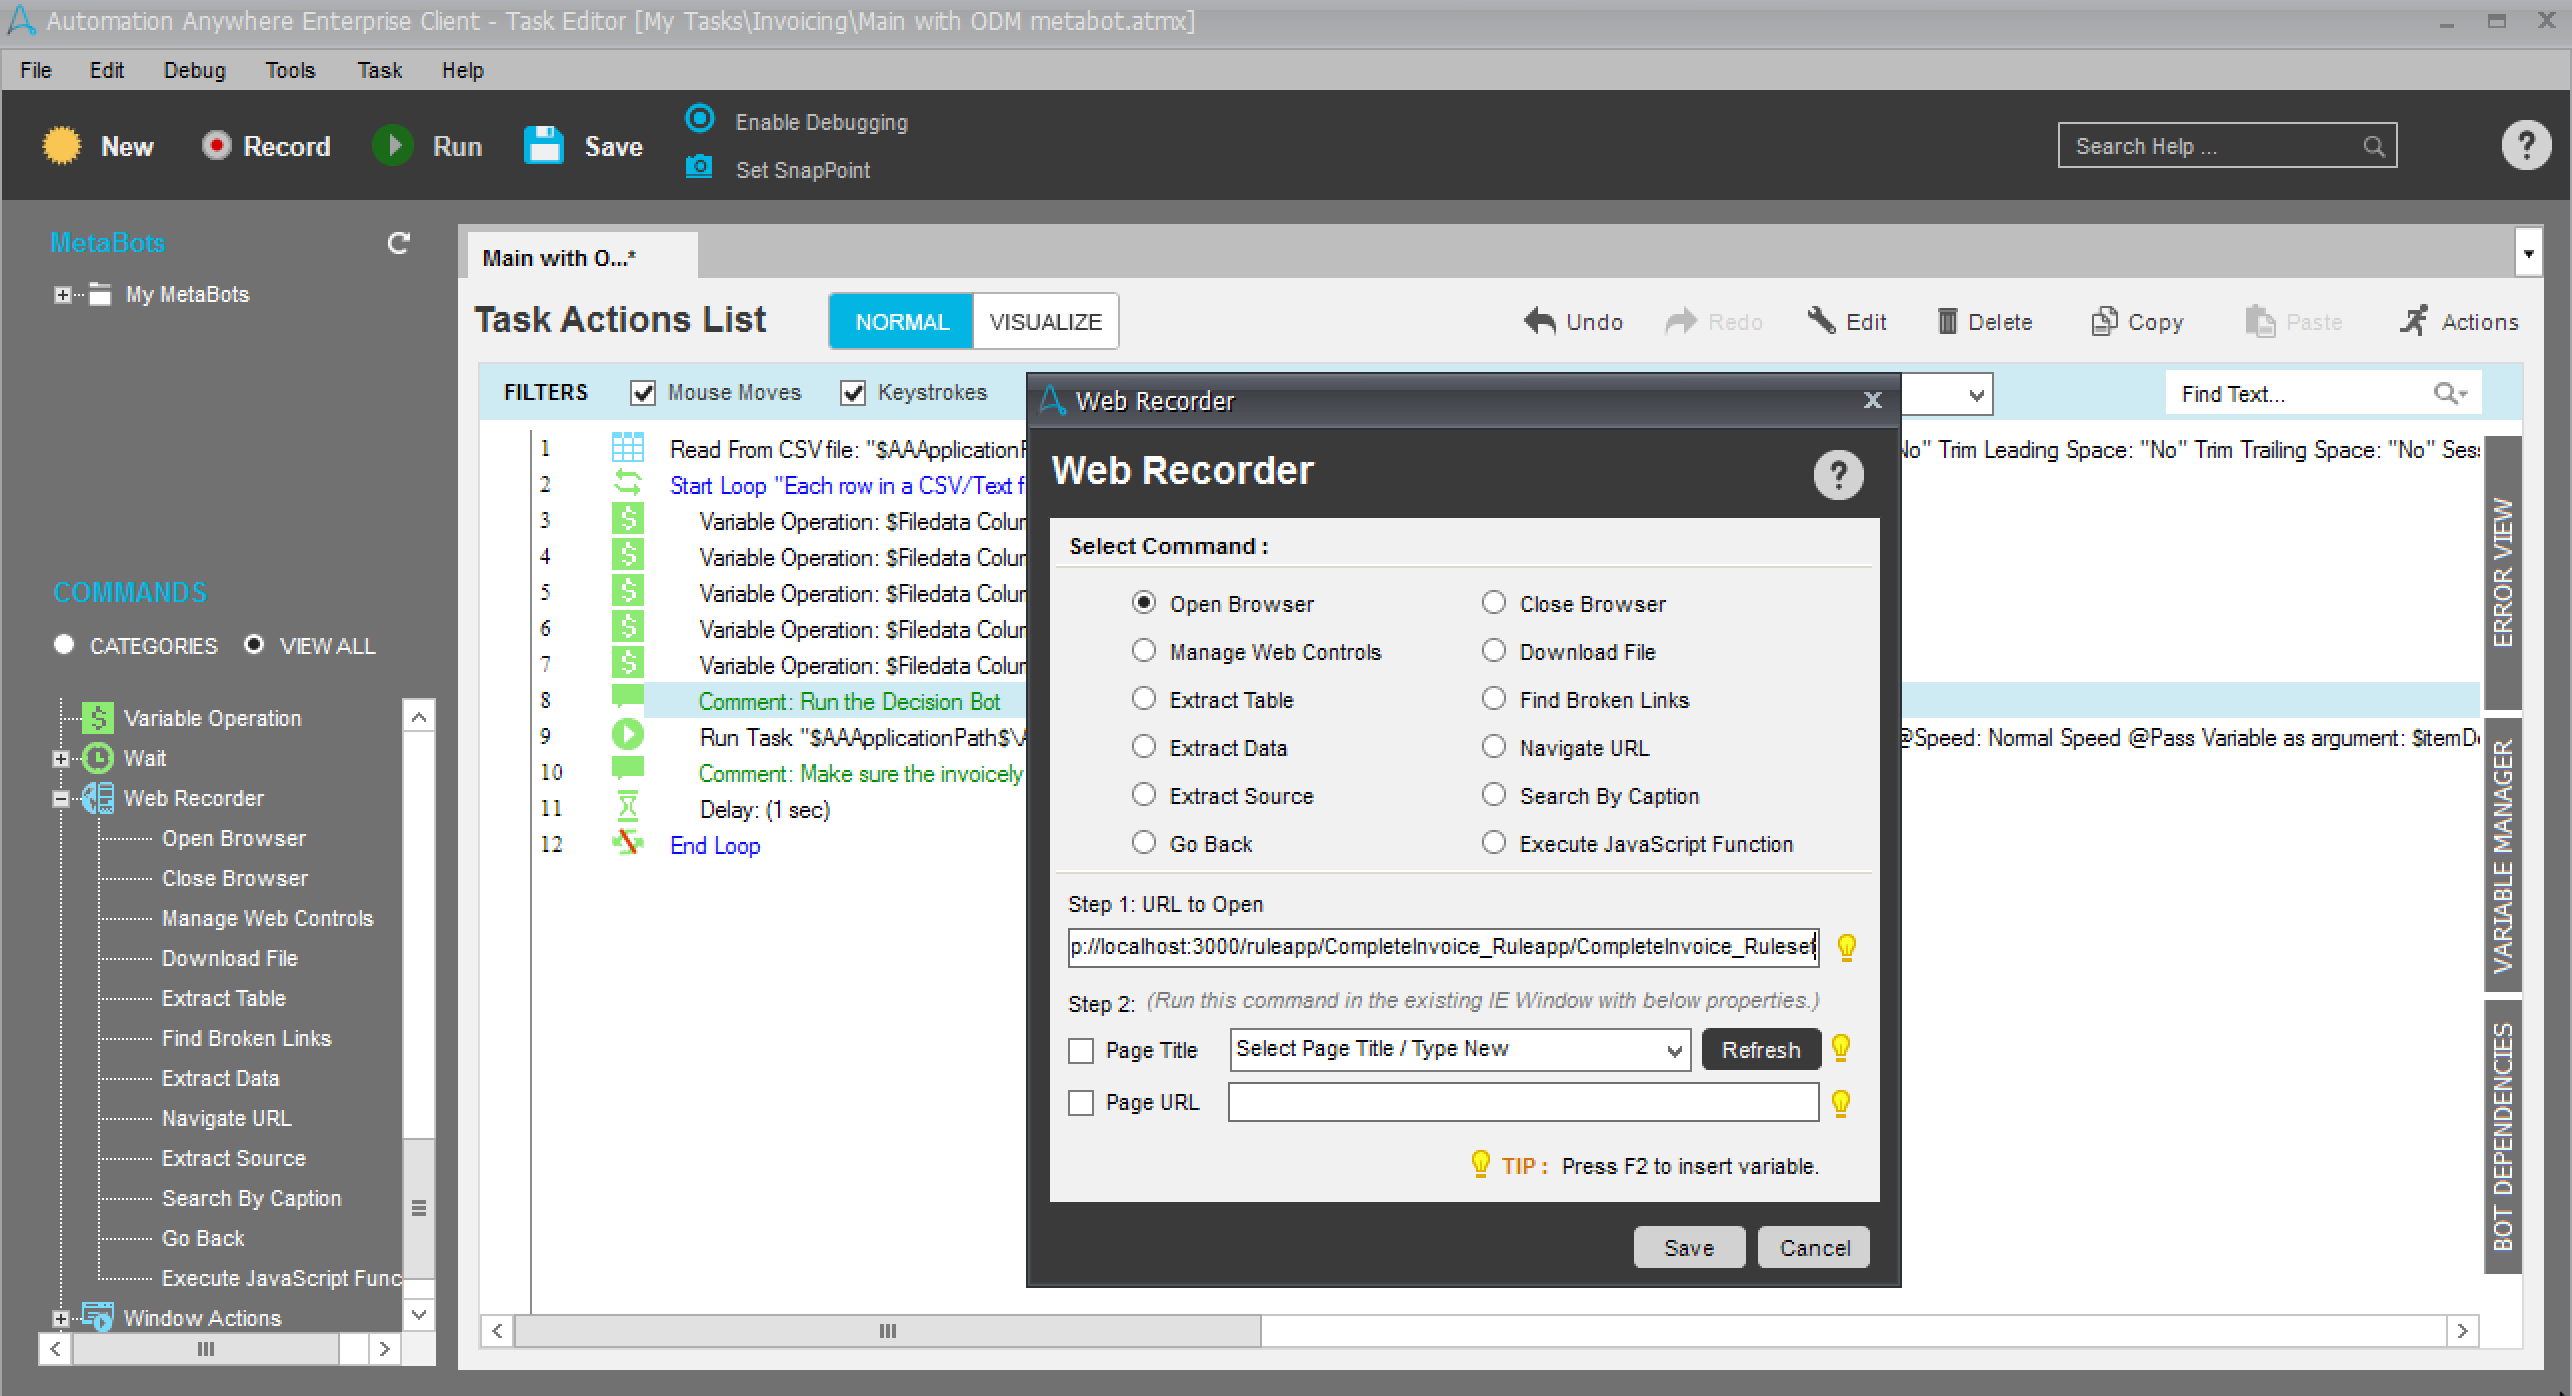
From your Main task, you first need to open the browser to the correct URL: drag and drop the Web Recorder / Open Browser command in your task, and enter the Decision Form URL.
Now, drag and drop your Decision Bot from the MetaBots list, and map the variables of your main task to the ones of your metabot.
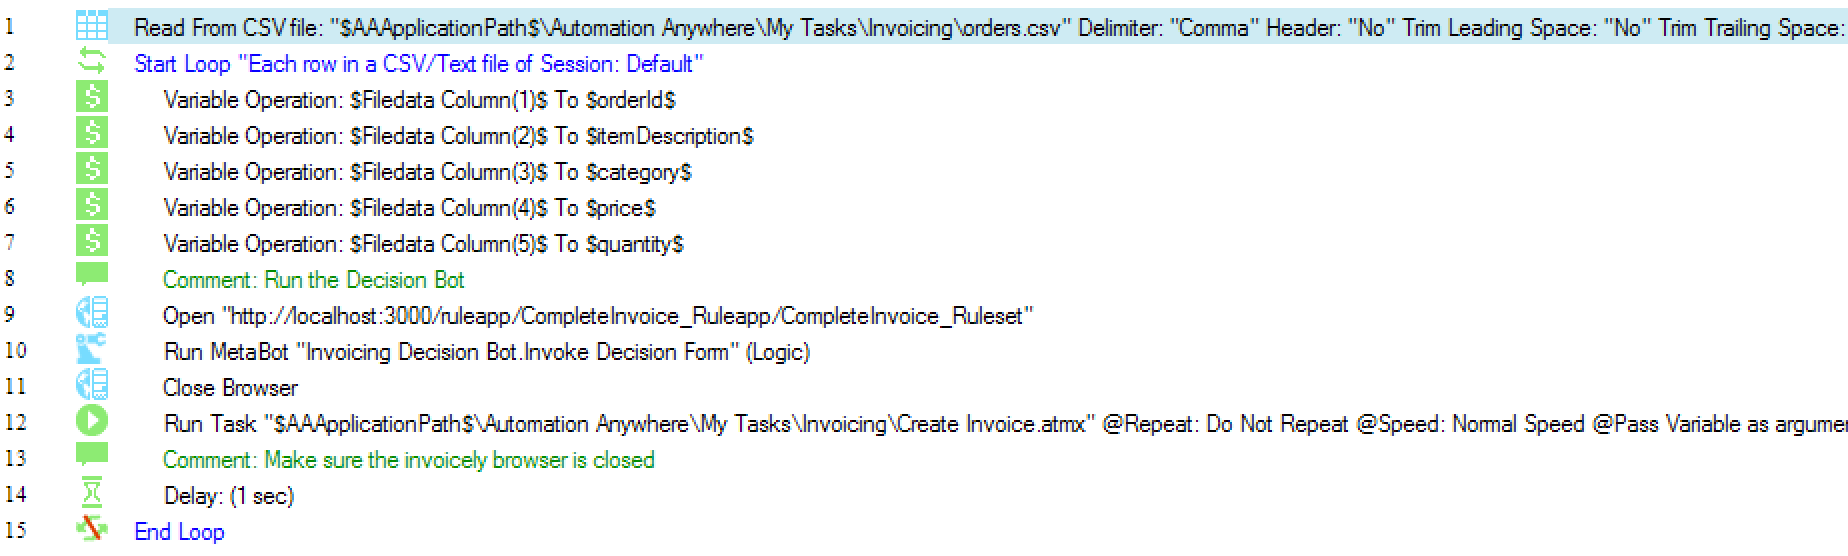
Your main task should look like this:
For issues relating to this sample, please use the GitHub issue tracker. We welcome contributions following our guidelines.
The source files found in this project are licensed under the Apache License 2.0.
© Copyright IBM Corporation 2017.