The goal of this project is to generate visuals based on music rhythm.
It can be decomposed in two parts:
- The graphic part, which is based on the Gray-Scott reaction-diffusion model is responsible for creating those atypical visuals.
- The audio part extracts frequency informations from the music and uses it to control the reaction-diffusion settings in real-time.
A documentation on how the project was made, is currently beeing done and will soon arrive.

You can find a release containing the application zipped, pre-compiled and ready to use.
It is also possible to import the project in visual studio as a "Cmake Solution".
Make sure CMake, Git and GCC are installed by typing sudo apt install cmake git g++
To install the required dependencies, open a terminal and type:
sudo apt install libsoil-dev libglm-dev libglew-dev libglfw3-dev libxinerama-dev libxcursor-dev libxi-dev libfreetype-dev libgl1-mesa-dev xorg-dev freeglut3-dev libasound2-dev
To install, build and start the application, you simply have to clone this project and execute the bash script with ./start.sh.
This will create a build directory, compile the source code and launch the newly created executable.
Unfortunately, the use of OpenGl has been deprecated by MacOs, making it impossible (without re-writing parts of the program) to run the application on this system.
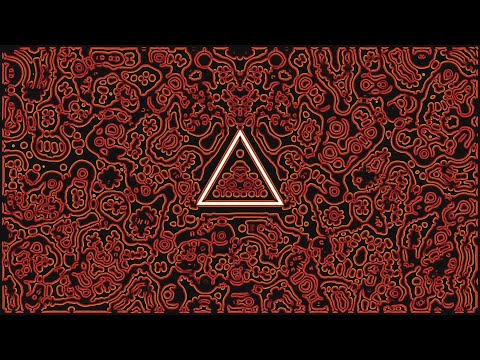
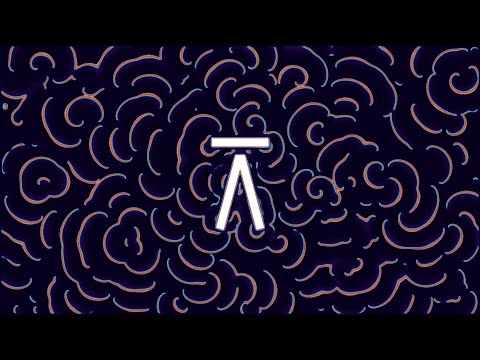
The Gray-Scott reaction diffusion model is used to simulate the evolution of two chemicals on a 2D grid, reacting and diffusing over time.
To visualize what is happening, a color gradient is applied to each pixel, depending on their chemicals B concentration.
At the beginning of the application the whole grid is filled with chemicals A (shown in a dark blue color), except for the circle in the middle of the screen (in white) which is constantly adding new chemicals B to the simulation, every new frame.
The equation is based on those four parameters wich can be tweaked with the user interface in the "Reaction diffusion" tab:
- diffusion rate A
- diffusion rate B
- feed rate
- kill rate
It may be a lot to start with. What I advise is to set diffusion rate A to 1.0, the diffusion rate B to 0.5 and simply tweak the feed and kill rate to understand how the changes affects the simulation.
Even tough those four values can create a variety of patterns, things can be pushed further with the use of noises.
Initially, every parameter type is set to "number", applying the same value to the whole simulation.
This type can be changed to "voronoi" or "perlin noise" which are more complex types, allowing value change depending on its position on the screen.
Noises have the following properties:
- Base value : the minimum value applied to the whole simulation (exactly the same thing than the "number" type allowed to do).
- Strength factor : the value added when the area is in the white area of the noise.
- Scale : the lower the scale, the bigger the noise pattern will be.
- Offset : two values to move the noise along the X and Y axis.
- Scale moving & Time multiplier : if the scale moving is ticked, the scale will change over time. The speed can be controlled with the time multiplier value.
To play audio in the application, you will need to select a WAV file using the filebrowser (located in the audio player section). There are many sites to convert mp3 (or other format) audio file to WAV. I would recommand convertio.
If during file playback, the audio becomes absolute noises, pause the playback a few seconds and resume it.
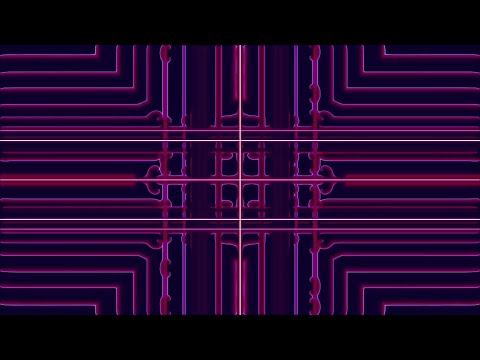
The graphic displayed, shows the real-time audio frequencies going from 0 to 8000 Hertz.
Hooks are used to link audio informations with reaction diffusion properties or even shapes.
The three things a hook needs are:
- an input
- an output
- an operation
The input comes from the audio. The three available ones are:
- the bass : sensitive to low frequencies sound (from 0 to 80 Hertz roughly)
- the snare : sensitive to higher frequencies (from 2000 to 8000 Hertz roughly)
- the lead : any sound that has a high variation and that is not included by the bass or snare
It is really hard to make a perfect audio detection algorithm that works for any kind of music.
This one was conceived mostly for techno music, but it was tested with a large variety of music (going from french music to post-rock / metal, along with rap)
The output is what's going to be affected by the audio variations.
It can be a reaction diffusion property (for noise type parameters, a property like scale or offset must be selected).
It may also be a shape property such as its size, border or angle.
Finally, the operation describes how the output will be affected.
An operation uses an initial value (the value set when there is no audio variation).
It needs a calculation value (the value that will be added or subtracted from the initial value depending on the intensity of the song variation)
And the last thing is the mode. There are three existing modes (addition, subtraction, and boolean).
The boolean mode only switches from the initial value to the calculation value when the song variation is important.
To avoid having to remember every numbers and parameters of the simulation there is a preset system.
A preset will save every settings of the simulation including : reaction diffusion properties, shapes, hooks and gradient
Each preset is saved under an XML type file in the "presets" folder located at the root of the project.
The load of existing presets is only done at the application startup.
Thanks to the agreement of those wonderful artists, here are some demonstrations of the project.