Phoenix provides MLOps and LLMOps insights at lightning speed with zero-config observability. Phoenix provides a notebook-first experience for monitoring your models and LLM Applications by providing:
- LLM Traces - Trace through the execution of your LLM Application to understand the internals of your LLM Application and to troubleshoot problems related to things like retrieval and tool execution.
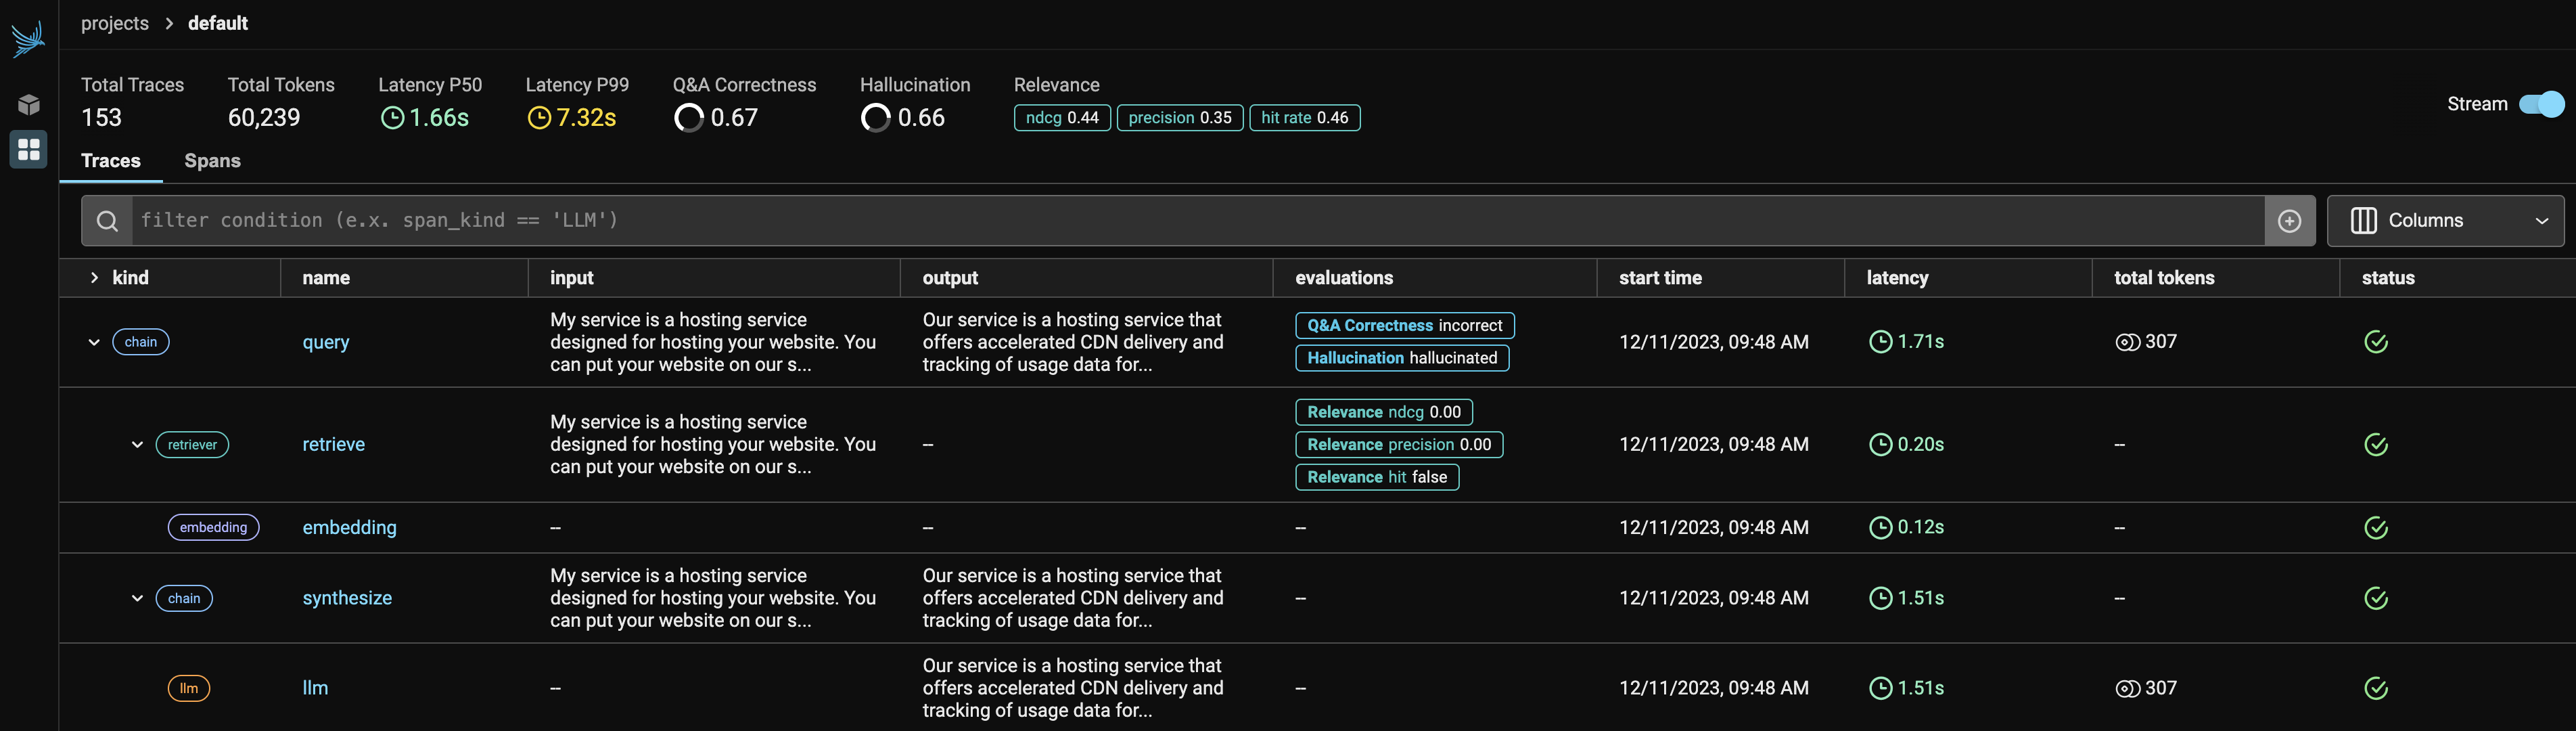
- LLM Evals - Leverage the power of large language models to evaluate your generative model or application's relevance, toxicity, and more. Embedding Analysis - Explore embedding point-clouds and identify clusters of high drift and performance degradation.
- RAG Analysis - Visualize your generative application's search and retrieval process to identify problems and improve your RAG pipeline. Structured Data Analysis - Statistically analyze your structured data by performing A/B analysis, temporal drift analysis, and more.

Table of contents:
You have a few options for setting up this project. The easiest way to get started is GitHub Codespaces, since it will setup all the tools for you, but you can also set it up locally if desired.
You can run this repo virtually by using GitHub Codespaces, which will open a web-based VS Code in your browser:

Once the Codespace opens (this may take several minutes), open a terminal window in the Codespace.
A related option is VS Code Dev Containers, which will open the project in your local VS Code using the Dev Containers extension:
- Start Docker Desktop (install it if not already installed)
- Open the project:
- In the VS Code window that opens, once the project files show up (this may take several minutes), open a terminal window.

-
Install the required tools:
- Azure Developer CLI
- Python 3.9, 3.10, or 3.11 (Only necessary if you want to enable authentication)
-
Create a new folder and switch to it in the terminal.
-
Run this command to download the project code:
azd init -t Arize-ai/phoenix-on-azure
Note: this command will initialize a git repository, so you do not need to clone this repository.
-
Create a Python virtual environment and install the required packages:
pip install -r requirements.txt
-
Open a terminal window inside the project folder.
Follow these steps to deploy Phoenix to Azure:
-
Login to your Azure account:
azd auth login
-
Create a new azd environment:
azd env new
Enter a name that will be used for the resource group. This will create a new folder in the
.azurefolder, and set it as the active environment for any calls toazdgoing forward. -
Run this command to provision all the resources:
If you want your data to be persisted between deployments, you can set the
PERSISTENCEenvironment variable totruebefore running theprovisioncommand.azd config set alpha.resourceGroupDeployments on # azd env set PERSISTENCE true azd provision
This will create a new resource group, and create the Azure Container App and PostgreSQL Flexible server inside that group. It will use the
init.shandpost.shhooks to set up default secrets, and pass the necessary environment variables to the Azure Container App. -
Once the deployment is complete, you will see the URL for the Azure Container App in the output. You can open this URL in your browser to see the Phoenix web app.
Phoenix is an external project and is not affiliated with Microsoft.