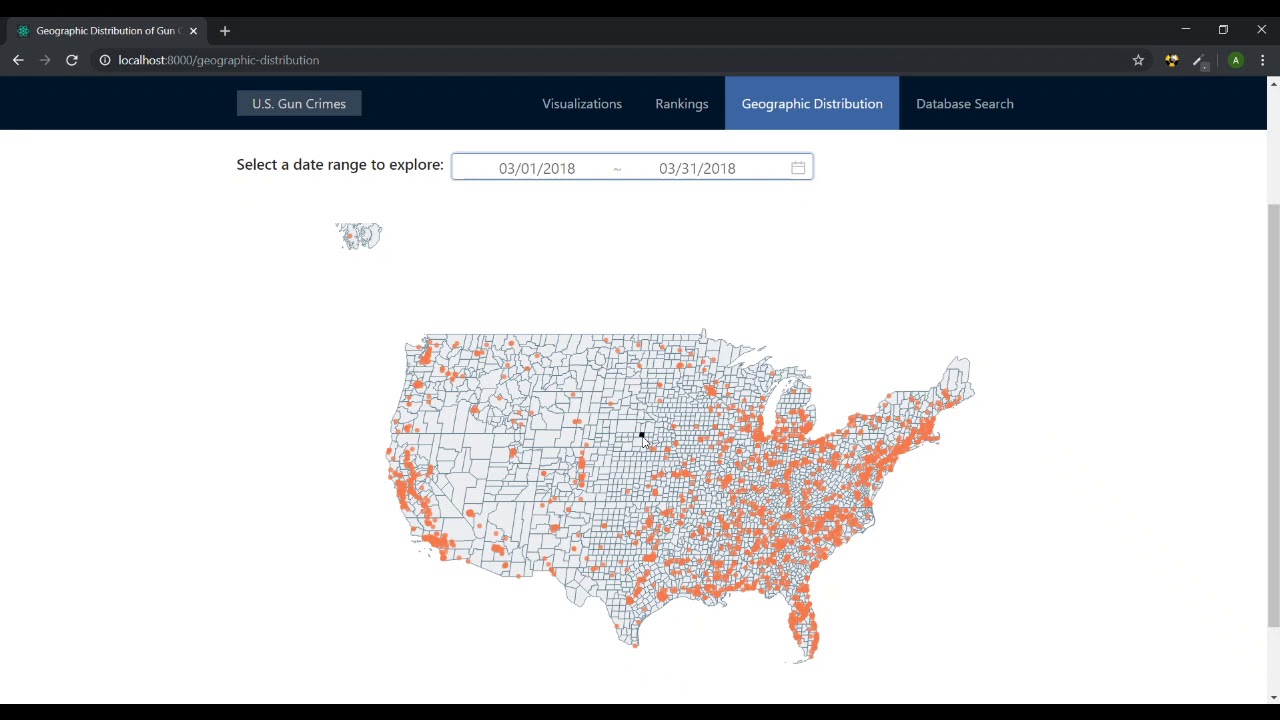
A web app that informs users about gun crime trends in the U.S., using over 230,000 incident records scraped from the Gun Violence Archive for the period of 2013–2018. Data source.
Note: This was developed as a course project at the University of Florida. For our class, we were required by the instructor to use the Oracle database hosted at our university, which is behind a VPN. This has two unfortunate consequences:
-
The app cannot be hosted publicly (e.g., on Heroku) unless the tables are migrated to a different database.
-
You will not see any data when you run the app. You can, however, explore the frontend itself and our backend logic.
- Demo Video
- Getting Started: Running the App
- Database Schema Overview
- How the Data Was Obtained
- Contribution Guidelines
- Command Cheat Sheet
- Sources and Attributions
Here's a YouTube video walking through the app on a local environment:
-
Clone this repo using your preferred method (
httpsorssh). -
From the root project directory, run
yarn setup. This will install packages for all directories in succession (top-level, client, and server).
Note: I'd recommend temporarily disabling Windows Defender if you're on Windows. It can significantly slow down the speed of package managers like yarn, but you're obviously disabling it at your own risk.
- Run
yarn clientfrom the root project directory to launch the frontend. You can also runyarn devto launch both the frontend and the backend, but again, note that the backend will not work for you.
By default, the frontend runs on localhost:8000 and proxies the backend, which runs on localhost:3000.
See the Command Cheat Sheet for a list of available commands.
We'll need to use environment variables in both the frontend (e.g., for the Google Maps API key) and the backend (e.g., for our DB connection credentials). To avoid exposing sensitive information to the public, we'll introduce new variables via template files that will be checked in to Git. Whenever we add a new environment variable, we'll share its name (but not the value) via the template file. Never put sensitive information in the templates.
Follow these two steps:
-
In
client/, make a copy of theenv.templatefile and name it.env. -
In
server/, make a copy of theenv_emplatedirectory and name itenv.
Note: We decided not to use Google Maps, so the frontend environment template is currently empty.
-
Install the TSLint extension for VS Code (the non-deprecated version).
-
Install the Prettier - Code formatter extension for VS Code.
-
Install the Path Autocomplete extension for VS Code.
Below are the SQL commands that were used to create our tables in Oracle:
CREATE TABLE Incident
(
    id INT NOT NULL,
    i_date DATE NOT NULL,
    n_killed INT NOT NULL, CHECK (n_killed >= 0),
    n_injured INT NOT NULL, CHECK (n_injured >= 0),
    n_guns_involved INT, CHECK (n_guns_involved > 0),
    notes VARCHAR2(260),
    latitude NUMBER NOT NULL,
    longitude NUMBER NOT NULL,
    source_url VARCHAR2(255),
    PRIMARY KEY(id),
    FOREIGN KEY(latitude, longitude) REFERENCES Location(latitude, longitude)
);

CREATE TABLE IncidentCharacteristic
(
    incident_id INT NOT NULL,
    incident_characteristic VARCHAR(100) NOT NULL,
    PRIMARY KEY(incident_characteristic, incident_id),
    FOREIGN KEY(incident_id) REFERENCES Incident(id)
);

CREATE TABLE Location
(
    latitude NUMBER NOT NULL,
    longitude NUMBER NOT NULL,
    city_or_county VARCHAR(50) NOT NULL,
    state VARCHAR(20) NOT NULL,
    state_house_district INT,
    state_senate_district INT,
    PRIMARY KEY(latitude, longitude)
);

CREATE TABLE Participant
(
    id INT NOT NULL,
    name VARCHAR(150),
    age INT, CHECK (age >= 0 AND age <= 150),
    gender CHAR(1), CHECK(gender='M' OR gender = 'F'),
    type VARCHAR(15), CHECK(type='Victim' OR type= 'Subject-Suspect'),
    relationship VARCHAR(41),
    status VARCHAR(27),
    PRIMARY KEY(id),
    incident_id INT NOT NULL,
    FOREIGN KEY(incident_id) REFERENCES Incident(id)
);

CREATE TABLE Gun
(
    id INT NOT NULL,
    incident_id INT NOT NULL,
    type VARCHAR(15),
    stolen NUMBER(1), CHECK (stolen = 0 OR stolen = 1),
    PRIMARY KEY(id),
    FOREIGN KEY(incident_id) REFERENCES Incident(id)
);

CREATE TABLE StatePopulation
(
    state VARCHAR(20) NOT NULL,
    year NUMBER(4) NOT NULL, CHECK(year >= 2013 AND year <= 2018),
    population NUMBER NOT NULL, CHECK(population > 0),
    PRIMARY KEY(state, year)
);Our app uses data from the gun-violence-data repository, which provides a single CSV of 230,000+ gun crime incidents scraped from the Gun Violence Archive for the period of 2013–2018.
Unfortunately, much of the data had formatting and quality issues that would've made it unusable for our database project. For example, many fields contained delimited values that needed to be extracted into individual rows:

In the data preprocessing stage of our project, we wrote a number of Python scripts that split this single CSV into individual, normalized CSVs for each entity. Below is an example for participants:

A supplemenary entity, StatePopulation, was introduced later in the project based on an additional data set from the U.S. Census Bureau for state populations. This is used to compare states based on deaths per capita.
After all of the CSVs were generated, we used Oracle SQL Developer's SQL*Loader utility to bulk-load the CSVs into our database. In total, there are 1.5 million tuples spread across the six tables above:

Note: This was originally written as a guide for the group. We are not accepting contributions. If you notice bugs or any other issues, though, please do let us know.
We're not going to enforce any strict rules since it's a course project. TSLint and Prettier will take care of automatically formatting our code for us (see VS Code Extensions above).
Assuming you installed the TSLint and Prettier extensions: Do Ctrl+Shift+P in VS Code to bring up the command palette. Type settings json, and select Preferences: Open Settings (JSON). Copy-paste the following code anywhere in the JSON block:
"editor.formatOnSave": false,
"[javascript]": {
    "editor.formatOnSave": true
},
"[typescript]": {
    "editor.formatOnSave": true
},
"[typescriptreact]": {
    "editor.formatOnSave": true
},
"prettier.jsxSingleQuote": false,
"prettier.singleQuote": true,
When you save any TypeScript file that has linting errors, VS Code will automatically reformat your code to fix those errors for you.
We're using the Git feature branch workflow. This means we won't be directly committing to master, except for small changes here and there that don't require group approval.
Whenever you want to contribute a new feature or begin a new iteration of work, run the following commands:
git checkout master
git pull origin master
git checkout -b feature-branch-name
When you're ready to integrate your new feature into the app, be sure to:
- Rebase against master
- Resolve any merge conflicts
- Push your feature branch
So, assuming you're on your feature branch, run these commands:
git fetch && git rebase origin/master
- resolve merge conflicts, if any -
git push
Finally, make a pull request to merge your feature branch into master.
-
Run
yarn setupfrom the root directory to install all packages (root + client + server). -
Run
yarn clientfrom the root directory to launch the frontend (client). -
Run
yarn serverfrom the root directory to launch the backend (server). -
Run
yarn devfrom the root directory to run the client and server alongside each other, with hot reloading.