Lots of people have asked how to have many feature branches with Azure Data Factory and there are challenges with the single ADF Publish branch Data Factory utilizes. By default ADF uses the GitHub Flow for branching, but most of my customers want Git Flow for branching (feature branches with different deployments). See this link for Git Flow versus GitHub Flow.
![]()
ADF generates ARM templates in order to deploy your pipelines. There is only one ADF Publish branch which causes issues if you are wanting different features during development. Each feature needs to be tested/deployed seperately before merging to the collaboration branch where you typically publish. Plus, most organizations think they will be deploying Feature A before Feature B, but priorities sometimes change. External forces can cause Feature B to be scheduled for release before Feature A.

Note: When viewing screenshots it is best to right click on open in new tab.
- We will be creating a single Git Repo that will be shared by several different ADFs (all for the same set of pipelines). Each ADF will treat their branch as their collaboration branch which will create different folders under the adf_publish branch. Only the development braches will be linked to source control and the QA/Prod deployments will not be linked.

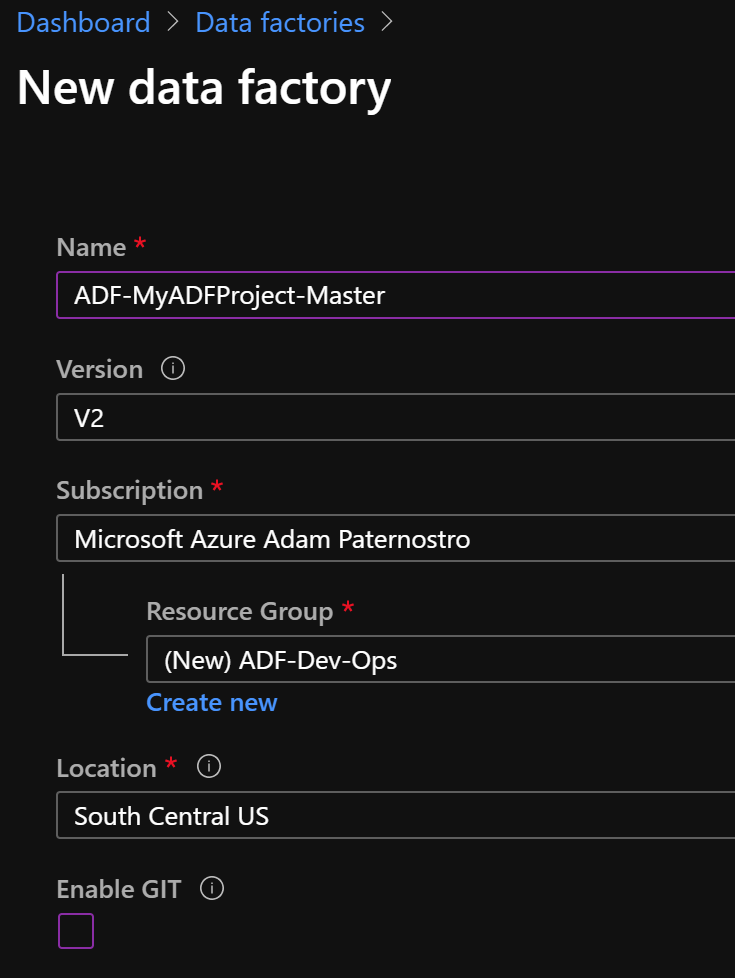
- In Azure create a resource group: ADF-Dev-Ops
- Create a Data Factory: ADF-MyADFProject-Master
- Click for Screenshot
- This will be our master data factory that will be used to Publish our Production data factory ARM templates.
- Developers will never code here
- You will replace ADF-MyADFProject with your real project name. Keep the "-Master" suffix to you can keep track of your resources.
- Create a Azure Dev Ops or GitHub project: MyADFProject
- Open the ADF (UI): ADF-MyADFProject-Master
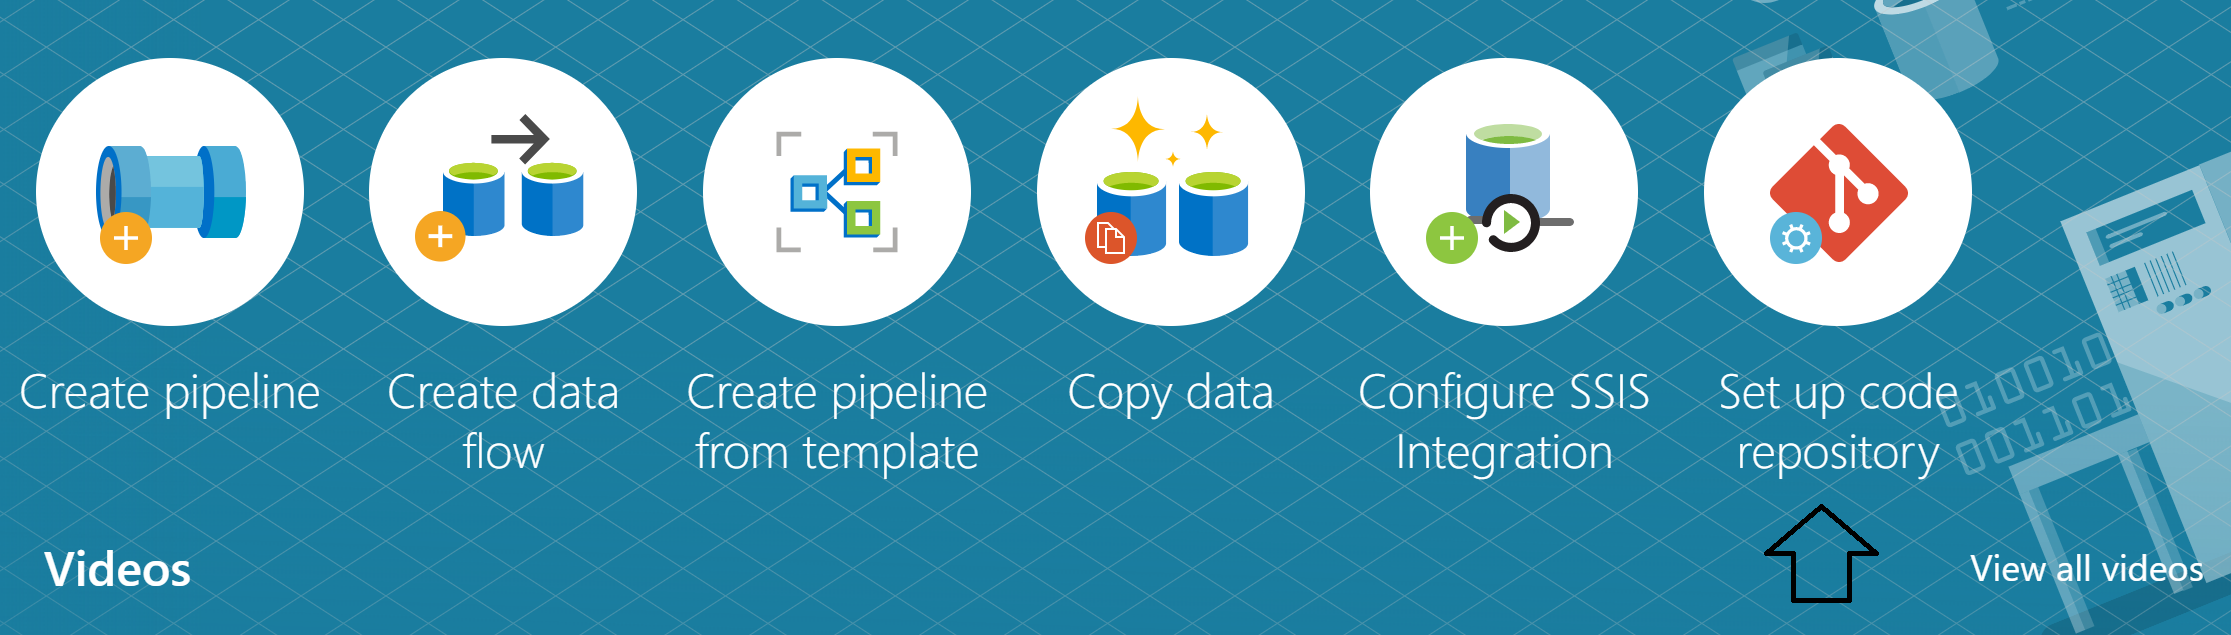
- Click on the link to source control Click for Screenshot
- Configure
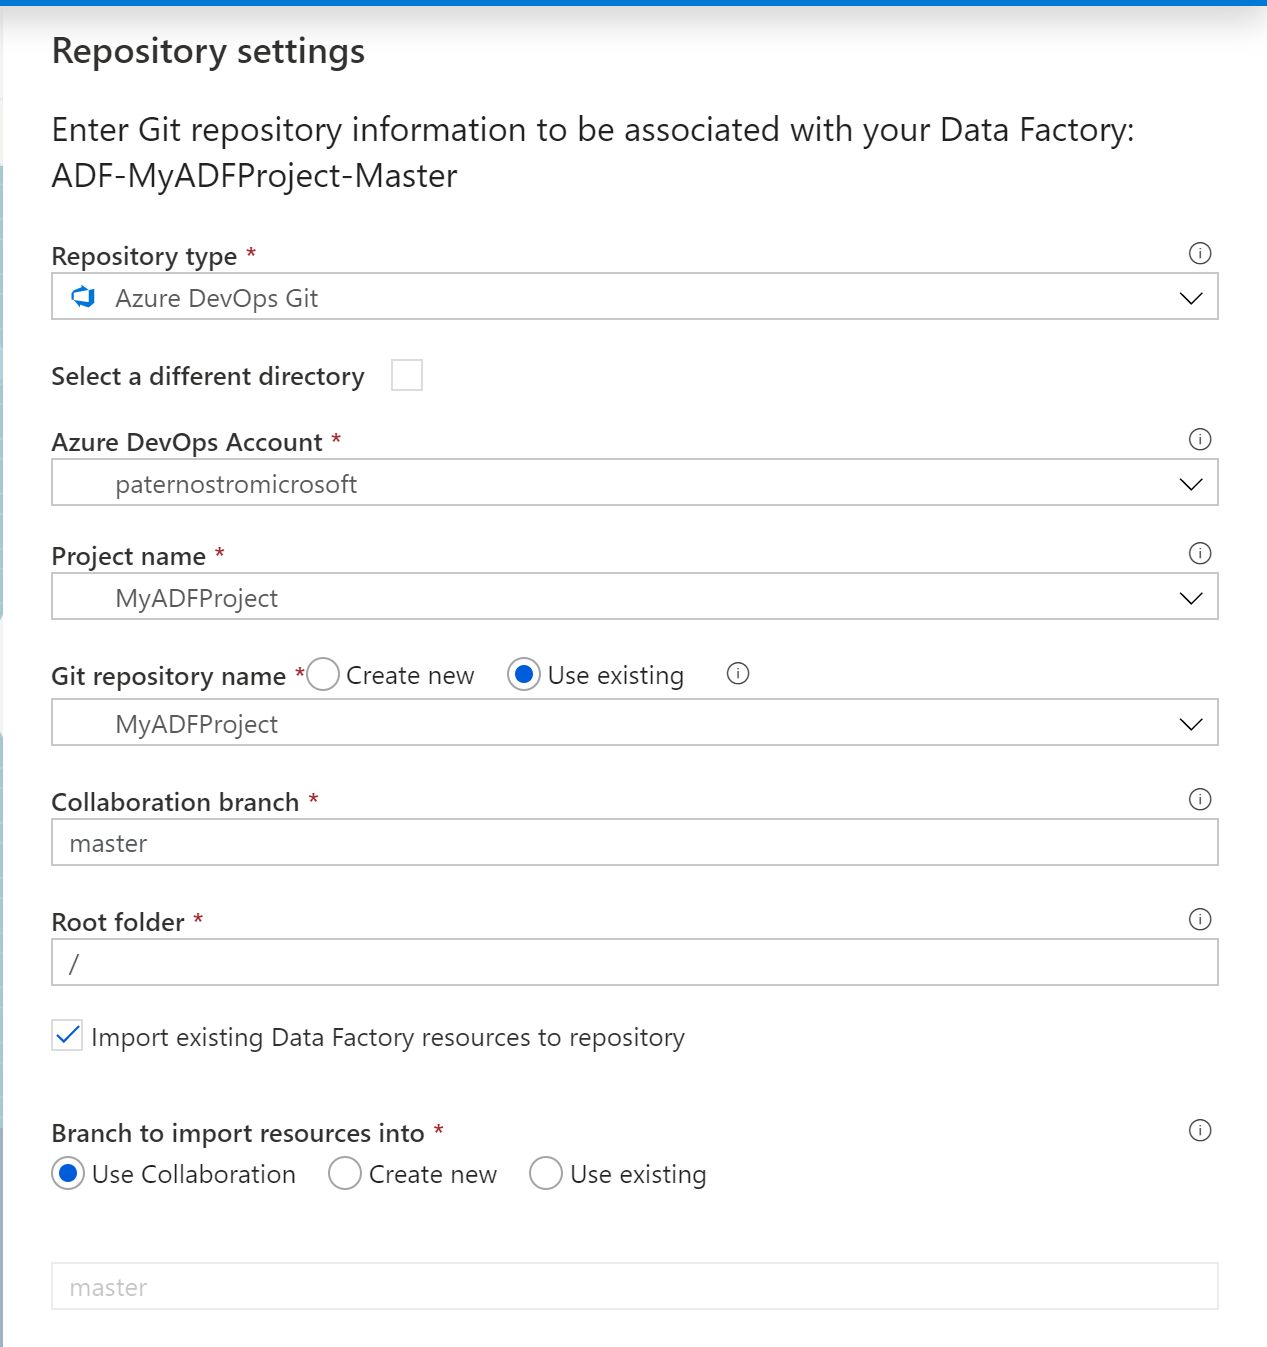
- Set the Collaboration branch to Master Click for Screenshot
- You only need the Import button check if you are doing this for an existing ADF
- Configure
- Download these three files
- In your Git repo
- Place the JSON in an "ARM-Templates" folder
- Place the PS1 in a "PowerShell-Scripts" folder
- Download the Azure Dev Ops Pipeline file that will do our deployment
- In your Git Repo
- Upload azure-pipelines.yml to the root (not in a folder)
- Summary
- We have created the master branch, linked to source control, have uploaded 3 files which will be used for our deployments and now have a dev ops pipeline. The 3 support files contains the ARM template to create a new ADF resource in Azure and an ADF PowerShell deployment script.
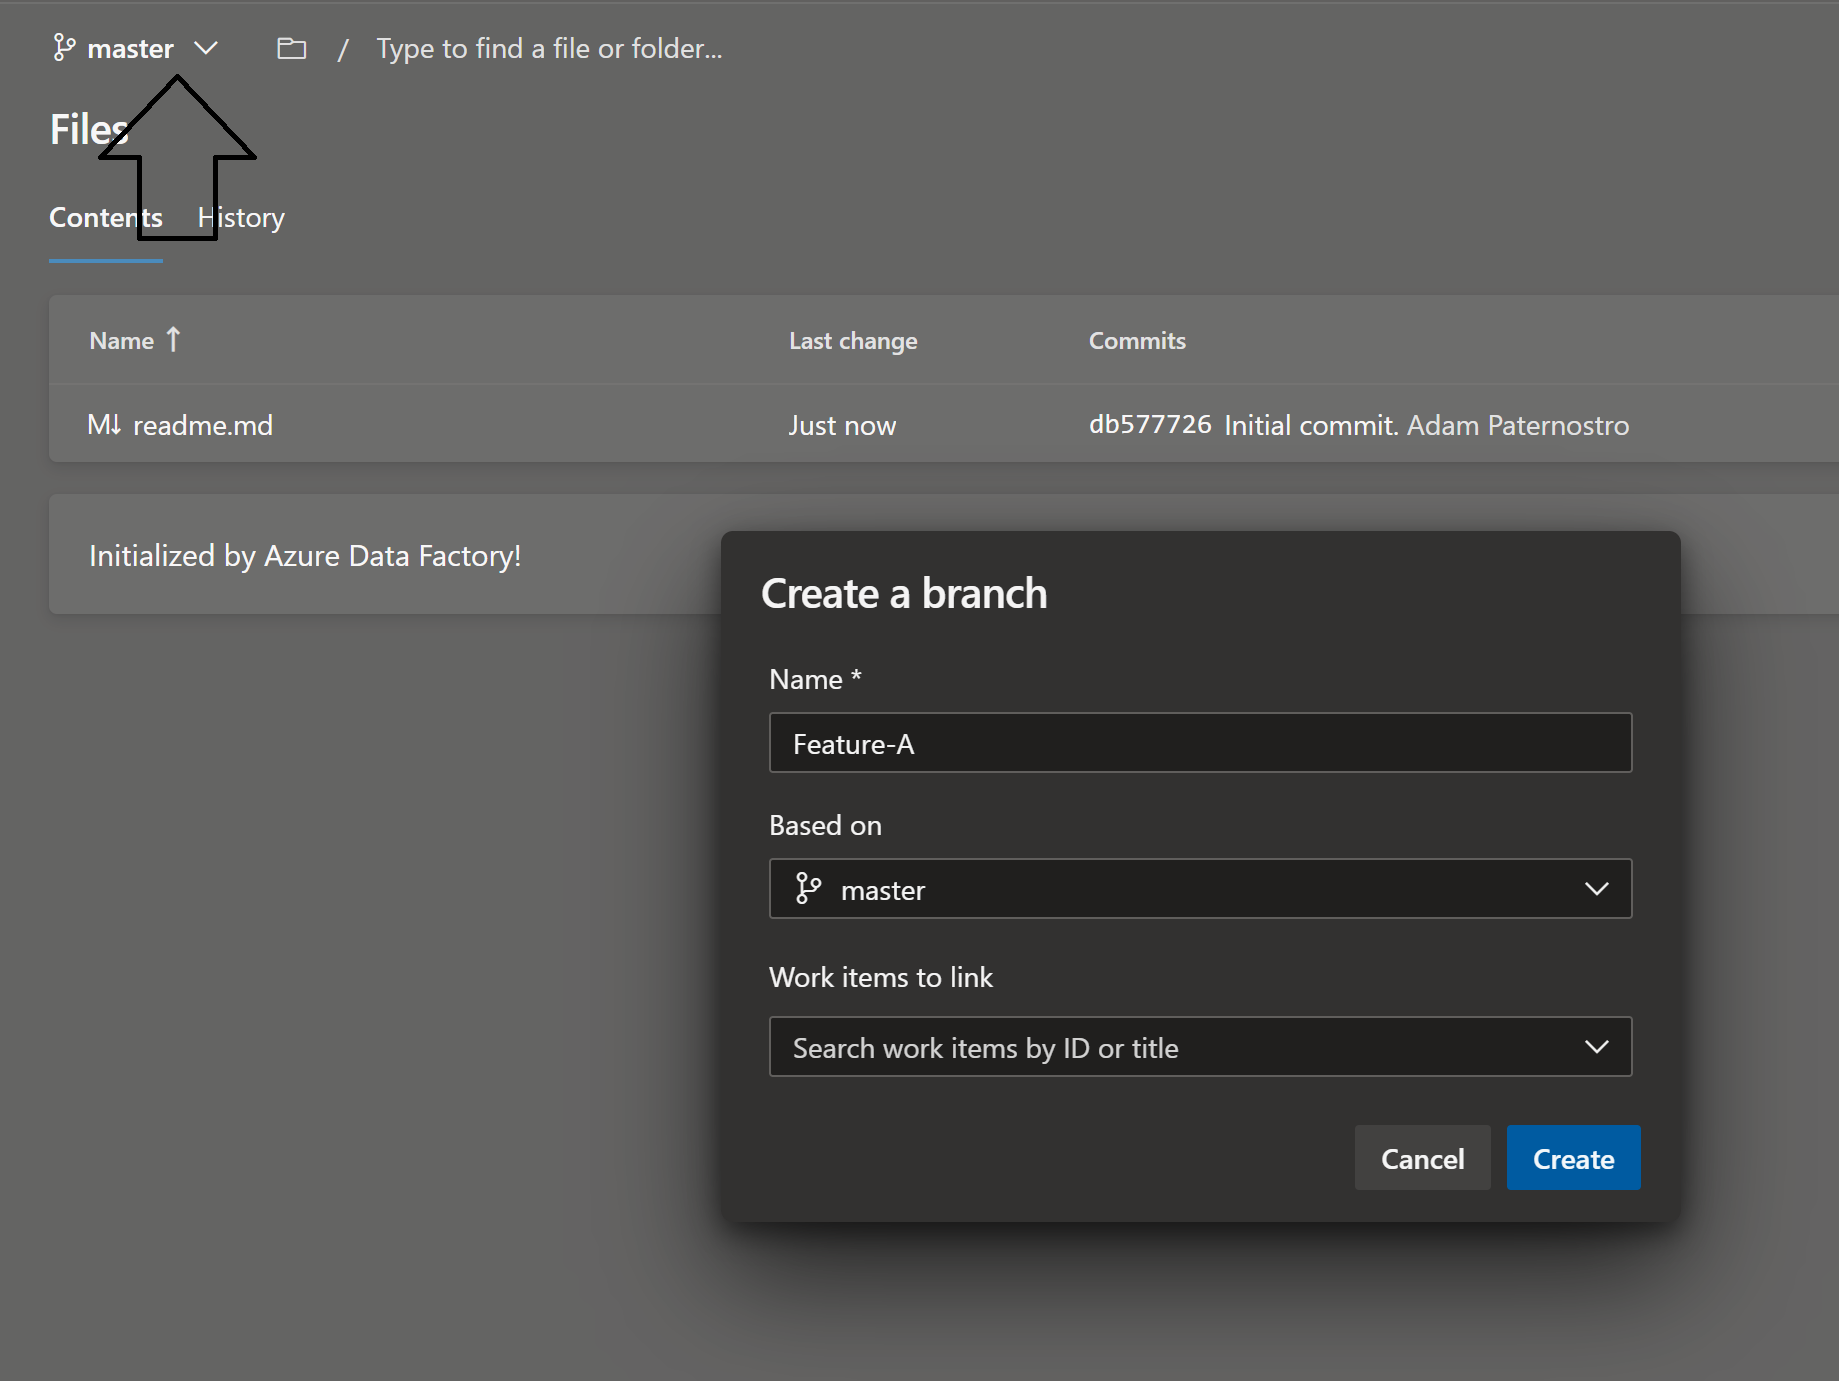
- In source control create a new branch from master called: Feature-A Click for Screenshot
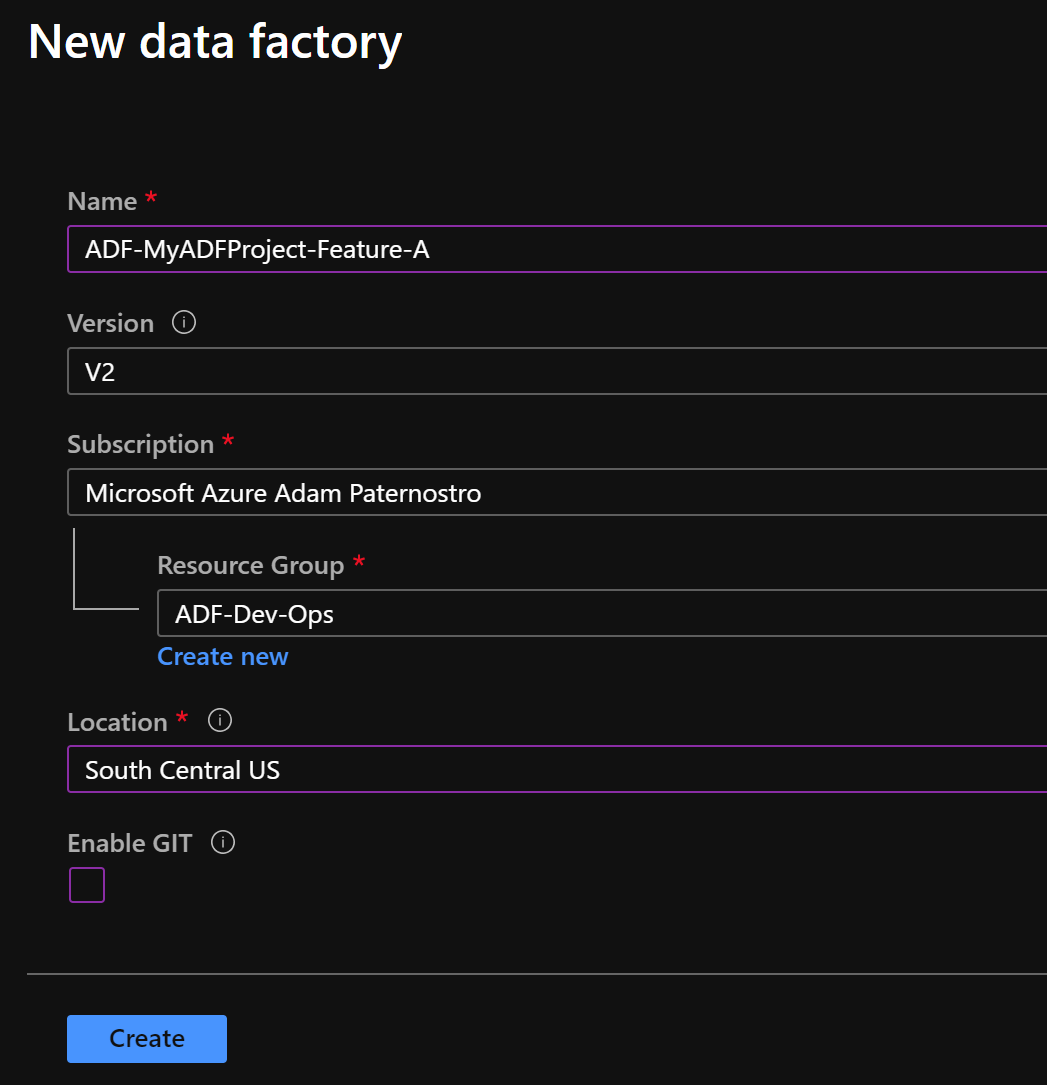
- Create a Data Factory: ADF-MyADFProject-Feature-A
- Click for Screenshot
- This will be used for coding our data factory
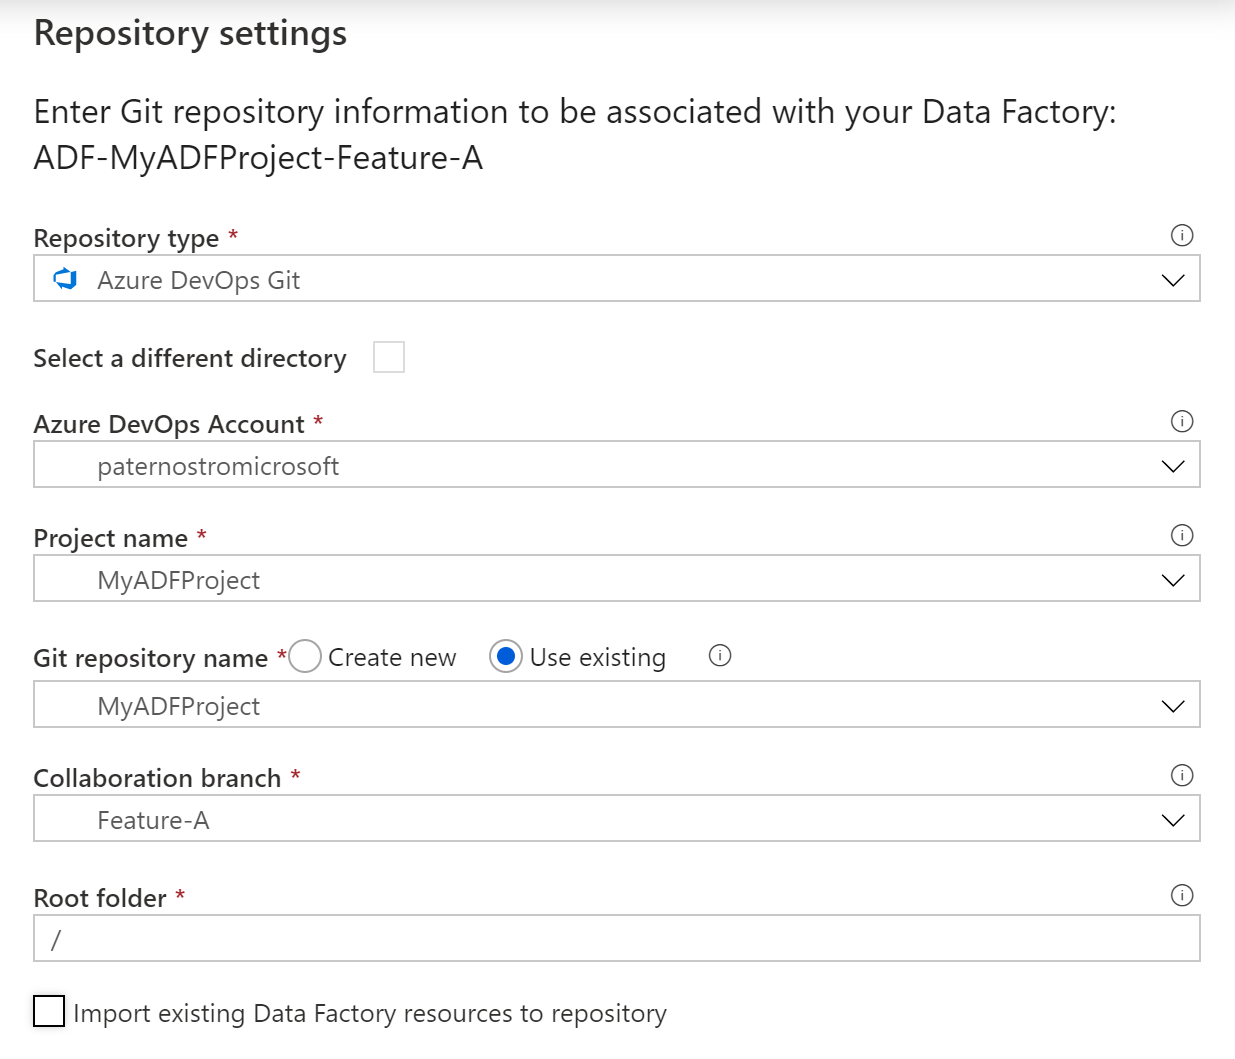
- Click on the link to source control
- Click for Screenshot
- Configure
- Set the Collaboration branch to Feature-A
- Click for Screenshot
- Note: You do not need to import resources since there are none at this point. The only resources should be from master.
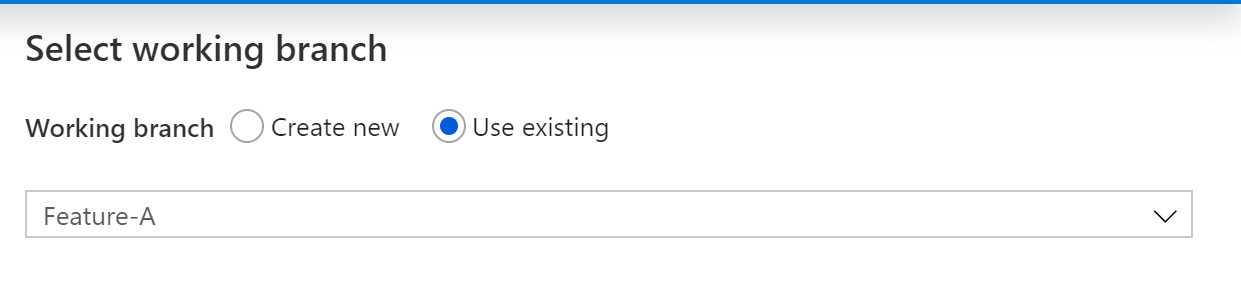
- Click on the pencil icon to create a pipeline
- Select Feature-A as your working branch Click for Screenshot
- Create a pipeline named "feature-a-test-pipeline"
- Add a Wait activity. This is just a test pipeline.
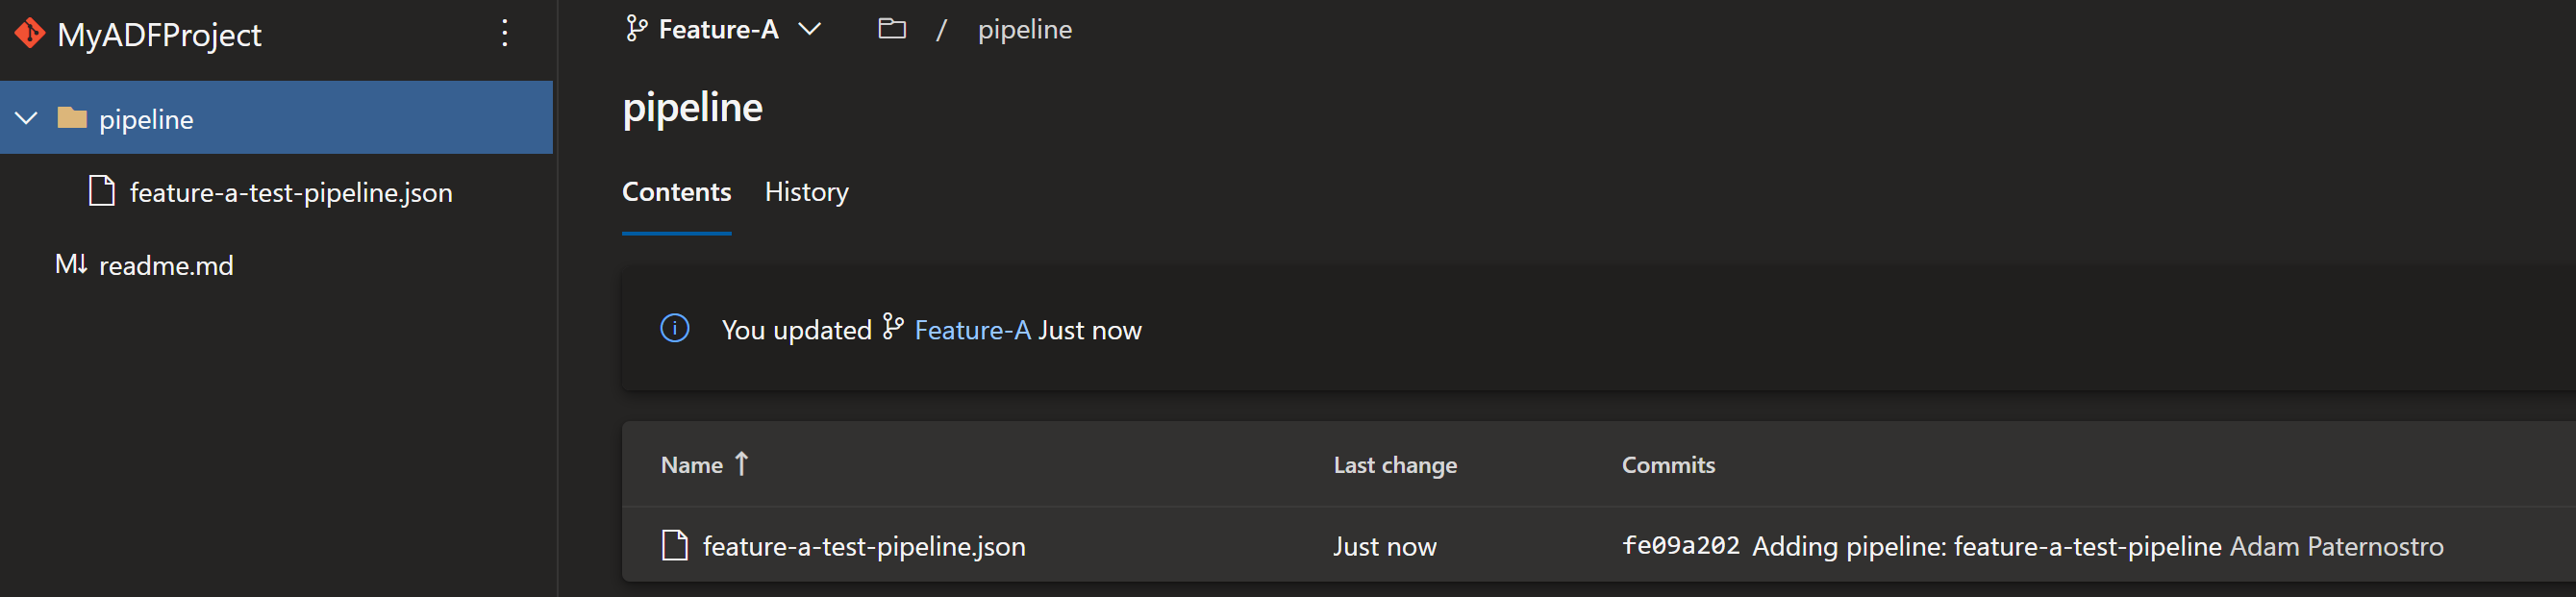
- Click Save All
- Go into source control under branch "Feature-A" and you should see your code Click for Screenshot
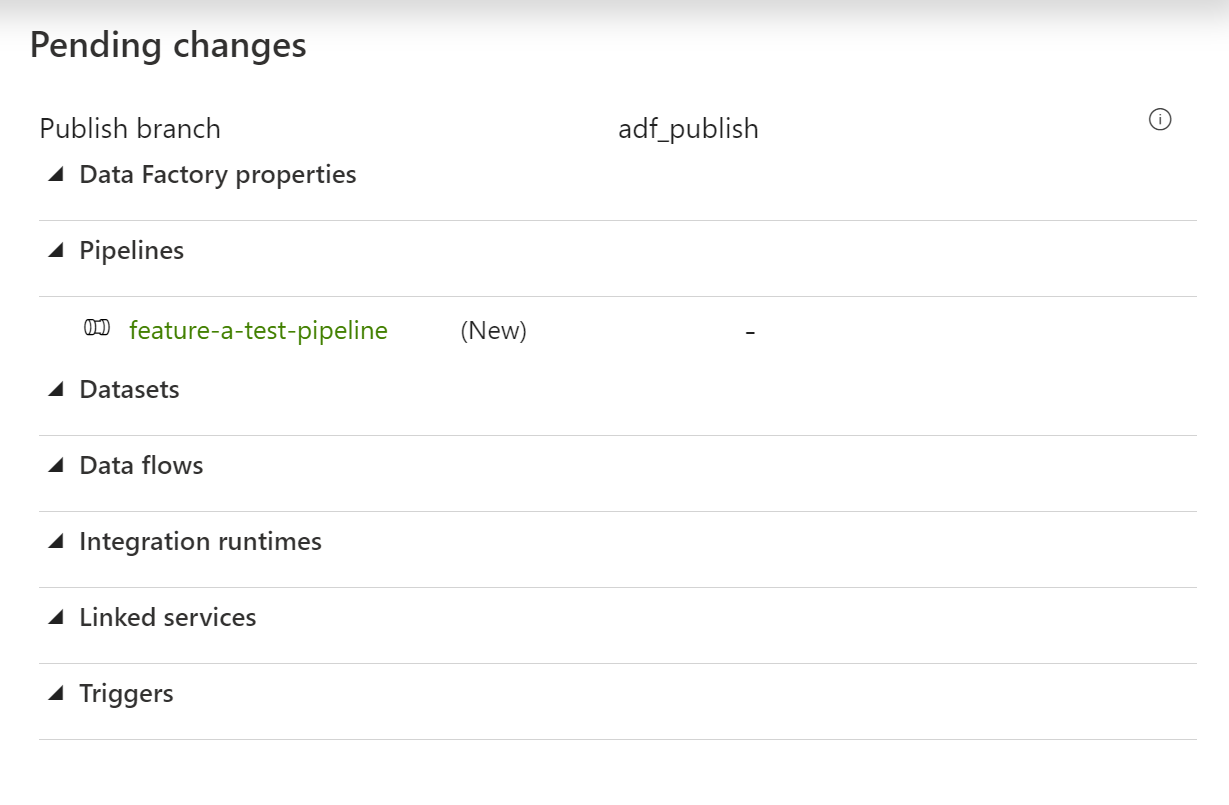
- In ADF click the "Publish" button Click for Screenshot
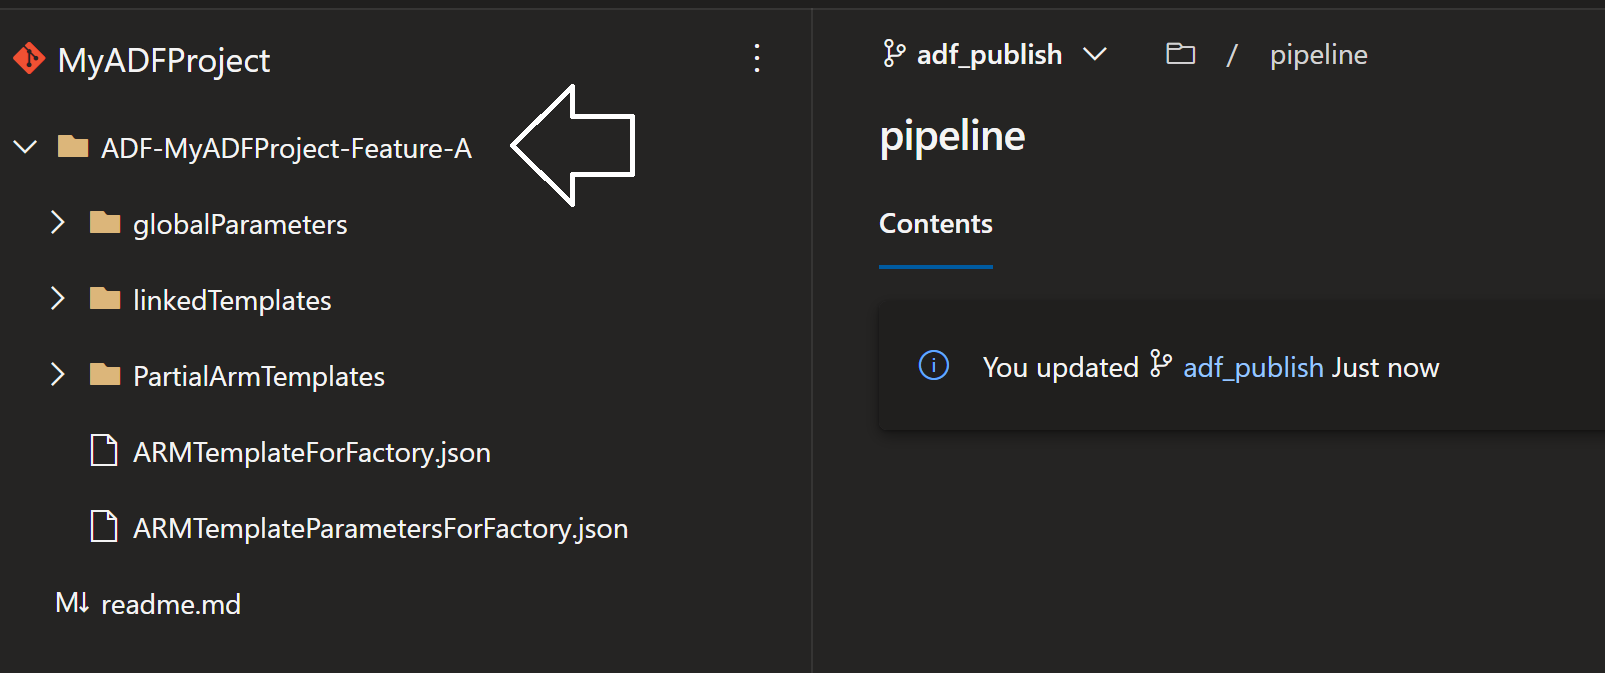
- Go into source control under branch "adf_publish" and you will see your genereated ARM templates under a folder call "ADF-MyADFProject-Feature-A" Click for Screenshot
- Summary
- We have created a development Feature A environment. This is where we will develop our data factory pipelines.
- You may create a Feature-B branch by doing the same steps are above. This is optional for now.
- We now want to deploy to QA
- We could have single QA environment (e.g. ADF-MyADFProject-QA) or we could have a QA environment (ADF-MyADFProject-Feature-A-QA)
- The single QA environment means we only have one place to test our features in UAT/QA
- The QA environment per Feature means we can have as many as we want for testing purposes
- At this point in time we many not know if feature-a or feature-b will be released first to production
- A possible issue with having a mulitple feature QA environments might be conflicts. Pipeline-1 in feature A and B might run at the 8 PM and could collide. Or if you have triggers you might run into collisions.
- I never use ADF triggers for blobs. You can read why here on slide 6 in the Azure-Big-Data-Architecture.pptx PowerPoint here: https://github.com/AdamPaternostro/Azure-Big-Data-and-Machine-Learning-Architecture
- Personally, I prefer multiple QA environments to keep things easy to test and take advantage of the cloud's abilty for me to create the resources I require.
- Update Feature A branch with any changes (or hotfixes) from Master (Prod)
- We will merge Master back into our Feature-A branch in case any changes in Master has occurred
One time commands to clone your repo
Subsequent times
cd \ git clone git@ssh.dev.azure.com:v3/paternostromicrosoft/MyADFProject/MyADFProjectcd MyADFProject git checkout master git pull git checkout Feature-A git pull git merge master git push - Manually publish the ADF
- In the Data Factory UI for ADF-MyADFProject-Feature-A click on the Publish button (just as you did before). You can skip this step if nothing was merged from Master
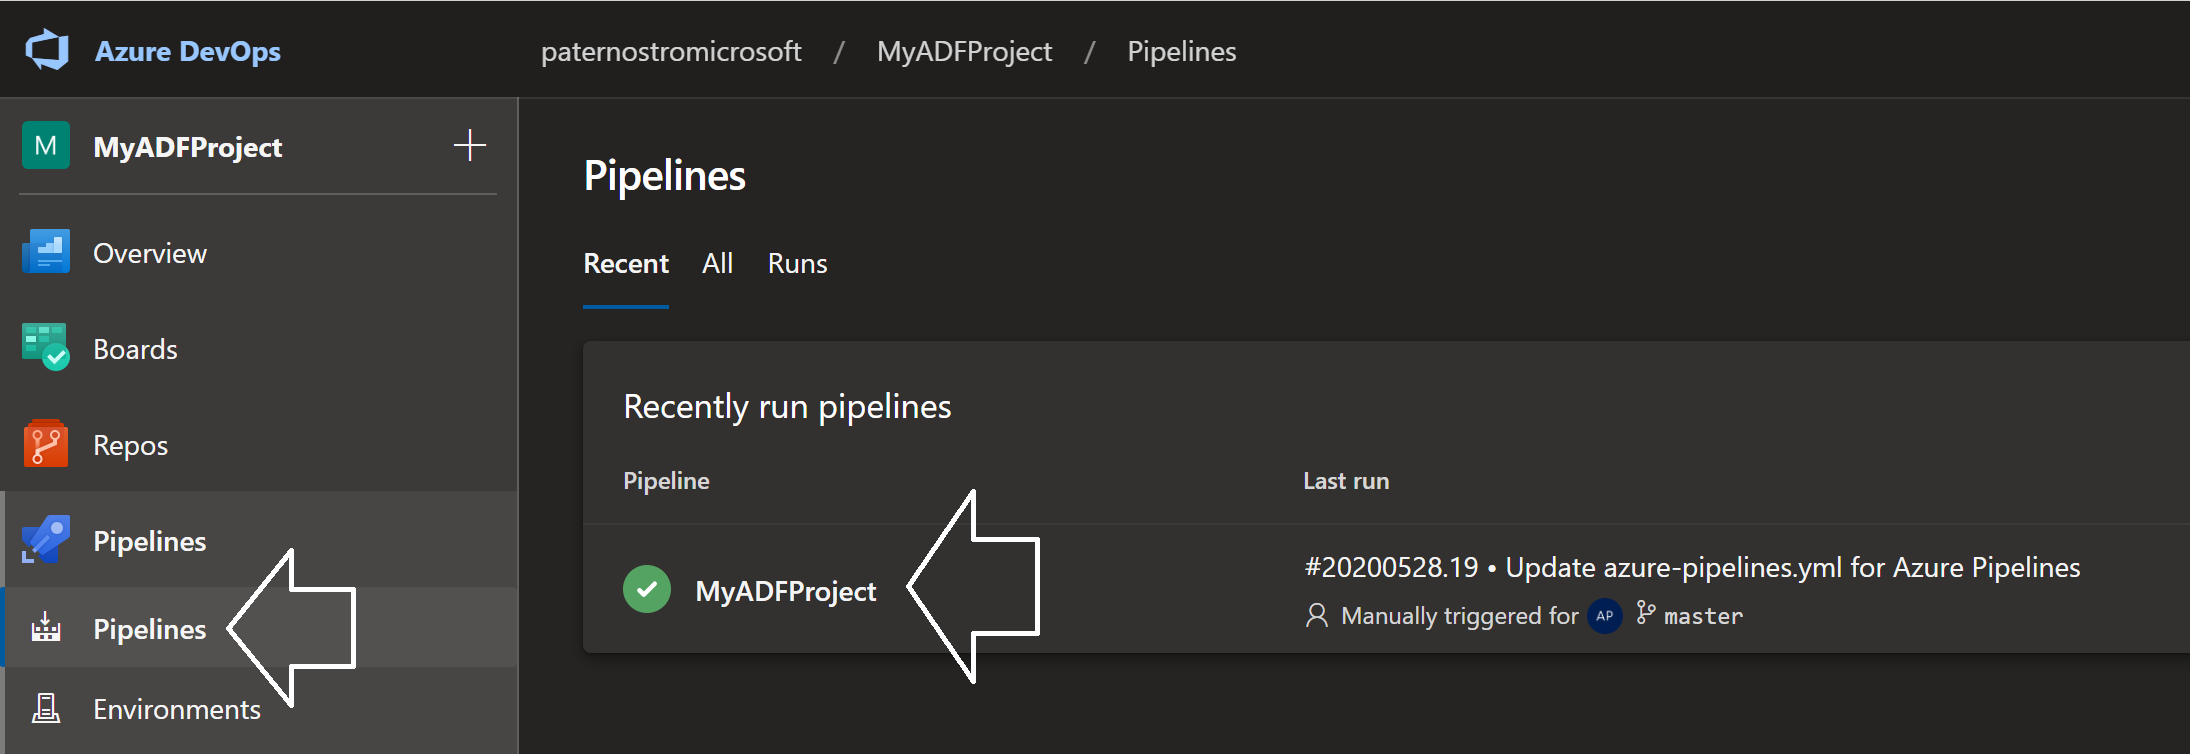
- Open your Azure Dev Ops Project
- Click on Pipelines | Pipelines
- Click the on pipeline "MyADFProject" Click for Screenshot
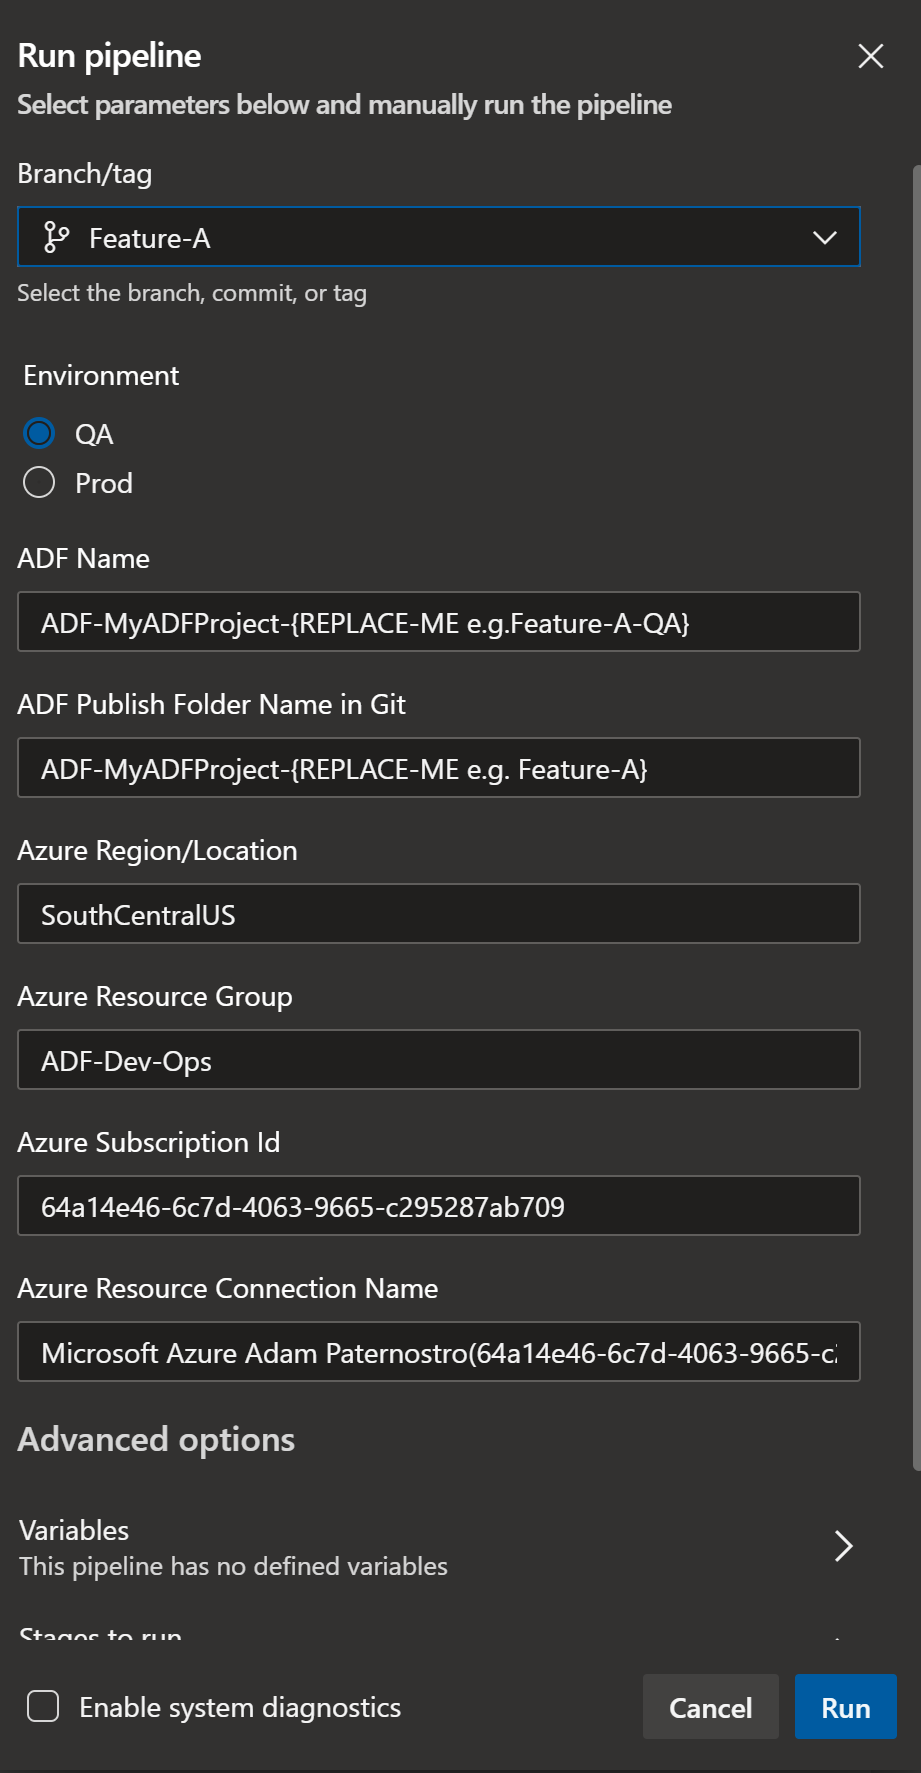
- Click on Run
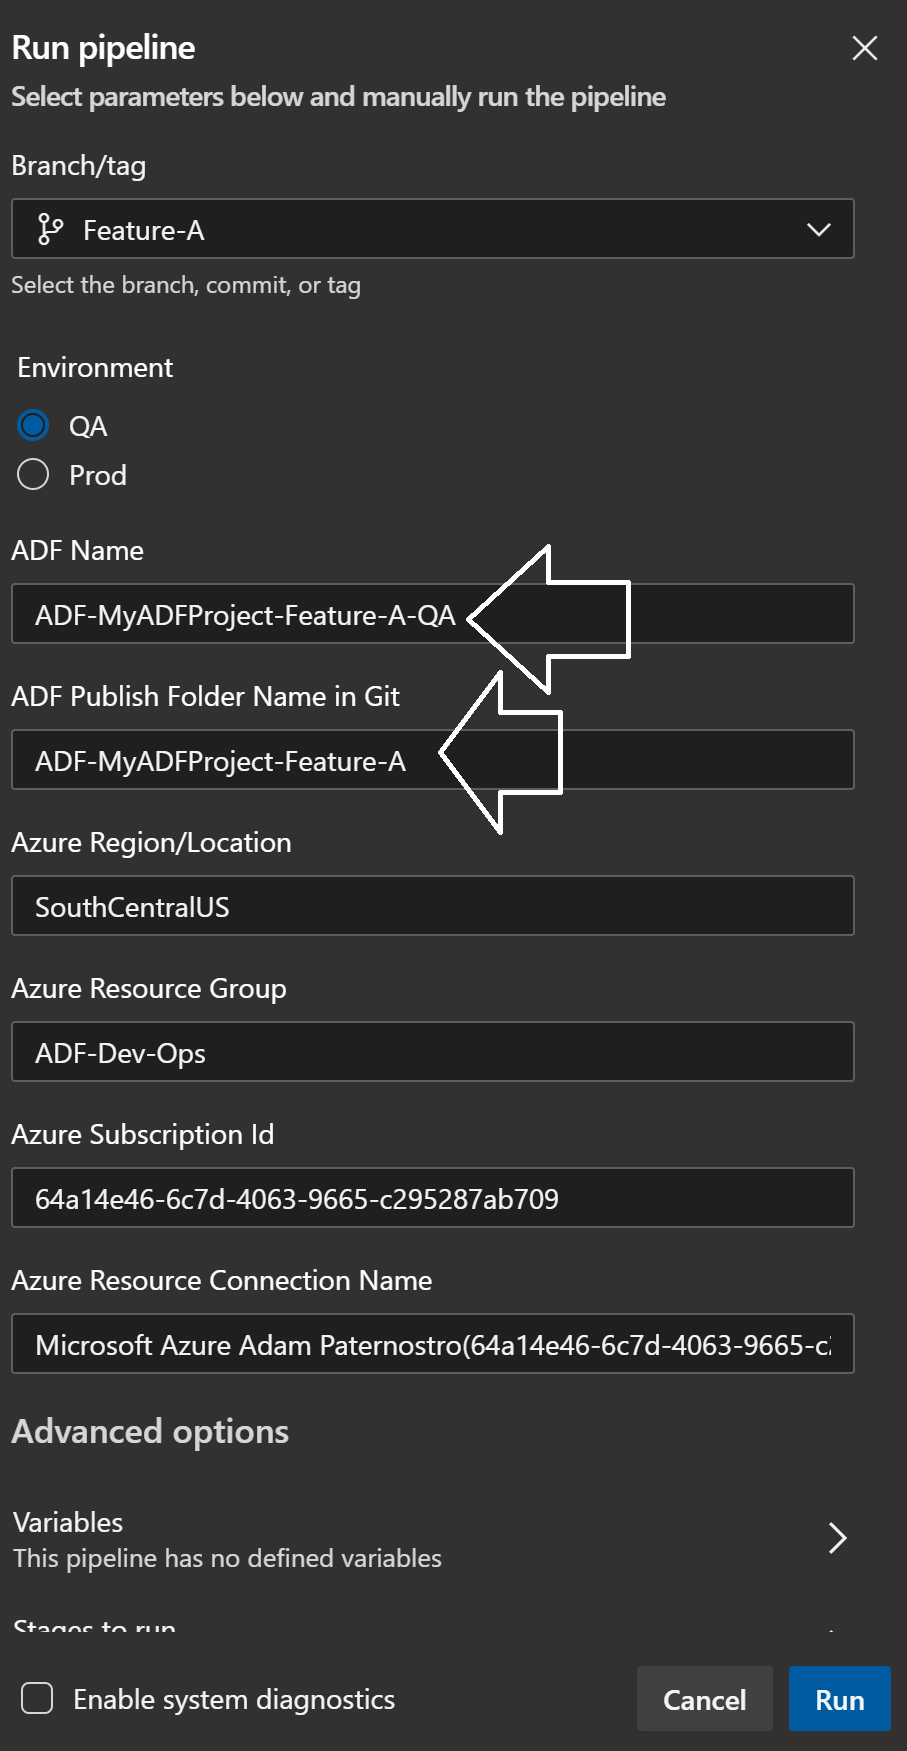
- Set the Branch to Feature-A
- Set the ADF: ADF-MyADFProject-Feature-A-QA
- A new ADF will be created in Azure if it does not exist. In this example we are creating a QA branch per feature branch.
- If you want just a single QA name it: ADF-MyADFProject-QA
- Set the ADF Publish Folder Name in Git: ADF-MyADFProject-Feature-A
- This is the name of the folder in the adf_publish git branch
- You will need to change the subscription id (you should do this in the azure-pipelines.yml)
- You will need a service connection to deploy this. I used a service principal for this example.
- To create a service connection click on Project Setting | Service Connections | New Service Connection
- Give it a name and connect it to Azure.
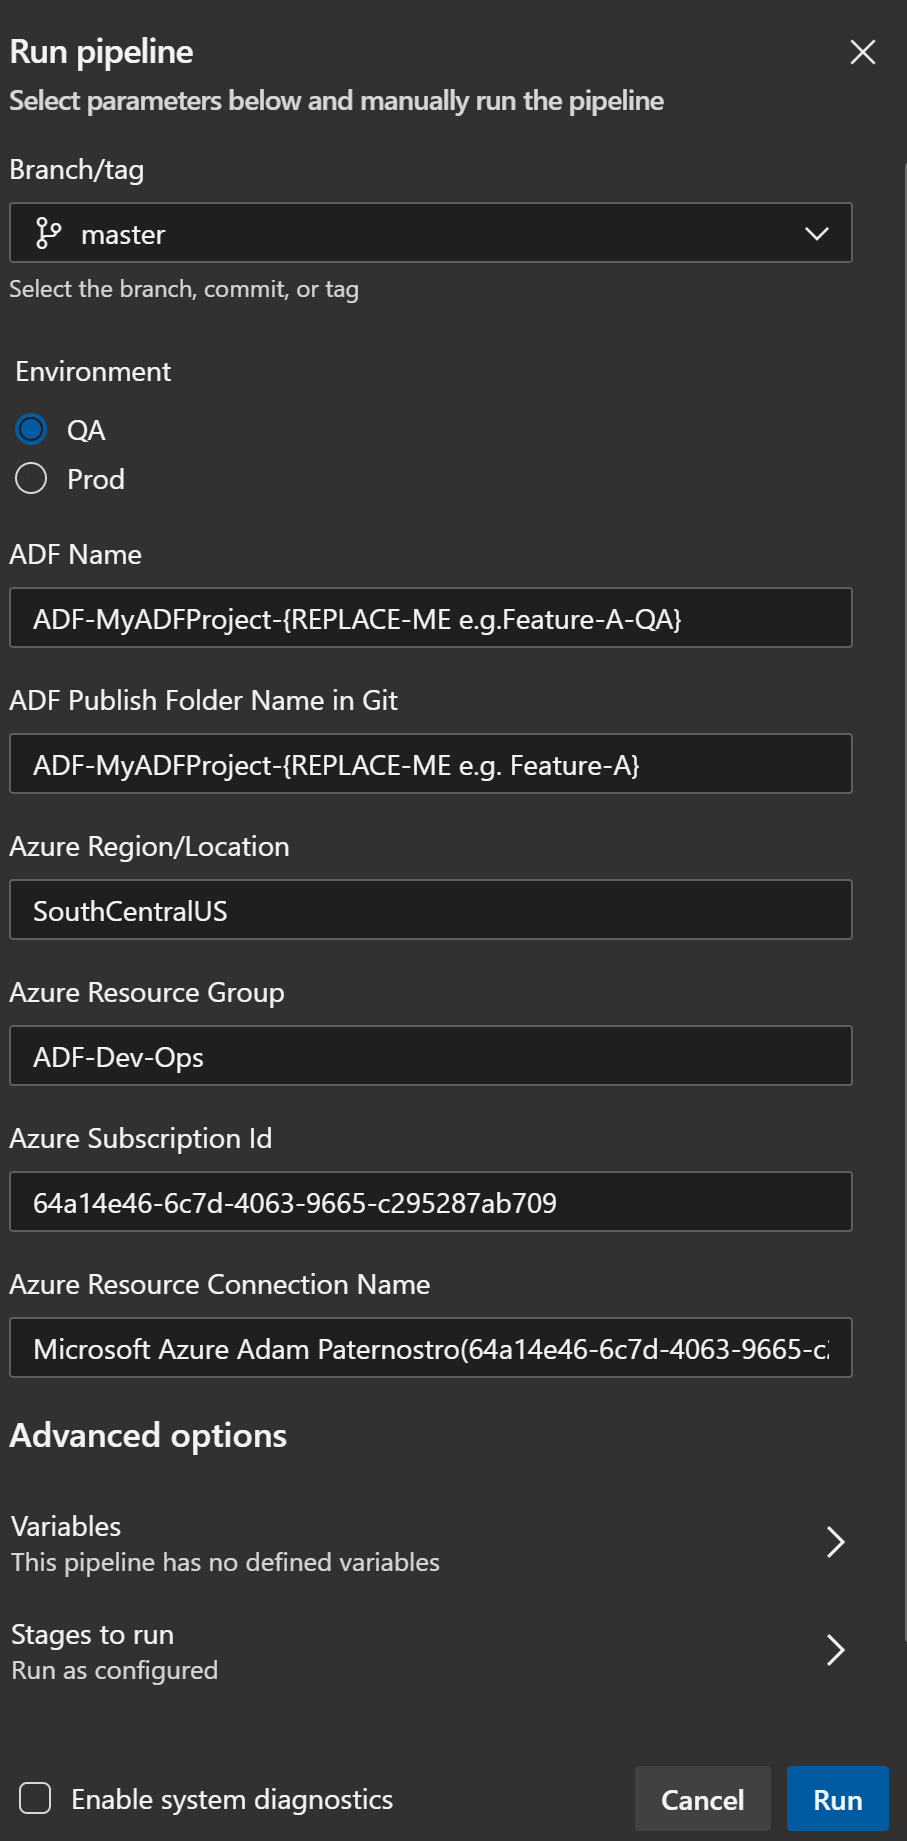
- The default parameters will look like this: Click for Screenshot
- The updated parameters will look like this: Click for Screenshot
- Now run it
- What is happening
- The files in the Git repo are being packaged up into build artifacts. I know we are not compiling code, but I like to package my items up to keep things consistent with how I do code deployments.
- A data factory will be created named "ADF-MyADFProject-Feature-A-QA".
- The data factory will have triggers disabled by the pre-deployment PowerShell
- The pipelines (connections, dataset, etc) will be deployed
- The data factory will have the triggers enabled and any old pipelines artifacts will be deleted
- An environment in Azure Dev Ops has been created named "QA"
- If fixes needed to be performed to feature-a, make the corrections, publish and re-deploy using the pipeline
-
If everything is good with Feature-A we now will deploy to Prod
-
To deploy to Production we need to merge the changes to the Master branch
git checkout Feature-A git pull git checkout master git pull git merge Feature-A git push -
Manually publish the ADF
- In the Data Factory UI for the ADF-MyADFProject-Master ADF, click on the publish button (make sure you are on the master branch)
- Even though we merged to master we still need to generate the ARM templates.
- We are ASSUMING nothing in master has changed. If a hotfix was performed, that should have been merged to the Feature-A branch and new QA deployment peformed.
-
Now re-run the Azure pipeline
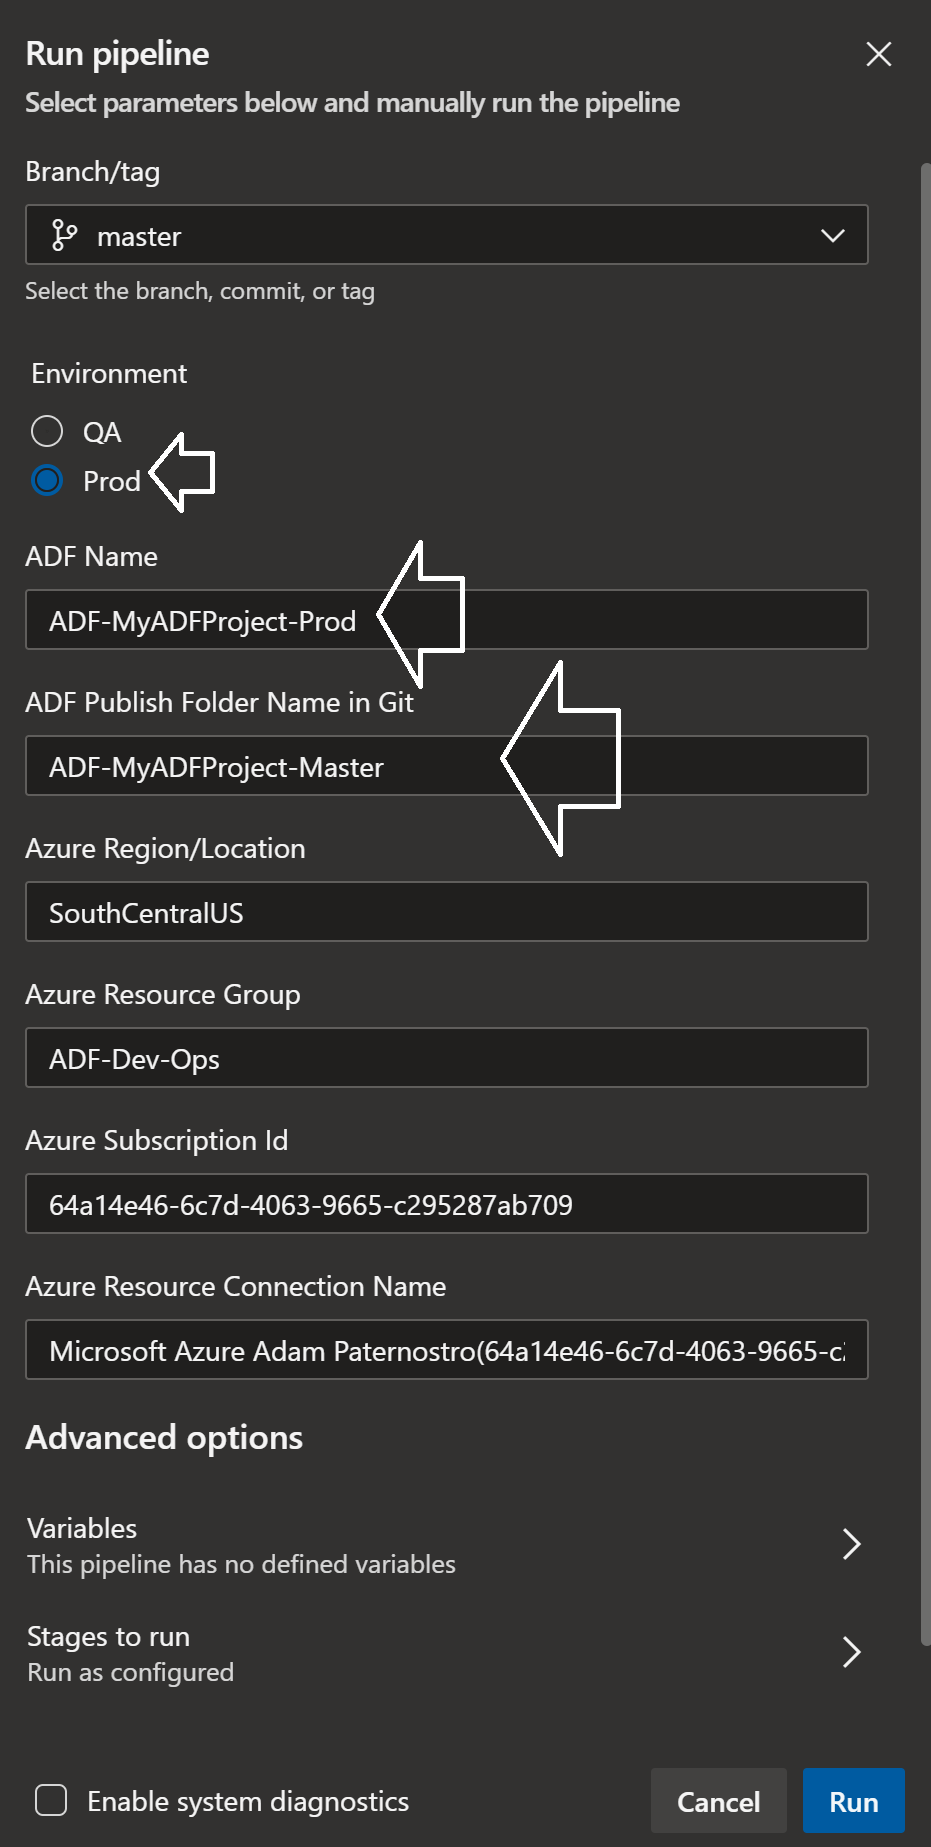
- Set the Branch to Master
- Set the Environment to Prod
- Set the ADF: ADF-MyADFProject-Prod
- A new ADF will be created in Azure if it does not exist
- We only have one production ADF (unlike a QA specific feature branch)
- Set the ADF Publish Folder Name in Git: ADF-MyADFProject-Master
- This is the name of the folder in the adf_publish git branch
- The default parameters will look like this: Click for Screenshot
- The updated parameters will look like this: Click for Screenshot
-
The data factory should now be deployed to Prod. Open the ADF-MyADFProject-Prod in Azure and take a look.
-
You should now merge Master to Feature-B so that Feature-B gets the changes performed in the Feature-A branch
cd MyADFProject git checkout master git pull git checkout Feature-B git pull git merge master git push -
NOTE: I am not a big fan of doing a publish in Master after the ADF has been tested in the feature branch. You could do a compare in the adf_publish branch as a sanity check:
cd MyADFProject
git checkout adf_publish
git pull
git diff adf_publish:./ADF-MyADFProject-Master adf_publish:./ADF-MyADFProject-Feature-A
- In Azure you will have resource that look like the below. Some companies will deploy QA and Prod to different subscriptions which is fine. You will need to change your subscription and connection when running the Dev Ops Pipeline (Parameters: Azure Subscription Id and Azure Resource Connection Name).

- A hotfix branch can be created off of master (e.g. Hotfix)
- A data factory for the hotfix can be created (e.g. ADF-MyADFProject-Hotfix)
- You can then open ADF, perform the fix and test
- When tested, merge back to Master, Publish and then deploy
- Merge Master to Feature-A, Feature-B, etc. to push the change to your feature branches
- Developers can use the ADF UI to create new branches off of each feature branch. When their work is complete a pull request back to the feature branch can be initiated.
- Do not edit the same pipeline in two feature branches. It is really hard to merge pipelines.
- Have one ADF per application (or logical application). Avoid having one ADF for lots of lots applications.
- You are merging JSON not source code. If you have an activity in a pipeline call Activity-A and you add a Activity-B and link A to B, then in another branch link Activity-A to Activity-C, when you merge, no source control system will link Activity-A to B to C. Or should it be A to C to B...
- You can always edit the ADF code in the browser to add/edit the code that the user interface does not currently support. Not everything in ADF can accept a parameters, but you have adjust this manually for most ADF items.
- https://docs.microsoft.com/en-us/azure/data-factory/parameterize-linked-services#json
- At this time, linked service parameterization is supported in the Data Factory UI in the Azure portal for the following data stores. For all other data stores, you can parameterize the linked service by selecting the Code icon on the Connections tab and using the JSON editor.
{ "properties": { "parameters": { "Storage Account Name": { "type": "string", "defaultValue": "mystoreageaccount" } }, "annotations": [], "type": "AzureBlobFS", "typeProperties": { "url": "https://@{linkedService().Storage Account Name}.dfs.core.windows.net", "encryptedCredential": "" } } } - https://docs.microsoft.com/en-us/azure/data-factory/parameterize-linked-services#json
- Performing DevOps with self-hosted integration runtimes. You need to use the same name of each self-hosted runtime in each environment (e.g. MyADF-IR and have an IR in your Dev, QA, Prod environments all named MyADF-IR).
- Per Azure documentation: In CI/CD scenarios, the integration runtime (IR) type in different environments must be the same. For example, if you have a self-hosted IR in the development environment, the same IR must also be of type self-hosted in other environments, such as test and production. Similarly, if you're sharing integration runtimes across multiple stages, you have to configure the integration runtimes as linked self-hosted in all environments, such as development, test, and production.
- Note: At this time you cannot make the IR name a parameter. This DOES NOT work:
{
   "name": "LaptopMenuData",
   "type": "Microsoft.DataFactory/factories/linkedservices",
   "properties": {
      "parameters": {
            "IRName": {
               "type": "string",
               "defaultValue": "AdamLaptop"
            }
      },
      "annotations": [],
      "type": "FileServer",
      "typeProperties": {
            "host": "C:\\Menu-Data",
            "userId": "ADAM-DESKTOP-PC\\azuredatafactory",
            "encryptedCredential": ""
      },
      "connectVia": {
            "referenceName": "@{linkedService().IRName}",  *** DOES NOT WORK ***
            "type": "IntegrationRuntimeReference"
      }
   }
}
- ARM Deployment tests:
- Test: Complete ARM deployment of ADF
- Result: Kept run history, but I had to combine my templates for my ADF Azure resource and my ADF "pipeline" resource, since Complete overwrites everything
- Test: Incremental ARM deployment of ADF
- Result: Kept run history
- Test: Complete ARM deployment of ADF
- Deploying while pipeline is executing tests:
- Test: Deploy while running with no changes to pipeline:
- Result: Everything was fine, executing pipelines kept running
- Test: Deploy while running with changes to pipeline
- Result: Everything was fine, executing pipelines kept running
- NOTE: I did not test triggers while running and deploying. I have a feeling you could miss an event if you are not careful.
- Test: Deploy while running with no changes to pipeline:
- Conclusion - When ADF starts a run, it basically has a copy of the ADF and executes the ADF. A deployment does not affect existing runs.