This is the unofficial transponder for MyCobot, which is added the functionality of showing data transmission to the original transponder.
From v0.0.5, the functionality of receiving commands via ESP-NOW is added. This functionality is disabled by default.
MyCobot ATOM Controller is also available, and it can send commands using ESP-NOW to this transponder.
* If you use this transponder, you have to write AtomMain 2.5 or later to the ATOM on your MyCobot.
The program can be compiled on the PlatformIO environment.
$ git clone https://github.com/3110/mycobot-transponder
$ cd mycobot-transponder
$ platformio run --target=upload
I have tested the program with PlatformIO IDE for VSCode on Windows 10.
The serial port to write the program is automatically detected.
If it is not detected, you can specify upload_port in platformio.ino.
If you compile the program with -DENABLE_ESP_NOW in [env:m5stack-basic] section of platformio.ini, the program can receive commands using ESP-NOW.
If you compile the program using Arduino IDE, you have to prepare the following folder structure and open transponder.ino:
transponder
+-- transponder.ino  <-- src/main.cpp
+-- CommandQueue.h   <-- src/CommandQueue.h
+-- CommandQueue.cpp <-- src/CommandQueue.cpp
+-- MyCobot.h        <-- src/MyCobot.h
+-- MyCobot.cpp      <-- src/MyCobot.cpp
+-- Transponder.h    <-- src/Transponder.h
+-- Transponder.cpp  <-- src/Transponder.cpp
+-- m5stack          <-- src/m5stack
    +-- EspNowReceiver.h
    +-- EspNowReceiver.cpp
    +-- UiTask.h
    +-- UiTask.cpp

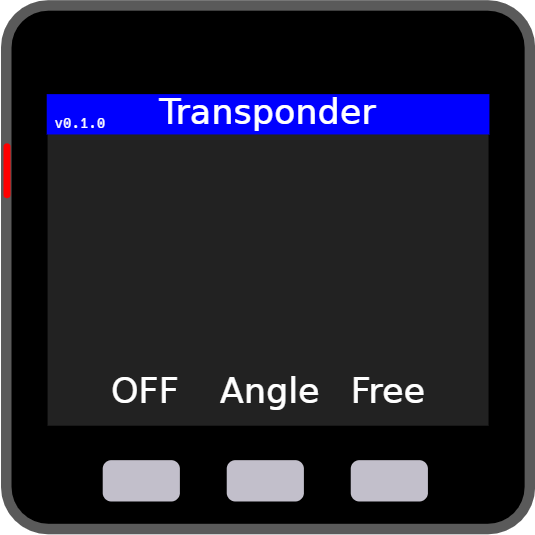
When you start Transponder, the above screen will be displayed. The LED on MyCobot ATOM turns white if data has been sent successfully from MyCobot Basic to MyCobot ATOM.
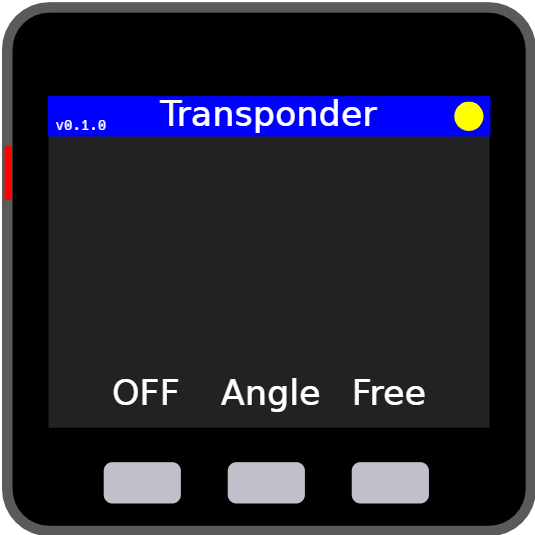
The yellow circle will be displayed on the right-top corner if ESP-NOW is enabled and connected.
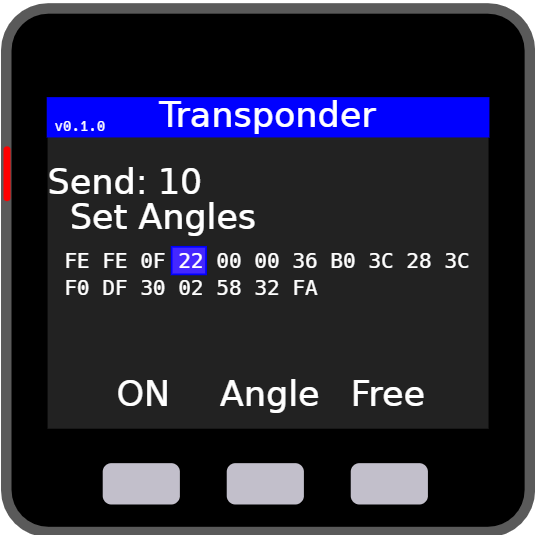
When the button A(left-most) is pressed, you can select whether to show the data transmission status on the screen. If the data transmission status is 'ON', the sending command, the number of commands sent, and the byte sequence of commands are displayed on the screen. The command number(the 4th byte) will have a blue background.
The setting of whether to display the data transmission status is saved in the non-volatile storage, and the setting will be reflected at the next startup.

If the button B(middle) is pressed when no command is sent, the 'Get Angles' command is sent to display the joint angles on the screen. The joint angles are not updated in real-time.
If the button C(right-most) is pressed when no command is sent, the 'Set Free Move' command is sent. You can move joints freely in case joints are locked.
From v0.1.0, the green(send) and red(receive) circles on the right corner, which display the data transmission status in real-time, are removed(they are meaningless).