


Welcome to the Playwright TypeScript Framework. This unique and comprehensive automation framework is designed to simplify and streamline the process of writing and managing automated tests for Web (Desktop & Mobile), APIs, and Electron Desktop applications. It's built on Playwright, a powerful browser automation library, and TypeScript, a statically typed superset of JavaScript, offering a robust and efficient environment for end-to-end testing.
This framework is ideal for QA professionals, developers, and business analysts looking to improve their testing practices and efficiency. It's equipped with utilities that simplify test creation and maintenance, allowing you to focus on writing your tests out of the box.
-
Unique Page Object Model Design Pattern: Our Page Object Model (POM) design stands apart from traditional POMs. It's a unique approach that significantly reduces complexity and accelerates coding, making it easier and faster to write scripts compared to traditional POMs. This means less time spent on setup and more time spent on creating effective tests. Discover how our approach differs with the traditional POM.
-
Ease of Use: Designed to be intuitive and user-friendly, making it an excellent choice for beginners to understand and write scripts. This means less time spent on learning the tool and more time spent on creating effective tests.
-
User-Friendly for All Roles: This framework is not just for QA Automation professionals. Developers, Manual QA, and Business Analysts can also contribute to end-to-end testing, promoting collaboration across different departments and roles.
-
Utility Functions: Simplifies element identification, performing general actions like button clicks, data input and asserting results. Additionally, it includes built-in functions for managing conditions and ensures a consistent default LoadState across applications.
-
Customizable: Easily adaptable to meet individual project needs, fitting seamlessly into any project, regardless of its specific requirements or constraints.
-
Inbuilt CI/CD Support with GitHub Actions: Facilitates continuous integration and continuous delivery with inbuilt support for GitHub actions, automating your testing process from code integration to delivery.
-
Versatile Support: It facilitates testing across Web (Desktop & Mobile),APIs and, Electron Desktop apps, allowing comprehensive testing across different platforms and applications.
-
Detailed Reporting: Provides screenshots, videos, and traces of test failures, making it easier to debug and resolve the issues.
-
Local Web Server: Allows you to test UI code changes directly on your local machine or on a VM, by effortlessly initializing a local web server, eliminating the need for a separate testing environment.
In summary, the Playwright TypeScript Framework is a powerful, flexible, and user-friendly tool that leverages the power of Playwright and TypeScript. It's an excellent choice for teams looking to improve their testing practices and efficiency.
- Getting Started
- Project Structure
- Customize Framework Setup
- Usage
- Utilities
- Executing Tests
- Additional Playwright Features
- Best Practices
- FAQs
- Issues and Feedback
- Contributions
- TypeScript: A statically typed superset of JavaScript programming language, enhancing code quality and understandability.
- Playwright Test: A modern end-to-end testing framework, facilitating test creation, execution, fixture management, and report generation.
- Playwright Assertions: Provides robust assertion capabilities for validating test outcomes.
- Allure Report: A flexible and visually appealing reporting tool, that offers clarity on test results.
- ESLint: A pluggable linting utility for JavaScript and TypeScript, ensuring code consistency and detecting potential errors.
- Prettier: An opinionated code formatter, ensuring consistent code style across the project.
- Logger (Winston): A versatile logging library, that produces both file-based logs and color-coded console outputs.
- Husky: Manages Git hooks to enforce quality checks, such as linting, before commits.
- Github Actions: A CI/CD platform integrated with GitHub, automating workflows like test execution on pull requests. Enhanced with Playwright's CI guide.
Before you begin, there are some essential requirements you must meet. Ensure you have the following software installed on your machine:
-
npm (v8.0.0 or later): Package manager for JavaScript, used to install and manage software packages.
- To verify your current version, use the command
npm -v. To upgrade to the latest version, please follow the document here. - If npm isn't installed, follow the npm installation guide.
- To verify your current version, use the command
-
Node.js (v18.0.0 or later): JavaScript runtime built on Chrome's V8 JavaScript engine, allowing the execution of JavaScript server-side.
- To verify your current version, use the command
node -v. To upgrade to the latest version, please follow the document here. - if Node.js isn't installed, download and install it from the title link provided.
- To verify your current version, use the command
-
Git: Distributed version control system used to track changes in source code during software development.
- To check if Git is installed, run the command
git --version. - If Git isn't installed, download and install it from the official Git website.
- To check if Git is installed, run the command
-
Visual Studio Code: A standalone source code editor that runs on Windows, macOS, and Linux.
-
Visual Studio Code Extensions:
-
Prettier - Code formatter: A VSCode extension for consistent code formatting. Install it directly from the title link provided.
-
ESLint: A VSCode extension for identifying and fixing linting issues. Install it directly from the title link provided.
-
Playwright Test for VSCode: A VSCode extension that integrates Playwright testing framework, enabling writing, running, and debugging end-to-end tests directly within VSCode. Install it directly from the title link provided.
For detailed information on executing tests with this extension, please visit executing tests with Playwright Test for VSCode documentation.
-
-
Visual Studio Code Settings: To ensure consistency with the prettier format settings, apply the following configurations in your VSCode settings (to access the settings window, use
Cmd+,for Mac andCtrl+,for Windows):- Quote Style: Set
typescript.preferences.quoteStyletosinglefor consistent quote usage across your code. - Format On Save: Enable
Format On Save Modeand set it tofile. This ensures your code is automatically formatted every time you save, enhancing readability and consistency.
- Quote Style: Set
Begin your project by following the steps to install it either with command-line instructions or by doing it step-by-step manually.
This method makes setup easy by avoiding the long steps in the manual installation process. It automatically installs all the dependencies, libraries, playwright browsers, Winston logger, and Husky pre-commit hook that are necessary to start your project. Initializing the project, also intitialises a new Git repository if neither the current nor the parent directory is a Git repository.
The installation steps are below:
-
Install Node.js
Node.js installation can be done directly from the website or through CLI. Find the Node.js installation steps here.
-
Create a Playwright Test Directory
mkdir playwright-e2e-tests cd playwright-e2e-tests -
Run the below command to initialize a project
npx vasu-playwright-cli init
This command will set up a new project with a ready-to-use Playwright TypeScript framework, which includes:
- Setting up the Playwright TypeScript framework template with sample tests.
- Creating a new
package.jsonfile with all the necessary dependencies. - Initializing a new Git repository if neither the current nor parent directory is a Git repository.
- Installing all the npm packages, including the playwright utils library, which contains playwright helper methods.
-
If you encounter errors during the installation process, follow these steps to resolve them:
-
Change ownership of the npm directories to the current user:
sudo chown -R $(whoami) ~/.npm
-
Clear the npm cache forcefully:
npm cache clean --force
-
Retry initializing the Playwright TypeScript project:
npx vasu-playwright-cli init
These steps will help fix permission issues and cache-related problems that might occur during the setup.
-
This is a step-by-step process to install all the dependencies, libraries, and playwright browsers manually. Please refer to the Installation section for complete instructions on setting up the project on your local machine.
Keeping your project up to date is crucial.
-
Run the below command to update the Playwright library with the latest version of utility functions.
npm i -D vasu-playwright-utils@latest
This command keeps your Playwright library up to date with the latest playwright utilities which contain the helper methods that are updated regularly.
-
For further more steps and how to fix dependency errors while installing packages after the project update, please visit Project Update Guide section.
Understanding the project's architecture is key to working with the code. Please refer to the Project Structure section for an overview of the directory layout and file organization.
Learn how to configure and customize the framework to suit your needs. Please refer to the Customize Framework Setup section for detailed instructions.
Setting up a page context is a common task in web testing. Please refer to the Pages section on how to set up a page context before each test.
Page objects are utilized to encapsulate information about the elements present on each page of your application. They also provide a structured way to write action and assertion functions for various functionalities on each page. This approach promotes code reusability and makes the tests easier to maintain and understand. Page objects can be found in the pages directory.
Here's an example of a page object under the pages package:
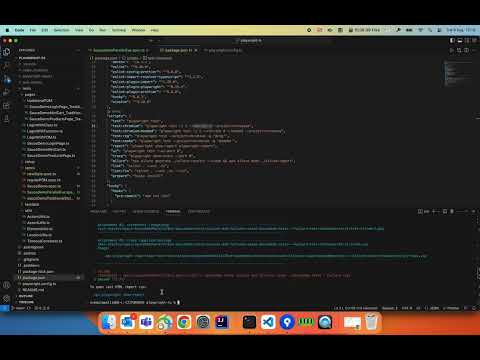
sauce-demo-login-page.ts
// importing test data
// @testdata is the alias path set to testdata directory in tsconfig.json file
import { failureLoginCredentials, sauceDemoCredentials } from '@testdata/sauce-demo-test-data';

// importing utility functions
import { click, clickAndNavigate, fill, gotoURL } from 'vasu-playwright-utils';
import { expectElementToBeVisible } from 'vasu-playwright-utils';
import { getLocator, getLocatorByPlaceholder, getLocatorByRole } from 'vasu-playwright-utils';

const userName = `#user-name`;
const password = () => getLocator(`#password`).or(getLocatorByPlaceholder('Password', { exact: true }));
const login = () => getLocatorByRole('button', { name: 'Login' });
const errorMessage = `//*[contains(@class,'error-message')]`;

export async function navigateToSauceDemoLoginPage() {
  await gotoURL('https://www.saucedemo.com/');
}

export async function logInSuccessfully() {
  await fill(userName, successLoginCredentials.username);
  await fill(password(), successLoginCredentials.password);
  await clickAndNavigate(login());
}

export async function failureLogin() {
  await fill(userName, failureLoginCredentials.username);
  await fill(password(), failureLoginCredentials.password);
  await click(login());
}

export async function verifyErrorMessageForFailureLogin() {
  await expectElementToBeVisible(errorMessage);
}

export async function verifyLoginPageisDisplayed() {
  await expectElementToBeVisible(userName);
}
In this example, the sauce-demo-login-page represents the login page within the application. It includes methods to navigate to the Saucedemo homepage, execute both successful and unsuccessful login actions, verify the success of the login in the successful login scenario, and confirm the display of an error message in the case of a failed login.
Refer to the Utilities section on how to import and use utility functions.
Refer to the Running Tests section below on how to run tests.
Tests are written in the specs directory. Each test file should correspond to a specific feature or functionality of the application under test. Tests are constructed using Page objects.
Here's an example of a test file under the specs directory:
sauce-demo-all-pass.spec.ts
// import test from PageSetup.ts which sets up the page before each test
// @pagesetup is the alias path set up to page-setup.ts in tsconfig.json file
import { test } from '@pagesetup';

// importing page objects to use all functions within that page to construct the tests
// @pages is the alias path set up to pages directory in tsconfig.json file
import * as LoginPage from '@pages/sauce-demo/sauce-demo-login-page';
import * as MiniCart from '@pages/sauce-demo/sauce-demo-mini-cart';
import * as ProductsPage from '@pages/sauce-demo/sauce-demo-products-page';

test.describe.configure({ mode: 'parallel' });

test.describe('Saucedemo tests for successful, unsuccessful logins and add products to cart @smoke', () => {
  // beforEach hook to navigate to home page in each test
  test.beforeEach('Navigating to sauce demo page', async () => {
    await LoginPage.navigateToSauceDemoLoginPage();
  });

  test('Saucedemo tests - Successful login will display Products Page', async () => {
    await LoginPage.loginWithValidCredentials();
    // verifying products page is displayed on successful login
    await ProductsPage.verifyProductsPageIsDisplayed();
  });

  test('Saucedemo test - Error message is displayed and Products page is not displayed on failed login', async () => {
    await LoginPage.loginWithInvalidCredentials();
    // verifying Login is still displayed
    await LoginPage.verifyLoginPageisDisplayed();
    // verifying Products Page is not displayed
    await ProductsPage.verifyProductsPageIsNotDisplayed();
  });

  test('Saucedemo test - Add product to cart', async () => {
    await LoginPage.loginWithValidCredentials();
    await ProductsPage.verifyProductsPageIsDisplayed();
    await ProductsPage.addToCartByProductNumber(1);
    // verifying mini cart count is updated to 1
    await MiniCart.verifyMiniCartCount('1');
  });
});
In this example, we are setting the page state by importing test from @PageSetup and writing the spec file. Here are some important points to note:
-
Import
testfrom@PageSetupinstead from@playwright/test.page-setupis customized for this framework to set the page state. This ensures that the page is set up correctly before each test. -
setPagefunction frompage-setupfile will set the page state before each test and is imported to our spec files while executing the tests. If you want to use the Playwright page directly to write our tests, we can usegetPagefunction frompage-utilsfile. The page object is managed by the framework, and we can use thesetPageandgetPagefunctions to set and get the page state, ensuring that all of the pages operate on the same page object.
In the first test.describe block of this example, We first navigate to the home page, then perform the login action, and finally verify if the login was successful. Here LoginPage represents a login page within the application. It includes methods to navigate to the homepage, perform a login action, and assertions for successful and failed logins.
Similarly, ProductsPage and MiniCart are also page objects that have functions for their respective pages. Here,ProductsPage page functions are used to assert whether products page is displayed on successful login and also adding products to cart. MiniCart page function is used to verify the cart count after adding products to cart.
The beforeEach hook, is utilized to navigate to the home page before the execution of each test within the test.describe block in this file.
Playwright supports parameterization both at test level and project level. Sample parameterized test spec file was added as sauce-demo-parameterised.spec.ts under specs folder for easy reference. For project-level parameterisation, please refer to the Playwright documentation here.
You can pass environment variables to Playwright test scripts to configure and customize their behavior. These variables are useful for storing sensitive information like API keys and configuring test parameters based on the environment. You can set and use these variables in various ways, from the command line to test configurations. For more information on how to set and use these variables, please refer to the Playwright documentation here.
For a data-driven approach, Playwright supports creating tests from CSV files. For more information, please refer to the Playwright documentationhere.
Explore various utility functions and helpers that can make your testing more efficient. The Utilities section in this project encompasses a variety of functions designed to enhance the efficiency of your testing process. These utilities include:
- Page Utilities: Functions that assist in setting and getting page objects, switching between the pages, closing and reloding a page, loading and getting the page url, getting windows size, page navigations etc.
- Locator Utilities: Functions that assist in locating elements on the page, making it easier to interact with them.
- Action Utilities: Functions that encapsulate standard actions such as clicking, form filling, keyboard events, and dragging; providing a more concise way to execute these operations within your tests.
- Element Utilities: Functions for handling conditional statements with web elements, such as checking if an element is visible, hidden, or contains certain text or input values.
- Assertion Utilities: Helpers that simplify the process of making assertions about the state of the application, enhancing the readability and maintainability of your tests.
- Optional Parameter Type Objects: Provides a set of options for utility modules.
Please refer to the Utilities documentation for a comprehensive guide to the available utilities in this project, including detailed descriptions and examples of how to import and use them.
We have the flexibility from executing a single test to executing a specific set of tests, or the entire test suite. Testing can be carried out on a single browser or across multiple browsers simultaneously. By default, tests run in a headless mode, and the test outcome is displayed in the terminal.
Playwright Test for VSCode extension empowers you to run specific tests or entire test suites directly from the editor. You can conveniently trigger tests with a click, making it efficient to validate changes.
For detailed guidance on configuring test settings in the playwright.config file, and executing tests, please visit Executing tests using a Playwright Test for VSCode extension.
Playwright allows you to execute tests in parallel across multiple workers. This can significantly speed up the execution of your test suite.
To enable parallel execution, add the following line at the top of your spec file, above the test block:
test.describe.configure({ mode: 'parallel' });The number of workers can be configured either in the playwright.config file or via the command-line interface.
Utilize a variety of commands to execute your tests in different modes. Below are a few illustrative examples:
The package.json file contains several scripts designed to streamline test execution. Here are a few common examples:
- To run a single test in chromium headed mode (i.e., with the browser UI visible), use the
grepcommand to specify the test:
npm run test:chromium-headed -- -g 'Successful login will display Products Page'- To run all the tests in a spec file in chromium headless mode:
npm run test:chromium -- sauce-demo-all-pass.spec.ts- To run all the tests in multiple spec files in headed mode:
npm run test:chromium-headed -- sauce-demo-parameterised.spec.ts sauce-demo-all-pass.spec.ts- To run all the tests in a spec file with 3 threads, and 2 retries in chromium headless mode:
npm run test:chromium -- sauce-demo-all-pass.spec.ts -j 3 --retries 2- To run in debug mode:
npm run test:chromium-headed -- -g 'Saucedemo test - Add product to cart' --debug- To run all the smoke tests using the tag in headless mode for all the projects:
npm run test -- -g '@smoke'- To run all tests in headless mode for all the projects:
npm run testYou can also use the playwright command to run your tests as illustrated in the below example:
npx playwright test -c playwright.config.ts -g "logo is present @reg" --headed -j 1 --retries 0Here's what each option does:
-c: Specifies the configuration file for Playwright. In this case, it'splaywright.config.ts.-g: This is the "grep" option, which allows you to run specific tests instead of all of them. In this case, it's running the test with the name "logo is present @reg".-j: Specifies the number of workers to use. In this case, it's1.--retries: Specifies the number of times to retry failed tests. In this case, it's0.--headed: Runs the tests in headed mode. By default, tests are run in headless mode.--project=chromium: Runs the tests in the Playwright Chromium browser. By default, it will run all the projects in the playwright.config.ts--repeat-each 3: Repeats each test 3 times. This is useful for verifying the stability of a test or checking intermittent issue fixes locally by running the test multiple times.--grep-invert: The opposite of-gor grep. It filters out the tests to run.--max-failures 4: Stops after the first 4 test failures. This includes a count of failures in the retry test as well.--list: Lists all the tests, but does not run them.
For more information, please refer to the Playwright CLI documentation.
Playwright Test offers several built-in reporters tailored for various requirements, while also offering the flexibility to seamlessly integrate custom reporters. You can configure these reporters either through the command line or within the playwright.config.ts file. For a comprehensive guide on Playwright's in-built reporters, refer to the official documentation.
- Playwright command: After executing tests, you can view the reports using the following command:
npx playwright show-report <path to the report>- Framework Configured script: This framework's configuration for viewing reports is defined in the
package.jsonunder thescriptssection:
"report": "playwright show-report playwright-report"To access the reports post-test execution using this configuration, run:
npm run report-
UI Mode: Playwright's UI mode allows you to explore, run, and debug tests in a watch mode. Dive deeper into this feature here.
-
Test Generator: With Playwright, you can automatically generate tests. It inspects the page to determine the optimal locator, prioritizing by role, text, and test ID locators. Learn more about test generation using
Codegenhere. -
Trace Viewer: The Playwright Trace Viewer offers a graphical interface to review recorded traces post-execution. Get more details here.
Here are some recommended best practices when using this framework:
-
Use Utility Functions: Whenever possible, use the Utilities functions provided in the framework, instead of directly using Playwright methods. These utility functions are designed to simplify common tasks and make your tests more readable and maintainable.
-
Feedback on Utility Functions: If you encounter a missing utility function for a specific action or assertion, please provide feedback for future improvements. In the meantime, use the corresponding Playwright method with
getPagefrom@PageSetupfor the task at hand, and once we introduce new utility functions, you can easily switch to them. Your feedback is crucial to enhancing our utilities. -
Conditional Statements: Use functions like
isElementVisible,isElementCheckedfrom elementutils. These functions automatically wait for the element to become visible, with customizable timeout options. If you want to use assertions like expectElementToBeVisible then use functions from AssertUtils. -
Retrieving Text and Input Values: To fetch texts or input values, consider functions like
getAllTextsandgetAllInputValuesfrom elementutils. These methods come with built-in waits, ensuring they only proceed once an element is available, preventing premature returns of an empty Array. -
clickandNavigate vs click: If a click action triggers page navigation, use the
clickandNavigateutility function instead of theclickfunction.clickandNavigatefunction includes built-in checks for frame navigation and waits for a new page to load. Use theclickfunction if it is an Ajax call when you don't navigate to a different page. -
check vs click: Use the
checkoruncheckutility functions for checkboxes or radio inputs to toggle the state of a checkbox or to choose/deselect a radio option. If you find these functions unreliable or inconsistent during tests, we highly encourage you to provide us with detailed feedback so we can enhance the functionality of these utilities. Meanwhile, please opt for theclickfunction as a substitute forcheck/uncheck. -
Fill vs pressSequentially: Use the fill utility function as default to fill the form fields. Use presssequentially utility function when you want to simulate entering character by character likely to be the keyboard press events, such as when testing auto-search suggestions or autofill features. Playwright type documentation
-
Optional Parameters - Force & noWaitAfter:
-
force: In Playwright, the force boolean option in action methods like
click,check,uncheck,dragAndDrop,dblclicketc, allows bypassing the actionability checks on elements by setting it totrue. It's useful for simulating actions that require overriding these default checks.await click('#element-id', { force: true }) -
noWaitAfter: Actions that initiate navigations are waiting for these navigations to happen and for pages to start loading. You can opt out of waiting by setting this flag to
true. You would only need this option in exceptional cases such as navigating to inaccessible pages.await click('#submit-button', { noWaitAfter: true })
-
-
-
Web-First Assertions: Prioritize using playwright web-first assertions in your tests instead of jest or other library assertions. Playwright Web First Assertions documentation.
-
Soft Assertions for Non-Critical Checks: Use a soft assertion when a test assertion isn't critical, allowing the test to continue and fail at the end. For critical assertions, use a hard assertion i.e. the default assertion. For more info, please refer Soft Assertions documentation.
For Playwright's reference to soft assertions, please visist Playwright Soft Assertions documentation.
-
Backticks for Xpath & CSS: Always use backticks for Xpath & CSS selectors so that you can use single & double quotes together if needed without any escape characters.
-
Playwright's Inbuilt Features: Playwright comes with a wide range of inbuilt features. Make sure to utilize these as needed.
In addition to these, Playwright also recommends following certain best practices. You can find more details in the Playwright Best Practices documentation
Please refer to the FAQ documentation for questions about dependencies, libraries, utilities and errors.
If you encounter any issues or have feedback, please Raise an Issue on GitHub.
We welcome contributions! Feel free to submit a Pull Request on GitHub.