Xplorer FX setup
This document will attempt to document the process of setting up a Playstation console with an Xplorer module connected to a computer using a parallel cable. Using this setup it's possible to run custom code on the console and write emulator tests, homebrew, dumping memory cards etc...
- Compatible Playstation
You need an early "fat" Playstation with a PARALLEL I/O port
available at the back. The region shouldn't matter (the Caetla
firmware can handle both PAL and NTSC video output).
Wikipedia has a list of Playstation models with a parallel connector.
The parallel connector was removed from newer fat Playstation models (starting with SCPH-900X apparently) and from the PSone so those can't be used.
Any console model up to and including SCPH-750X should do the trick.
Here are two of my consoles featuring a parallel I/O port: a PAL SCPH-1002 and a PAL SCPH-7502 stacked on top with the Xplorer FX module connected.
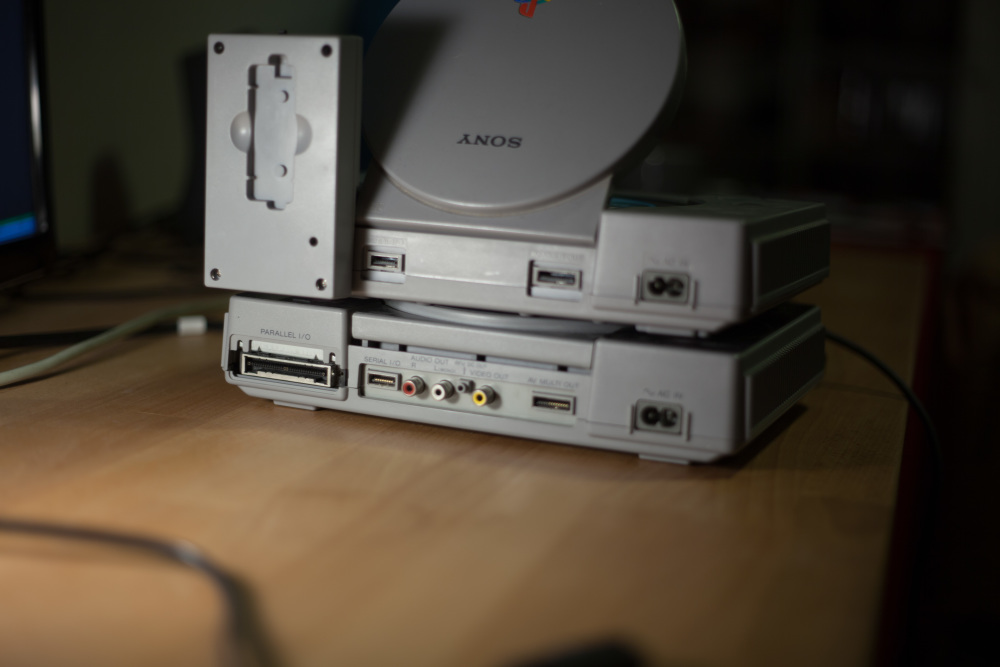
Note that there's a little screw in lone hole at the back of the Xplorer module that can be used to secure it to the console instead of putting stress on the connector itself.
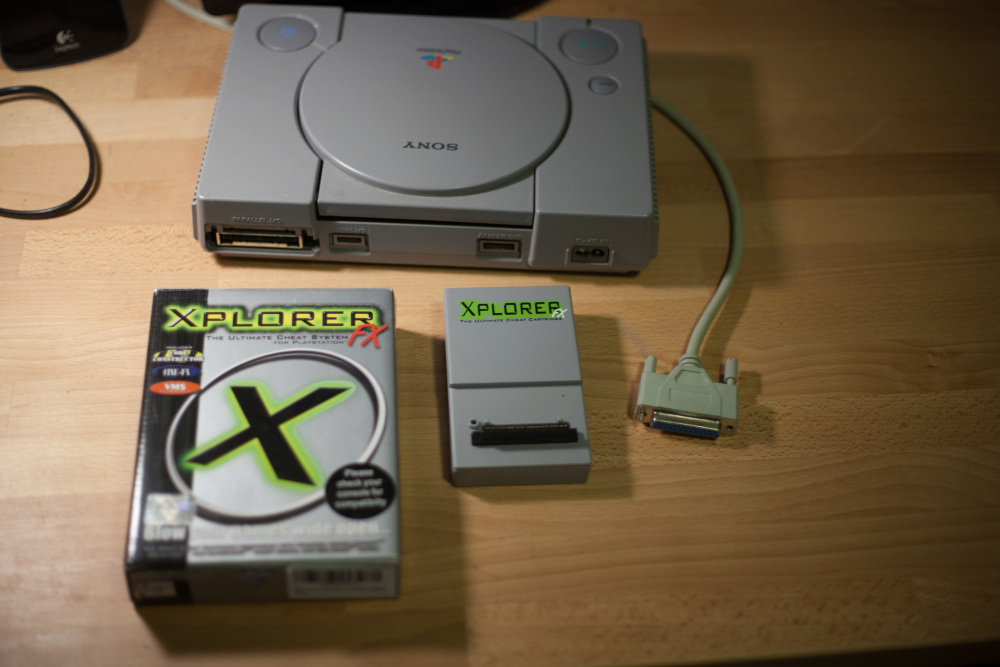
- Xplorer FX module
The "FX" part is important, there are other versions out there which are significantly different. Maybe they work, maybe they don't, I can only vouch for the FX version.
Also not all other versions have a parallel port to connect a PC which make them useless for our purposes.
Of course those modules are no longer being produced but they're not difficult to find online in my experience.
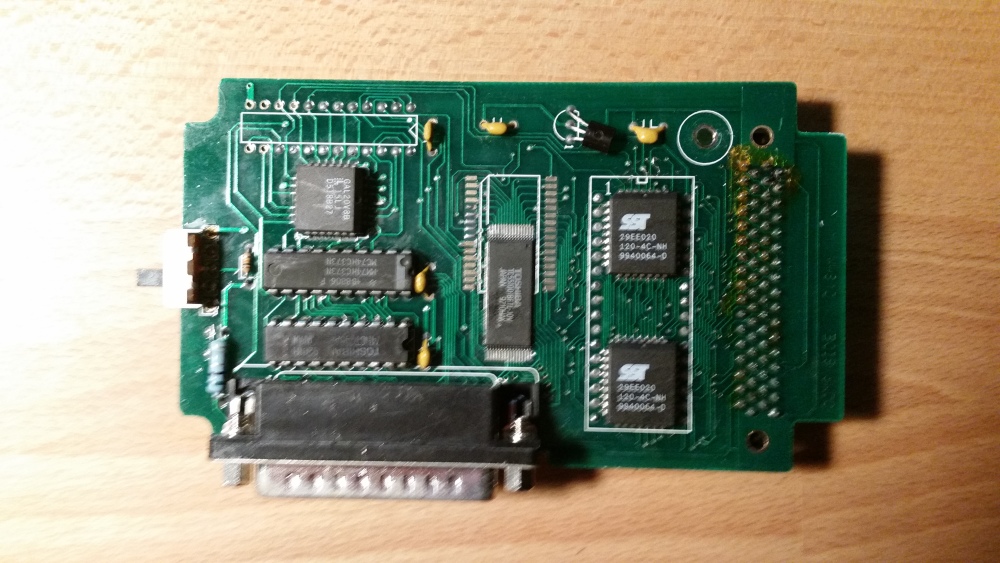
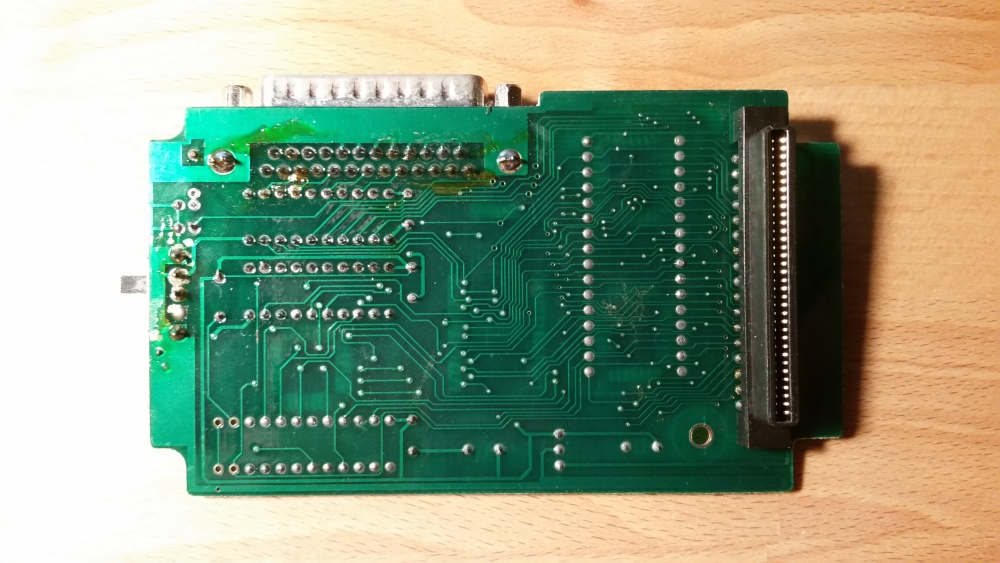
You can even find differences among different FX modules, there are various EEPROM configurations. I don't know if all are supported by X-killer, for reference here's what my Xplorer FX module's PCB looks like:
- PC running Windows
I tested with Windows 7 but it should work with earlier versions.
We'll only need windows for the initial flash of the caetla firmware, after that we'll be able to do everything from Linux.
- Parallel port
The PC must have a real parallel port to connect to the Xplorer FX module. Either on the motherboard or a PCI/PCIe daughterboard.
The cheap printer-to-USB dongles won't work, unfortunately. Apparently they don't truly emulate a real parallel port, only the printer-specific protocol or something like that. They're recognized as a printer interface and not a parallel port both on Windows and Linux. Maybe they could be abused to communicate with an Xplorer FX module but it definitely won't work out of the box.
I'm using a "LogiLink PC-0013" card connected on a PCI slot. Linux recognizes it as:
Parallel controller: MosChip Semiconductor Technology Ltd. PCI 9865 Multi-I/O Controller
- Parallel cable with DB25 connectors
Obviously. Make sure you get the right connectors, if you look for parallel cables online you'll often find ones with "connectics"/micro ribbon connectors popular with old printers while the Xplorer FX uses DB25.
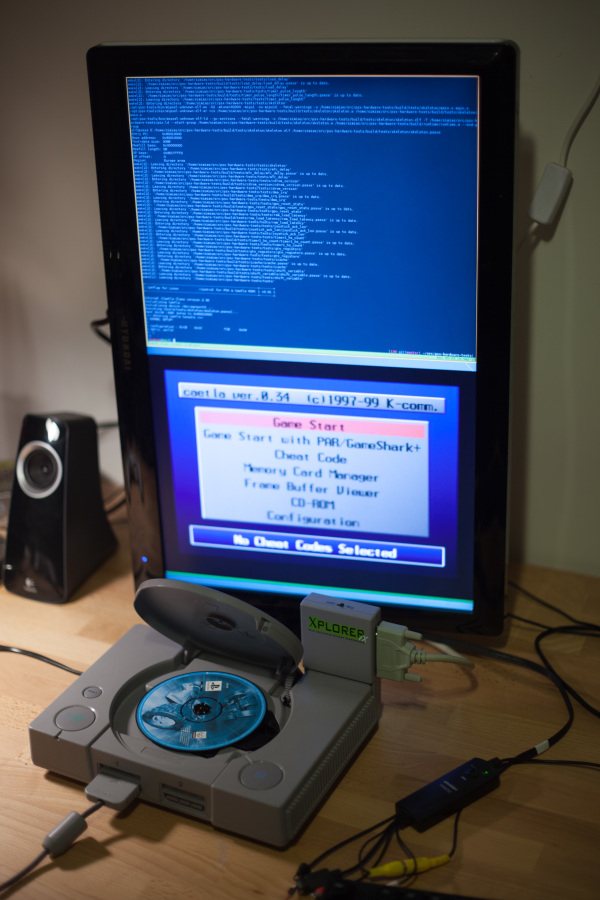
After inserting the Xplorer FX module in the console's PARALLEL I/O
port and making sure switch on the top of the module is ON you can
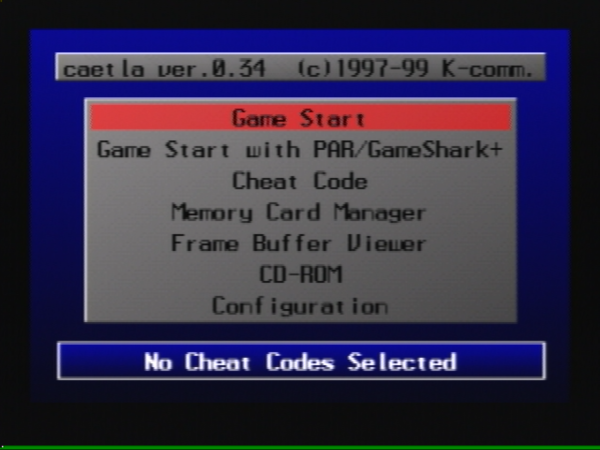
turn the console on and you should see the original Xplorer FX ROM's
menu displayed on the console's video output:
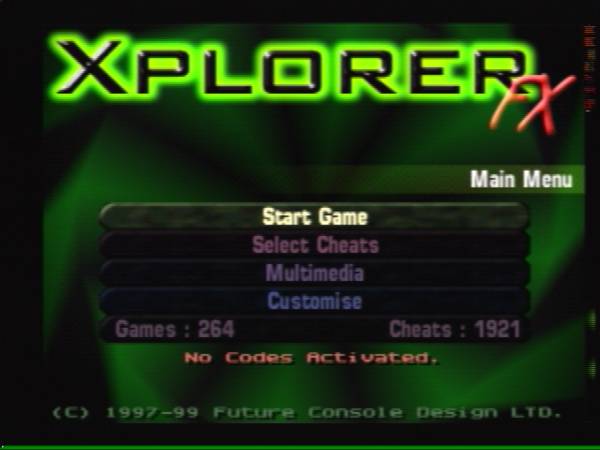
This default ROM is probably very nice if you want to cheat at video games but it's not great for developing and running code. For this reason we'll flash it with the (much less colorful) caetla-0.34 ROM that we'll be able to control easily from the Linux command line.
If instead the console boots up normally make sure the Xplorer-FX is
plugged correctly and that its switch is in the ON position. You may
have to cleanup the console's port with a spray duster or something
similar: most people never used the parallel port on their console and
it can get pretty dusty after a decade or two.
If it still doesn't work the worst case scenario is that the module is broken or has a bad firmware (the Playstation BIOS looks for a special "Licensed by Sony Computer Entertainment Inc." byte string at the beginning of the module's ROM before it attempts to run its code, if the ROM is bad the BIOS will ignore it and continue as usual).
If you can't get the Xplorer-FX to work on your console you should try another one to make sure the module's the problem. If it really turns out that the module's bricked you could probably try to salvage it by continuing this procedure and attempting to flash a new firmware.
Don't attempt a "blind" flash if you're not sure the Xplorer is actually broken: if the flash doesn't complete succesfully you risk ending up with a nice Xplorer-themed paperweight.
For this reason it can be a good idea to screw the module in the console once you made sure that it works properly, this way you don't risk unplugging it by mistake (and that's quite easy to do when the big Parallel cable is plugged in the module).
The next step is to replace the Xplorer FX factory ROM with Caetla. Unfortunately I don't think there's any open source tool to do that, the only working program I've found runs on Windows (tested on Windows 7).
So take your favorite Windows PC, install a parallel port PCI/PCIe card if it doesn't have one on the motherboard and make sure the drivers are correctly installed.
Next you'll need to use a program called "x-killer" by Tim Schuerewegen. As far as I know it's the only Xplorer flashing program left that will work with a modern Windows version. All the other tools I've found rely on raw parallel port access which is only possible in Windows 9x...
Tim has been nice enough to make me an updated x-killer binary that uses the "inpout32.dll" library to work on later Windows versions.
For convenience I've bundled this updated version of x-killer, the inpout32.dll and the Caetla 0.34 ROM in a zip archive: x-killer_caetla.zip.
Before you run the x-killer.exe program you need to make sure the
inpout32.dll sees your parallel port and is correctly initialized.
In order to do this you must start a command line session with
administrator privileges in order for the inpout32 library to gain
access to the parallel port. On Windows XP you should be administrator
by default, on later versions you'll have to hunt the Command Prompt
program in the start menu, right click it and select "run as
administrator".
From this administrator command prompt cd to the directory
containing the inpout32.dll file and run:
rundll32 inpout32.dll,Info
This should pop a new window up that will look like this:
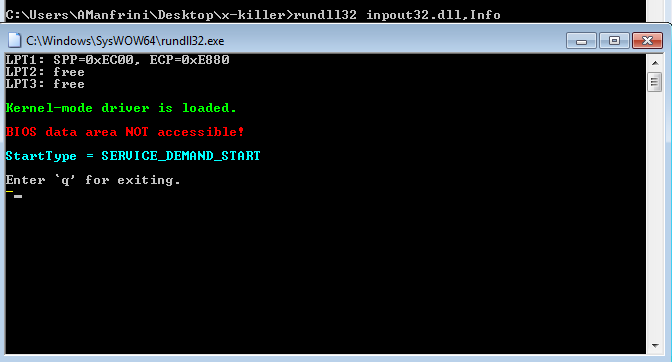
Make sure you have the green "Kernel-mode driver is loaded" message. If that's not the case it probably mean that you're not running the command with administrator privileges.
You should also see your parallel interface appearing in one of the three "LPT" entries at the top, if all three are "free" it means that it didn't recognize the parallel port. Make sure the drivers are correctly installed (check the Windows Device Manager) and attempt to reboot the computer and start the procedure again (admin command prompt -> rundll32).
If the input32.dll is correctly initialized you're good to go.
Connect the computer's parallel port to the Xplorer's FX side port if
it's not already done, start the console and fire up x-killer.exe
(it should be in the same directory as the inpout32.dll).
You can mess around in x-killer's interface: it let's you dump memory cards, reset the console and many other things. More importantly it will let us flash the module with Caetla so that we can use it in Linux.
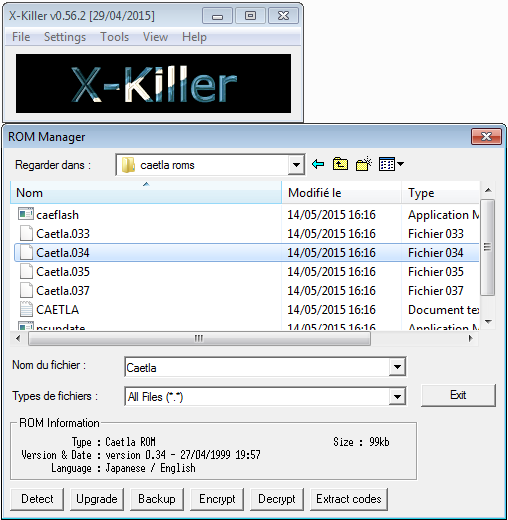
In order to do this find Tools -> ROM Manager in x-killer's menu. In
the file selector dialog select the Caetla.034 file provided in the
archive. There are other versions of Caetla out there (up to 037 I
think) but x-killer only seems to support this one and it works fine
in my experience.
You'll see that x-killer is able to display some details about the ROM in the "ROM Information" portion of the dialog:
If everything looks fine, if you're sure that the Xplorer FX is well secured at the back of your console and you don't risk having a power outage within the next minute or so it's time to make the big jump: press the "Upgrade" button and x-killer will attempt to flash Caetla on the module.
If everything went as planned you should now see Caetla's menu when you boot up the console:
Congratulations, you can now ditch Windows, from this point we can do everything from a decent OS.
In order to control the Playstation through the Xplorer FX module in
Linux you'll need to build the catflap command line utility, you can find the source here:
https://github.com/hkzlab/catflap4linux
Use catflap help to display the various commands supported by the
utility. You can dump/upload the contents of the RAM and Video RAM,
dump and restore the contents of memory cards. And of course, you can
upload your own programs!
For instance you can try to run this simple executable: helloworld.psexe.
Simply start the console and execute:
catflap run helloworld.psexe
You should see a gradient appearing on the screen for a few seconds:
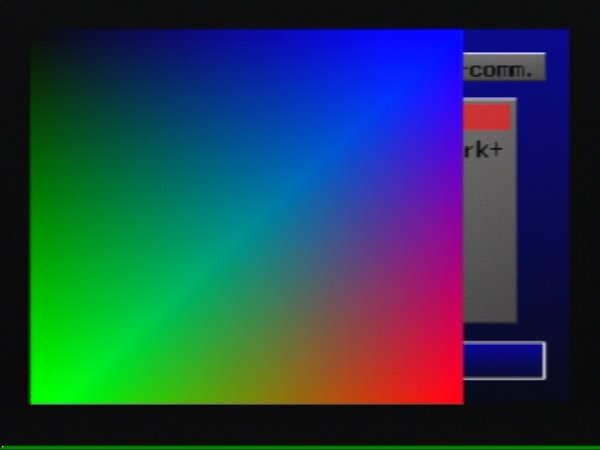
You should also see a "Hello, world!" message in catflap's output: it forwards the console's serial port to the command's standard output.
Sometimes while using catflap if I reset my console it won't restart, I end up on a black screen. This seems to happen when the parallel port in is a weird state that locks the Xplorer for some reason. When that happens you can just start the "catflap run" command and then restart the console, it usually unlocks it. Unplugging the parallel port works as well but it's more annoying...
You can easily dump your console's BIOS using catflap. The BIOS is
memory mapped at address 0x1fc00000 and is 512kB big so we can dump
it using:
catflap down bios.bin 0x1fc00000 0x80000
Where bios.bin is the name of the output file. The command will take
a little while to complete (around 15s on my machine).
That should be the subject of another guide but basically you'll need
a toolchain targeting mipsel-unknown-elf. At least an assembler but
you can use a full C compiler. There's an unofficial PSX
SDK available online that you can
use, it basically lets you build a GCC crosscompiler and provides a
bunch of handy libraries (especially if you plan to program a game).
My tests written in assembly are available in my psx-hardware-tests repository.
I wrote a small utility in Rust to convert the ELF binaries generated by gcc/binutils to the "EXE" format used on the playstation: elf2psxe.
There's a similar utility in the PSX SDK mentioned above.
Good luck!