Ruby CLI to spawn processes to get work done
The phrase "¡véte!" in Spanish means, basically, "Get out!". This tool helps to clear out work in a hurry, using a simple approach of spawning a set number of concurrent processes to handle each job. Jobs are defined as files in a directory, so there is no need for a database or any other complexity.
To use vete, there are three steps:
- Define a method called
setupwhich sets up a context for each task - Define a method called
perform(task)which is invoked for each task - At the end of your script, trigger everything with
require "vete"
When your script executes, the setup method is called once. Its purpose is to
initialize a context that all subsequent tasks will inherit. It also is where new
tasks are defined or prior failed tasks can be prepared to be retried. Instance
variables and other context defined in the setup method is available to each task.
Once the setup method has been called, a configurable number of worker processes
will be spawned in parallel. Each worker will immediately call perform(task). Since
each process inherits the context defined by the setup method, memory is efficiently
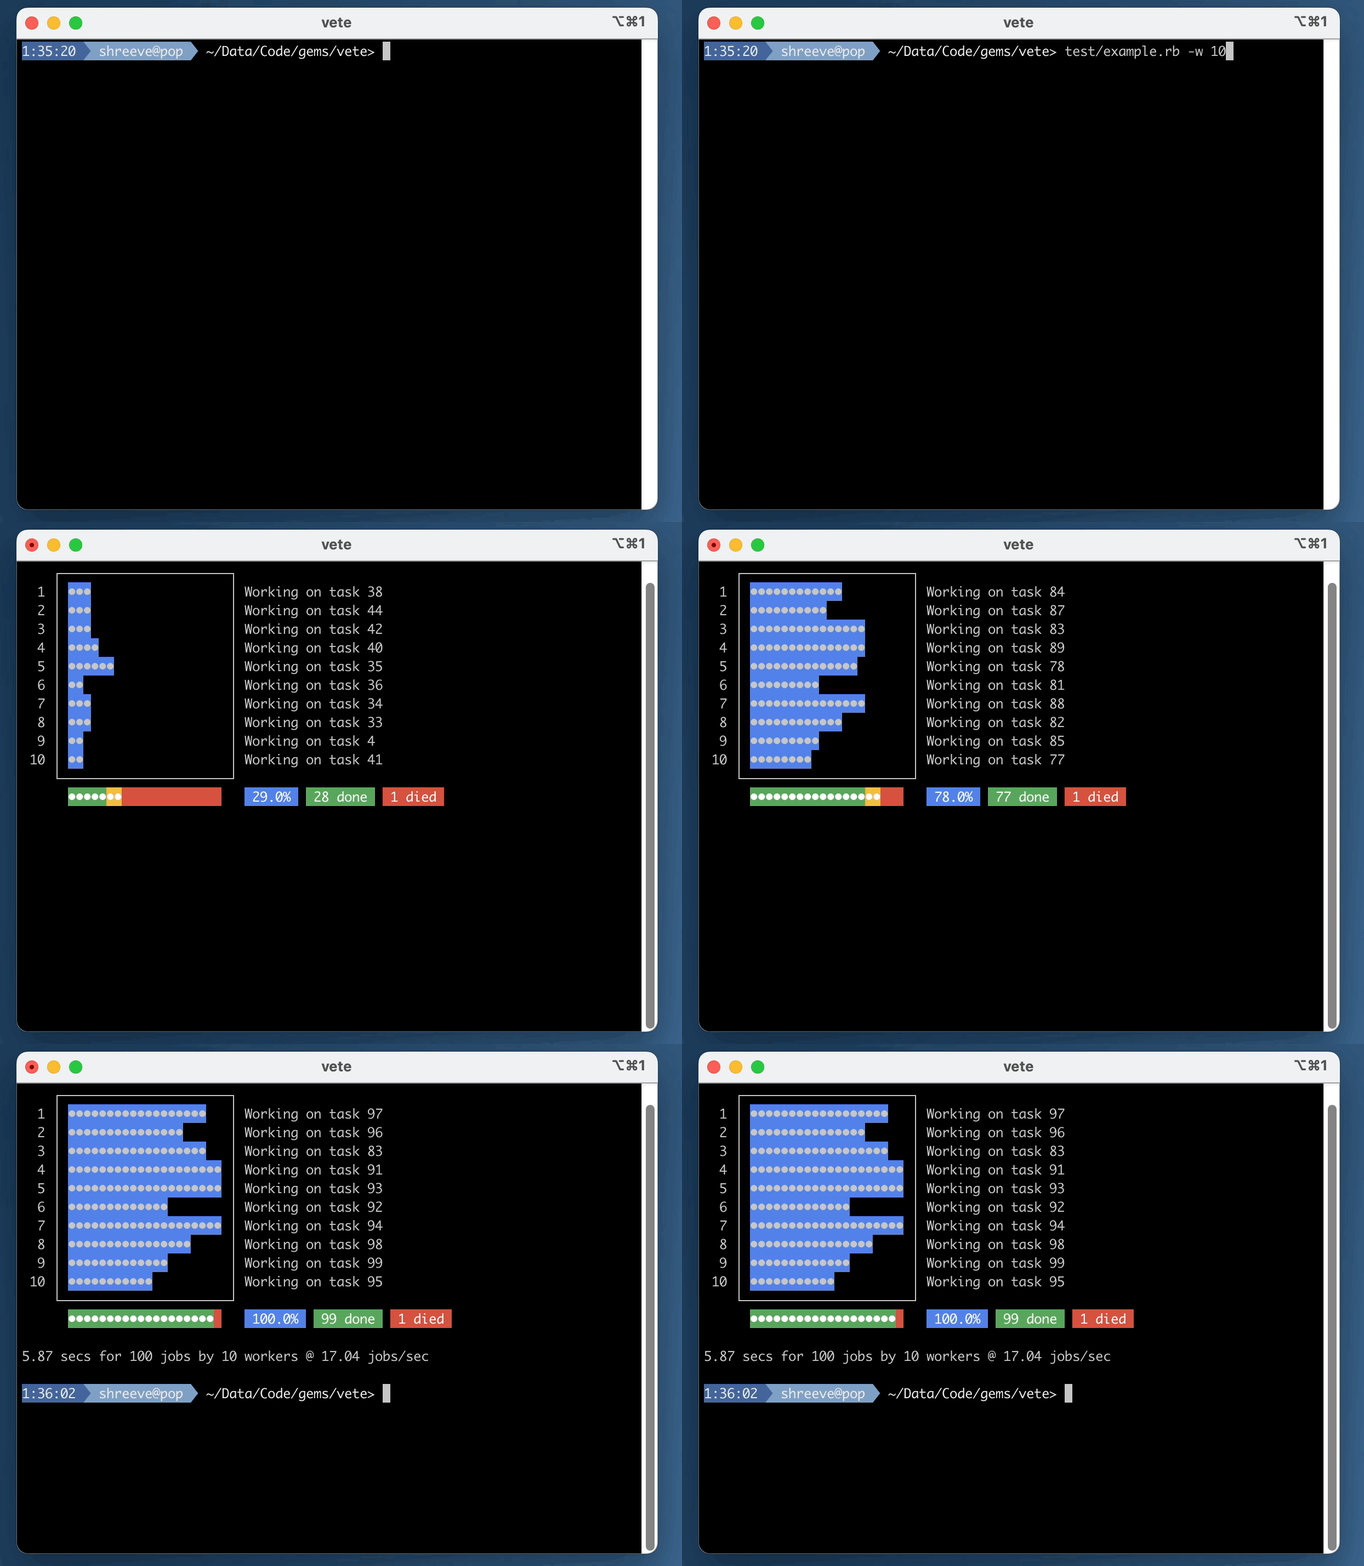
shared. As tasks are executed, a progress bar will indicate the overall completion status.
Running the test/example.rb script with 10 workers:
Here is the code for the above:
#!/usr/bin/env ruby

def setup
  vete_retry or begin # retry prior failed tasks, or
    vete_init # initialize the main task directory structure
    100.times {|i| vete_todo(i + 1) } # create 100 new tasks
  end
  @time = Time.now # instance variables are visible to each task
end

def perform(task)
  sleep rand # simulate some work performed
  secs = Time.now - @time # do something with @time (defined in setup)
  exit 1 if rand < 0.03 # simulate a 3% chance of failure
end

require "vete" .vete/
├── died/
├── done/
└── todo/
The above directory structure is used by vete to define tasks and to process
their lifecycle. Tasks are defined as files in the .vete/todo directory. For example,
if we needed to pull down a report for four days in April 2023, we may define these
four tasks as follows:
  .vete/
  ├── died/
  ├── done/
  └── todo/
├── 20230410
├── 20230411
├── 20230412
└── 20230413
This file structure can be defined in the setup method, or you could choose to
manually create the files any other way.
When vete is launched by the require "vete" line in the script, it will call
the setup script (if it is defined). Then, it will look for files in the .vete/todo
directory. The desired number of worker processes is then launched in parallel, each
time calling perform(task) with task being the full pathname of the next file in the
todo directory.
If perform(task) executes without any error, then the file for that task will be moved
to the done directory. If errors occur, the file is moved to the died directory.
Suppose that three of the tasks above successfully completed, but one failed. This would
yield the following file structure:
  .vete/
  ├── died/
  │   ├── 20230412
  ├── done/
  │   ├── 20230410
  │   ├── 20230411
  │   └── 20230413
  └── todo/
Note that any filename can be used and the files can be either empty (with the filename
being used to indicate the nature of the task), or the files can contain data (such as
JSON or anything else). The perform method is free to do whatever is needed to process
the task and since it's running in it's own process, there is no concern for traditional
thread concurrency issues, etc.
As an example, here is another valid set of tasks that may contain JSON payloads that are needed when processing each task.
  .vete/
  ├── died/
  ├── done/
  └── todo/
      ├── amazon.json
      ├── apple.json
      ├── facebook.json
      └── google.json
A command line utility (simply called vete) can be used to launch a script that
defines the perform(task) method and, optionally, the setup method. You can also
run vete -r to remove the entire .vete directory.
Running vete -h provides some additional help:
$ vete -h

usage: vete [options]
    -b, --bar <width>                Progress bar width, in characters
    -c, --char <character>           Character to use for progress bar
    -d, --delay <mode>               Delay mode (rand, task, numeric)
    -h, --help                       Show help and command usage
    -r, --reset                      Remove directory used for job processing and quit
    -v, --version                    Show version number
    -w, --workers <count>            Set the number of workers (default is 1)
Running a vete enabled script (ie - one that contains require "vete" as the last
line of the file) will automatically extend the vete command line utility. As a result,
you can run your vete enabled script directly and pass any of the above command line
options, as follows:
test/example.rb -w 10This will run the example.rb file (which creates 100 tasks) and it will spawn 10
concurrent processes to perform the work. See the screencast at the top of this file
to see how this works.
