OAuth2 Provider currently supporting the Resource Owner Password Credentials Grant as described in Section 1.3.3 of RFC 6749.
Powered by Flask-OAuthlib, Redis and MongoDB.
$ pip install flask-sentinelOnce the extension and its dependencies are installed, you can use it like any other Flask extension:
from flask import Flask
from flask.ext.sentinel import ResourceOwnerPasswordCredentials, oauth


app = Flask(__name__)

# optionally load settings from py module
app.config.from_object('settings')

@app.route('/endpoint')
@oauth.require_oauth()
def restricted_access():
    return "You made it through and accessed the protected resource!"

if __name__ == '__main__':
    ResourceOwnerPasswordCredentials(app)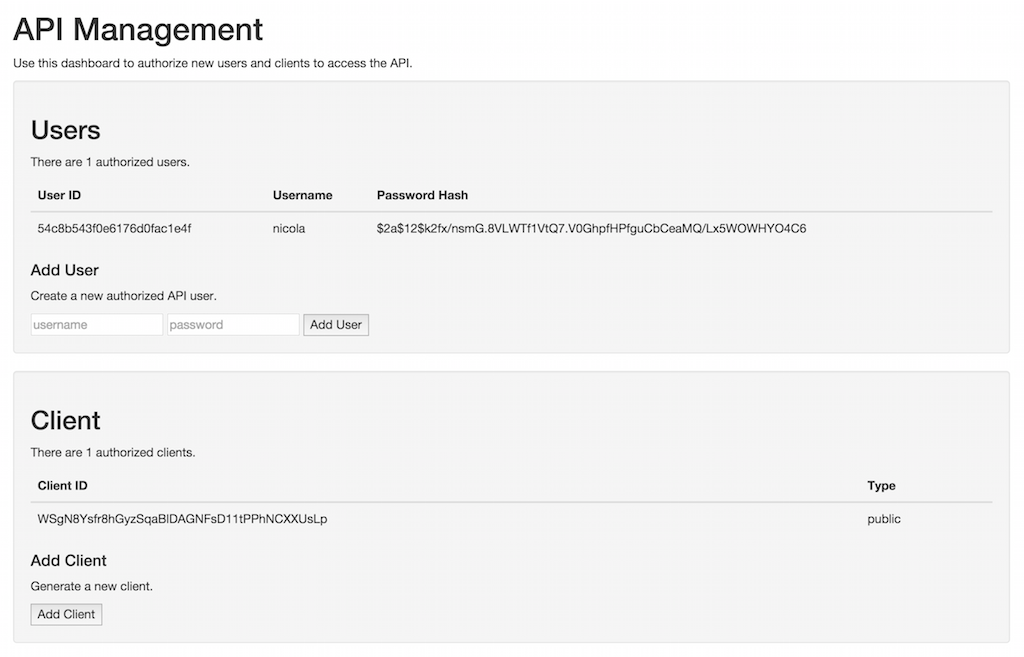
app.run(ssl_context='adhoc')You can create users and clients through the default management interface available at https://localhost:5000/oauth/management.
You can override the default page above with your own. Just drop your custom management.html file in a templates folder residing in your application root.
This page can and should have restricted access. In order to achieve that, set SENTINEL_MANAGEMENT_USERNAME and SENTINEL_MANAGEMENT_PASSWORD in your application settings. This will fire up a Basic Auth dialog when the page is accessed with a browser.
After creating a user and client, you may use curl to test the application.
$ curl -k -X POST -d "client_id=9qFbZD4udTzFVYo0u5UzkZX9iuzbdcJDRAquTfRk&grant_type=password&username=jonas&password=pass" https://localhost:5000/oauth/token
{"access_token": "NYODXSR8KalTPnWUib47t5E8Pi8mo4", "token_type": "Bearer", "refresh_token": "s6L6OPL2bnKSRSbgQM3g0wbFkJB4ML", "scope": ""}$ curl -X POST -d "client_id=9qFbZD4udTzFVYo0u5UzkZX9iuzbdcJDRAquTfRk&grant_type=refresh_token&refresh_token=s6L6OPL2bnKSRSbgQM3g0wbFkJB4ML" https://localhost:5000/oauth/token
{"access_token": "RmPAfqfsDoMCbQ2DUUehwcw1hMCMJj", "token_type": "Bearer", "expires_in": 3600, "refresh_token": "s6L6OPL2bnKSRSbgQM3g0wbFkJB4ML", "scope": ""}$ curl -k -H "Authorization: Bearer NYODXSR8KalTPnWUib47t5E8Pi8mo4" https://localhost:5000/endpoint
You made it through and accessed the protected resource!Configuration works like any other Flask configuration. Here are the built-in defaults:
|
Default prefix for OAuth endpoints. Defaults to |
|
Url for token creation endpoint. Set to |
|
Url for management endpoint. Set to |
|
Url for the redis server. Defaults to |
|
Mongo database name. Defaults to |
|
Username needed to access the management page. |
|
Password needed to access the management page. |
|
The error page when there is an error, default value is |
|
Default Bearer token expires time, default is |
|
You can also configure the error page uri with an endpoint name. |
Other standard PyMongo settings such as MONGO_HOST, MONGO_PORT, MONGO_URI are also supported; just prefix them with SENTINEL_ as seen above.
When a token is created it is added to both the database and the Redis cache. In Redis, key is the access token itself while value is the id of the user who requested the token. This allows for fast token authentication/verification bypassing the database lookup. This tecnique can be used, for example, when integrating flask-sentinel with Eve powered REST API instances.
See the Eve-OAuth2 example project.
When working with OAuth 2.0, all communications must be encrypted with SSL/TLS. This example uses auto-generated SSL certificates, however in a production environment you should use a more formal, widely trusted certificate associated with your domain. In addition, requests should be handled by something like NGINX and proxied to the authentication service.
Note: Add `-k` to your `curl` arguments if you are working with an untrusted development server running under SSL/TLS.
Bcrypt and a randomly generated salt are used to hash each user password before it is added to the database. You should never store passwords in plain text!
Flask-Sentinel is a Nicola Iarocci and Gestionali Amica open source project distributed under the BSD license.
This work is based on the yoloAPI project by Josh Brandoff and Jonas Brunsgaard.