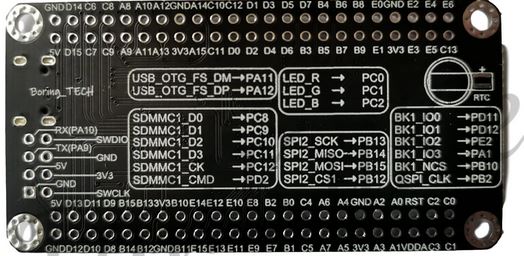
STM32H743VIT6 Boring_TECH W25Q64 QSPI Sources
STM32H7 FW v1.9.0
STM32CubeIDE v1.7.0
STM32CubeProgrammer v2.7.0
Just a simple example. This example does not create a .stldr file. It communicates with the W25Q64 and handles operations such as read,write etc...
Based on WeAct Studio H743VIT6 and some chinese source.
WeAct Studio H743VIT6 : https://github.com/WeActTC/MiniSTM32H7xx/tree/master/SDK/HAL/STM32H743/06-SPIFlash_Test/Drivers/BSP/W25QXX
Chinese Source : https://cloud.tencent.com/developer/article/1662643
Also quadspi.h , quadspi.c , main.h edited.
Just a simple example. This example does not create a .stldr file. It communicates with the W25Q64 and handles operations such as read,write etc...
Based on Controllers Tech Youtube channel and GitHub, ST Official QSPI Driver for N25Qxx, DevEBox H743VIT6 and some chinese source.
This example is based on the general similarity between the W25Qxx and the N25Qxx. In the project, ST's official N25Qxx drivers were edited for the W25Qxx.
Controllers Tech Video : https://youtu.be/xIfh_uYy-OU
Controllers Tech GitHub : https://github.com/controllerstech/STM32/tree/master/QSPI/N25Qxxx
DevEBox H743VIT6 : https://github.com/manoloaterol/MCUDEV_DevEBox_H743-W25Q64-EL
Chinese Source : https://cloud.tencent.com/developer/article/1662643
This example is similar to the video on the Controllers Tech Youtube channel.
Also quadspi.h , quadspi.c , main.h edited.
STM32CubeIDE to build .stldr file
I took this project as an example to create the .stldr file. : https://github.com/manoloaterol/MCUDEV_DevEBox_H743-W25Q64-EL
And very useful video . If you are going to create your own .stldr file you should watch. : https://youtu.be/XqCq0xtQmbI
The two boards have the same MCU and FLASH, but each board's FLASH is connected to different pins. So the .stldr file in that project(DevEBox) will not work in Boring_TECH.
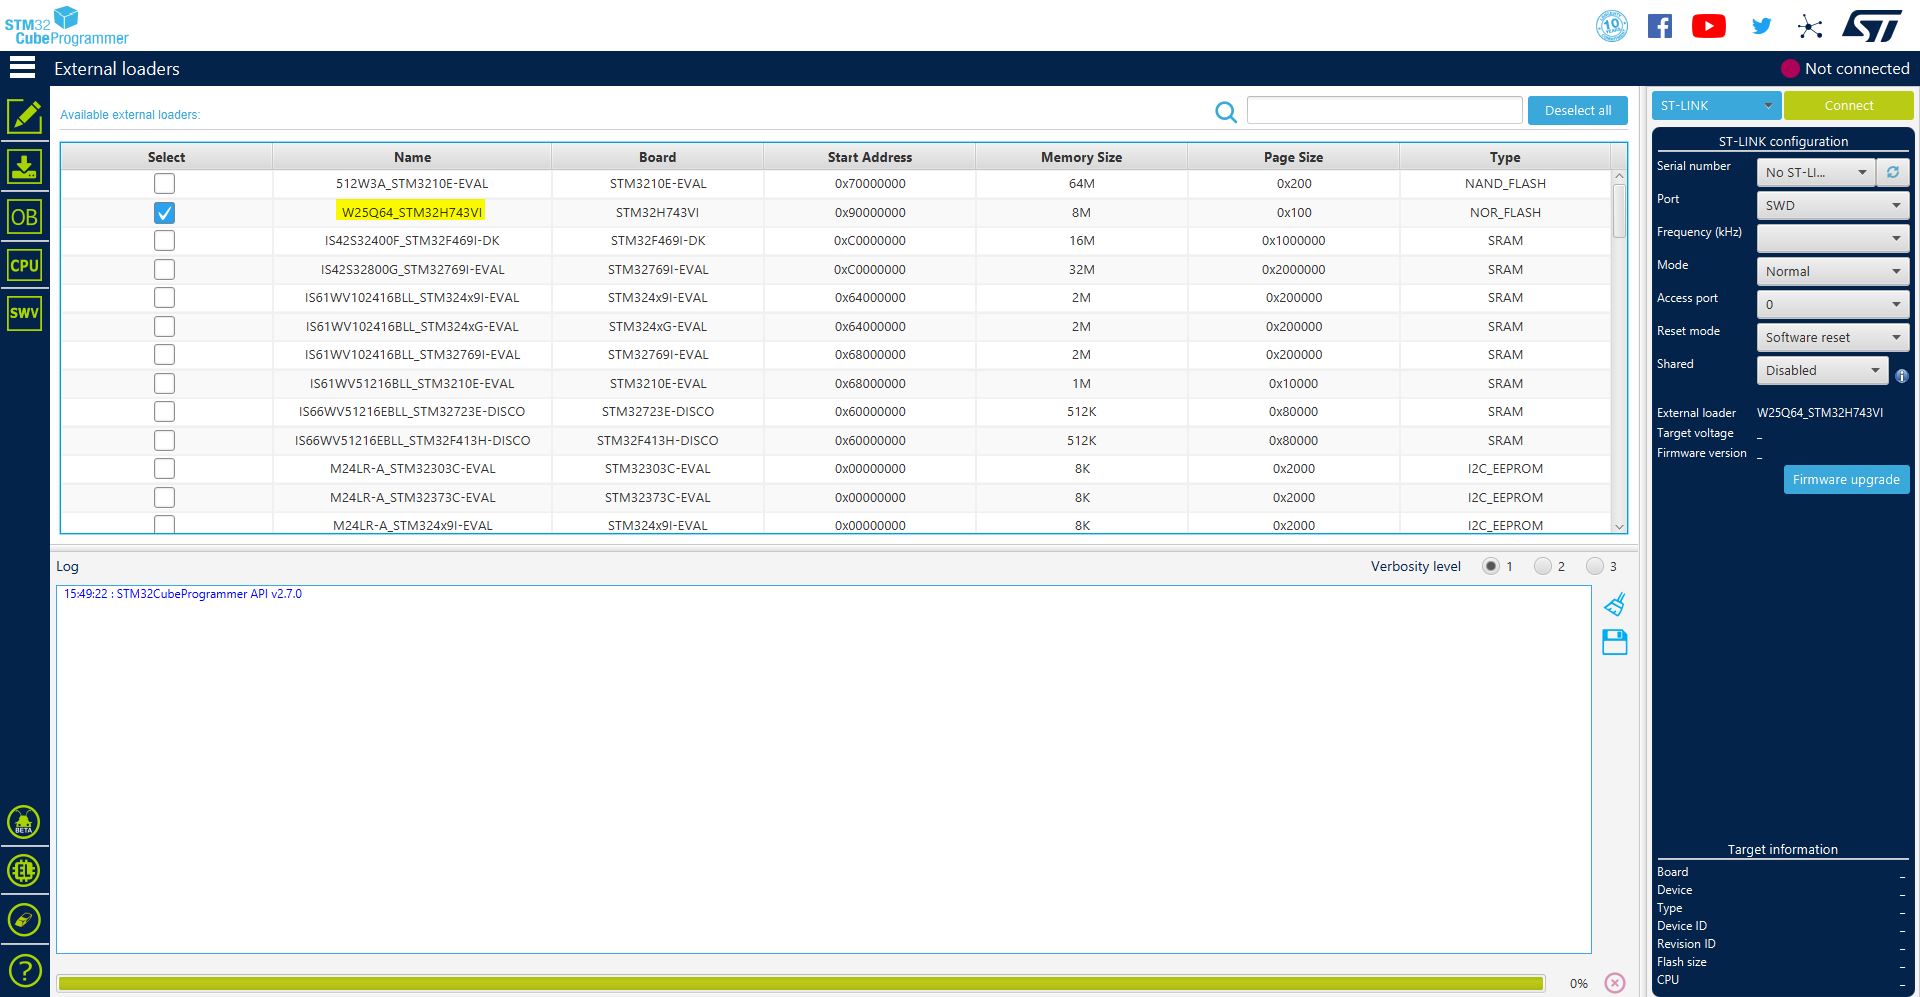
Copy the .stldr file into CubeProgrammer\bin\ExternalLoader\
When you run CubeProgrammer, you can find it in External Loaders(EL) with the name W25Q64-STM32H743VI
Just simple examples. Based on the video on the Controllers Tech Youtube channel.
Controllers Tech Video : https://youtu.be/gAyuF20ok8c
Controllers Tech GitHub : https://github.com/controllerstech/STM32/tree/master/QSPI/N25Qxxx/EXT_MEM_BOOT
The XIP_1 project is the same as Example2. The only difference is the use of Memory Mapping Mode.
The XIP_2 project is install on W25Q64. It is similar to the project created after 6:08 in the video.
There is a very important difference. An additional line must be edited in the system_stm32h7xx.c file. It will not work if not edited.
Before editing : SCB->VTOR = FLASH_BANK1_BASE | VECT_TAB_OFFSET; /* Vector Table Relocation in Internal FLASH */
After editing : SCB->VTOR = QSPI_BASE | VECT_TAB_OFFSET; /* Vector Table Relocation in Internal FLASH */
Copy the W25Q64 .stldr file into \STM32CubeIDE\plugins\com.st.stm32cube.ide.mcu.externaltools.cubeprogrammer.win32_2.0.0.202105311346\tools\bin\ExternalLoader\
Everything else is the same as the video.