Dieter, Pierre-Henri and Gleb gets Raspberry Pi computers for Christmas, and embarks on a Coding Adventure!
This document gives you everything you need to get hacking with the Raspberry Pi!
- I just gave all you guys real computers!. It can do everything your laptop can do!
- You can actually build stuff with it!
- Simple stuff, like hook up speakers to it and use it as a music player... or
- Build your own Hardware! You can connect buttons, lights, a small screen, etc!
It's basically the innards of an iPhone 5, with all the pins exposed! It's built and maintained by the Raspberry Pi foundation as an educational tool.
- It has a powerful graphics card, can play 1080p video and has HDMI out!
- It can run either Linux or Android, and is built for easy programming! We'll mess around with Linux and Python!
- You can easily build your own hardware and attach it! Like buttons, LEDs, the christmas lights, etc...
- It's the most popular educational computer on the market!
Specifically, I gave you guys the newest Raspberry Pi 2! Here's the Specs
Raspberry Pi has a quickstart guide here.
Step 1: Setup!
Copy NOOBS onto the SD card I gave you using your computer. Then stick it into your Raspberry Pi.
Step 2: Connect!
Plug your Raspberry Pi into a monitor, keyboard, mouse and power! Then follow the NOOBS installer to install Raspbian (a derivative of Debian Linux, just like Ubuntu)
Step 3: Mini Project: LEDs and Buttons!
Let's do some Physical Computing on the Raspberry Pi! Try to make a little circuit with an LED, and use python to turn it on and off using the GPIO pins!
Expand it to also read the value of buttons!
*CAREFUL:* You CAN damage your raspberry pi by connecting the pins incorrectly!

1. ALWAYS disconnect your circuit before plugging and unplugging components or changing things.
2. DO NOT draw more than 3.3V or less than 0V from a pin. Don't wire power directly to ground!
3. Do NOT draw more than 5mA from a pin! Use the included transistors to switch higher power things on and off.
4. Use Pull-down and Pull-up resistors with buttons.
What is a pull-up and pull-down resistor?
Check out Pat's course CS107E, it has a guide to basic electronics with the Raspberry Pi.
Step 4: Serial Bridge from Laptop to RPi!
Install the SILABS USB to UART CP21xx driver, and try to make Python on your Raspberry Pi talk to you computer over Serial!
1 Install the SILABS driver
2 Plug the USB to UART adapter into your computer
3 Install a serial console on your computer, like CoolTerm
4 Write a Raspberry Pi program to send and receive serial data, and see if it shows up on your laptop.
Step 5: Mini Project: Transistors and Lasers!
Switch the Laser on and off with the Raspberry Pi using transistors!
The laser wants a higher voltage and higher current supply than the Raspberry Pi can provide. This is where you can use the transistor: The transistor is just a switch. A switch you can control electronically. By switching low power on the "base" pin, you can control whether high power flows through the other pins.
Follow This article on how to switch 9v using a NPN transistor and hook up a higher voltage to your laser!
Step 6: Mini Project: Servos and why you also need an Arduino!
Drive a Servo with PWM!
Make the servo turn left and right from Python!
Python is not great for driving Servos (and Linux in general isn't!) since it doesn't guarantee the timing of when things will happen. The same little processor is also driving your screen, mouse, keyboard, the network, keeping time, etc etc.
You can do better than python by using this ServoBlaster Kernel Module or by connecting it to an Arduino or a Motor Shield / HAT
The BEST you can do is to use hardware PWM. RaspberryPi has one dedicated little chip just to make PWM signals. This tutorial explains how to use WiringPi to access this port.
Step 7: Start Designing Your Own Stuff, or Get Insired By Others!
Read the rest of this page, and check out the "Cool communities and places to look" or google for "Raspberry Pi projects"!
We can built lots of stuff. But that's not a useful answer. The RaspberryPi is primarily an educational tool, but it's beefy enough to do tons of real-world stuff. So, here's the capabilities of this little kit:
The RaspberryPi is a quad-core 1Ghz computer, with 1Gb RAM and a 16GB SD card for storage. It has a fast graphics card on it (for its size) that can decode 1080p movies to your big screen (1920x1080 maximum resolution). So, you can definitely play movies, netflix, youtube, all that kinds of stuff on here.
It also has 100Mbps ethernet and four USB2.0 ports. So you can plug in (multiple!) external hard drives, and you can use it as a file server. It can share four hard-drives on your network. It's also powerful enough to run a webserver! You can host your own website on it. Or use it to torrent things! You can even leave it plugged into the university's network at school, and use it as a file server. Log into it remotely, and download things over the fast school internet. Host a minecraft server! Host an IRC chat server! Host a Tor node for anonymous browsing! Naturally, you can plug in many USB devices! Plug in a webcam and use it as a remote monitor!
You can power it from batteries (I can help you set this up), and it's reasonable to imagine getting 5 to 10 hours of battery life from it.
It runs linux or android so you can learn how to work with a linux system. It's a really great machine for programming: Use it to learn how to program all kinds of stuff in Python: For example, use PyGame to write your own game!
- You can buy any size (from tiny to huge) LCD touchscreen on eBay, and build your own tablet!
- You can build your own hardware that connects to the GPIO pins on the side!
- Buttons, switches, LEDs, and LED matrices!
- Stepper motors, DC motors, servos! Things that turn!
- Accelerometers, Magnetometers, Gyroscopes, Barometers, Thermometers! Tons of sensors that measure the real word!
You can make a weather station that displays the current temperature and the chance of rain. Or measure the current internet ping latency and light up a row of LEDs accordingly. You can have it check your email for you, and light up an LED for every unread message - and beep every time a new message arrives!
There's a whole range of RaspberryPi HATs that sit on top of the Raspberry Pi to give you additional functionalty! My favorite is the Sense HAT! It's currently in space on the ISS, and it has a ton of sensors, a small joystick, and a badass 8x8 RGB LED display matrix, so you can make cool animations.
You can pair it with LED controllers (like the PixelPusher) and make an LED wall, or a starry night sky on the ceiling of your room!
You can hook up a motor controller and build a 2D cutter that slices up paper into shapes! Or moves a pen around to draw things programmatically! You can even build a robot! A super-fancy robot would be a rubix cube solver!
Hook it up to a Passive Infrared Sensor, and it can sense when someone is moving in your room - regardless of whether the light is on! Build a security system!
Here's some more ideas:
Multimedia-related:
- Set it up as Airplay speakers! You can stream music to it from your phone!
- Use it as a media center! Hook it up to a screen and your external harddrive, and it can play movies!
Software-related:
- Use it to run a torrent client to save stuff to your external harddrive without needing your computer
- Make a digital picture frame! Have it cycle through instagram pictures.
Hardware-related:
- Easier:
- Display temperature forecast for today on the 7-segment display
- Make the buttons send emails, texts, or scroll through different things on the display
- Measure latency to your favorite server, display it as an LED graph
- Make a sweet animation of LEDs blinking
- Intensely awesome:
- Pair it with an Arduino Mega and RAMPS shield, and build any 3-axis movable CNC machine!
- Build a 3D Printer
Where to go to learn more?
The main programming languages I suggest is Python and C. Use Python for all the experiments and hacking, use C for things that needs to be fast or needs to run without an operating system: bare metal right on the hardware!
Here's the curriculum I suggest you work through:
- Pat's CS107e Raspberry Pi Course Guides
- For hardware, understand basic electricity
- For using a transistor as a switch, follow this TL;DR then read this tutorial
- Learn basic electronics with Make Magazine's Awesome Video Course
- Learn the (UNIX command line)[https://github.com/cs107e/courseware/blob/master/guides/unix.md]
- Learn basic Python!
- Once you're ready... Build your OWN OPERATING SYSTEM!!
More Advanced Topics:
Great Communities: A big part of building stuff is having inspiration and a community to draw from. Here's some great places that's fun to look at people's projects online:
- Raspberry Pi Blog
- Adafruit Learn
- Pimoroni Learn
- Wolfgang Klerk's Arduino and Raspberry Pi Projects
- Hackaday, both the blog and the whole site
- Dangerous Prototypes
Sources of Hardware and Software: Where can you browse around and buy all the cool hardware parts for your awesome project?
Badass Projects Built on Raspberry Pi:
- FarmBot. Plants and waters a garden. Pairs a Raspberry Pi, Arduino, stepper motor drivers
- Pi Tablet. A 7" multitouch home-made tablet!
- Pi-Top Laptop. A hackable laptop - slide open the top to reveal a raspberry pi and breadboard space.
Cool hardware additions to the Raspberry Pi:
- AdaFruit Trinket. Like a tiny arduino: good for PWM generation, analog sensor reading, and real-time programming.
- SenseHAT. So cool - RGB LED matrix and a boatload of sensors!
- OLED Displays like this and this. Small, cheap, low-power, programmable displays.
- Rechargeable LiPo power source.
- LED Matrix Displays
- High Fidelity Audio Out such as the pHAT DAC for phat beats.
Each of you have slight variations on this, but here's the list of everything!
| Img | What is it? | What's it for?? |
|---|---|---|
 |
1x Raspberry Pi 2 (Model B) | A single-board 1Ghz quad-core computer with 1GB Ram! |
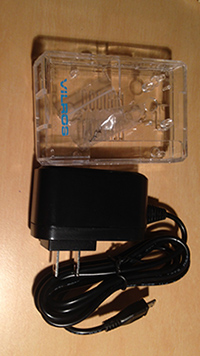 |
Case and Power Supply | Put the Pi in it, and power it up! |
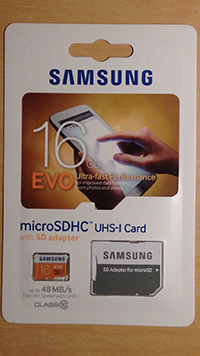 |
16GB MicroSD Card | This is the "hard drive" for your Pi! We'll put Linux on this. |
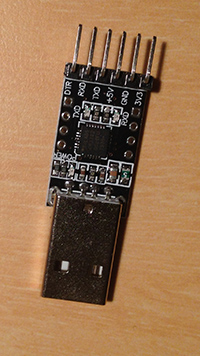 |
SILabs USB to UART Bridge | We can use this to connect to the Pi from our normal computer, when we don't have a screen or a ethernet cable for the Pi. |
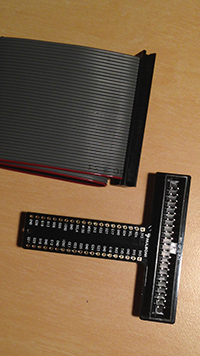 |
T-Cobbler | A simple way to connect the Pi to a breadboard to hook up electronics! |
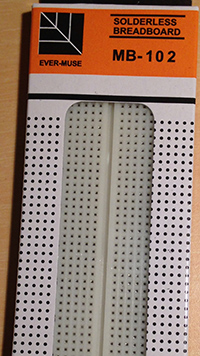 |
Breadboard | Build electronic circuits simply by pushing components into this! |
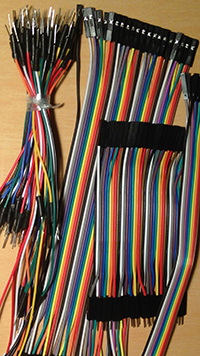 |
Assorted Jumper Cables | Hook things up together! |
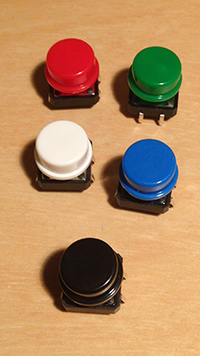 |
Buttons! | Program these to do something on click! |
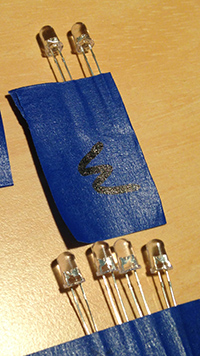 |
R,G,B,W LEDs! | Light them up from your code! |
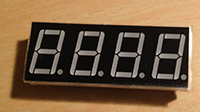 |
7-segment display! | Display numbers from your code! Temperature? Latency? Unread emails? Anything! |
| Micro Servo! | Make the servo turn left and right from Python! Although an arduino is really better for this, since it can run in real time rather than sitting on top of linux. | |
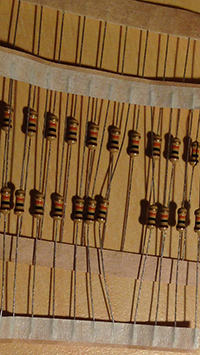 |
1k and 10k Resistors! | You need these to hook up LEDs and Buttons! |
| 2N3904 Transistors! | These are NPN Transistors! General purpose digital switch and amplifier! Use it to switch on and off larger stuff from the Pi. You can build a touch switch with it! |
When you build stuff, you really need tools to test what you're doing. This avoids getting really frustrated when things don't work and you don't know why. Here's the testing tools I recommend:
Hardware:
- A multimeter! Like our Fluke! With it, you can check that something is turned on, that there's not too much or too little power before you plug something in, and what values your resistors are. This lets you measure voltage, resistance, and continuity.
- A Serial to USB connection! I included one! This lets you plug your computer directly into anything that has a serial connection, so you can check the data going in and out of it. For example, you can check whether a GPS is actually spitting out positions before wiring it up to your raspberry pi.
- A logic analyzer! This connects to a wire, and reads every bit going on that wire. So you can use it to "snoop" on the digital data sent between chips.
- An oscilloscope for analog circuits: This can display the analog wave going along a cable. For example, this can show you the sound waves going to your speaker! So you can check whether they're distorted or clipped.
Software:
- First of all, use the Scientific Method to debug your code: Come up with a hypothesis for what might be wrong. Formulate an experiment to test your hypothesis. Then run your experiment and see if it proves or disproves your hypothesis. For example: Problem: "the LED doesn't turn on". Hypothesis: "there is no power coming out of the raspberry pi on that pin". Test: "Put a multimeter between the pin and ground. It should read 0v". Take the measurement, if it is 0v, now you know the problem must be with turning the pin on! If it is 3.3V, then the problem must be something with the LED.
- Put "print" statements in your code and check that each part is working as expected.
- Write your code in small chunks, and test every chunk.
- Learn how to use a debugger to step through your code.